Adorable Crochet Bulldog Pattern: A Step-by-Step Amigurumi Tutorial
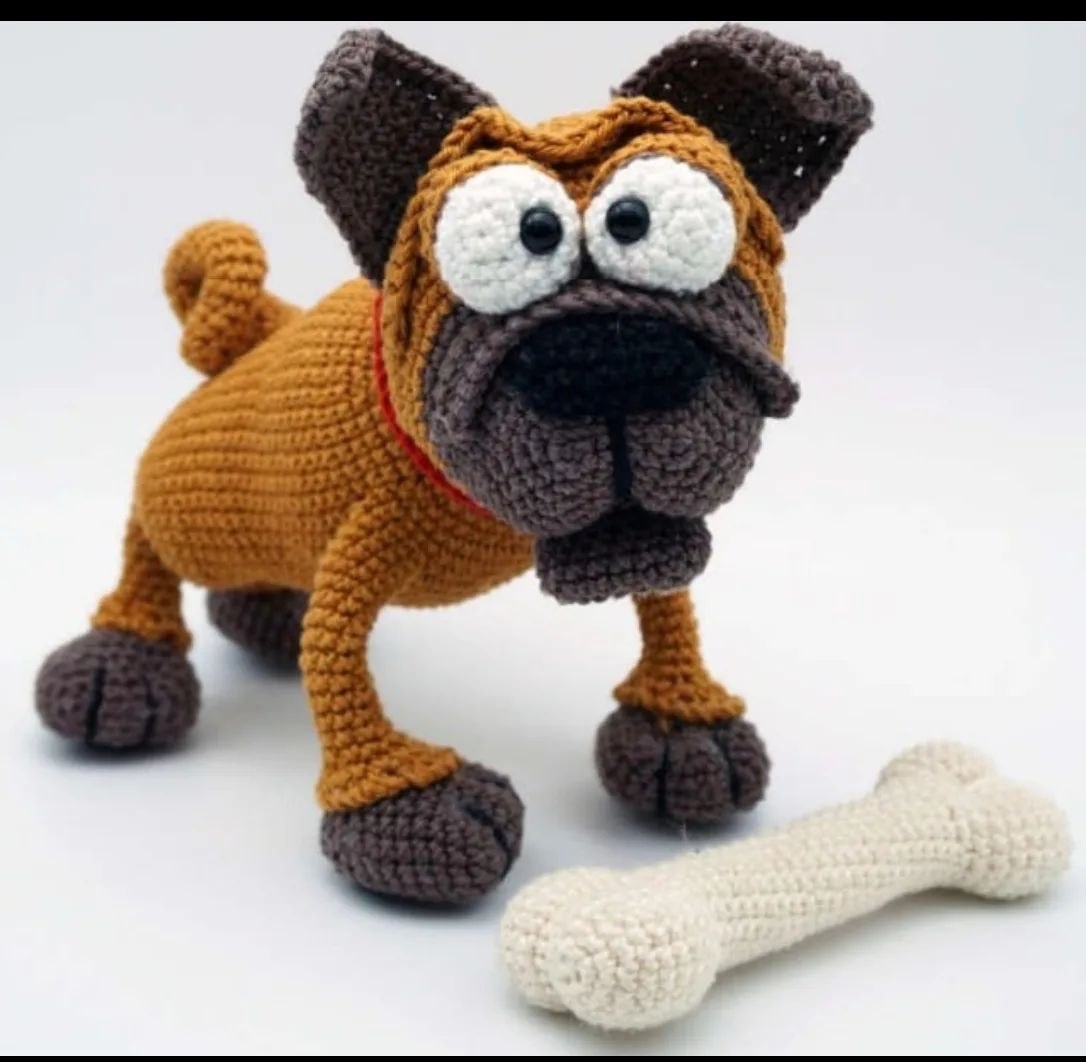
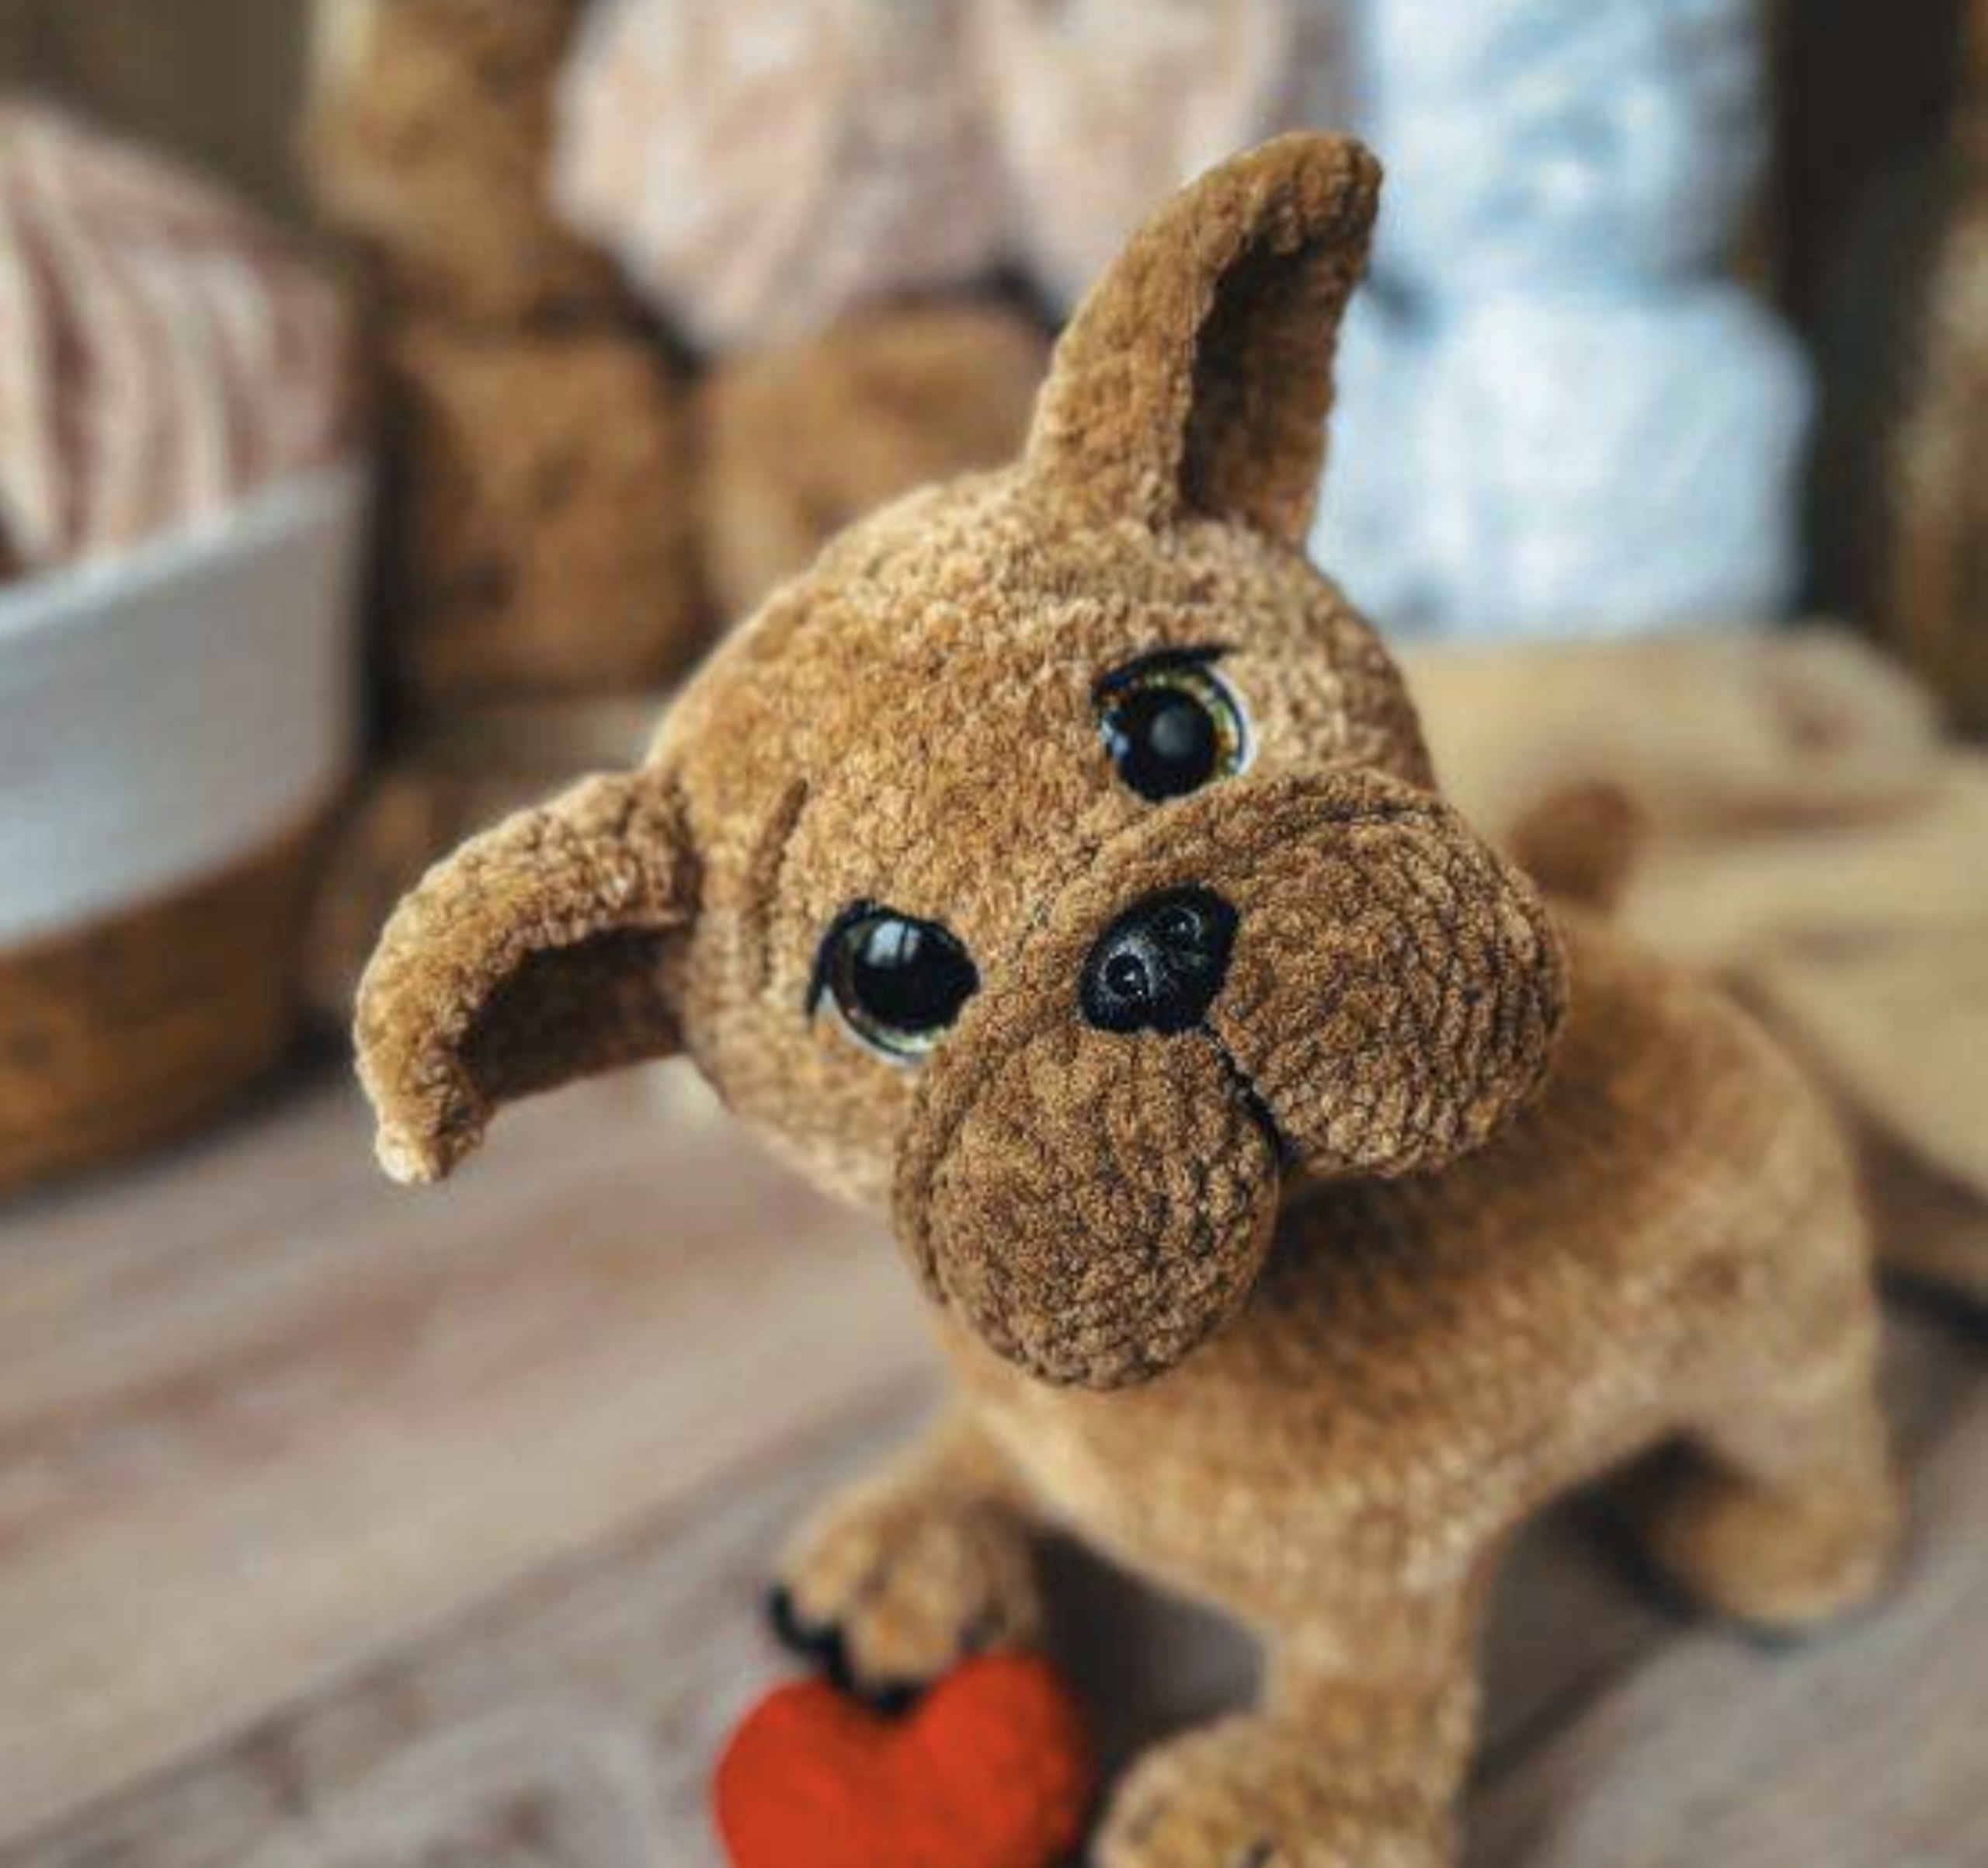
If you are looking for a new crochet project that is as much about character as it is about skill, you have found it! This adorable crochet bulldog pattern will guide you through creating a plush, wrinkly, and incredibly cute bulldog companion. Bulldogs have a unique charm—those heavy brows, stout little bodies, and expressive faces make them perfect for amigurumi lovers.
This pattern is designed to be beginner-friendly, though it does involve some intermediate techniques like working around attached parts and creating textured “paw pads” using color changes. By the time you finish, you will have a sturdy, high-quality toy that is approximately 8 inches tall and 7 inches long—the perfect size for a nursery shelf or a desk companion.
Materials & Abbreviations
To ensure your bulldog looks just as professional as the photos, I recommend using a soft, plush yarn like velour or chenille. This will give your pup that signature soft, “squishy” feel.
Materials Needed
- Yarn: Plush/Velour yarn in the following colors:
- Light Gray (for the main body)
- Dark Gray (for details)
- Black (for the paw pads and facial details)
- White (for facial details)
- A bright accent color, like Yellow (for the neck bandana)
- Crochet Hook: 3.0 mm (or size appropriate for your yarn)
- Safety Eyes: 0.7 inch (18 mm)
- Safety Nose: 0.7 inch (18 mm)
- Joints: 1.75 inch (45 mm) safety joint (for the head)
- Stuffing: Polyfill or hollowfiber
- Other Tools: Scissors, a tapestry needle, and safety pins
Abbreviations (US Terms)
- MR: Magic Ring
- ch: Chain
- sc: Single Crochet
- inc: Increase (2 sc in one stitch)
- dec: Decrease (sc 2 together)
- hdc: Half Double Crochet
- sl st: Slip Stitch
- BLO: Back Loops Only
- ( … )*n: Repeat the instructions inside the parentheses n times
Step-by-Step Instructions
Front Legs (Make 2)
We begin the legs with black yarn to create the paw pads. Stuff the legs firmly as you work.
R1: 8 sc in MR (8)
Change to gray yarn. Do not cut the black yarn; you will use it for the color change in the next round.
R2: 8 inc (16)
R3: (1 sc, inc) * 2, (1 hdc in black, 1 inc in gray) * 4, (1 sc, inc) * 2 (24). You can now cut the black yarn and fasten off.
R4: 24 sc in BLO (24)
R5: 24 sc (24)
R6: 3 sc, (1 sc, dec) * 6, 3 sc (18)
R7: 18 sc (18)
R8: 3 sc, 6 dec, 3 sc (12)
R9-13: 12 sc (5 rounds total)
Fasten off and leave a long tail for sewing. Repeat for the second leg.
Back Legs (Make 2)
Like the front legs, start with black yarn and stuff firmly.
R1: 8 sc in MR (8)
Change to gray yarn. Do not cut the black yarn.
R2: 8 inc (16)
R3: (1 sc, inc) * 2, (1 hdc in black, 1 inc in gray) * 4, (1 sc, inc) * 2 (24)
R4: 24 sc in BLO (24). Tip: Keep your marker centered on the “heel” area.
R5: 3 sc, (1 sc, dec) * 6, 3 sc (18)
R6: 2 inc, 14 sc, 2 inc (22)
R7: 5 sc, 6 dec, 5 sc (16)
R8: 3 dec, (1 sc, inc) * 2, 3 dec (12)
R9: 12 sc (12)
R10: 4 sc, (1 sc, inc) * 2, 4 sc (14)
R11: 5 sc, 1 inc, 2 sc, 1 inc, 5 sc (16)
R12: 1 sc, 1 dec, 11 sc, 1 dec (14)
R13: 14 sc (14)
Fasten off and leave a tail for sewing. Repeat for the second back leg.
Tail
Use the main body color. Do not stuff the tail.
R1: 6 sc in MR (6)
R2: 6 sc (6)
R3: (2 sc, inc) * 2 (8)
R4-5: 8 sc (2 rounds total)
Fasten off and weave in ends.
Body
Use the main body color. Stuff very firmly as you go.
R1: Ch 11.
R2: Starting from the 2nd ch from the hook: inc, 8 sc, 4 sc in the very last ch, then working along the opposite side of the chain: 8 sc, inc (24). This creates an oval shape.
R3: 2 inc, 8 sc, 4 inc, 8 sc, 2 inc (32)
R4: (1 sc, inc) * 2, 8 sc, (1 sc, inc) * 4, 8 sc, (1 sc, inc) * 2 (40)
R5: (2 sc, inc) * 2, 8 sc, (2 sc, inc) * 4, 8 sc, (2 sc, inc) * 2 (48)
R6: Attaching the legs. 4 sc, 4 sc around the first back leg, 8 sc, 4 sc around the first front leg, 8 sc, 4 sc around the second front leg, 8 sc, 4 sc around the second back leg, 4 sc (48). Note: Use a stitch marker to ensure you are starting at the back center.
R7: (1 sc, inc) * 2, 6 sc around the back leg, 4 inc, (1 sc, inc) * 4, 2 sc around the front leg, (1 sc, inc) * 2, 2 sc around the front leg, (1 sc, inc) * 4, 4 inc, 6 sc around the back leg, (1 sc, inc) * 2 (96)
R8: 96 sc (96)
R9: 12 sc, 4 dec, 56 sc, 4 dec, 12 sc (88)
R10-14: 88 sc (5 rounds total)
R15: (2 sc, dec) * 4, 15 sc, 1 dec, (2 sc, dec) * 6, 15 sc, (dec, 2 sc) * 4 (73)
R16: 26 sc, 3 dec, 9 sc, 3 dec, 26 sc (67)
R17: (1 sc, dec) * 4, 42 sc, (1 sc, dec) * 4, 1 sc (59)
R18: Attaching the tail. 57 sc, 2 sc around the tail, (59)
R19: 2 sc around the tail, 3 sc, 1 dec, (5 sc, dec) * 2, 17 sc, (dec, 5 sc) * 2, 1 dec, 3 sc, 2 sc around the tail stitches (53)
R20: 2 sc around the tail, 2 sc, 1 dec, (4 sc, dec) * 2, 17 sc, (dec, 4 sc) * 3 (47)
R21: (3 sc, dec) * 3, 17 sc, (dec, 3 sc) * 3 (41)
R22: 13 sc, (1 sc, dec) * 5, 13 sc (36)
R23: Creating the neck opening. (2 sc, dec) * 3, ch 6, skip 12 sc on the body, from the 13th stitch: (dec, 2 sc) * 3 (24)
R24: (1 sc, dec) * 3, 1 sc in the chain, (1 sc, dec) * 2, 1 sc on the body, (1 sc, dec) * 3 (16)
R25: 8 dec (8)
Fasten off. For the neck part, join yarn in the first stitch of the neck area: R1: 12 sc on body, 6 sc in the ch (18). R2: 18 sc. R3: 9 dec. Stuff the neck area and secure.
Ears (Make 2)
Use the main body color.
R1: 2 ch.
R2: inc in 2nd ch from hook (2)
R3: 2 inc (4)
R4: inc, 2 sc, inc (6)
R5: 6 sc (6)
R6: inc, 4 sc, inc (8)
R7-9: 8 sc (3 rounds)
Finish by making 1 ch and sc around the edge of the ear. In the very top point, work 3 sc to create a blunt tip.
Muzzle and Head
The muzzle is worked in two identical pieces and then joined to create the bulldog’s characteristic wrinkles.
The Muzzle
Use your secondary color (for the snout).
R1: 6 ch.
R2: Starting from 2nd ch: 4 sc, 3 sc in last ch, 3 sc on other side of ch, inc (12)
R3: inc, 3 sc, 3 inc, 3 sc, 2 inc (18)
R4: 1 sc, inc, 3 sc, (1 sc, inc) * 3, 3 sc, (1 sc, inc) * 2 (24)
R5: Joining the two pieces. 19 sc on the first piece, 19 sc on the second piece (38)
R6: 38 sc (38)
R7: 9 sc offset, 20 sc, 18 sc in front loops (38)
R8: 8 sc, 4 inc, 26 sc (42)
R9: 24 sc, 18 sc in the back loops of R6 (42)
R10: (2 sc, dec) * 6, 18 sc (36)
R11: (1 sc, dec) * 6, 18 sl st (30)
R12: (1 sc, inc) * 6, 18 inc in front loops (54)
R13: (5 sc, inc) * 9 (63)
R14-19: 63 sc (6 rounds)
R20: (7 sc, dec) * 7 (56)
R21: 3 sc, 1 dec, (6 sc, dec) * 6, 3 sc (49)
R22: (5 sc, dec) * 7 (41)
R23: 2 sc, 1 dec, (4 sc, dec) * 6, 2 sc (35)
R24: (3 sc, dec) * 7 (28)
R25: (2 sc, dec) * 7 (21)
R26: (1 sc, dec) * 7 (14)
R27: 7 dec (7)
Fasten off and stuff the muzzle firmly.
The Head Base
The head base is worked similarly to the muzzle but serves as the skull structure. Follow the same logic as the muzzle rows until R11, but ensure the shape is more rounded. For the final rounds, continue following the decrease pattern (similar to the muzzle) to create a closed shape that can be attached to the body.
Finishing
This is where your bulldog truly comes to life! Assembly is key to getting that expressive look.
Eye Placement & Tensioning
Place the safety nose in the center of the muzzle fold. For the eyes, work them into Round 12 of the muzzle. Place the first eye in the 7th increase from the front loops, and the second eye in the 13th increase from the front loops. There should be about 12 sc between the eyes. To get that “soulful” look, use a long needle and black yarn to pull the thread through the eye area (eye tensioning), creating a slight indentation around the eyes.
The Head & Ears
Locate the center between Round 16 and 17 of the body. This is where the neck will be. Install your safety joint and attach the head. As you stuff the head, distribute the polyfill evenly so it doesn’t look lopsided. Sew the ears onto the head, positioned roughly at the level of Rounds 17-18. Ensure there are about 12 sc of space between the inner edges of the ears.
Final Details
- Eyebrows: Using dark gray yarn, embroider two small, thick eyebrows above the eyes to give him a “grumpy” but cute expression.
- Claws: Using black yarn, embroider small lines on the tips of the feet to represent claws.
- Bandana: Crochet a small triangle (Ch 31, 30 sc, edge with hdc) in your accent color and tie it around the neck.
Tips
- Tension is Everything: When working with plush yarn, your tension can vary wildly. Try to keep your stitches consistent so the stuffing doesn’t show through.
- Hiding Ends: Always weave your yarn tails deep into the stuffing to ensure they don’t pop out later.
- Use Pins: Before sewing the legs, head, or ears, use safety pins to find the perfect placement. This prevents mistakes and ensures symmetry.
- Stuffing: Don’t be afraid to overstuff! A firm toy holds its shape much better than a floppy one.