Crochet Sleeping Bunny Pattern: A Cute and Cozy Amigurumi Tutorial
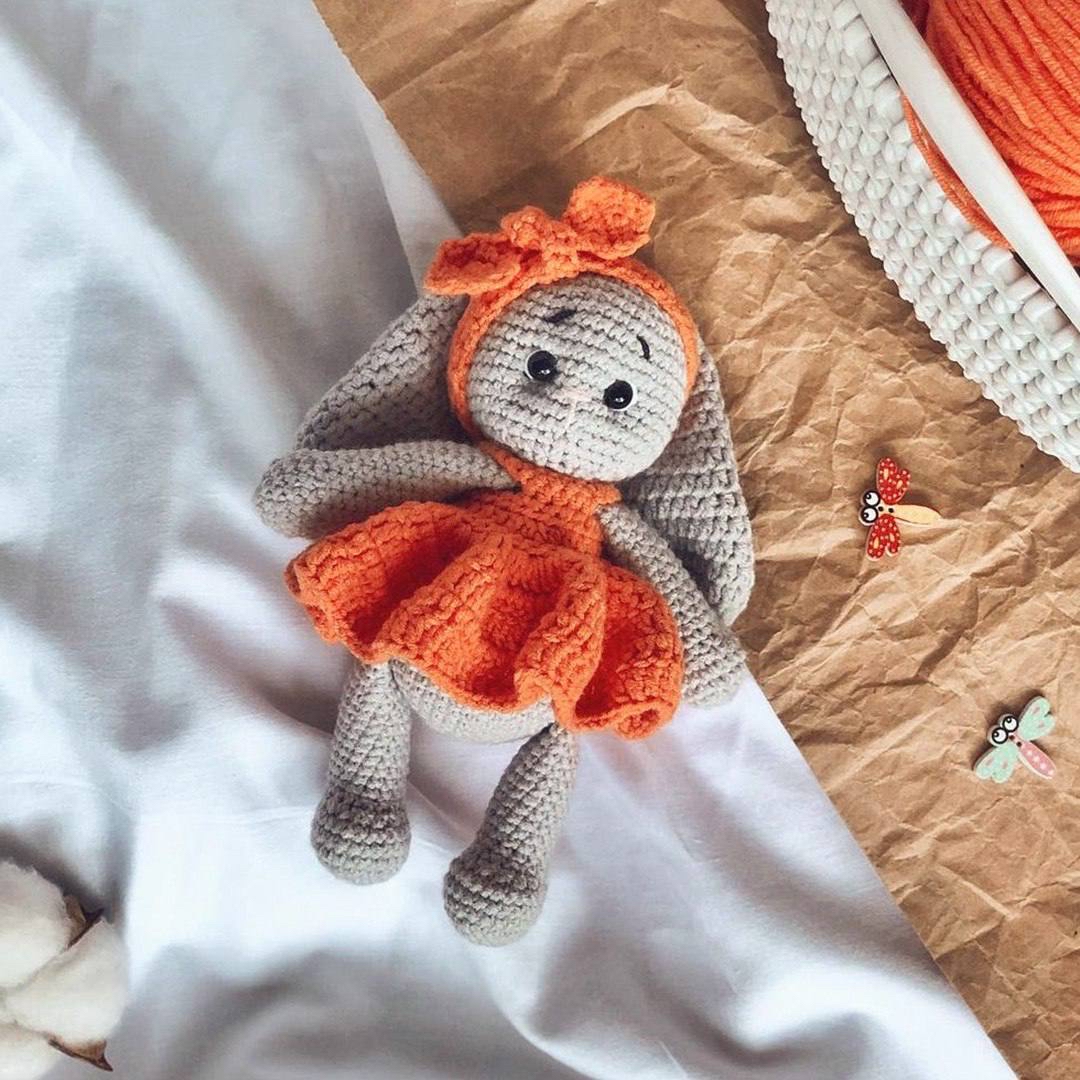
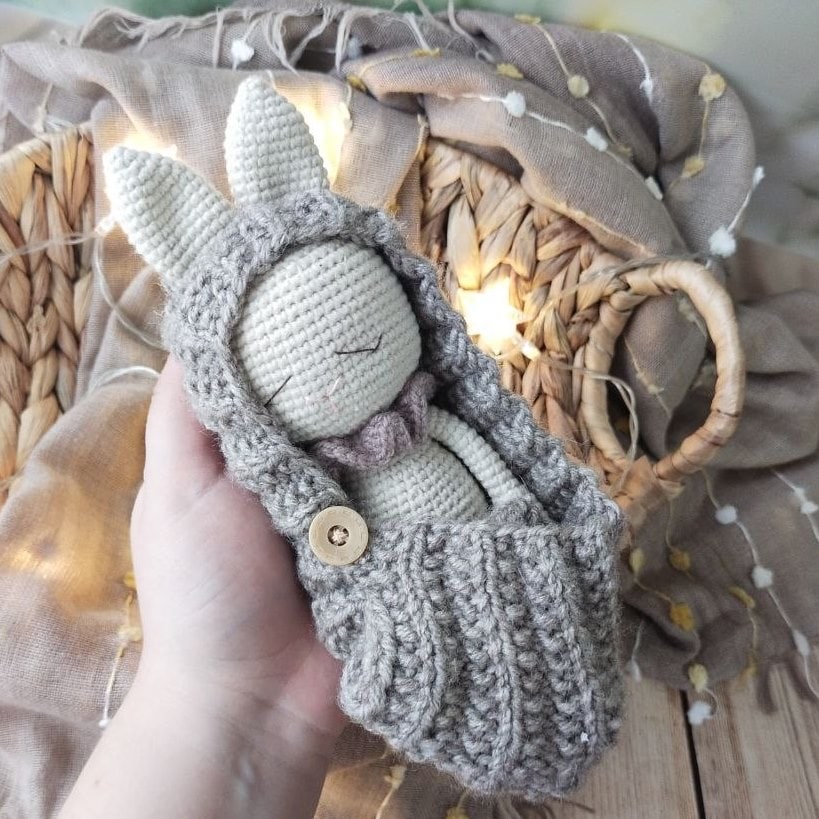
There is nothing more heartwarming than a tiny, sleeping creature. If you are looking for your next amigurumi project, this Sleeping Bunny is the perfect choice. This adorable little bunny comes tucked into its own cozy knitted cocoon, making it an ideal gift for a nursery, a baby shower, or a special treat for a little one in your life. This tutorial will guide you through crocheting the bunny, knitting a soft cocoon, and adding those sweet finishing touches that bring the character to life.
Materials and Tools
To complete this project, you will need the following supplies. While I have listed specific yarn types used in the original design, you can substitute them with any yarn of a similar weight.
- Yarn for the Bunny: A medium-weight cotton or blend yarn (such as YarnArt Jeans in color 05 Linen). You will need less than one skein.
- Yarn for the Collar: A soft, textured yarn in a dusty rose or dark violet shade.
- Yarn for the Cocoon: A soft, medium-weight yarn (such as Alize Superlana Midi in color 207).
- Optional Trim: A fluffy, faux-fur style yarn (like YarnArt Mink in color 337 Mink) for a luxury touch.
- Crochet Hook: 1.5 mm (or a size that produces a tight, sturdy stitch).
- Knitting Needles: US size 3-4 (3-3.5 mm) for the cocoon.
- Stuffing: Polyester fiberfill or similar stuffing material.
- Embroidery Thread: Pink and brown thread for the facial features.
- Wire: 1.5 mm insulated wire (optional, for posable arms). You will also need pliers and wire cutters.
- Extras: A sewing needle, stitch markers, a small button, and tweezers or a skewer to help with stuffing.
- Toning: Art pastels (pink and light brown), a small brush, and a tiny container of water.
Crochet Abbreviations
This pattern uses standard US crochet terms. Please ensure you are familiar with these before beginning:
- MR: Magic Ring
- ch: Chain
- sc: Single Crochet
- inc: Increase (2 sc in the same stitch)
- dec: Decrease (sc 2 stitches together) – Note: When instructed, perform decreases through the front loops only (FLO) to create shape.
- dc: Double Crochet
Step-by-Step Instructions
1. The Legs (Make 2)
We start by creating the feet and legs. The bunny will be approximately 6 inches from the top of the head to the heels.
R1: 6 sc in MR (6)
R2: 6 inc (12)
R3: (1 sc, inc) x 6 (18)
R4: (2 sc, inc) x 6 (24)
R5-6: 24 sc (24)
R7: 6 sc, 6 dec, 6 sc (18)
R8: 6 sc, 3 dec, 6 sc (15)
R9: 15 sc (15)
R10: (3 sc, dec) x 3 (12)
Stuff the foot area firmly. Do not stuff the upper leg section yet.
R11: (2 sc, dec) x 3 (9)
R12: (2 sc, inc) x 3 (12)
R13-15: 12 sc (12)
R14: (2 sc, dec) x 3 (9)
R15: (2 sc, inc) x 3 (12)
R16: (3 sc, inc) x 3 (15)
R17-20: 15 sc (15)
R21: (3 sc, dec) x 3 (12)
To prepare for joining, fold the work in half and sc 6 through both layers to close the opening.
2. The Arms (Make 2)
The arms are designed to be posable using wire.
R1: 6 ch in MR (6)
R2: 6 inc (12)
R3-7: 12 sc (12)
R8: (1 sc, dec) x 4 (8)
Stuff the hand area firmly. Do not stuff the rest of the arm.
R9-22: 8 sc (8)
Assembly Tip: Measure the distance from the start of the tapering to the end of the arm. Cut a piece of 1.75-inch insulated wire to size. Bend the ends and cover them with tape to prevent poking through the crochet. Insert the wire into the arm, fold the edges of the crochet together, and join them with 4 sc. The wire should remain hidden inside.
3. The Body
The body is worked in a continuous spiral. You may use the same color as the bunny or a different color to mimic clothing.
R1: 6 sc in MR (6)
R2: 6 inc (12)
R3: (1 sc, inc) x 6 (18)
R4: (2 sc, inc) x 6 (24)
R5: (3 sc, inc) x 6 (30)
R6: (4 sc, inc) x 6 (36)
R7: (5 sc, inc) x 6 (42)
R8-9: 42 sc (42)
Attach the legs to the sides of the body, ensuring they are parallel and facing the same direction. Stuff the body as you go.
R10: 6 sc (leg and body together), 15 sc, 6 sc (body and leg together), 15 sc (42)
R11-12: 42 sc (42)
R13: (5 sc, dec) x 6 (36)
R14-15: 36 sc (36)
R16: (4 sc, dec) x 6 (30)
R17-18: 30 sc (30)
R19: (3 sc, dec) x 6 (24)
R20-21: 24 sc (24)
R22: (2 sc, dec) x 6 (18)
Now, attach the arms. Place them evenly on the sides, leaving 5 sc between them.
R23: 4 sc (arm and body together), 5 sc, 4 sc (second arm and body together), and continue around. Work in rounds until you reach the middle of the back. Place a marker at the center of the back.
4. The Head
Note: Stuff the head only after you have embroidered the face.
R1: 24 sc in MR (24)
R2: (3 sc, inc) x 6 (30)
R3: 2 sc, inc, (4 sc, inc) x 5, 2 sc (36)
R4: (5 sc, inc) x 6 (42)
R5: 3 sc, inc, (6 sc, inc) x 5, 3 sc (48)
R6: (7 sc, inc) x 6 (54)
R7-18: 54 sc (54)
Embroidery: Using your pink and brown thread, embroider the eyes (closed/sleeping style) and the nose. Start the nose embroidery around Row 6 according to your desired design.
R19: (7 sc, dec) x 6 (48)
R20: 3 sc, dec, (6 sc, dec) x 5, 3 sc (42)
R21: (5 sc, dec) x 6 (36)
R22: 2 sc, dec, (4 sc, dec) x 5, 2 sc (30)
R23: (3 sc, dec) x 6 (24)
R24: (2 sc, dec) x 6 (18)
R25: (1 sc, dec) x 6 (12)
R26: 6 dec (6)
Fasten off and weave in your ends.
5. The Ears (Make 2)
R1: 6 sc in MR (6)
R2: 6 sc (6)
R3: 6 inc (12)
R4: 12 sc (12)
R5: (1 sc, inc) x 6 (18)
R6-13: 18 sc (18)
R14: (1 sc, dec) x 6 (12)
Fold the ears in half and sc 5 stitches through both layers to close. Leave a long tail for sewing the ears to the top of the head.
6. The Ruffle Collar
This piece creates a beautiful decorative collar for the bunny.
Setup: Chain a length equal to the circumference of the bunny’s neck, plus an additional 15 inches for the ties (totaling approximately 28-30 inches).
R1: 32 sc (or the number of chains corresponding to your neck measurement), 1 ch, turn.
R2: 31 dc inc (work 3 double crochets into every stitch to create the ruffle), work 1 sc in the last stitch. Then, ch 40 for the tie.
The Knitted Cocoon
The cocoon is a separate piece worked with knitting needles using a “Pearl Stitch” (a textured knit/purl combination).
The Pattern
Cast on: 111 stitches.
Odd Rows (1, 3, etc.): Edge st, (2 knit, 1 purl) repeat to end, 2 knit, edge st.
Even Rows (2, 4, etc.): Edge st, 1 purl, (3 knit, 1 purl) repeat to end, edge st.
Construction
R1-5: Work in the pattern above.
R6: 49 pattern sts, 5 dec, 3 pattern sts, 5 dec, 49 pattern sts.
R7: 49 pattern sts, 5 inc, 3 pattern sts, 5 inc, 49 pattern sts.
R8-21: Continue in pattern.
(If making the version with a fur trim, work until the piece is 22 inches long and 2 inches wide. If adding trim, work until the piece is 22 inches long and 3 inches wide).
Closing the Cocoon:
To close the cocoon, work in pattern to the middle stitch (stitch 56). Working with the right side facing you, decrease by working two stitches together, alternating between the left and right needles until all stitches are closed.
Finishing the Cocoon:
Add a small pompom to the top of the hood. For the button closure, crochet a small loop (7-9 chains) and sew it to the cocoon, then attach your button to the opposite side.
Finishing Touches
Assembly
- Sew the ears to the top of the head.
- Sew the collar around the neck.
- To dress the bunny, insert the ears through the slits in the cocoon, tuck the bunny’s legs in, fold the bottom corner over, and secure it with the button and loop.
Toning with Pastels
To give your bunny a professional, lifelike look, use the “wet method” with art pastels. This adds a soft blush to the cheeks, nose, and limbs.
How to do it:
1. Fold a piece of paper into quarters to use as a palette.
2. Place your pastel sticks on the paper.
3. Dip a small brush (synthetic bristles work best) into water.
4. Pick up the color from the pastel just like you would with paint.
5. Gently apply the color to the bunny’s cheeks, nose, and paws. If the color is too intense, mix a little more water on your paper to dilute it.
Expert Tips
- Tension is Key: Since this is an amigurumi project, try to keep your crochet tension tight so the stuffing doesn’t show through the stitches.
- Safety First: If making this for a very young infant, skip the wire and the pastel toning to ensure the toy is 100% safe for teething and handling.
- Stuffing Technique: Use a skewer or tweezers to push stuffing into tight corners like the ears and the tips of the feet.