Adorable Amigurumi Penguin Crochet Pattern: Step-by-Step Tutorial
Looking for a cozy project to brighten up your winter crafting? There is nothing quite as charming as a little penguin! This amigurumi penguin is the perfect project for beginners and experienced crocheters alike. With its round belly and sweet expression, it makes a wonderful handmade gift, a nursery decoration, or a cuddly companion for your desk.
In this detailed guide, we will walk you through every step of creating your own little penguin friend. We have designed this tutorial to be easy to follow, using standard US crochet terms. Whether you are looking to improve your skills with shaping or simply want to make something cute, this penguin is the perfect choice.
Materials & Abbreviations
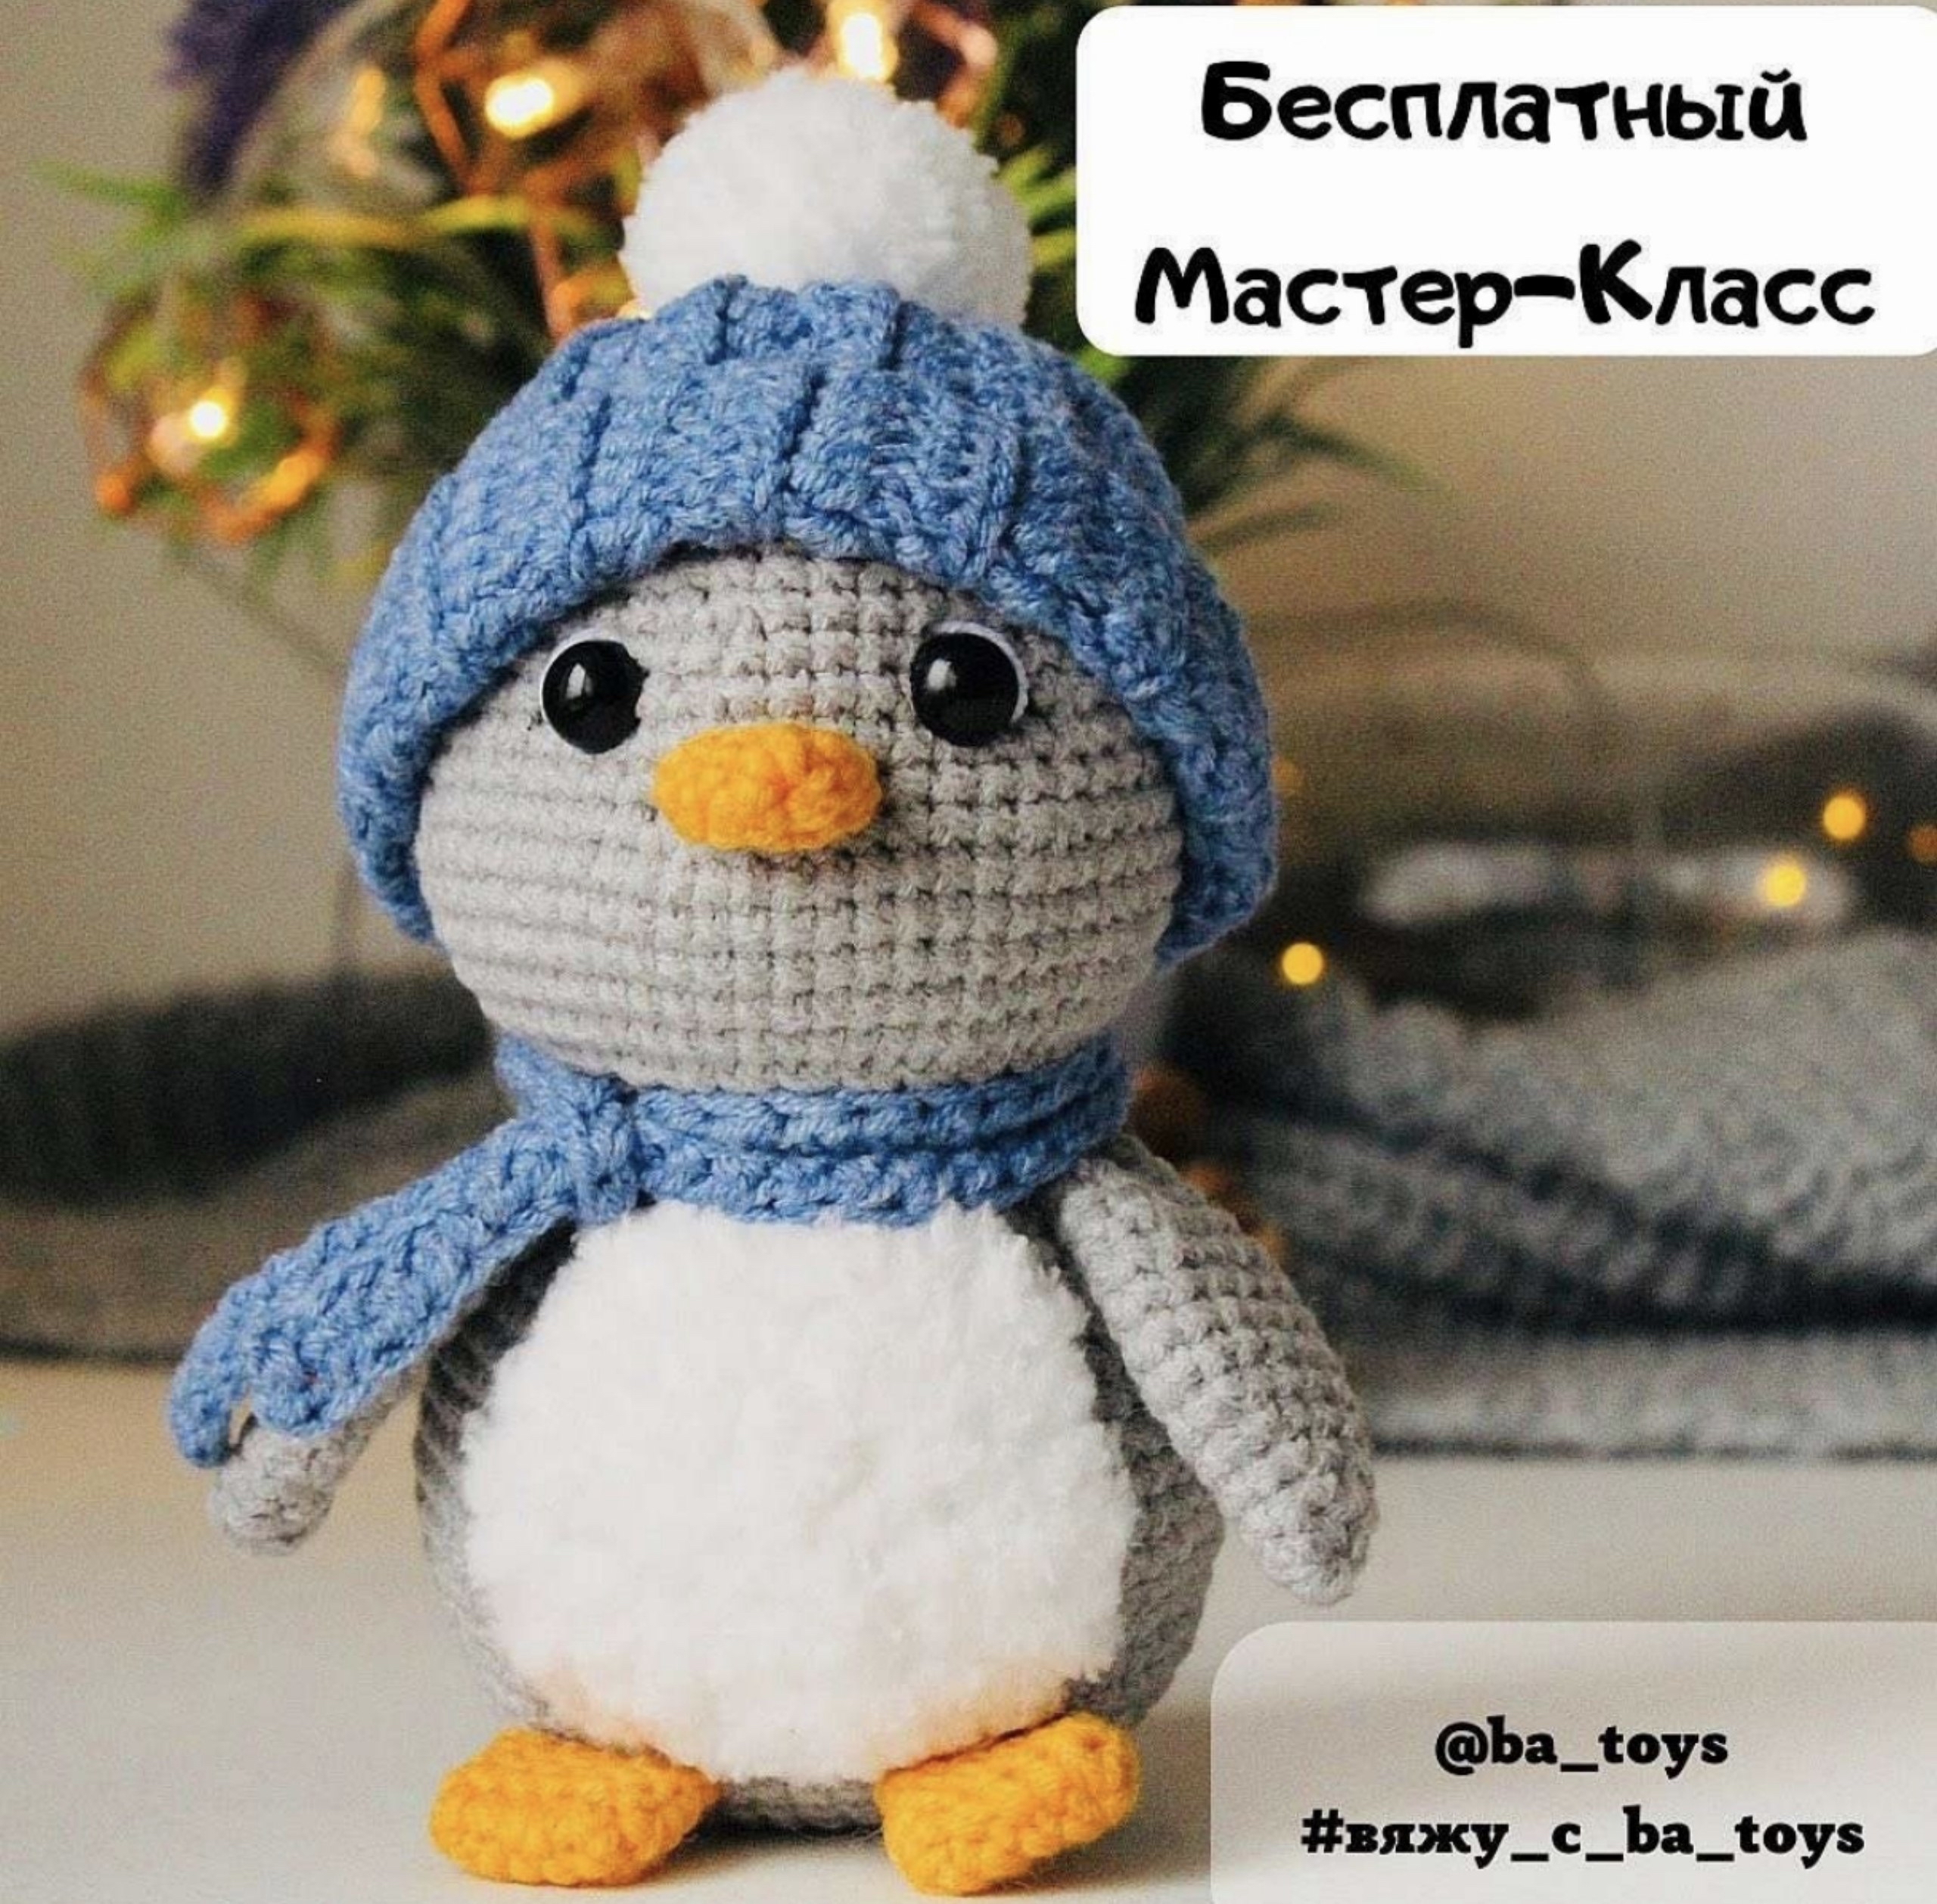
Before you pick up your hook, gather all your materials. To get the look seen in the photos, we recommend using a combination of cotton and plush yarns to create a nice contrast in textures.
Materials Needed
- Yarn:
- Grey cotton or cotton-blend yarn (for the body, head, and wings)
- White plush/chenille yarn (for the belly and pompom)
- Orange cotton yarn (for the beak and feet)
- Black embroidery thread or thin cotton yarn (for the facial details)
- Crochet Hooks: 2.0 mm (for the main body) and 2.5 mm (for the plush pompom/belly)
- Eyes: 8 mm safety eyes
- Stuffing: High-quality polyester fiberfill
- Tools: Yarn needle, scissors, and stitch markers
Abbreviations (US Terms)
- MR: Magic Ring
- ch: Chain
- sc: Single crochet
- hdc: Half double crochet
- inc: Increase (two single crochets in one stitch)
- dec: Decrease (single crochet two stitches together)
- sl st: Slip stitch
- BLO: Back loop only
- FLO: Front loop only
- (…) * n: Repeat the instructions inside the parentheses n times
Step-by-Step Instructions
The Feet (Make 2)
Using orange yarn, start by chaining 6. We will work around the chain to create an oval shape.
- Round 1: Starting in the second chain from the hook: 4 sc, 3 sc in the last chain, 3 sc along the opposite side of the chain, inc (12)
- Rounds 2-3: sc in each stitch around (12)
- Round 4: (dec, 4 sc) * 2 (10)
Flatten the piece and sc across the opening to seal the foot (5 sc). Fasten off and weave in the ends. Do not stuff the feet.
The Beak
Using orange yarn:
- Round 1: 6 sc in MR (6)
- Round 2: (2 sc, inc) * 2 (8)
- Round 3: sc in each stitch around (8)
- Round 4: (sc, inc) * 4 (12)
Finish with a slip stitch. Fasten off, leaving a long tail for sewing the beak to the head later.
The Body
Using grey yarn, start by chaining 11. Work around the chain to create the base of the body.
- Round 1: Starting in the second chain from the hook: 9 sc, 3 sc in the last chain, 8 sc along the opposite side, inc (22)
- Round 2: inc, 8 sc, 3 inc, 8 sc, 2 inc (28)
- Round 3: sc, inc, 8 sc, (sc, inc) * 3, 8 sc, (sc, inc) * 2 (34)
- Round 4: 2 sc, inc, 8 sc, (2 sc, inc) * 3, 8 sc, (2 sc, inc) * 2 (40)
- Round 5: 3 sc, inc, 8 sc, (3 sc, inc) * 3, 8 sc, (3 sc, inc) * 2 (46)
- Round 6 (Attaching Feet): 2 sc, work 5 sc together with the first foot, 4 sc, work 5 sc together with the second foot, 30 sc (46)
- Round 7: sc in each stitch around (46)
- Round 8: 4 sc, inc, 8 sc, (4 sc, inc) * 3, 8 sc, (4 sc, inc) * 2 (52)
- Round 9: 5 sc, inc, 8 sc, (5 sc, inc) * 3, 8 sc, (5 sc, inc) * 2 (58)
- Round 10: 24 sc, inc, 30 sc, inc, 2 sc (60)
- Rounds 11-13: sc in each stitch around (60)
- Round 14: (8 sc, dec) * 6 (54)
- Round 15: (7 sc, dec) * 6 (48)
- Rounds 16-17: sc in each stitch around (48)
- Round 18: (6 sc, dec) * 6 (42)
- Rounds 19-20: sc in each stitch around (42)
- Round 21: (5 sc, dec) * 6 (36)
- Round 22: sc in each stitch around (36)
- Round 23: (4 sc, dec) * 6 (30)
- Round 24: sc in each stitch around (30)
Stuff the body firmly with fiberfill. Do not cut the yarn, as we will continue directly into the head.
The Head
Continuing from the body with grey yarn:
- Round 25: Working in FLO (Front Loop Only): 30 inc (60)
- Rounds 26-30: sc in each stitch around (60)
- Round 31: (8 sc, dec) * 6 (54)
- Rounds 32-33: sc in each stitch around (54)
- Round 34 (Eye Holes): 7 sc, dec, sc, ch 1, skip 1 stitch, 5 sc, dec, 2 sc, ch 1, skip 1 stitch, 4 sc, dec, (7 sc, dec) * 3 (48)
- Round 35: sc in each stitch around (48)
- Round 36: (6 sc, dec) * 6 (42)
- Rounds 37-38: sc in each stitch around (42)
- Round 39: (5 sc, dec) * 6 (36)
- Round 40: (4 sc, dec) * 6 (30)
- Round 41: (3 sc, dec) * 6 (24)
- Round 42: (2 sc, dec) * 6 (18)
- Round 43: (sc, dec) * 6 (12)
- Round 44: 6 dec (6)
Insert the 8 mm safety eyes into the holes created in Round 34. Stuff the head firmly, fasten off, and weave in the ends.
The Belly
Using white plush yarn and the 2.5 mm hook:
- Round 1: 6 hdc in MR (6)
- Round 2: (hdc, inc) * 6 (12)
- Round 3: (2 hdc, inc) * 6 (18)
Finish with a slip stitch. Fasten off, leaving a long tail for sewing. (Note: If you find plush yarn difficult to sew with, you can use a matching white cotton thread for the assembly).
The Wings (Make 2)
Using grey yarn:
- Round 1: 6 sc in MR (6)
- Round 2: (2 sc, inc) * 2 (8)
- Round 3: (3 sc, inc) * 2 (10)
- Round 4: (4 sc, inc) * 2 (12)
- Round 5: (5 sc, inc) * 2 (14)
- Rounds 6-9: sc in each stitch around (14)
- Round 10: (5 sc, dec) * 2 (10)
- Round 11: (4 sc, dec) * 2 (10)
- Rounds 12-13: sc in each stitch around (10)
- Round 14: 5 dec (5)
Close the hole and fasten off. Do not stuff the wings.
Finishing & Assembly
Now comes the fun part—bringing your penguin to life!
- Beak: Sew the orange beak to the center of the face, just below the eyes.
- Wings: Sew the wings to the sides of the body. If you want the wings to be moveable, you can use a loose joint technique with your yarn; otherwise, sew them securely in place.
- Belly: Center the white plush circle on the front of the penguin and sew it firmly to the grey body.
- Face Details: Using black embroidery thread, add small highlights to the eyes and stitch tiny eyebrows. You can also add a little blush to the cheeks with a pink marker or embroidery thread for extra cuteness.
- Optional Accessories: You can crochet a small blue hat and scarf using the same techniques as the body to dress up your penguin for winter!
Pro Tips for the Perfect Penguin
To ensure your amigurumi looks professional, keep these tips in mind:
- Tension is Key: Since we are using safety eyes and stuffing, keep your stitches tight so the fiberfill doesn’t peek through. If you see gaps, try dropping down half a hook size.
- Invisible Decreases: For a cleaner look, use the invisible decrease method (working in the front loops only of the two stitches being decreased).
- Symmetry: When attaching the wings and feet, use stitch markers to ensure they are placed symmetrically on both sides of the body.
- Plush Yarn Handling: Plush yarn can be slippery. When crocheting the belly, use your fingers to feel for the stitches if the yarn obscures the holes.