How to Crochet a Cute Sheep with a Tiny Sweater: Dolly the Sheep Amigurumi Pattern
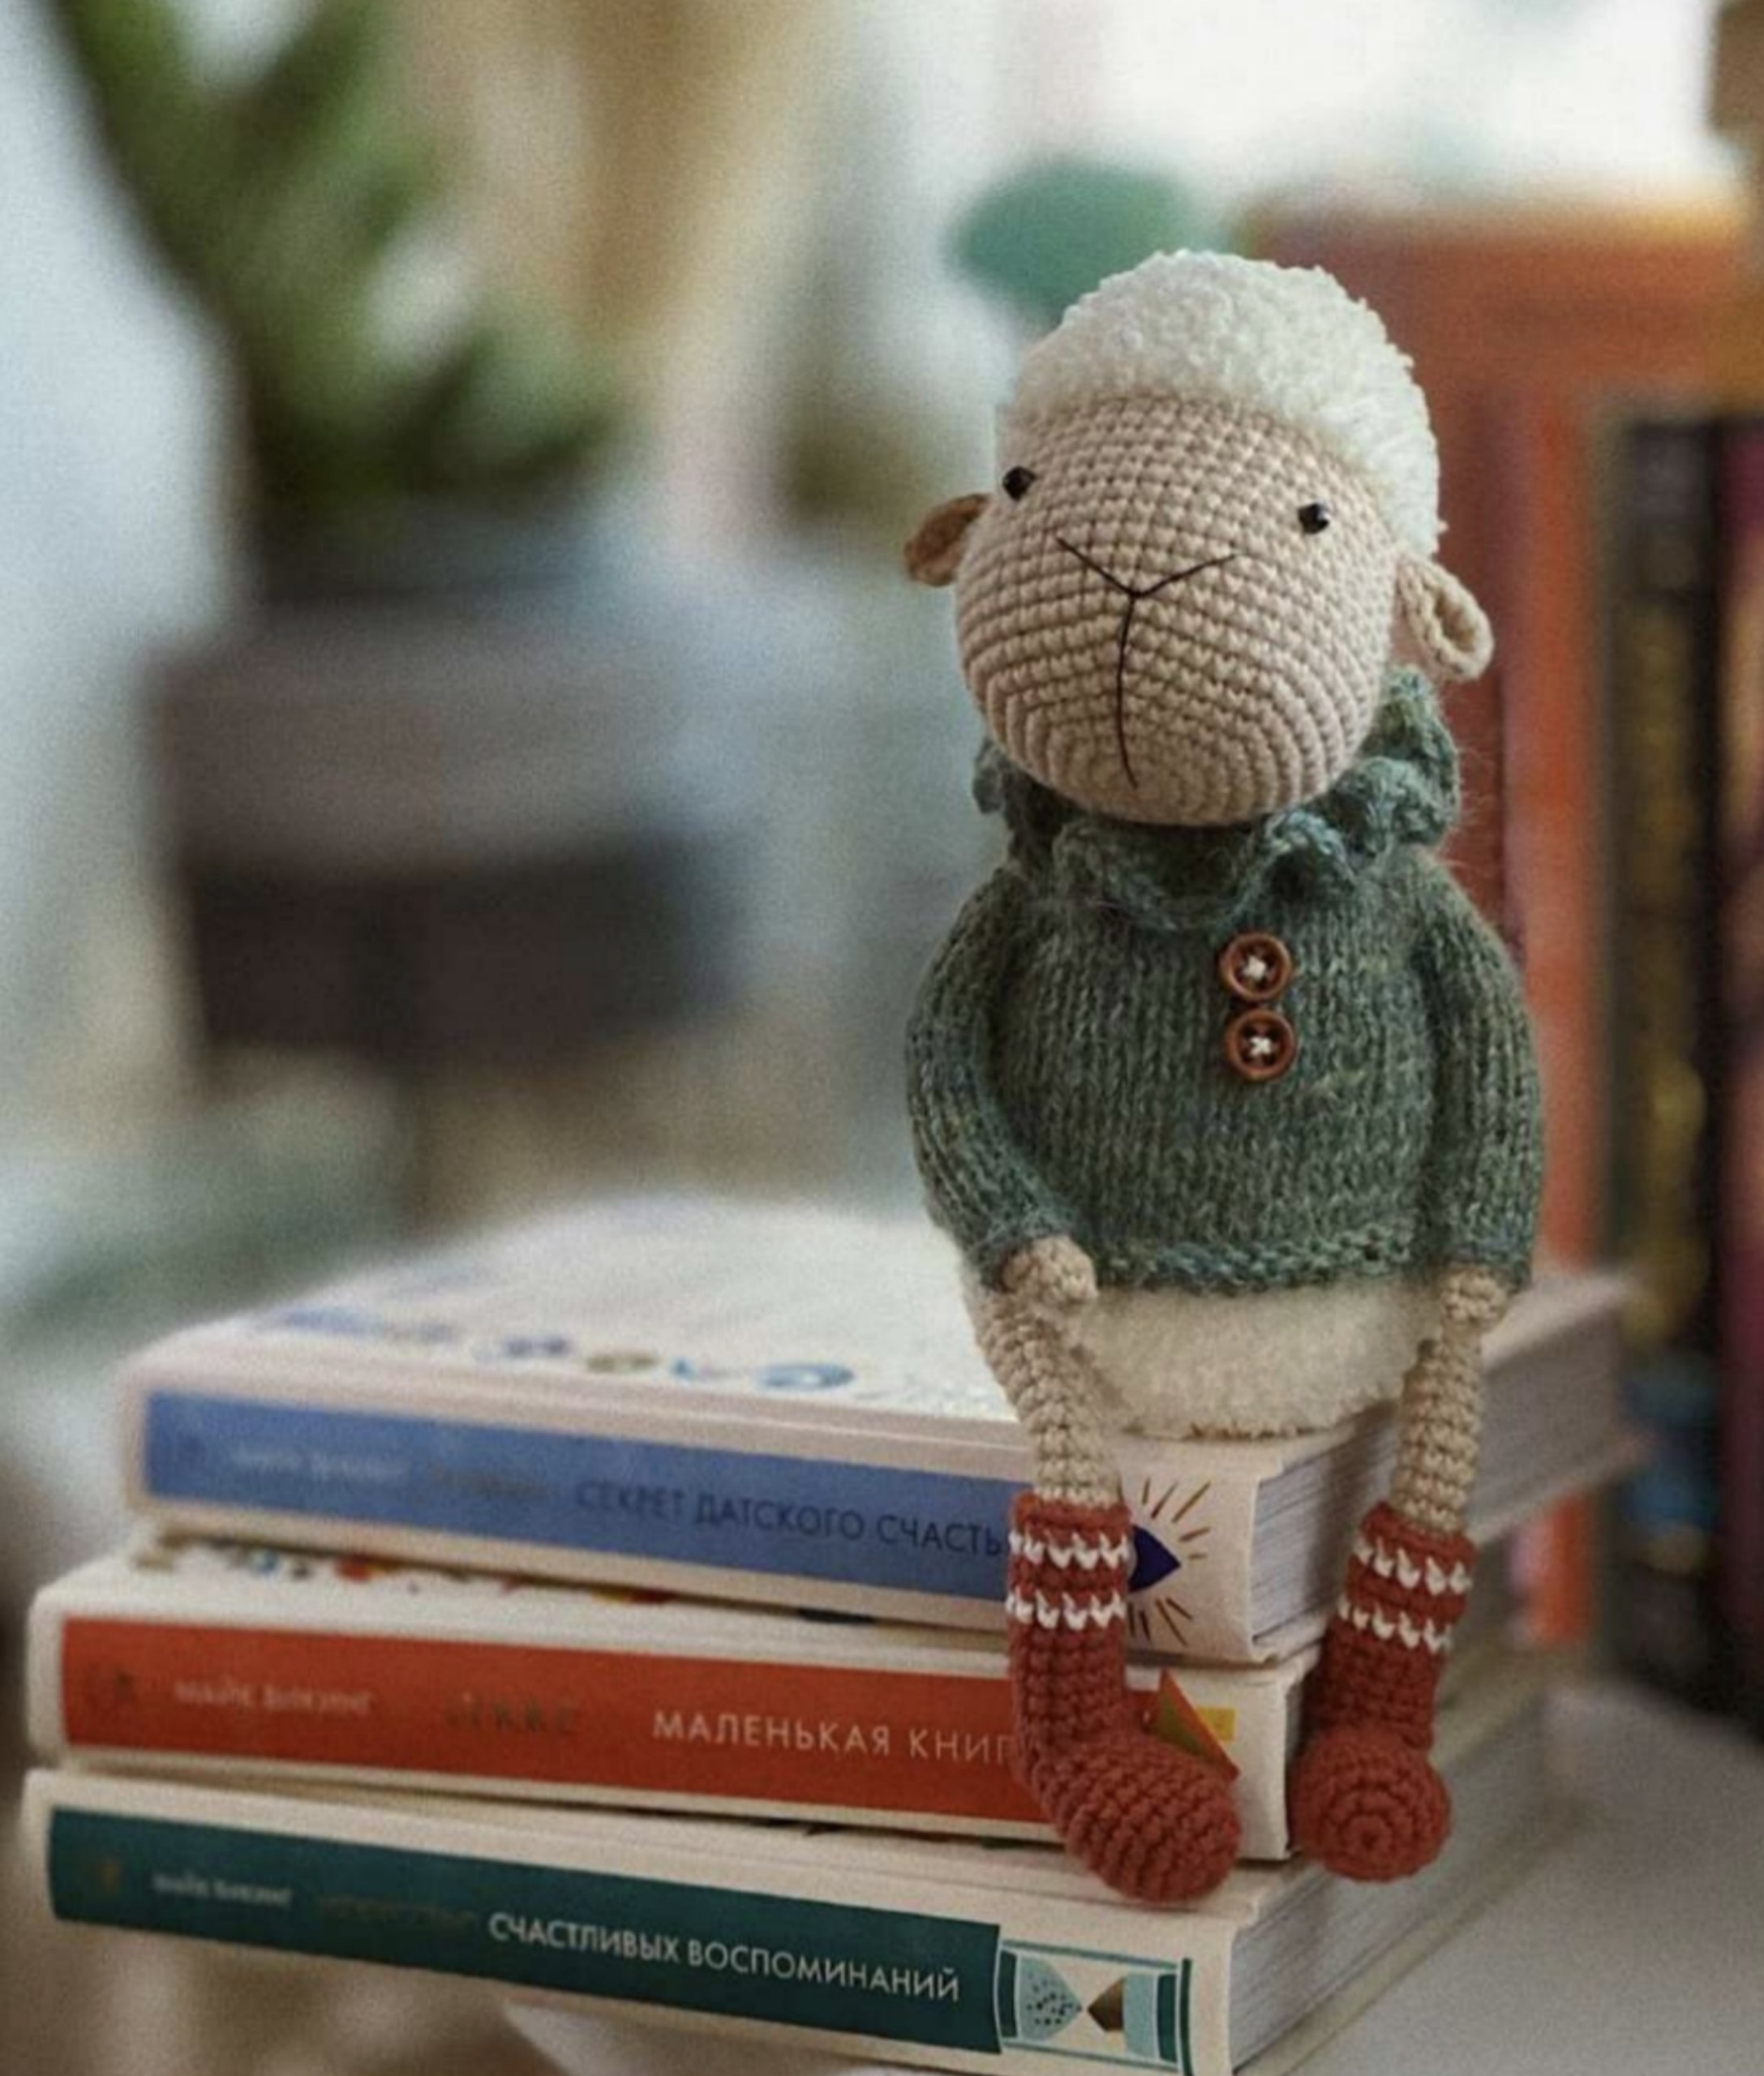
If you are looking for your next adorable amigurumi project, look no further! Dolly the Sheep is a charming, handcrafted character that combines the soft textures of fleece with a cozy, hand-knitted sweater. This pattern is perfect for those who love creating whimsical creatures that look like they belong in a high-end boutique toy shop. Whether you are making this as a gift for a little one or a decorative piece for your shelf, Dolly is sure to bring a smile to anyone’s face.
This tutorial is designed to be accessible for intermediate crocheters and knitters, but I have broken everything down into clear, easy-to-follow steps. We will be using a mix of crochet for the body parts and a little bit of knitting for that iconic tiny sweater. Grab your hooks and needles, and let’s get started!
Materials & Abbreviations
To ensure Dolly turns out looking just like the photos, I recommend using high-quality yarns. The finished toy should measure approximately 8.5 inches tall.
Yarn Requirements
- Main Body & Head (Cotton Blend): Approximately 1.75 oz (50g) of a cotton/acrylic blend (50/50) in Light Beige, Terracotta, and White.
- Fluffy Wool (Polyester): Approximately 1.75 oz (50g) of a soft micro-polyester yarn in Pearl/White.
- Tiny Sweater (Alpaca): Approximately 1.75 oz (50g) of a soft Alpaca blend in Gray-Blue.
Tools & Notions
- Crochet Hooks: 1.75mm and 2mm hooks.
- Knitting Needles: 2mm circular and double-pointed needles (DPNs).
- Safety Eyes: 3mm to 4mm size.
- Stuffing: Poly-fill or hollowfiber.
- Extras: Tapestry needle, scissors, stitch markers, sewing pins, thin wire (optional for limbs), electrical tape (to wrap wire), and 2 small buttons for the sweater.
- Embroidery: Black embroidery floss for the nose.
Crochet Abbreviations (US Terms)
- MR: Magic Ring
- ch: Chain
- sc: Single crochet
- hdc: Half double crochet
- inc: Increase
- dec: Decrease
- sl st: Slip stitch
Knitting Abbreviations (US Terms)
- k: Knit
- p: Purl
- yo: Yarn over
- selvedge: Edge stitch
Step-by-Step Instructions
The Head
Using the Light Beige cotton blend and a 1.75mm hook, begin by working into a Magic Ring.
- 6 sc in MR (6)
- 6 inc (12)
- (1 sc, inc) * 6 (18)
- (2 sc, inc) * 6 (24)
- (3 sc, inc) * 6 (30)
- (4 sc, inc) * 6 (36)
- (5 sc, inc) * 6 (42)
- (6 sc, inc) * 6 (48)
- Rounds 9-13: 48 sc (5 rounds)
- (14 sc, dec) * 3 (45)
- Rounds 15-17: 45 sc (3 rounds)
- (13 sc, dec) * 3 (42)
- Rounds 19-20: 42 sc (2 rounds)
- (12 sc, dec) * 3 (39)
- Rounds 22-23: 39 sc (2 rounds)
Note: Insert safety eyes between rounds 15 and 16, approximately 11 stitches apart.
- (11 sc, dec) * 3 (36)
- Rounds 25-26: 36 sc (2 rounds)
- (4 sc, dec) * 6 (30)
Begin stuffing the head firmly with poly-fill.
- (3 sc, dec) * 6 (24)
- (2 sc, dec) * 6 (18)
- (1 sc, dec) * 6 (12)
- 6 dec (6)
Fasten off, weave in ends, and pull the opening closed tightly.
The Fluffy Wool Cap
Using the Pearl/White polyester yarn and a 2mm hook, start with a chain of 2. Starting from the 2nd chain from the hook:
- 6 sc (6)
- 6 inc (12)
- (1 sc, inc) * 6 (18)
- (2 sc, inc) * 6 (24)
- (3 sc, inc) * 6 (30)
- (4 sc, inc) * 6 (36)
- Rounds 7-8: 36 sc (2 rounds)
- (11 sc, inc) * 3 (39)
- Rounds 10-11: 39 sc (2 rounds)
- (12 sc, inc) * 3 (42)
- Rounds 13-14: 42 sc (2 rounds)
Fasten off, leaving a long tail for sewing the cap to the head.
The Ears (Make 2)
Using Light Beige yarn and a 1.75mm hook, ch 4. Starting in the 2nd ch from hook:
- 2 sc, 3 sc in the last ch. On the other side of the chain, 2 sc (7). Turn your work.
- 2 sc, dec, 2 sc (10)
Fasten off, leaving a long tail. Fold the ear in half and sew the edges together. Do not cut the tail; you will use it to attach the ears to the head later.
The Arms (Make 2)
Using Light Beige yarn and a 1.75mm hook.
- 6 sc in MR (6)
- (2 sc, inc) * 2 (8)
- Rounds 3-23: 8 sc (21 rounds)
Optional: Insert a thin wire armature for poseability. Fold the arm in half and sc through both layers to close. Fasten off and weave in ends.
The Legs & Socks (Make 2)
Using Terracotta yarn and a 1.75mm hook. Place your stitch marker in the center of the foot.
- 6 sc in MR (6)
- 6 inc (12)
- (2 sc, inc) * 4 (16)
- Rounds 4-7: 16 sc (4 rounds)
- 3 sc, dec, 6 sc, dec, 3 sc (14)
- 14 sc (14)
- 2 sc, dec, 1 sc, ch 4, skip 4 stitches from the previous row, 1 sc, dec, 2 sc (12)
- 4 sc, 4 sc along the ch-4, 4 sc (12)
- 6 dec (6)
Fasten off, stuff the foot, and leave a tail. Now, join Light Beige yarn to the first unworked stitch of round 9 and work in the round:
- 4 sc into the round and 4 sc into the half-stitches of the ch-4 (8)
- Rounds 2-22: 8 sc (21 rounds)
Optional: You can add wire to the legs. To create the “sock” look, switch colors between Terracotta and White for the final few rounds as indicated in the pattern images.
The Body
Using the Pearl/White polyester yarn and a 2mm hook. Start with a ch 2 and 6 sc in the 2nd ch from hook.
- 6 sc (6)
- 6 inc (12)
- (1 sc, inc) * 6 (18)
- (2 sc, inc) * 6 (24)
- (3 sc, inc) * 6 (30)
- (4 sc, inc) * 6 (36)
- (5 sc, inc) * 6 (42)
- (6 sc, inc) * 6 (48)
Attaching the Legs: In Round 9, you will work the legs directly into the body. Work 10 sc, then insert your hook into the leg to work 4 sc through both the leg and the body, continue 20 sc around the body, work 4 sc through the other leg, and finish with 10 sc (48).
- 10 sc, 4 sc through leg stitches, 20 sc, 4 sc through leg stitches, 10 sc (48)
- Rounds 11-18: 48 sc (8 rounds)
- (14 sc, dec) * 3 (45)
- Rounds 20-21: 45 sc (2 rounds)
- (13 sc, dec) * 3 (42)
- Rounds 23-24: 42 sc (2 rounds)
- (12 sc, dec) * 3 (39)
- Rounds 26-27: 39 sc (2 rounds)
- (11 sc, dec) * 3 (36)
- 36 sc (36)
Stuff the body firmly. To attach the arms, work 6 sc, then sc through both the arm and body for 4 stitches, continue 16 sc around the body, and finish with 7 sc (36). Continue rounds 31-35 as per the decrease pattern, then finish with a shaping row to close the bottom.
The Tiny Sweater (Knitted)
Using Gray-Blue Alpaca yarn and 2mm DPNs.
Body: Cast on 32 stitches. Work in alternating rows of knit and purl to create texture, following the pattern for increases and decreases to shape the torso. Use waste yarn to hold the sleeve stitches at round 10.
Sleeves: Using 4 DPNs, pick up the stitches from the waste yarn. Work 26 rounds of 9 knit stitches.
Collar: Using a 2mm crochet hook, ch 34 + 1. Work 34 inc, then (1 sc, inc) * 34. Finish with a round of hdc for a ruffled effect.
Finishing
Now it’s time to bring Dolly to life! Assembly is key to making her look professional.
- The Cap: Sew the white woolly cap onto the head.
- The Ears: Use the long tails to sew the ears onto the sides of the head.
- The Face: Using one strand of black embroidery floss, carefully embroider a small nose shape.
- The Limbs: Sew the arms and legs onto the body.
- The Sweater: Sew the collar to the neck, decorate with two tiny buttons, and carefully pull the sweater over Dolly’s body. Use sewing pins to help position the sweater perfectly before securing it with a seam at the back.
Tips for Success
Mastering the “Shift Stitch”
When working in rounds, you might notice your work begins to spiral or tilt. This is because the starting marker naturally shifts. To keep your rounds perfectly circular, work one extra single crochet at the end of a round and move your stitch marker to the new “first” stitch. This “shift stitch” ensures your amigurumi stays symmetrical.
Tension and Stuffing
For amigurumi, tight tension is your best friend. If your stitches are too loose, the white stuffing will peek through the beige yarn. When stuffing, push the fiber into the corners of the head and body to ensure there are no lumps.
Working with Alpaca Yarn
Alpaca yarn is incredibly soft but can be “fuzzy.” When knitting the tiny sweater, try not to pull the yarn too tightly, as this can make the stitches difficult to see. If you find it tricky, use stitch markers to keep track of your increases and decreases.