DIY Crochet Little Man Amigurumi Pattern: A Quirky Character Tutorial
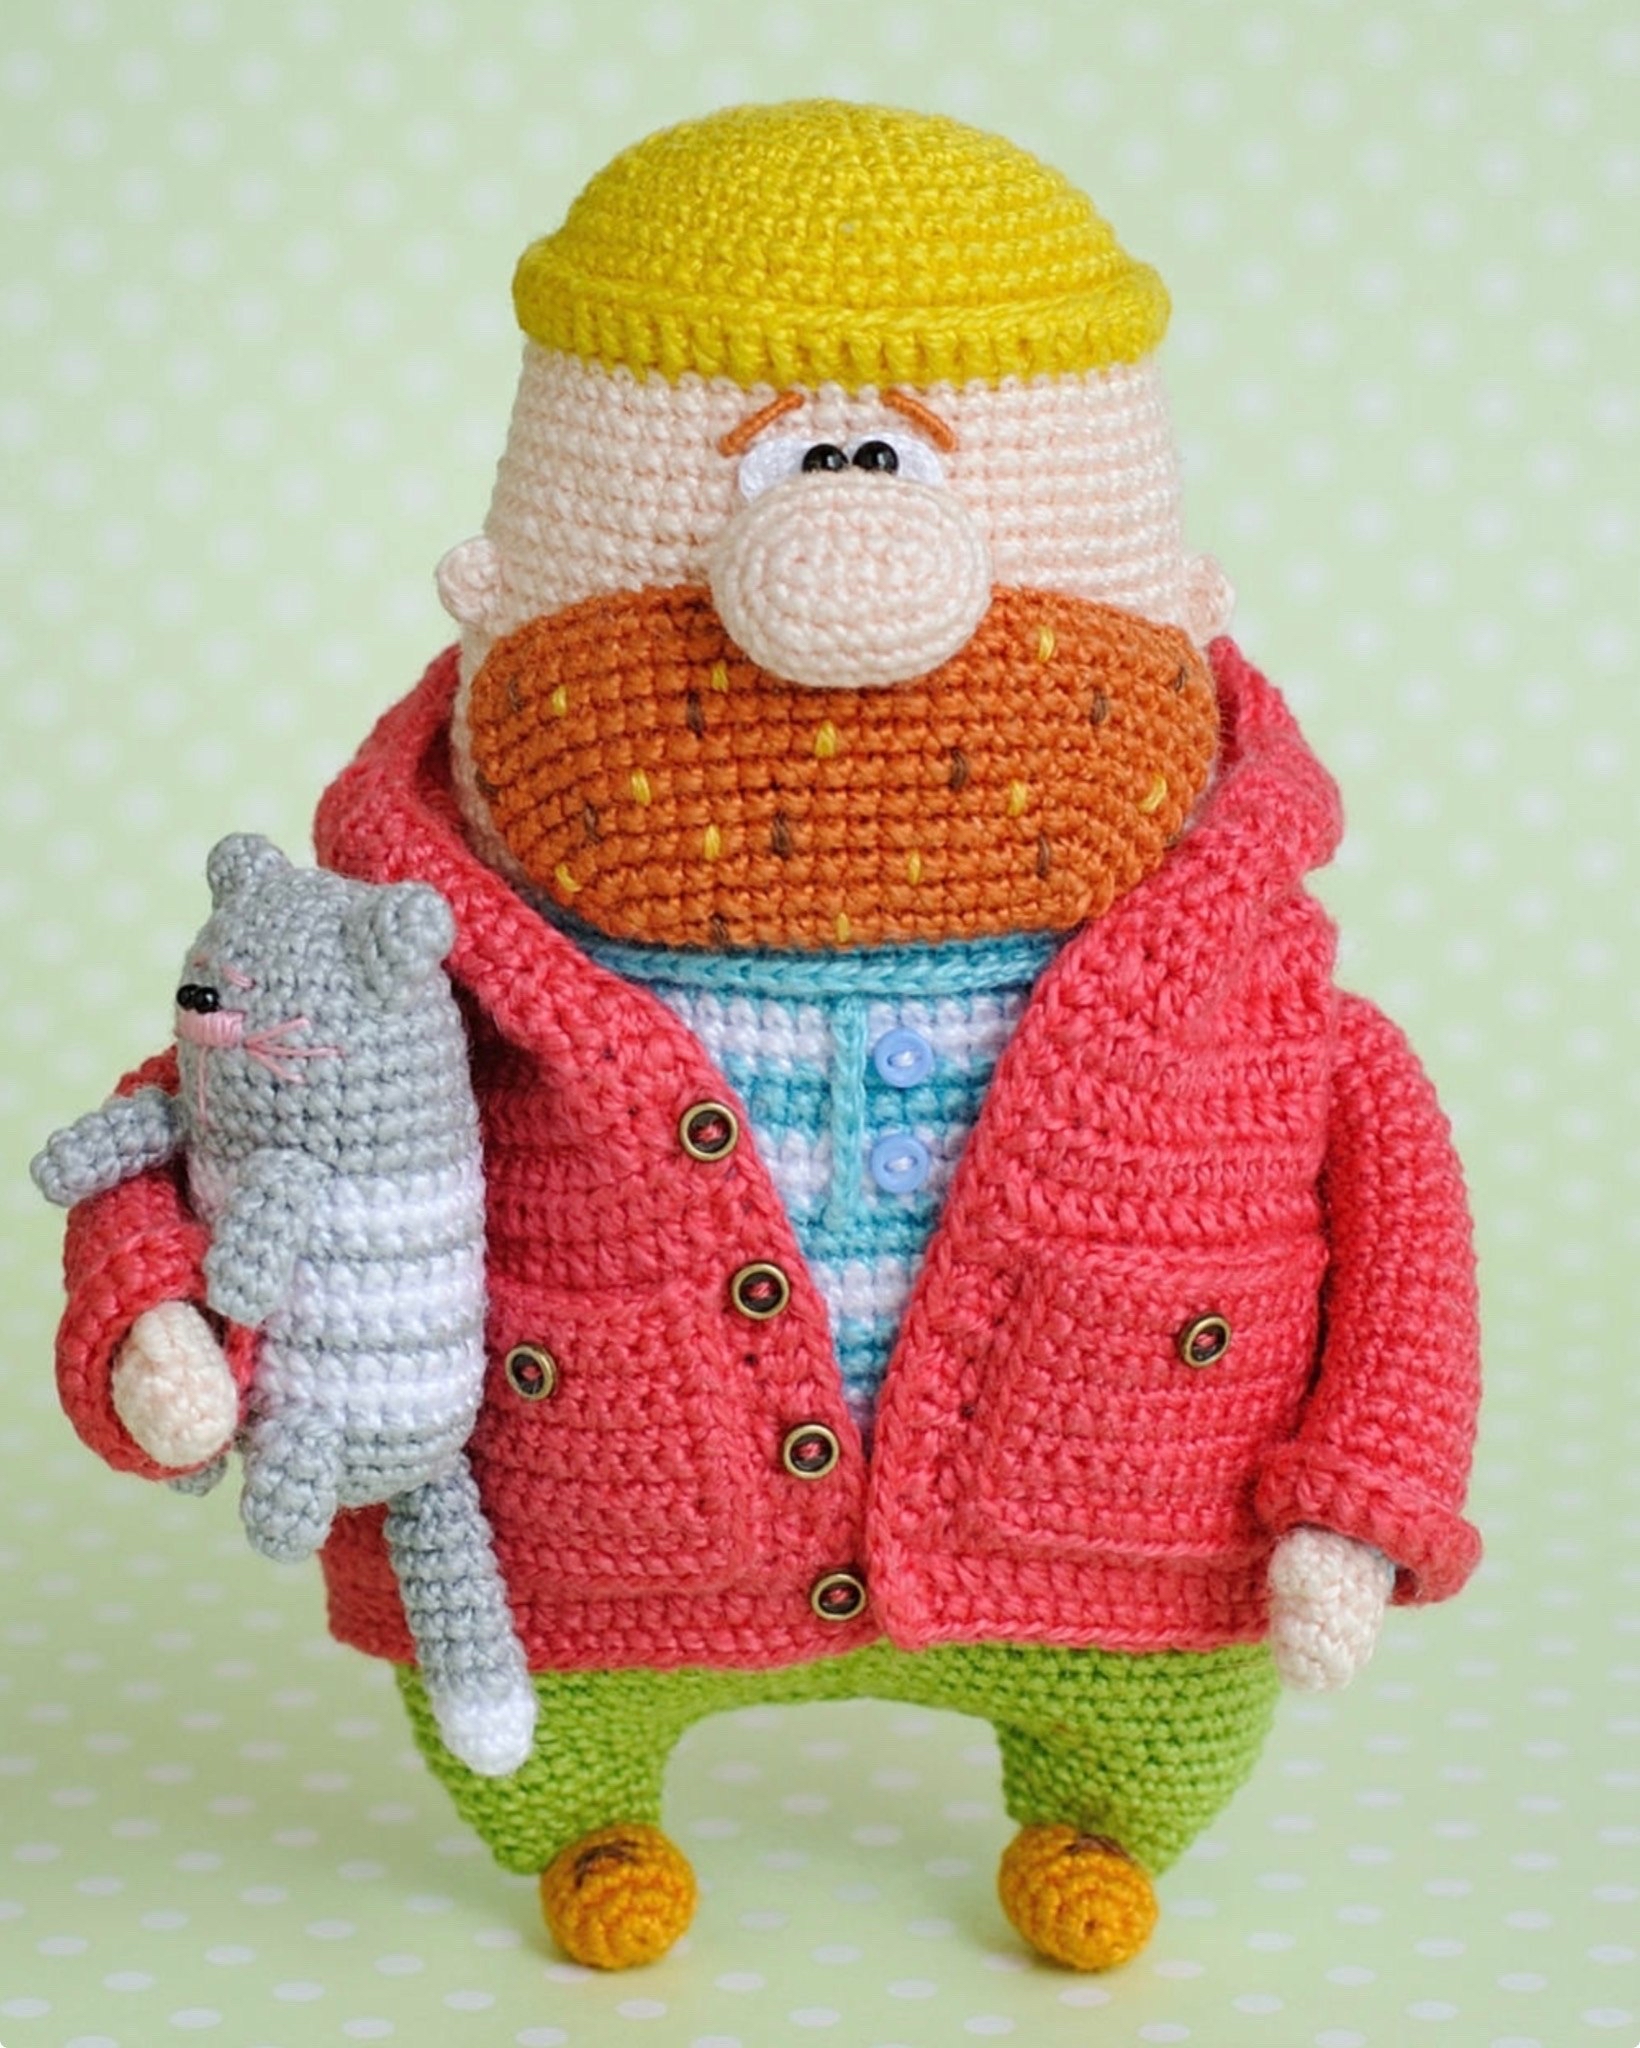
Are you looking for a unique, personality-filled crochet project that stands out from the usual teddy bears and bunnies? Look no further! This tutorial will guide you through creating a “Little Man”—a delightfully quirky, bearded character wearing a striped shirt, a cozy jacket, and even carrying his tiny gray cat companion. This amigurumi project is perfect for anyone looking to add a bit of character to their crochet collection or looking for a whimsical gift for a friend.
This pattern is designed to be beginner-friendly, though it does require working with fine thread and changing colors frequently. The result is a highly detailed, textured little fellow that looks like he stepped right out of a storybook. Grab your favorite hooks and let’s get started!
Materials & Abbreviations
Materials Needed
- Crochet Thread: Fine cotton thread (approx. 90 yards per 10g ball) in the following colors:
- Yellow (for the hat)
- Beige/Skin tone (for the head, hands, ears, and nose)
- Light Blue (for the striped shirt and collar)
- White (for the striped shirt, cat, and eye whites)
- Mustard/Ocher (for the belt and boots)
- Light Pink (for tiny details like the belt buckle)
- Lime Green (for the pants)
- Brick Red (for the beard)
- Bright Pink (for the jacket)
- Gray (for the cat)
- Embroidery Floss: White, Yellow, Brown, Pink, and Light Green for fine detailing.
- Hooks: 0.6mm and 0.9mm crochet hooks.
- Eyes: 0.1-inch (2.5mm) beads or safety eyes, and 0.04-inch (1mm) beads for pupils.
- Wire: 0.04-inch (1mm) aluminum or copper wire for posable arms.
- Stuffing: Polyester fiberfill.
- Buttons: 0.12-inch (3mm) blue buttons for the shirt and metallic/copper buttons for the jacket.
- Adhesive: Clear craft gel or fabric glue.
- Tools: Scissors, sewing needle, stitch markers, and pliers/wire cutters.
Abbreviations (US Terms)
- MR: Magic Ring
- ch: Chain
- sc: Single Crochet
- inc: Increase
- dec: Decrease
- hdc: Half Double Crochet
- tr: Treble Crochet
- sl st: Slip Stitch
- (…) * n: Repeat the sequence inside the parentheses n times
- Number in parentheses: Total stitch count at the end of the round
Step-by-Step Instructions
The Head, Body, and Legs (Worked Top-Down)
This entire section is worked as one continuous piece, starting from the top of the hat and working downwards. Remember to stuff the piece firmly as you progress.
The Yellow Hat
Start with yellow thread and a 0.9mm hook:
- Rnd 1: 6 sc in MR (6)
- Rnd 2: 6 inc (12)
- Rnd 3: (1 sc, inc) * 6 (18)
- Rnd 4: 1 sc, inc, (2 sc, inc) * 5, 1 sc (24)
- Rnd 5: (3 sc, inc) * 6 (30)
- Rnd 6: 2 sc, inc, (4 sc, inc) * 5, 2 sc (36)
- Rnd 7: (5 sc, inc) * 6 (42)
- Rnd 8: 3 sc, inc, (6 sc, inc) * 5, 3 sc (48)
- Rnd 9: (11 sc, inc) * 4 (52)
- Rnd 10-13: 52 sc (52)
The Face and Neck
Switch to beige/skin tone thread. Do not cut the yellow thread; pull it to the front to create the hat brim later.
- Rnd 14: Work in the back loops only: 52 sc (52)
- Rnd 15: 6 sc, inc, (12 sc, inc) * 3, 6 sc (56)
- Rnd 16-18: 56 sc (56)
Note: At this point, take the yellow thread and work 2 ch, then 51 tr into the front loops of Round 14 to create the hat brim. Join with a sl st, fasten off, and hide the tail.
Continue with beige thread:
- Rnd 19: (13 sc, inc) * 4 (60)
- Rnd 20-22: 60 sc (60)
- Rnd 23: 7 sc, inc, (14 sc, inc) * 3, 7 sc (64)
- Rnd 24-26: 64 sc (64)
- Rnd 27: (15 sc, inc) * 4 (68)
- Rnd 28-30: 68 sc (68)
- Rnd 31: 8 sc, inc, (16 sc, inc) * 3, 8 sc (72)
The Striped Shirt (Telnyashka)
Switch to light blue thread:
- Rnd 32: 72 sc (72)
- Rnd 33: Work in back loops only: 72 sc (72)
Switch to white thread:
- Rnd 34-35: 72 sc (72)
Continue with light blue thread:
- Rnd 36: 72 sc (72)
- Rnd 37: (17 sc, inc) * 4 (76)
Switch to white thread:
- Rnd 38-39: 76 sc (76)
Continue with light blue thread:
- Rnd 40-41: 76 sc (76)
Switch to white thread:
- Rnd 42: 76 sc (76)
- Rnd 43: 9 sc, inc, (18 sc, inc) * 3, 9 sc (80)
Continue with light blue thread:
- Rnd 44-45: 80 sc (80)
Switch to white thread:
- Rnd 46-47: 80 sc (80)
Continue with light blue thread:
- Rnd 48: (19 sc, inc) * 4 (84)
- Rnd 49: 84 sc (84)
Switch to white thread and fasten off:
- Rnd 50-51: 84 sc (84)
The Belt and Pants
Switch to mustard thread:
- Rnd 52: Work in back loops only: (19 sc, dec) * 4 (80)
- Rnd 53: 80 sc (80)
Switch to lime green thread:
- Rnd 54: 9 sc, dec, (18 sc, dec) * 3, 9 sc (76)
- Rnd 55-56: 76 sc (76)
- Rnd 57: (17 sc, dec) * 4 (72)
- Rnd 58-59: 72 sc (72)
- Rnd 60: 8 sc, dec, (16 sc, dec) * 3, 8 sc (68)
- Rnd 61: 68 sc (68)
Dividing for the Legs
Rnd 62: Sc 6, place a marker in the 6th stitch, then sc 22 more (Total 28). Fold the body in half so the front and back meet. Insert your hook into the 29th stitch and the 6th stitch (at the marker) and join with a sl st. Then, sc 11 through both layers to create the crotch, and continue sc 22 around the first leg.
The Legs and Boots
Left Leg
- Rnd 63: 10 sc, dec, 10 sc (21)
- Rnd 64: (5 sc, dec) * 3 (18)
- Rnd 65: 2 sc, dec, (4 sc, dec) * 2, 2 sc (15)
- Rnd 66: 15 sc, sl st. Fasten off, leaving a long tail.
Right Leg
Follow the exact same instructions as the left leg.
Boots (Make 2)
Use mustard thread and a 0.9mm hook:
- Rnd 1: 6 sc in MR (6)
- Rnd 2: 6 inc (12)
- Rnd 3-7: 12 sc (12)
- Rnd 8: 6 dec (6)
Close the hole by pulling the front loops together. Fasten off and sew the boots to the bottom of the legs (attaching the front of the leg to Round 6 of the boot and the back to Round 7).
The Accessories: Collar, Arms, and Ears
The Collar
Using light blue thread, work around the front loops of Round 33 of the body: 72 sc.
The Arms (Make 2)
Start with beige thread. For the Left Arm, use the following pattern:
- Rnd 1: 5 sc in MR (5)
- Rnd 2: 5 inc (10)
- Rnd 3: 10 sc (10)
- Rnd 4: 7 sc, “bobble” (tr 3 in one stitch), 2 sc (10)
- Rnd 5: 4 sc, dec, 4 sc (9)
Switch to blue/white thread (alternating every 2 rounds) and work 19 rounds of 12 sc. For the Right Arm, follow the same pattern but change Round 4 to: 2 sc, bobble, 7 sc (10).
Pro-tip: Insert 4.7-inch (12cm) pieces of wire into the arms before sewing them to the body to make them posable.
Ears and Face Details
- Ears: 4 sc in MR, (1 sc, inc) * 3 (9), then 9 sc. Sew between rounds 21 and 24 of the head.
- Beard: Work an oval shape in brick red thread. Embroider vertical yellow and brown spots for texture. Sew to the face.
- Nose: Work an oval in beige thread and sew so the top sits on the face and the bottom sits on the beard.
- Eyes: Crochet small white ovals (4 ch, sc, etc.) and glue them above the nose. Add beads for pupils.
The Jacket and Pockets
Using bright pink thread, work in rows (turning at the end of each row). Start with an 87-ch foundation.
- Rnd 1: 85 hdc in 3rd ch from hook.
- Rnd 2-5: 85 hdc.
- Rnd 6-11: Follow the shaping instructions in the pattern (dec/inc) to create the silhouette.
- Rnd 12: Create armholes by working 14 hdc, ch 7 (skip 7 sts), 35 hdc, ch 7 (skip 7 sts), 14 hdc.
- Rnd 13-34: Follow the decreasing/increasing rounds as specified to taper the jacket.
Pockets: Crochet two small squares (12 ch, 11 sc) and sew them onto the jacket. Add tiny buttons for a finished look.
The Tiny Cat Companion
Using gray and white thread, crochet a small striped body (starting with 6 sc in MR and working up to 27 sc) and add tiny ears and a tail. Sew the cat’s features with pink embroidery thread.
Finishing
Once all pieces are crocheted, carefully sew the arms, ears, nose, and beard to the body. Use stitch markers to ensure symmetry before permanently sewing. Add the buttons to the shirt and jacket, and finish with the final embroidery details: the belt buckle (pink), the hair/eyebrow details, and the little cross-stitches on the boots.
Tips for Success
- Tension is Key: Since you are using very fine hooks and thread, keep your tension consistent to avoid large gaps where stuffing might show through.
- Color Changes: To get clean color changes, pull the new color through the last two loops of the final stitch of the previous color.
- Stuffing: Don’t be afraid to use a chopstick or a pencil to push stuffing into tight corners like the nose or the hands.
- Symmetry: Always use pins to position facial features (eyes, nose, beard) before sewing. It is much easier to move a pin than to unpick stitches!