DIY Crochet Ballerina Bear Pattern: A Sweet Amigurumi Tutorial
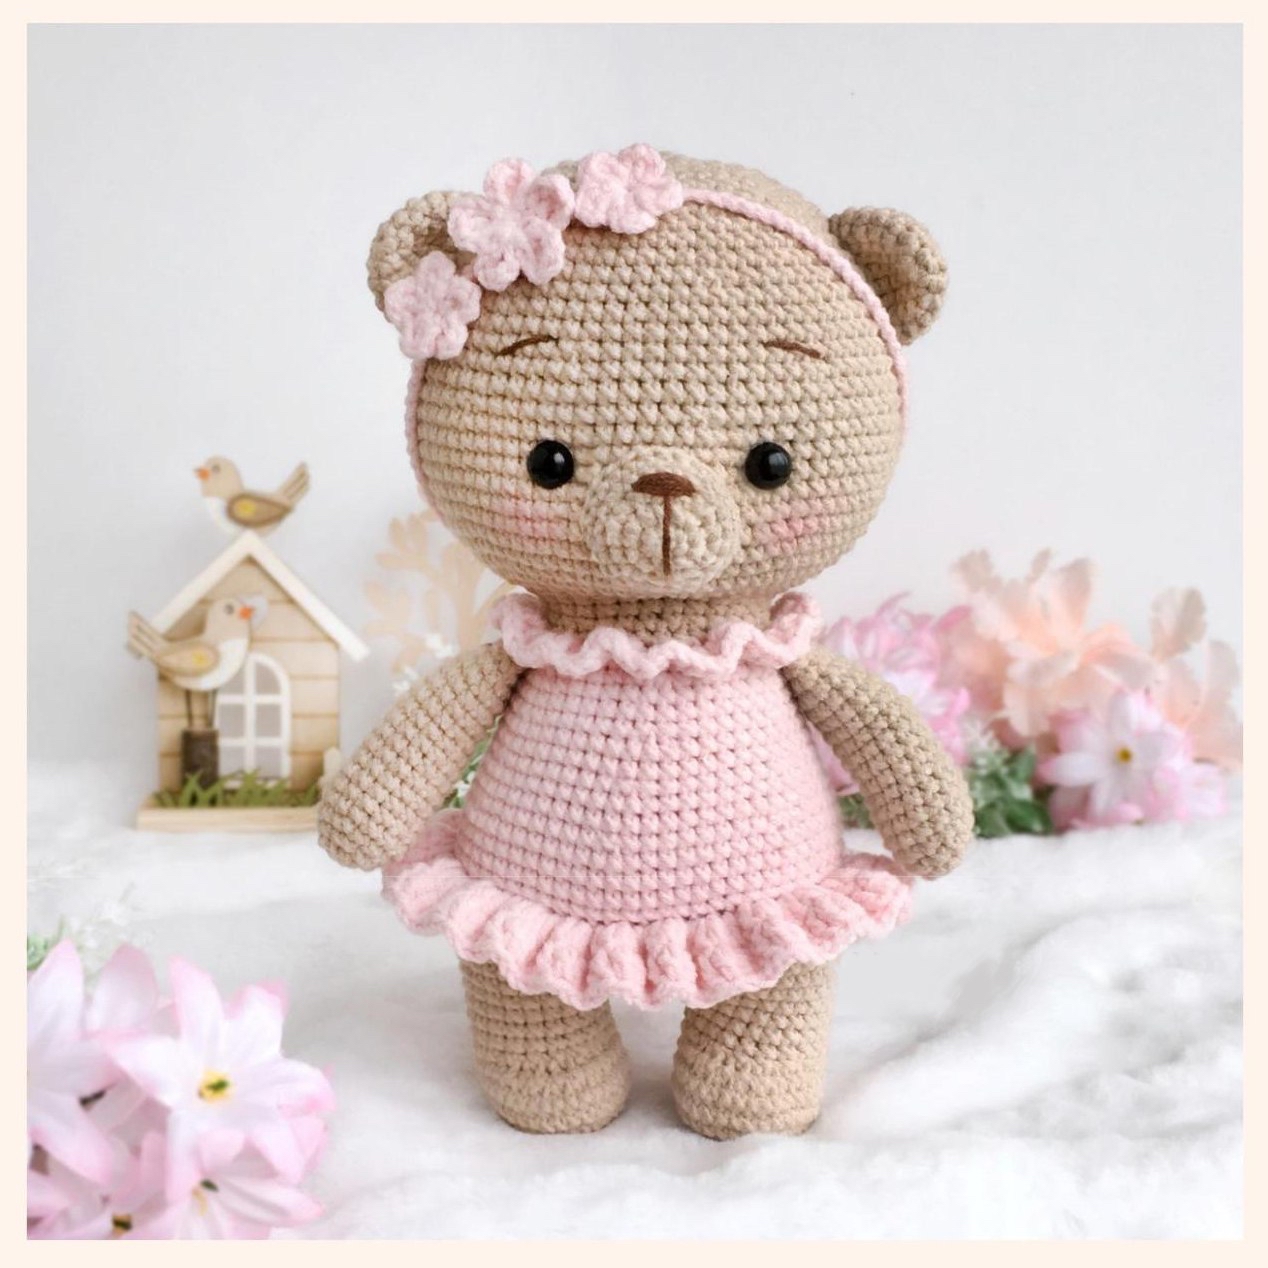
Are you looking for your next adorable amigurumi project? Welcome to our step-by-step guide to creating “Rosie,” the most charming crochet ballerina bear you will ever meet! This little bear is dressed in a soft pink tutu and a matching floral headband, making her the perfect companion for a nursery, a sweet gift for a child, or a lovely addition to your own crochet collection.
Whether you are a beginner looking to practice your shaping or an intermediate crocheter wanting to whip up a quick and cute project, this pattern is designed to be approachable and fun. By the end of this tutorial, you’ll have a beautifully shaped, 8-inch tall ballerina bear ready to dance into your heart.
Materials & Abbreviations
Before we pick up our hooks, let’s make sure you have everything you need. For a bear of approximately 8 inches in height, I recommend using a fine-weight yarn to ensure the stitches are tight and the stuffing stays hidden.
What You Will Need:
- Fine Weight Yarn:
- Beige (for the body, arms, legs, and head)
- Pink (for the dress, collar, headband, and flowers)
- Embroidery Thread: Brown (for the nose and eyebrows)
- Sewing Thread: Beige (to sew the pieces together)
- Safety Eyes: 8 mm
- Crochet Hook: 2.00 mm (or a size that creates very tight stitches)
- Stuffing: Polyester fiberfill
- Other: A long yarn needle and a stitch marker
US Crochet Abbreviations:
This pattern uses standard US terminology. Please ensure you are using US terms rather than UK terms to avoid confusion!
- MR: Magic Ring
- sc: Single crochet
- ch: Chain
- sl st: Slip stitch
- dc: Double crochet
- tr: Treble crochet
- inc: Increase (2 sc in one stitch)
- dec: Decrease (sc 2 together)
- st(s): Stitch(es)
- (sc, inc) * n: Repeat the sequence inside the parentheses n times
Step-by-Step Instructions
The Arms (Make 2)
Working with beige yarn. Stuff halfway when finished.
- MR, 6 sc (6)
- 6 inc (12)
- (3 sc, inc) * 3 (15)
- Rounds 4-16: 15 sc (13 rounds total)
- (3 sc, dec) * 3 (12)
- 12 sc
- Fold the arm in half and sc through both sides together to close (6 sc).
Fasten off, leaving a tail for sewing.
The Legs (Make 2)
Working with beige yarn. Stuff as you go.
- MR, 8 sc (8)
- 8 inc (16)
- (sc, inc) * 8 (24)
- (2 sc, inc) * 8 (32)
- Rounds 5-6: 32 sc (2 rounds)
- 11 sc, 5 dec, 11 sc (27)
- 8 sc, 5 dec, 9 sc (22)
- Rounds 9-10: 22 sc (2 rounds)
For the Left Leg: Work 16 sc total. Fasten off and leave a tail for sewing.
For the Right Leg: Work 22 sc total. Do NOT fasten off; we will continue working directly into the legs to create the body.
The Body and Dress
This section combines the legs and builds the torso. We will also transition from beige to pink here to create the dress.
- Starting from the right leg: 7 sc, ch 5, 22 sc across the left leg, 5 sc along the chain, 22 sc across the right leg, 5 sc along the chain. Place your stitch marker here (54).
- (8 sc, inc) * 6 (60)
- Rounds 3-7: 60 sc (5 rounds)
Switch to pink yarn:
- 60 sc
- Working in Back Loops Only: 60 sc
- Rounds 10-12: 60 sc (3 rounds)
- 4 sc, dec, (8 sc, dec) * 5, 4 sc (54)
- Rounds 14-15: 54 sc (2 rounds)
- (7 sc, dec) * 6 (48)
- Rounds 17-18: 48 sc (2 rounds)
- 3 sc, dec, (6 sc, dec) * 5, 3 sc (42)
- Rounds 20-21: 42 sc (2 rounds)
- (5 sc, dec) * 6 (36)
Adjust your stitch marker so it sits exactly in the middle of the bear’s back. This is where we will attach the arms.
- 6 sc; 6 sc through the first arm and the body together; 12 sc; 6 sc through the second arm and the body together; 6 sc (36)
Switch back to beige yarn:
- Working in Back Loops Only: 36 sc
- 2 sc, dec, (4 sc, dec) * 5, 2 sc (30)
- Rounds 26-27: 30 sc (2 rounds)
Work an additional 1 or 2 sc so that your marker is once again centered on the back. Do not fasten off; we will continue with the head, but first, let’s finish the dress details.
The Skirt and Collar
These pieces add the “ballerina” flair! We will work them by attaching yarn to the front loops of the body.
The Skirt
Join pink yarn to the front loops of the 9th round of the body. Turn the body upside down so the legs are pointing up.
- (2 dc in one st, 2 dc in one st, 3 dc in one st) * 20 (140)
- 140 dc
Fasten off and weave in your ends inside the body.
The Collar
Join pink yarn to the front loops of the 24th round of the body. Again, turn the body upside down (legs up).
- (2 dc in one st, 2 dc in one st, 3 dc in one st) * 12 (84)
Fasten off and weave in your ends. Ensure the body is very firmly stuffed, especially around the neck area, to support the head.
The Head
Continue working with beige yarn. Stuff the head firmly as you go.
- MR, 45 sc (45)
- (2 sc, inc) * 15 (60)
- (9 sc, inc) * 6 (66)
- 5 sc, inc, (10 sc, inc) * 5, 5 sc (72)
- (11 sc, inc) * 6 (78)
- Rounds 6-12: 78 sc (7 rounds)
- (11 sc, dec) * 6 (72)
- Rounds 14-15: 72 sc (2 rounds)
- 5 sc, dec, (10 sc, dec) * 5, 5 sc (66)
- 66 sc
- (9 sc, dec) * 6 (60)
- 60 sc
- 4 sc, dec, (8 sc, dec) * 5, 4 sc (54)
- 54 sc
- (7 sc, dec) * 6 (48)
- 3 sc, dec, (6 sc, dec) * 5, 3 sc (42)
- 5 sc, dec, (4 sc, dec) * 5, 2 sc (30)
- 3 sc, dec, (4 sc, dec) * 5, 2 sc (24)
- (3 sc, dec) * 6 (18)
- (sc, dec) * 6 (12)
- 6 dec (6)
Eye Placement: Insert your 8mm safety eyes between rounds 10 and 11. They should be approximately 12 stitches apart (with 10 stitches visible between them).
Ensure the head is very tightly stuffed. Fasten off and weave in the ends.
Face and Ears
Now, let’s give Rosie her personality!
The Muzzle
Using beige yarn:
- MR, 6 sc (6)
- 6 inc (12)
- (sc, inc) * 6 (18)
- (2 sc, inc) * 6 (24)
- 24 sc
Fasten off. Sew the muzzle onto the face between rounds 3 and 11. Use brown embroidery thread to stitch a small nose and tiny eyebrows.
The Ears
Using beige yarn:
- MR, 6 sc (6)
- 6 inc (12)
- (sc, inc) * 6 (18)
- Rounds 4-6: 18 sc (3 rounds)
Fasten off. Sew the ears onto the head between rounds 16 and 23. For a cute look, sew them so they are slightly concave/curved.
Head Shaping (The Secret to Cute Eyes!)
To give your bear that soulful, “indented” look around the eyes, follow this technique:
- Mark points near the eyes (using the corners of the eyes as guides).
- Thread a long needle with beige yarn.
- Insert the needle through the bottom of the head and pull it up through the area just below one eye.
- Insert the needle back into the eye area and pull it out through the bottom of the head.
- Repeat this process for the second eye.
- Pull the thread tight to create the eye sockets, knot it securely, and weave the tail inside the head.
Accessories: Headband and Flowers
The Headband
Using pink yarn, chain 90 (or enough to fit comfortably around the bear’s head). Slip stitch to join the ends to form a loop and fasten off, leaving a small tail to sew on the flowers.
Small Flowers (Make 2)
- MR, (2 ch, dc, 2 ch, sl st) * 5.
Tighten the ring, fasten off, and weave in the ends.
Large Flower (Make 1)
- MR, (3 ch, tr, 3 ch, sl st) * 5.
Tighten the ring, fasten off, and weave in the ends.
Finally, sew the flowers onto the pink headband to complete the look!
Finishing
Once all pieces are sewn and embroidered, do a final check. Make sure all your ends are tucked away securely inside the body and head. Your Ballerina Bear Rosie is now ready for her debut!
Tips for Success
- Tension is Key: Since this is amigurumi, use a slightly smaller hook than suggested on your yarn label. This ensures there are no gaps where the stuffing might peek through.
- Consistent Stuffing: When stuffing the body and head, push the fiberfill into the corners and crevices. A lumpy bear is hard to sew together!
- The “Back Loop Only” Rule: Be very careful during the body section. Working in the back loops only is what creates the “ledge” that allows the pink dress to sit perfectly on the beige body.
- Symmetry: When sewing the ears and arms, use stitch markers to ensure they are level and even on both sides.