Adorable Crochet Bunny Pattern: How to Make a Cute Mochi Rabbit
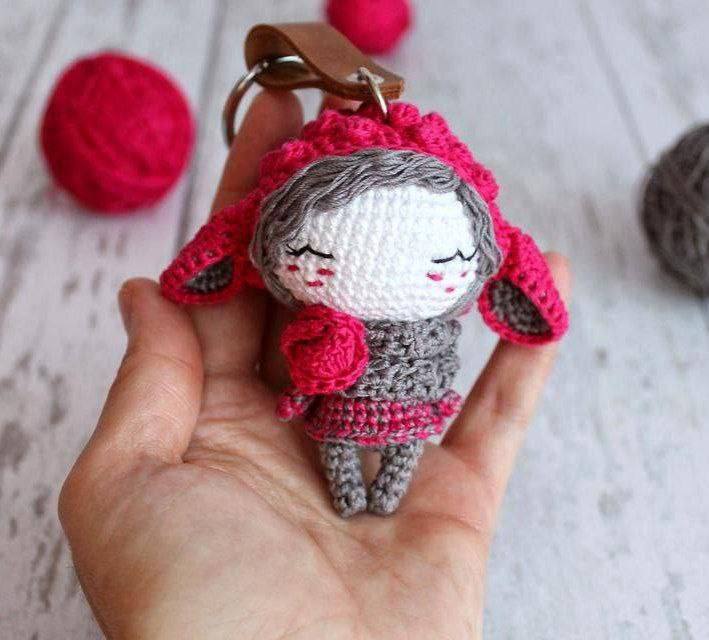
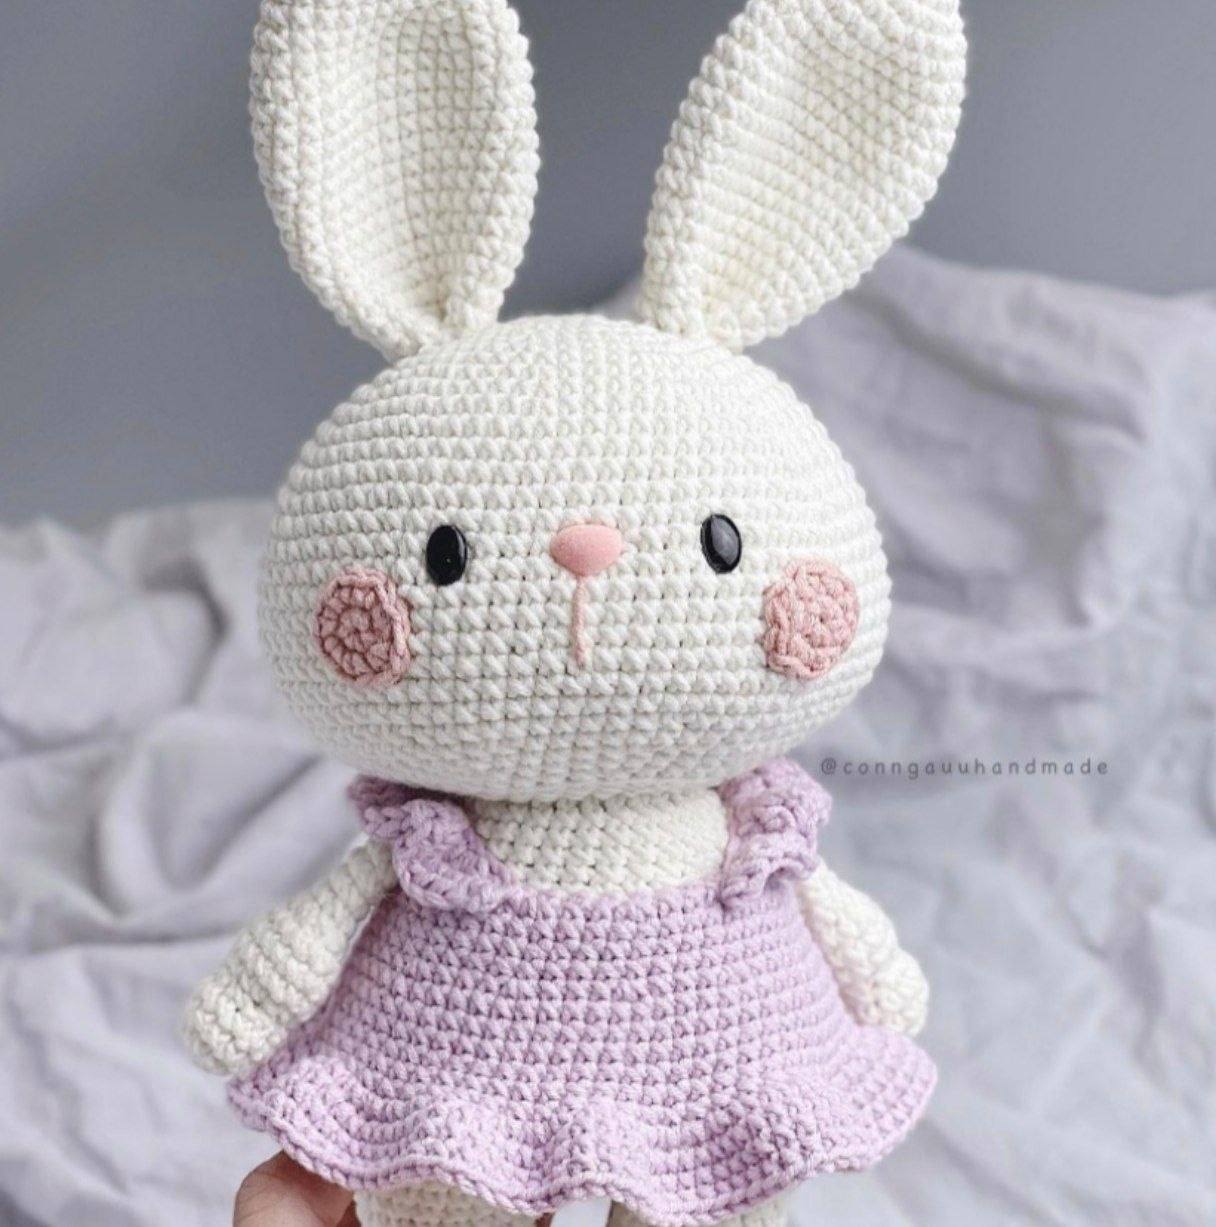
Looking for your next cozy crochet project? Meet Mochi, the most darling little bunny you’ll ever create! This amigurumi pattern is designed for those who love the “kawaii” aesthetic—characterized by a round, chubby body, oversized head, and a sweet, innocent expression. Whether you are looking for a handmade gift for a baby shower, a companion for a child, or just a cute addition to your own collection, this Mochi Bunny is the perfect choice.
This tutorial is written with beginners in mind. We will walk through the process step-by-step, from the floppy ears to the ruffled little skirt. While this project requires some basic knowledge of shaping, the repetitive nature of the rounds makes it a relaxing and rewarding experience. Grab your hook and some soft yarn, and let’s get started!
Materials & Abbreviations
To achieve the look seen in the photos, we recommend using a smooth cotton or cotton-blend yarn to keep the stitches crisp and the shape firm. If you use a bulkier yarn, your bunny will simply be larger, but you may need to adjust your hook size accordingly.
Materials Needed
- Yarn: Medium weight cotton or acrylic blend (White for the bunny, Light Purple for the skirt, and Pink for the cheeks/nose).
- Crochet Hook: 2mm (or a size that keeps your stuffing from showing through).
- Safety Eyes: 10mm x 7mm oval safety eyes.
- Safety Nose: 10mm pink safety nose.
- Stuffing: Polyester fiberfill.
- Tools: Yarn needle, scissors, and stitch markers (highly recommended).
- Embroidery Thread: Pink thread for the mouth.
US Crochet Terms & Abbreviations
- MR: Magic Ring
- sc: Single Crochet
- inc: Increase (2 sc in one stitch)
- dec: Invisible Decrease
- hdc: Half Double Crochet
- dc: Double Crochet
- sl st: Slip Stitch
- ch: Chain
- hdc-inc: Half Double Crochet Increase (2 hdc in one stitch)
- dc-inc: Double Crochet Increase (2 dc in one stitch)
- BLO: Back Loop Only
Step-by-Step Instructions
The Ears (Make 2)
The ears are designed to have a slightly folded, organic look. Do not stuff the ears completely; leave them a bit loose to maintain their shape.
- Round 1: 7 sc in MR (7)
- Round 2: 7 sc (7)
- Round 3: 7 inc (14)
- Round 4: 14 sc (14)
- Round 5: (1 sc, inc) x 7 (21)
- Round 6: 21 sc (21)
- Round 7: (6 sc, inc) x 3 (24)
- Round 8: (7 sc, inc) x 3 (27)
- Round 9: 27 sc (27)
- Round 10: (8 sc, inc) x 3 (30)
- Rounds 11-14: 30 sc (30)
- Round 15: (8 sc, dec) x 3 (27)
- Rounds 16-17: 27 sc (27)
- Round 18: (7 sc, dec) x 3 (24)
- Rounds 19-20: 24 sc (24)
- Round 21: (6 sc, dec) x 3 (21)
- Rounds 22-23: 21 sc (21)
Fasten off, leaving a long tail for sewing. To create the “folded” effect, pinch the edges of the ear together and sew a few stitches across the opening, then sew the sides together slightly to give it a natural curve.
The Cheeks (Make 2)
Using pink yarn, create two small circles for the blushing cheeks.
- Round 1: 7 sc in MR (7)
- Round 2: 7 inc (14)
Fasten off and leave a long tail for sewing to the face.
The Head
The head is the most prominent part of the Mochi Bunny. Ensure your tension is consistent so the stuffing doesn’t leak.
- Round 1: 8 sc in MR (8)
- Round 2: 8 inc (16)
- Round 3: (1 sc, inc) x 8 (24)
- Round 4: (2 sc, inc) x 8 (32)
- Round 5: (7 sc, inc) x 4 (36)
- Round 6: (5 sc, inc) x 6 (42)
- Round 7: (6 sc, inc) x 6 (48)
- Round 8: (7 sc, inc) x 6 (54)
- Round 9: (8 sc, inc) x 6 (60)
- Round 10: (9 sc, inc) x 6 (66)
- Rounds 11-12: 66 sc (66)
- Round 13: (21 sc, inc) x 3 (69)
- Round 14: 69 sc (69)
- Round 15: (22 sc, inc) x 3 (72)
- Rounds 16-20: 72 sc (72)
- Round 21: (23 sc, inc) x 3 (75)
- Round 22: 75 sc (75)
- Round 23: (23 sc, dec) x 3 (72)
- Round 24: (10 sc, dec) x 6 (66)
- Round 25: (9 sc, dec) x 6 (60)
- Round 26: (8 sc, dec) x 6 (54)
- Round 27: (7 sc, dec) x 6 (48)
- Round 28: (6 sc, dec) x 6 (42)
- Round 29: BLO (5 sc, dec) x 6 (36)
- Round 30: (4 sc, dec) x 6 (30)
- Round 31: 30 sc (30)
Fasten off and leave a long tail for sewing to the body. Eye Placement: Place the safety eyes between rounds 16 and 17, spaced 8 stitches apart. Insert the safety nose in the center. Embroider a small vertical line for the mouth using pink thread.
The Arms (Make 2)
- Round 1: 6 sc in MR (6)
- Round 2: 6 inc (12)
- Rounds 3-4: 12 sc (12)
- Round 5: (1 sc, dec) x 4 (8)
- Round 6: BLO 8 inc (16)
- Rounds 7-9: 16 sc (16)
- Round 10: 8 dec (8)
- Rounds 11-16: 8 sc (8)
Flatten the end of the arm and sc 4 times across to close the opening. Fasten off and weave in the ends.
The Legs and Body
We will start by making two separate legs and then joining them to form the torso.
The Legs
- Round 1: 8 sc in MR (8)
- Round 2: 8 inc (16)
- Round 3: (1 sc, inc) x 8 (24)
- Rounds 4-7: 24 sc (24)
- Round 8: 8 sc, 4 dec, 8 sc (20)
- Round 9: 8 sc, 2 dec, 8 sc (18)
- Rounds 10-13: 18 sc (18)
Fasten off the first leg. Repeat rounds 1-13 for the second leg, but do not fasten off.
Joining and the Body
Now, we connect the legs to create the body.
- Join: Ch 3, then sl st into the first leg. Mark the first stitch of Round 14 as the start.
- Round 14: 18 sc around the first leg, 3 sc in the chain, 18 sc around the second leg, 3 sc in the chain (42)
- Round 15: (6 sc, inc) x 6 (48)
- Round 16: (7 sc, inc) x 6 (54)
- Rounds 17-21: 54 sc (54)
- Round 22: (7 sc, dec) x 6 (48)
- Round 23: 48 sc (48)
- Round 24: (6 sc, dec) x 6 (42)
- Round 25: 42 sc (42)
- Round 26: (5 sc, dec) x 6 (36)
- Rounds 27-29: 36 sc (36)
- Round 30: BLO (4 sc, dec) x 6 (30)
- Rounds 31-32: 30 sc (30)
- Round 33 (Adding Arms): 7 sc, 4 sc (through both the arm and the body), 11 sc, 4 sc (through both the arm and the body), 4 sc (30)
- Round 34: 34 sc (34)
Fasten off and leave a tail for sewing the head to the body.
The Skirt
Using purple yarn, attach your thread to the back loops of Round 30 of the body, starting at the center of the back.
- Round 1: 30 sc (30)
- Round 2: (2 sc, inc) x 10 (40)
- Rounds 3-5: 40 sc (40)
- Round 6: (3 sc, inc) x 10 (50)
- Rounds 7-12: 50 sc (50)
- Round 13: 50 inc (100)
- Rounds 14-16: 100 sc (100)
Fasten off and weave in the ends.
The Straps (Make 2)
Ch 14. Starting from the second chain from the hook, work in rows:
- Row 1: 1 sc, 3 hdc-inc, 3 dc-inc, 3 hdc-inc, 2 sc, ch 1, turn (21)
- Row 2: 2 sc, (1 hdc, 1 hdc-inc) x 3, (1 dc, 1 dc-inc) x 3, (1 hdc, 1 hdc-inc) x 3, 1 sc (30)
Fasten off and leave a long tail for sewing the straps to the skirt and the bunny’s shoulders.
Finishing
Now it is time to put everything together! Follow these steps for a professional finish:
- Stuffing: Ensure the head and body are firmly stuffed. The arms and legs should be lightly stuffed.
- Assembly: Sew the head to the body using the long tail left from the body.
- Ears: Sew the ears to the head between rounds 3 and 7.
- Cheeks: Sew the pink cheeks just below and to the sides of the eyes.
- Clothing: Attach the straps to the front of the skirt and then to the shoulders of the bunny.
Tips for Success
- Invisible Decreases: To keep your bunny looking smooth, always use the invisible decrease method (insert hook into front loops only of the next two stitches).
- Stitch Markers: Since amigurumi is worked in continuous spirals, using a stitch marker at the start of each round is essential to avoid miscounting.
- Tension: If you see gaps where the stuffing is peeking through, try going down half a hook size (e.g., from 2.25mm to 2.0mm).
- Customization: Feel free to change the skirt color or add a small bow to the ears for extra cuteness!