
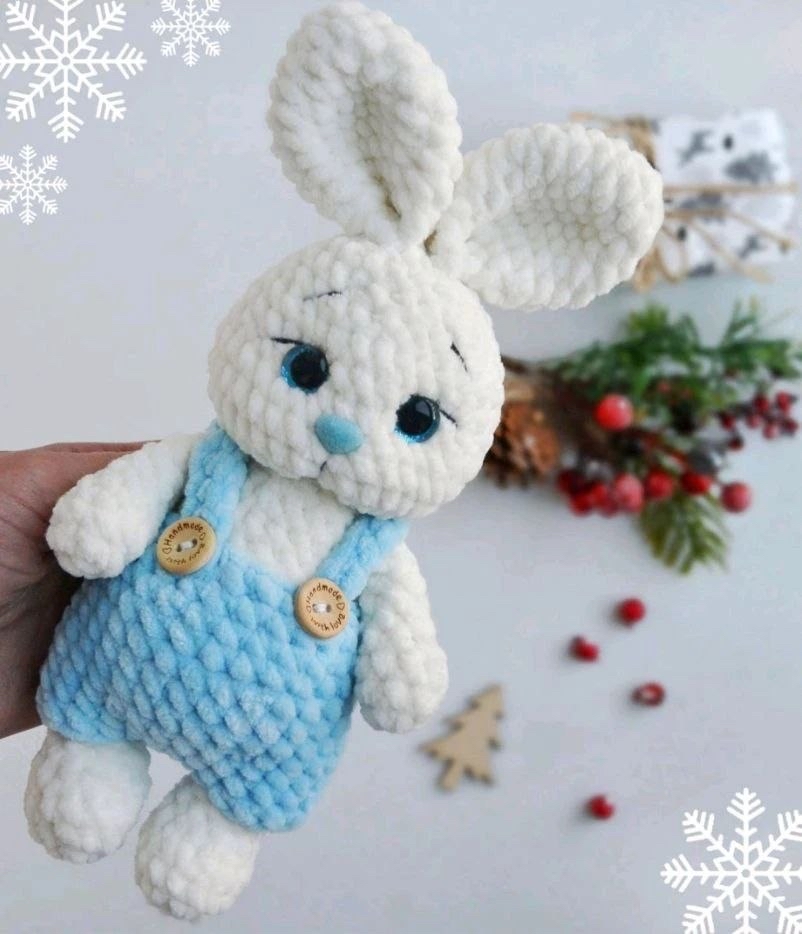
Adorable Plush Bunny Crochet Pattern: A Beginner-Friendly Tutorial
There is nothing quite as heartwarming as a handmade plushie. Whether you are looking to create a special gift for a little one or simply want to add a cozy, soft friend to your own home decor, this adorable plush bunny is the perfect project. This bunny is designed to be incredibly soft, using chunky chenille-style yarn to create a “squishy” texture that kids and adults alike will love.
This pattern is worked in continuous rounds (a spiral technique), which helps avoid the visible lines often seen in amigurumi. While this tutorial is written to be beginner-accessible, it assumes you have a basic grasp of crochet stitches. If you are new to amigurumi, don’t worry! This little bunny is a wonderful way to practice your shaping and assembly skills.
Materials and Supplies
To ensure your bunny turns out looking just like the photos, I recommend using the following materials. Please note that measurements and yarn weights may vary, but the following will give you a finished bunny approximately 8 inches tall.
- Plush Yarn (Chenille/Velvet style): You will need 100% polyester plush yarn (approx. 120 yards per 3.5 oz skein).
- Main Color: About half a skein (for the body, head, ears, and legs).
- Secondary Color: Slightly less than half a skein (for the overalls or dress).
- Cotton/Acrylic Blend Yarn: A smaller amount of 55% cotton / 45% acrylic yarn (approx. 56 yards per 1.7 oz skein) in black and white for facial details.
- Crochet Hook: 4.5 mm (approx. 1.75 inches).
- Safety Eyes: 12 mm (black or shiny).
- Safety Nose: 12 mm.
- Buttons: 2 small buttons for the overalls.
- Stuffing: Polyester fiberfill (poly-fill).
- Additional Tools: A large-eye needle for sewing, a long embroidery needle for face sculpting, tapestry needle, stitch marker, scissors, and sewing pins.
Crochet Abbreviations
This pattern uses standard US crochet terminology. Please ensure you are using US terms to avoid confusion with stitch heights.
- ch: chain
- sc: single crochet
- inc: increase (2 sc in one stitch)
- dec: decrease (sc 2 stitches together)
- sl st: slip stitch
- hdc: half double crochet
- st(s): stitch(es)
- ( ) x n: repeat the instructions inside the parentheses n times
- (…): The number in parentheses indicates the total number of stitches at the end of the round.
Step-by-Step Instructions
The Lower Legs (Make 2)
Start with the main color yarn.
Round 1: Ch 5. From the 2nd ch from the hook: 3 sc, 3 sc in the very last ch. On the other side of the chain, 2 sc, 1 inc (10).
Round 2: 1 inc, 2 sc, (1 inc, 2 sc) x 3, 2 sc, 2 inc (16).
Round 3: 16 sc (16).
Round 4: 4 sc, (1 dec, 1 sc) x 3, 3 sc (13).
Round 5: 4 sc, 3 dec, 3 sc (10).
Stuff the leg firmly with fiberfill. When you reach the top part of the leg that will be attached later, do not stuff it. Continue working in rounds.
Rounds 6-10: 10 sc (10) for 5 rounds.
Fold the leg in half and join the sides by working 3 sc through both layers. If needed, use a slip stitch to offset the starting point. For the final round, work 5 sc through both layers to close. Fasten off and leave a long tail for sewing.
The Tail
Round 1: Ch 2, 6 sc in the first ch (6).
Round 2: (1 sc, 1 inc) x 3 (9).
Round 3: (1 sc, 1 dec) x 3, then 1 sl st (6). Do not work through both sides; work in a single layer. Fasten off, stuff with fiberfill, and leave a tail for sewing.
The Upper Arms (Make 2)
Round 1: Ch 2, 6 sc in the first ch (6).
Round 2: (1 sc, 1 inc) x 3 (9).
Round 3: 9 sc (9).
Round 4: 2 dec, 5 sc (7).
Round 5: 1 dec, 5 sc (6).
Stuff the bottom of the arm. Leave the top part unstuffed. Continue working in rounds.
Rounds 6-9: 6 sc (6) for 4 rounds.
Fold the arm in half and work 3 sc through both layers to close. Fasten off and leave a tail.
The Ears (Make 2)
Round 1: Ch 2, 6 sc in the first ch (6).
Round 2: 6 inc (12).
Round 3: 12 sc (12).
Round 4: (1 sc, 1 inc) x 6 (18).
Rounds 5-9: 18 sc (18) for 5 rounds.
Round 10: (1 sc, 1 dec) x 6 (12).
Round 11: Fold in half and work 6 sc through both layers.
Round 12: Ch 1, fold in half once more and work 3 sc through both layers. Fasten off, leaving a long tail for sewing.
The Body and Head
This piece is worked as one continuous piece. The tail, legs, and arms are integrated into the rounds as you go.
Round 1: Ch 2, 6 sc in the first ch (6).
Round 2: 6 inc (12).
Round 3: (1 sc, 1 inc) x 6 (18).
Round 4: (2 sc, 1 inc) x 6 (24).
Round 5: (3 sc, 1 inc) x 6 (30).
Round 6 (Attach Tail): 9 sc, 1 inc, (4 sc, 1 inc) x 2, 6 sc, then 3 sc through all three layers (the tail and the body) (33).
Round 7 (Attach Lower Legs): 2 sc, 5 sc through both layers of the left leg, 14 sc, 5 sc through both layers of the right leg, 7 sc (33).
Round 8: 7 sc, (1 dec, 1 sc) x 4, 1 dec, 12 sc (28).
Round 9: 6 sc, 1 dec, 7 sc, 1 dec, 8 sc, 1 dec, 1 sc (25).
Round 10: (3 sc, 1 dec) x 5 (20).
Rounds 11-12: 20 sc (20) for 2 rounds.
Stuff the body firmly with fiberfill.
Round 13: (2 sc, 1 dec) x 5 (15).
Round 14: (3 sc, 1 dec) x 3 (12).
Round 15 (Attach Upper Arms): 2 sc, 3 sc through both layers of the left arm, 3 sc, 3 sc through both layers of the right arm, 1 sc (12).
Do not fasten off. We will now begin the head.
Round 16: 12 inc (24).
Round 17: (3 sc, 1 inc) x 6 (30).
Note: To keep the face symmetrical, use a stitch marker to track your rounds. You may need to add a few slip stitches to offset the start of the round so the marker stays at the “back” of the head.
Round 18: 4 sc, (1 inc, 1 sc) x 3, 9 sc, (1 inc, 1 sc) x 3, 5 sc (36).
Rounds 19-20: 36 sc (36) for 2 rounds.
Round 21: 4 sc, (1 dec, 1 sc) x 3, 9 sc, (1 dec, 1 sc) x 3, 5 sc (30).
Rounds 22-23: 30 sc (30) for 2 rounds.
Safety Eye Placement: Insert the safety eyes between rounds 21 and 22. The distance between the “legs” of the eyes should be 6 sc.
Nose Placement: Insert the safety nose between rounds 20 and 21.
Round 24: (3 sc, 1 dec) x 6 (24).
Round 25: 24 sc (24).
Round 26: 1 sc, 1 dec, (2 sc, 1 dec) x 5, 1 sc (18).
Round 27: (1 sc, 1 dec) x 6 (12).
Round 28: 6 dec (6).
Stuff the head very firmly, especially around the neck area, to ensure the head doesn’t wobble. Fasten off and weave in ends.
Finishing
Face Sculpting (The Muzzle Effect)
This is the “secret” step that makes the bunny look professional and cute! You will use a long needle and white cotton thread to pull the fabric inward around the nose and eyes.
1. Mark several points on the face with pins. Points 1 and 2 are in the center of the muzzle (between rounds 15 and 16). Points 3, 4, 7, and 8 are around the bottom of the eyes (between rounds 20 and 21). Points 5 and 6 are at the top of the eyes (between rounds 22 and 23).
2. Thread your needle with white cotton thread. Insert the needle at point 1, pull through to point 3, then to point 4, and back to point 1. Then, go from point 2 to point 8, then to point 7, and back to point 2. Pull tight to create the muzzle shape.
3. Repeat this process to refine the shape. Finally, create the “eye sockets” by threading through points 1, 4, 5, 6, 7, and 2 to pull the eyes slightly inward.
Embroidery
Using black cotton thread, embroider the eyelashes, eyebrows, and a small mouth. For the mouth, thread the needle through the bottom of the nose and pull it down to create a cute little line.
Sewing the Ears
Pin the ears to the top of the head between rounds 27 and 28. Sew them securely in place.
Outfit Options
Option 1: The Overalls
Body: Ch 27, join with a sl st to form a ring. Rounds 2-4: 27 sc. Round 5: Ch 3, skip 2 sc, 25 sc (28). Rounds 6-12: 28 sc. Fold the piece in half (leaving the tail hole in the middle) and sew the center together using 5 sc through both layers. Straps: Ch 16, from 2nd ch: 15 sc. Make two and sew to the front of the overalls. Attach buttons to the straps.
Option 2: The Dress and Skirt
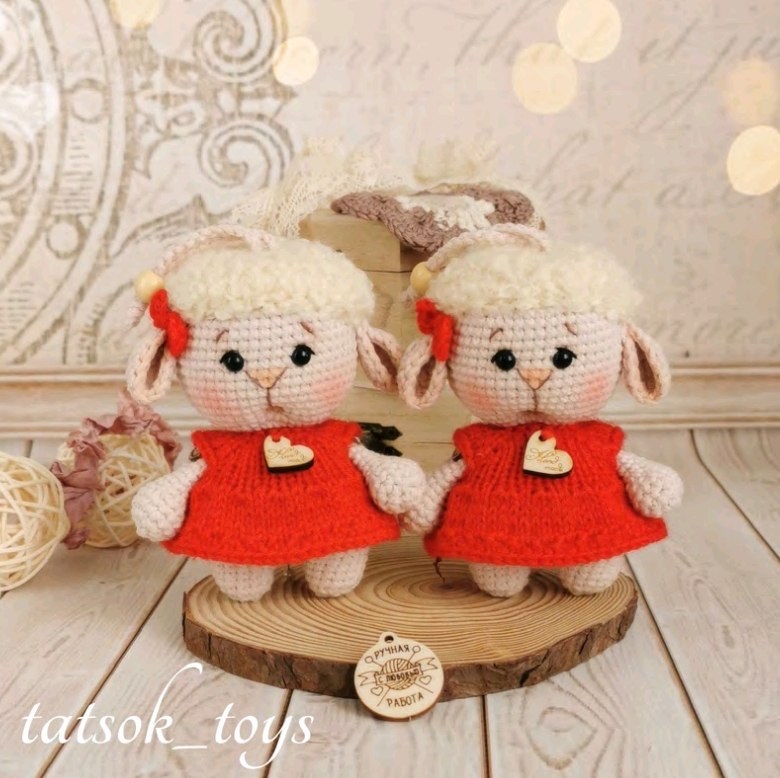
Follow the same body construction as the overalls, but use your secondary color for the main body. For the skirt, join yarn to the round where you worked the “skip” stitches. Round 1: (3 sc in each stitch) x 28 (84). Round 2: 84 hdc, then a final slip stitch round. Add a small bow to the head for a finished look!
Tips
- Tension is Key: When working with plush yarn, it is easy to lose track of stitches. Always use a stitch marker!
- Stuffing: Don’t be afraid to overstuff, especially the neck and the limbs. A well-stuffed amigurumi holds its shape much longer.
- Safety First: If this bunny is intended for a very small child, consider embroidering the eyes and nose instead of using plastic safety parts to prevent choking hazards.
- Seamless Look: When working through multiple layers (like the tail or legs), ensure your hook goes through all layers simultaneously to avoid gaps.