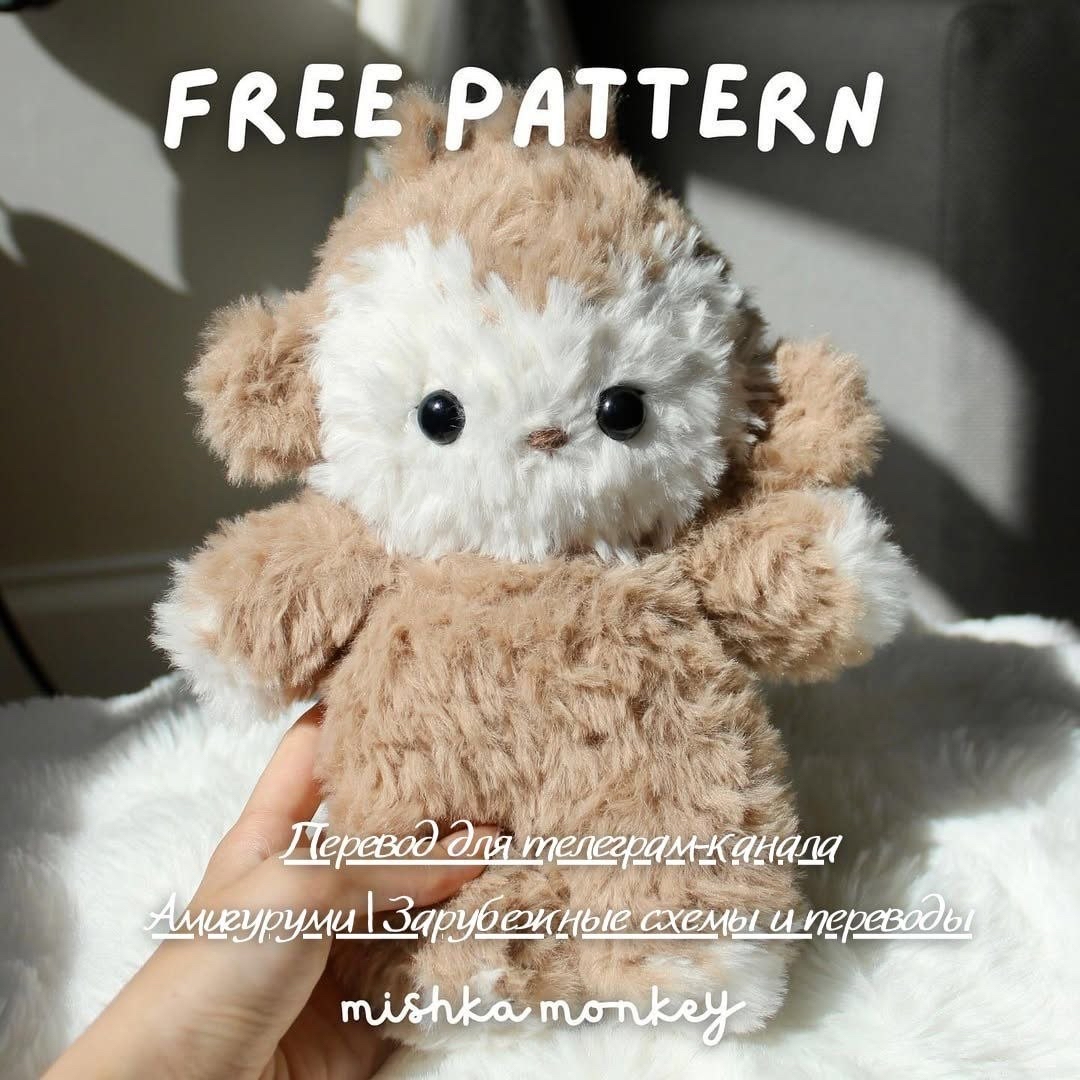
Fluffy Amigurumi Monkey Crochet Pattern: A DIY Plush Tutorial
Are you looking for your next adorable crochet project? There is nothing quite as heartwarming as a soft, cuddly animal to brighten up a nursery or sit on a bookshelf. This fluffy amigurumi monkey is the perfect project for anyone looking to create something extra cozy and unique. With its oversized head, tiny limbs, and incredibly soft texture, this little monkey is bound to be a favorite for both makers and recipients alike.
In this tutorial, we will walk you through the process of creating this adorable plushie from scratch. Because we are using faux fur yarn, the finished result will be exceptionally soft, making it a wonderful gift for children or a delightful addition to any handmade collection. Whether you are a seasoned amigurumi artist or a beginner looking to try something new, this step-by-step guide will help you navigate the fun of working with specialty yarns.
Materials & Abbreviations
Working with faux fur yarn requires a few specific tools to ensure your stitches are tight enough to keep the stuffing inside while still letting that beautiful fluff shine through.
Materials Needed
- Faux Fur Yarn: You will need two colors—a warm brown and a soft white.
- Thin Acrylic Yarn: A small amount of brown acrylic yarn is required for embroidering the nose.
- Crochet Hook: A 6.5mm (approx. 1/4 inch) hook.
- Safety Eyes: 14mm black safety eyes.
- Stuffing: High-quality polyester fiberfill.
- Sewing Tools: A yarn needle, scissors, and a stitch marker.
Abbreviations (US Terms)
Please ensure you are using US crochet terminology as we follow these standard abbreviations:
- MR: Magic Ring
- sc: Single crochet
- inc: Increase (2 sc in one stitch)
- dec: Decrease (sc 2 stitches together)
- ch: Chain
- sl st: Slip stitch
- BLO: Back loop only
- FLO: Front loop only
Step-by-Step Instructions
The Head
We begin the head with the brown faux fur yarn. Because fur yarn can be tricky, use your stitch marker to keep track of your rounds clearly.
Round 1: 8 sc in a MR (8)
Round 2: 8 inc (16)
Round 3: (1 sc, inc) x 8 (24)
Round 4: (3 sc, inc) x 6 (30)
Round 5: 30 sc (30)
Note: Now we will begin a color change to create the white face patch. When the pattern specifies a color, ensure you change the yarn at the end of the previous round.
Round 6: 2 sc in brown, 3 sc in white, 4 sc in brown, 3 sc in white, 18 sc in brown (30)
Round 7: 1 sc in brown, 5 sc in white, 2 sc in brown, 5 sc in white, 17 sc in brown (30)
Round 8-10: 1 sc in brown, 12 sc in white, 17 sc in brown (30) — (Work 3 rounds total)
Eye Placement: Before continuing, insert your 14mm safety eyes between Rounds 9 and 10. They should be placed approximately 4 stitches apart.
Start stuffing the head firmly with fiberfill.
Round 11: 2 sc in brown, (dec, 1 sc) x 3, 1 sc in brown, (dec, 1 sc) x 6 (21)
Round 12: (1 sc, dec) x 7 (14)
Fasten off the yarn. Since we are sewing the head to the body later, you do not need to leave a long tail here.
The Legs and Body
The body is worked as one piece that connects the two legs. We start with the white yarn for the “feet” and transition to brown.
First Leg:
Round 1: 9 sc in a MR (9)
Round 2-5: 9 sc in brown (4 rounds total)
Second Leg:
Repeat Rounds 1-5 for the second leg. However, do not fasten off after Round 5. Instead, chain 1 (ch 1) and use a slip stitch to join the two legs together. This join will count as your first stitch in the next round.
Body Construction:
Round 6: 4 sc, inc, 4 sc along the first leg, 1 sc in the ch, 4 sc, inc, 4 sc along the second leg, 1 sc in the ch (22)
Round 7-9: 22 sc (3 rounds total)
Round 10: (3 sc, dec) x 4, 2 sc (18)
Round 11: 18 sc (18)
Round 12: (1 sc, dec) x 6 (12)
Fasten off, leaving a long tail of yarn for sewing the head to the body. Stuff the body firmly.
The Arms
Make two arms using the following pattern:
Round 1: 7 sc in a MR (7) in white yarn.
Round 2-5: 7 sc in brown (4 rounds total)
Fasten off and leave a tail for sewing. Stuff the arms lightly, fold them in half, and sew the edges closed. Once finished, sew the arms to the upper sides of the body, positioned right below the head.
The Ears, Tail, and Face Details
To complete your monkey, we need the small details that bring him to life.
Ears (Make 2):
Using brown yarn, Round 1: 8 sc in a MR (8).
Fasten off and sew the ears onto the head between Rounds 8 and 10, right at the border where the white face meets the brown head.
Tail:
Using brown yarn, Round 1: Chain 9. Starting from the 2nd chain from the hook: (1 sc, inc) x 4 (12).
Leave a long tail for sewing and attach the tail to the center of Round 7 on the body.
Final Embroidery:
Using your thin brown acrylic yarn, embroider a small nose between the eyes. Finally, to give your monkey some personality, embroider three small loops at the very top of the head to represent little tufts of hair.
Finishing
Once all parts are sewn together, give your monkey a final squeeze to ensure the stuffing is evenly distributed. If there are any visible gaps in the stitches due to the faux fur, you can use small bits of the yarn to “fill in” the holes or simply fluff the fur to hide them. Your adorable amigurumi monkey is now ready for hugs!
Tips for Success
- Managing Faux Fur: Faux fur yarn can be difficult to see into. If you find yourself losing your stitches, try using a larger hook or use your fingers to move the fur aside so you can clearly see the “core” of the stitch.
- Tight Tension: Even though the fur is fluffy, try to keep your tension relatively tight. This prevents the white stuffing from peeking through the brown sections.
- Stitch Markers are Vital: Because the fur obscures the stitches, never attempt to crochet this without a stitch marker. It is the easiest way to ensure you don’t accidentally add or skip stitches.
- Eye Placement: Before you finalize the stuffing, double-check that the eyes are symmetrical. It is much easier to adjust them before the head is fully packed with fiberfill!