Free Crochet Plush Elephant Pattern: Easy Amigurumi Tutorial
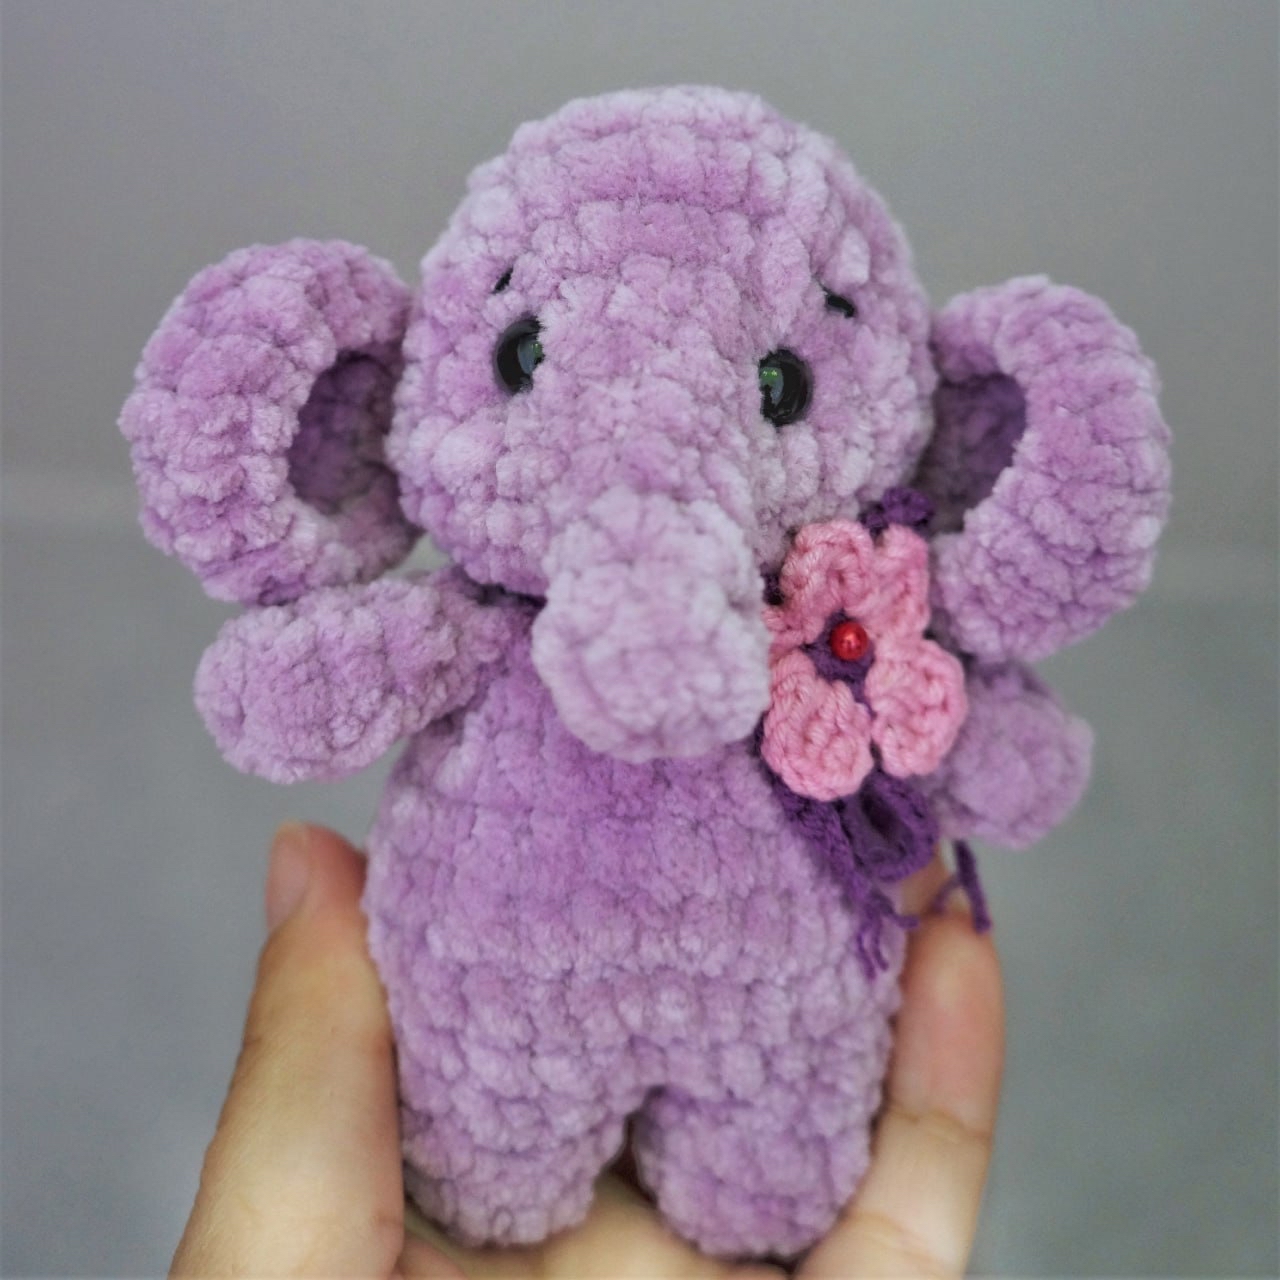
Are you looking for your next quick, ultra-cozy crochet project? This adorable, pocket-sized crochet plush elephant pattern is the perfect weekend make! Using super-bulky chenille yarn, this little cutie works up in just a couple of hours and makes a wonderful gift, baby shower present, or market prep bestseller.
Measuring approximately 5.5 inches tall when completed, this plush elephant is incredibly huggable and beginner-friendly. Grab your hook, settle into your favorite crafting chair, and let’s make a sweet little elephant friend together!
Materials & Abbreviations
Supplies Needed
- Yarn: Approx. 50 yards of Super Bulky (Size 6) plush chenille yarn (such as Premier Parfait Chunky or Himalaya Dolphin Baby) in your choice of color (lavender, pink, or classic gray).
- Crochet Hook: 3.5 mm (US E-4) crochet hook.
- Safety Eyes: 1 pair of 10 mm (approx. 0.4 inches) safety eyes.
- Stuffing: Polyester fiberfill stuffing.
- Notions: Yarn needle, stitch marker, scissors, and a small scrap of black embroidery thread for the eyebrows.
Abbreviations (US Terms)
- MR: Magic Ring
- ch: Chain
- sc: Single crochet
- inc: Increase (work 2 single crochets in the same stitch)
- dec: Decrease (work an invisible single crochet decrease over 2 stitches)
- sl st: Slip stitch
- Rnd: Round
- st(s): Stitch(es)
Step-by-Step Instructions
1. Crochet the Ears (Make 2)
The ears are crocheted first so they are ready to be seamlessly joined to the head as you work. We will not stuff the ears.
- Rnd 1: Work 6 sc into a MR. (6 sts)
- Rnd 2: Work 6 inc. (12 sts)
- Rnd 3: [1 sc, inc] * 6. (18 sts)
- Rnd 4: sc in each st around. (18 sts)
Fasten off, leaving a short tail. Fold the ears flat. We will attach them during the head assembly using 3 stitches across the base of each ear.
2. Crochet the Head & Trunk
This clever head design begins at the tip of the trunk and works its way back to the head in one continuous piece!
- Rnd 1: Work 5 sc into a MR. (5 sts)
- Rnd 2-3: sc in each st around. (5 sts for 2 rounds)
- Rnd 4: inc, 4 sc. (6 sts)
- Rnd 5: [1 sc, inc] * 3. (9 sts)
- Rnd 6: [2 sc, inc] * 3. (12 sts)
- Rnd 7: [3 sc, inc] * 3. (15 sts)
- Rnd 8: Work 5 inc, then 10 sc. (20 sts)
- Rnd 9: [inc, 2 sc] * 3, work 1 inc, then 10 sc. (24 sts)
- Rnd 10: [3 sc, inc] * 6. (30 sts)
- Rnd 11: sc in each st around. (30 sts)
Safety Eyes Placement: Place your 10 mm safety eyes between Rounds 7 and 8, leaving about 4 to 5 stitches of space between them. The eyes should sit symmetrically just above the trunk.
- Rnd 12 (Joining the Ears): In this round, you will join the ears directly to the head by crocheting through the stitches of both the folded ear and the head. Ensure your stitch marker is perfectly centered at the front of the head (above the trunk). If needed, make a shift stitch or two.
Instructions: 12 sc, 3 sc joining the first ear, 12 sc, 3 sc joining the second ear. (30 sts) - Rnds 13-14: sc in each st around. (30 sts for 2 rounds)
- Rnd 15: [3 sc, dec] * 6. (24 sts)
- Rnd 16: [2 sc, dec] * 6. (18 sts) Begin stuffing the head firmly, paying special attention to filling out the cheeks and the trunk.
- Rnd 17: [1 sc, dec] * 6. (12 sts)
- Rnd 18: Work 6 dec. (6 sts)
Fasten off, weave the tail through the remaining front loops, pull tight to close, and hide the yarn tail inside the head.
3. Crochet the Arms (Make 2)
We do not stuff the arms to keep them floppy and cute.
- Rnd 1: Work 6 sc into a MR. (6 sts)
- Rnds 2-4: sc in each st around. (6 sts for 3 rounds)
Fold the top opening of the arm flat and work 2 sc through both layers to close the opening. Fasten off, leaving a small yarn tail.
4. Crochet the Legs & Body
The legs are worked first, then joined together to build the body from the bottom up.
First Leg:
- Rnd 1: Work 6 sc into a MR. (6 sts)
- Rnd 2: [1 sc, inc] * 3. (9 sts)
- Rnds 3-4: sc in each st around. (9 sts for 2 rounds)
Fasten off and weave in the end of the first leg.
Second Leg & Joining:
- Repeat the steps for the first leg (Rnds 1-4), but do not cut the yarn.
- Rnd 5 (Joining Round): ch 1 from the second leg, then insert your hook into any stitch of the first leg to join. Work 9 sc around the first leg, 1 sc into the chain space, 9 sc around the second leg, and 1 sc into the opposite side of the chain space. (20 sts total)
Place your stitch marker here; this is now the center-back of the body. - Rnd 6: 4 sc, inc, 4 sc, 2 inc, 4 sc, inc, 4 sc. (24 sts)
- Rnd 7 (Tail Round): First, make the tail: ch 3, sl st in the 2nd ch from the hook, sl st in the next ch. Now, continue working single crochets in each of the remaining 23 stitches around the body. (24 sts total, with the tail securely attached)
- Rnd 8: 4 sc, dec, 4 sc, 2 dec, 4 sc, dec, 4 sc. (20 sts)
- Rnd 9: 4 sc, dec, 6 sc, dec, 6 sc. (18 sts)
- Rnds 10-11: sc in each st around. (18 sts for 2 rounds)
- Joining the Arms: In this round, we will crochet the arms to the body. Watch your alignment to make sure they sit symmetrically on the sides. Adjust the stitch counts slightly if needed.
Instructions: 4 sc, 2 sc joining the first arm, 6 sc, 2 sc joining the second arm, 4 sc. (18 sts) - Rnd 12: [4 sc, dec] * 3. (15 sts)
Fasten off, leaving a long tail for sewing. Stuff the body firmly with polyester fiberfill.
Finishing
Now it’s time to bring your crochet plush elephant to life!
- Sewing the Head: Align the head onto the body, ensuring the face and trunk are pointing directly forward. Using your yarn needle and the long yarn tail from the body, sew the head securely onto the body opening. Add more stuffing to the neck area right before closing your final stitches to prevent “floppy head syndrome.”
- Facial Sculpting (Optional): To give your elephant deeper, sweeter eyes, thread your yarn needle with a strand of your main body yarn. Insert the needle from the bottom of the head (neck area), bring it out right next to the outer corner of one eye, insert it one stitch over, and bring it back down to the neck. Pull the yarn gently to pull the eye inward, tie a secure knot at the neck, and repeat for the other eye. Hide all tails.
- Embroidery Details: Using a thin strand of black embroidery thread, sew simple little slanted eyebrows just above each eye.
- Accessorize: Personalize your elephant with a sweet touch! You can sew a tiny crochet flower near one ear, tie a bright satin ribbon around the neck, or make a small bow out of colorful yarn.
Tips for Amigurumi Success
- Working with Plush Yarn: Plush chenille yarn can sometimes shed or make it difficult to see your stitches. Use your fingers to feel for the stitch openings if they are hard to see. Using a stitch marker is highly recommended for keeping track of the start of your rounds!
- Magic Ring alternative: If you struggle to make a magic ring with plush yarn (as it can break when pulled tight), ch 2 instead, then work the required number of single crochets into the second chain from your hook.
- Invisible Decrease: To make your decreases look as seamless as possible, always use the invisible decrease method. Insert your hook into the front loops only of the next two stitches, yarn over, pull through both loops, yarn over, and pull through the remaining two loops.