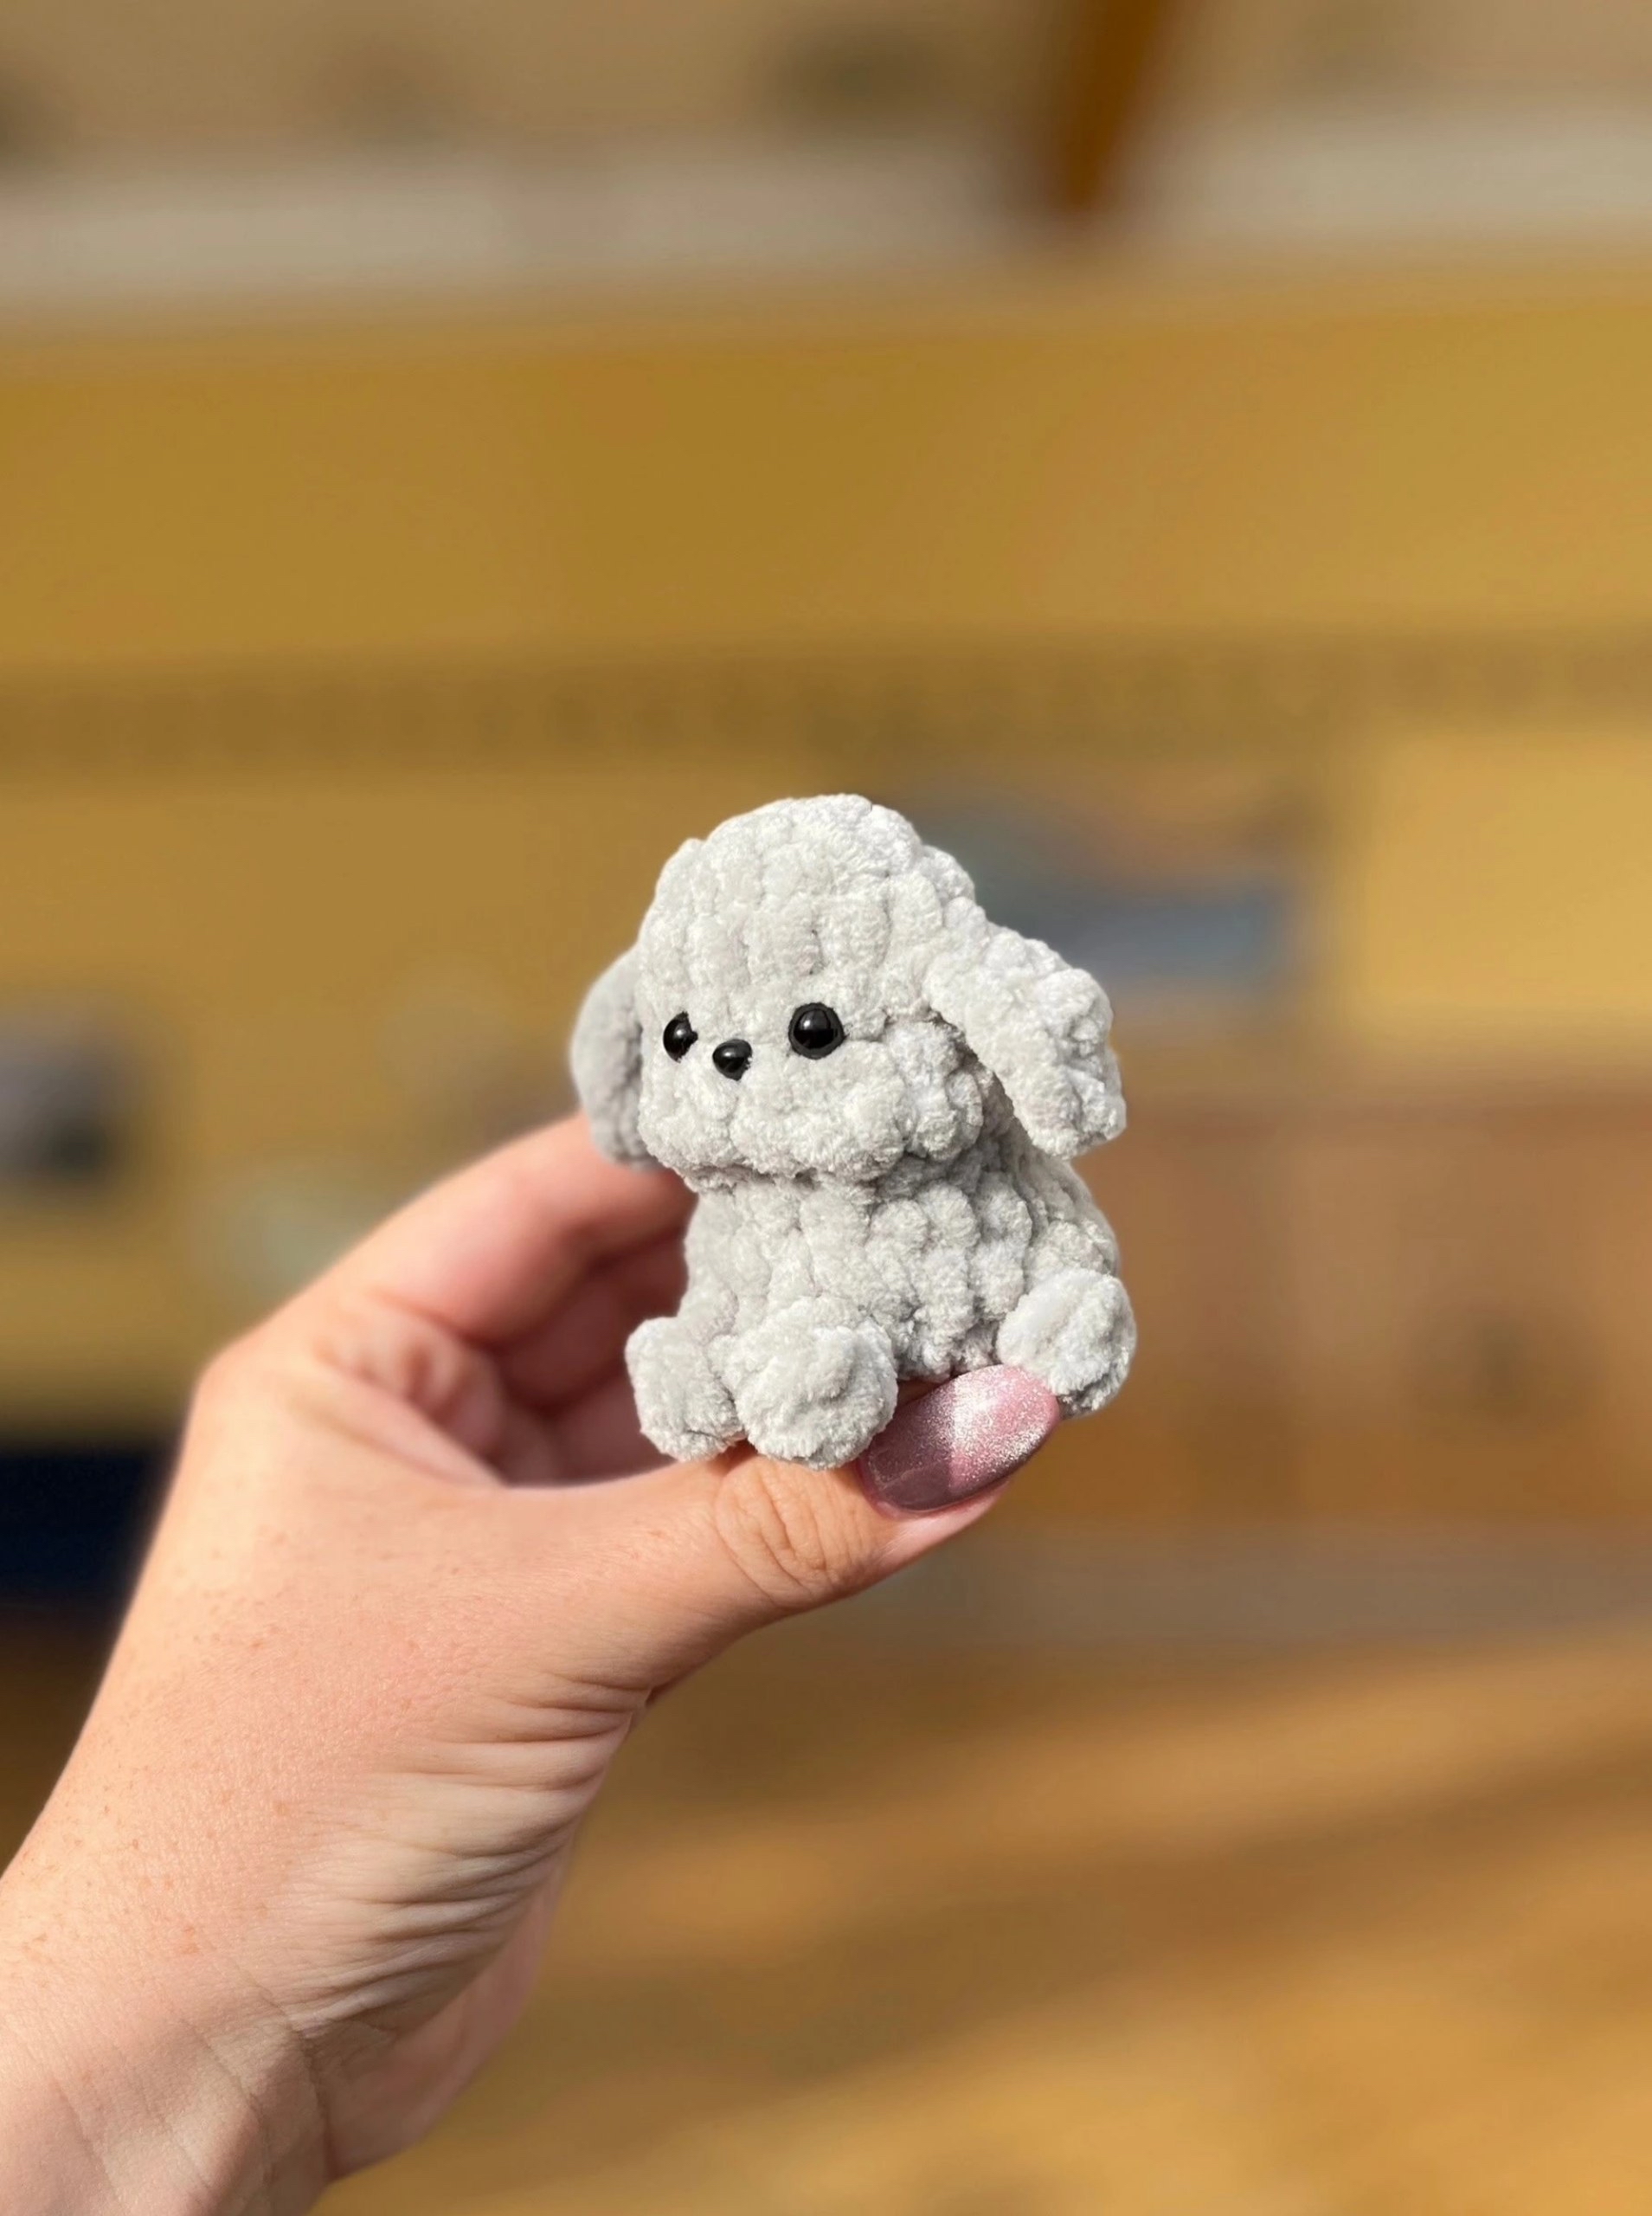
Plush Crochet Sheep Pattern: Easy Velvet Lamb Amigurumi Tutorial
There is nothing quite like the ultra-soft feel of velvet amigurumi! If you are looking to create a cozy, huggable companion for a nursery, a baby shower gift, or just a sweet additions to your handmade collection, this plush crochet sheep pattern is the perfect project. Using super bulky chenille yarn, you can whip up an adorable, squishy sheep (or boy lamb) that stands at a generous 12 to 12.5 inches tall.
This beginner-friendly tutorial will guide you step-by-step through crocheting your own plush sheep, shaping the face, adding gorgeous curly wool, and even knitting a little custom romper outfit to dress them up! Let’s grab our hooks and get started.
Materials & Abbreviations
Supplies Needed
- Yarn: Super Bulky Chenille Yarn (Size 6, approx. 120m/100g per skein, such as Himalaya Dolphin Baby or Premier Yarns Parfait Chunky)
- Main Color (Cream/Off-White for Wool): Approx. 131 yards (1 skein)
- Contrast Color (Beige/Taupe for Face and Limbs): Approx. 65 yards (0.5 skein)
- Crochet Hook: Size US E-4 / F-5 (3.5 mm) or size needed to obtain a tight tension
- Safety Eyes: 14 mm with secure backings
- Fiberfill Stuffing: High-quality polyester stuffing
- Tools: Large-eye tapestry needle, sharp scissors, stitch markers, and a lighter (to lightly singe the ends of the plush yarn to prevent fraying)
Crochet Terms & Abbreviations (US Terms)
- MR: Magic Ring (or Magic Circle)
- ch: Chain stitch
- sc: Single crochet
- inc: Single crochet increase (2 single crochets in the same stitch)
- dec: Single crochet decrease (invisible decrease recommended)
- bpsc: Back Post Single Crochet (insert hook from back to front to back around the post of the stitch)
- sl st: Slip stitch
- st(s): Stitch(es)
- Rep: Repeat the instructions inside the asterisks the indicated number of times
Step-by-Step Instructions
Head
The head is crocheted using your Contrast Color (Beige/Taupe). It starts from the nose and widens toward the back of the head.
- Rnd 1: Work 6 sc in a MR (6)
- Rnd 2: Work 6 inc (12)
- Rnd 3: *1 sc, inc* rep 6 times (18)
- Rnd 4: *2 sc, inc* rep 6 times (24)
- Rnd 5: *3 sc, inc* rep 6 times (30)
- Rnd 6: *4 sc, inc* rep 6 times (36)
- Rnd 7: *5 sc, inc* rep 6 times (42)
- Rnd 8: *6 sc, inc* rep 6 times (48)
- Rnds 9-14: Sc in each st around (48 sts for 6 rounds)
- Rnd 15: *7 sc, inc* rep 6 times (54)
- Rnds 16-18: Sc in each st around (54 sts for 3 rounds)
- Rnd 19: *7 sc, dec* rep 6 times (48)
- Rnd 20: *6 sc, dec* rep 6 times (42)
- Rnd 21: *5 sc, dec* rep 6 times (36)
- Rnd 22: *4 sc, dec* rep 6 times (30)
- Rnd 23: *3 sc, dec* rep 6 times (24)
Safety Eye Placement: Insert the 14 mm safety eyes between Rounds 15 and 16. Ensure the line of decreases remains centered between the eyes (this creates a subtle, cute muzzle bulge). Leave a distance of exactly 8 sc stitches between the eyes once secured.
Fasten off and hide the yarn tail. Stuff the head firmly, distributing the fiberfill evenly from the center to the sides. Add extra stuffing in the lower cheek area and between the eyes to emphasize the muzzle shape.
Upper Limbs (Arms)
Make two. Start with the Contrast Color.
- Rnd 1: Work 6 sc in a MR (6)
- Rnd 2: Work 6 inc (12)
- Rnd 3: *1 sc, inc* rep 6 times (18)
- Rnd 4: Work 18 bpsc around (18) (This creates a defined edge for the hoof)
- Rnd 5: *4 sc, dec* rep 3 times (15)
- Rnd 6: *3 sc, dec* rep 3 times (12). On the final stitch, change to the Main Color.
- Rnds 7-10: Sc in each st around (12 sts for 4 rounds)
- Stuff the lower half of the arm lightly. Do not stuff the upper half.
- Rnd 11: *2 sc, dec* rep 3 times (9)
- Rnds 12-13: Sc in each st around (9 sts for 2 rounds)
- Fold the top edge of the arm flat and work 4 sc through both layers to close. Fasten off.
- Hoof Trim Detail: Join your Main Color yarn to the exposed front loops of Round 4. Slip stitch around all 18 stitches, join with a sl st to the first stitch, fasten off, and weave in all yarn ends.
Lower Limbs (Legs)
Make two. Start with the Contrast Color.
- Rnd 1: Work 6 sc in a MR (6)
- Rnd 2: Work 6 inc (12)
- Rnd 3: *1 sc, inc* rep 6 times (18)
- Rnd 4: *2 sc, inc* rep 6 times (24)
- Rnd 5: Work 24 bpsc around (24)
- Rnd 6: *6 sc, dec* rep 3 times (21)
- Rnd 7: *5 sc, dec* rep 3 times (18)
- Rnd 8: Sc in each st around, changing to the Main Color on the final stitch (18)
- Rnd 9: Sc in each st around (18)
- Rnd 10: *4 sc, dec* rep 3 times (15)
- Rnds 11-14: Sc in each st around (15 sts for 4 rounds)
- Stuff the leg halfway.
- Rnd 15: *3 sc, dec* rep 3 times (12)
- Rnds 16-17: Sc in each st around (12 sts for 2 rounds)
- If necessary, work 1 extra offset sc to ensure your fold aligns properly. Fold the top edge flat and work 6 sc through both layers to close. Fasten off.
- Hoof Trim Detail: Repeat the slip stitch trim around the exposed front loops of Round 5 using the Main Color.
Ears
Make two using the Contrast Color. Choose your variation:
- For a Girl Sheep:
- Rnd 1: 6 sc in MR (6)
- Rnd 2: 6 inc (12)
- Rnd 3: *3 sc, inc* rep 3 times (15)
- For a Boy Lamb:
- Rnd 1: 6 sc in MR (6)
- Rnd 2: 6 inc (12)
For both styles: Fasten off, leaving a long tail for sewing. Fold the flat circle in half and sew the first two stitches of the edge together to create a realistic pinched ear shape.
Body
Crocheted from the bottom up using the Main Color. You will join the legs and arms directly into the body as you crochet!
- Rnd 1: Work 6 sc in a MR (6)
- Rnd 2: Work 6 inc (12)
- Rnd 3: *1 sc, inc* rep 6 times (18)
- Rnd 4: *2 sc, inc* rep 6 times (24)
- Rnd 5: *3 sc, inc* rep 6 times (30)
- Rnd 6: *4 sc, inc* rep 6 times (36)
- Rnd 7: *5 sc, inc* rep 6 times (42)
- Rnd 8: *6 sc, inc* rep 6 times (48)
- Rnd 9: *7 sc, inc* rep 6 times (54)
- Rnd 10: Sc in each st around (54)
- Rnd 11 (Joining the Legs): Crochet 6 sc through the stitches of the first leg and the body together, work 18 sc across the front, crochet 6 sc through the stitches of the second leg and the body together, then work 24 sc across the back (54)
- Rnd 12: Sc in each st around (54)
- Rnd 13: *7 sc, dec* rep 6 times (48)
- Rnd 14: Sc in each st around (48)
- Rnd 15: *6 sc, dec* rep 6 times (42)
- Rnd 16: Sc in each st around (42)
- Rnd 17: *5 sc, dec* rep 6 times (36)
- Rnd 18: Sc in each st around (36)
- Note: Start stuffing the body firmly now, paying close attention to the bottom area so your sheep sits nicely.
- Rnd 19: *4 sc, dec* rep 6 times (30)
- Rnd 20: Sc in each st around (30)
- Rnd 21: *3 sc, dec* rep 6 times (24)
- Rnd 22 (Joining the Arms): Work 2 sc, work 4 sc through the first arm and body together, work 6 sc across the chest, work 4 sc through the second arm and body together, then work 8 sc across the back (24). (Adjust the exact placement slightly if needed to keep the arms perfectly centered on the sides of your sheep.)
- Rnd 23: Sc in each st around (24)
Stuff the rest of the body firmly. Fasten off, leaving a long tail for sewing the head to the body.
Tail
Attach your Main Color yarn directly to the back of the body between Rounds 8 and 9, making sure it is centered.
- Chain 7.
- Starting in the second chain from your hook, work a triple increase (3 sc in the same chain) in the next 5 chains.
- Work 1 sc in the final chain.
- Slip stitch back into the stitch on the body to secure. Fasten off and weave in the ends.
Adding the Curly Wool
To give your sheep its classic, fluffy look, you will work curly loops directly onto the head using the Main Color.
Attach your yarn under a single crochet stitch at the back of the head (around Round 10). Work in a spiral going up toward the crown (Rounds 1 to 10):
- Loop Pattern: *Ch 3, skip 1 sc stitch, sl st into the next stitch*. Repeat this pattern around.
- Spacing: For Rounds 1 through 7, skip exactly 1 stitch between loops. As you move down towards the back of the head (Rounds 8-10), you can increase the distance to skipping 2 stitches on the front area and 3 stitches on the back area to keep the curls from bunching too tightly.
Face Opening (Rounds 10 to 15): To leave a sweet exposed face, transition from working in a spiral to working in turning rows between the ears (approx. 3 stitches away from each eye/ear edge). Work back and forth in rows until you reach the base of the ears, then fasten off and hide your tails inside the head.
Finishing & Assembly
Face Sculpting
To give your sheep a professional, sweet expression, perform a quick needle sculpting process:
- Insert a long thread of your contrast color yarn through the bottom neck opening up to the lower-inner corner of the left eye.
- Pass it across to the lower-inner corner of the right eye, then pull it back down to the neck.
- Gently tug on both ends to sink the eyes slightly into the head and pull them closer together. Tie a secure knot at the neck and hide the tails inside.
Embroidering Facial Features
- Eyes: Use thin white cotton yarn or embroidery floss to stitch a thin white accent on the outer-lower edges of the safety eyes. Add tiny black eyelashes.
- Eyebrows: Embroider simple diagonal eyebrows on Round 12 using thin dark thread.
- Nose: Stitch a classic “Y” or “T” shaped nose in pink or dark brown yarn directly in the center of the face on Round 17.
- Hooves: Stitch a vertical line through the center of each hoof to mimic cloven feet.
- Cheeks: Lightly apply a touch of real cosmetic blush under the eyes using a makeup brush or cotton swab.
Ear Placement
- For a Girl Sheep: Sew the ears at eye level (between Rounds 15 and 16), approximately 6 stitches away from the outer edge of each eye.
- For a Boy Lamb: Sew the ears higher up on the head (between Rounds 10 and 11), approximately 6 stitches away from the outer edge of each eye.
Sewing Head to Body
Sew the head securely to the neck opening of the body. Be sure to add extra fiberfill stuffing to the neck area right before closing your final stitches to ensure the head does not wobble!
Bonus: Easy Knitted Romper Outfit
If you would love to dress up your new plush companion, here is a quick pattern for a cozy romper using standard US knitting terms.
- Materials: DK weight cotton/acrylic blend yarn (like YarnArt Jeans), US size 2 to 3 (2.5 – 3 mm) knitting needles.
- Abbreviations: CO (Cast on), K (Knit), P (Purl), YO (Yarn over), BO (Bind off).
- Note: Slip the first stitch of every row (edge stitch) and purl the last stitch of every row.
Instructions:
- CO 32 sts.
- Row 0: Slip 1, K30, P1 (32)
- Row 1 (Raglan Increases): Slip 1, K4, YO, K1, YO, K5, YO, K1, YO, K8, YO, K1, YO, K5, YO, K1, YO, K4, P1 (40)
- Row 2 & All Even Rows: Slip 1, purl all stitches to the end, P1.
- Row 3: Slip 1, K5, YO, K1, YO, K7, YO, K1, YO, K10, YO, K1, YO, K7, YO, K1, YO, K5, P1 (48)
- Row 5: Slip 1, K6, YO, K1, YO, K9, YO, K1, YO, K12, YO, K1, YO, K9, YO, K1, YO, K6, P1 (56)
- Row 7: Slip 1, K7, YO, K1, YO, K11, YO, K1, YO, K14, YO, K1, YO, K11, YO, K1, YO, K7, P1 (64)
- Row 9: Slip 1, K8, YO, K1, YO, K13, YO, K1, YO, K16, YO, K1, YO, K13, YO, K1, YO, K8, P1 (72)
- Row 11: Slip 1, K9, YO, K1, YO, K15, YO, K1, YO, K18, YO, K1, YO, K15, YO, K1, YO, K9, P1 (80)
- Row 13: Slip 1, K10, YO, K1, YO, K17, YO, K1, YO, K20, YO, K1, YO, K17, YO, K1, YO, K10, P1 (88)
- Row 15: Slip 1, K11, YO, K1, YO, K19, YO, K1, YO, K22, YO, K1, YO, K19, YO, K1, YO, K11, P1 (96)
- Row 17 (Divide for Sleeves): Slip 1, K12, BO 22 sts, K26, BO 22 sts, K12, P1 (52)
- Row 18: Slip 1, P50, P1 (52)
- Row 19 (Body Increases): Slip 1, *K1, YO, K2, YO* repeat across, ending with K1, P1 (77)
- Rows 20-39: Divide stitches onto double-pointed needles or use magic loop to knit in the round for 20 rounds of stockinette stitch (all knit).
- Row 40 (Tail Opening): Bind off 4 stitches in the center of the back to allow the tail to pop out.
- Row 41: Cast on 4 new stitches over the gap on the next row and continue knitting.
- Knit 15 more rounds. BO all stitches. Sew the crotch seam together between the leg openings and weave in ends. Thread a 100-ch crochet cord through the back as a tie!
Crochet Tips for Plush Yarn
- Burn the Ends: Chenille yarn frays easily. Gently melt the very tip of your cut yarn tails with a lighter to lock the fibers in place.
- Work Curliest Loose: When making the head curls, keep your working tension relaxed. The looser your chains are, the fluffier and more voluminous the sheep’s wool will look!
- Stitch Markers are Essential: Plush yarn makes it difficult to see individual stitches. Always use a stitch marker on the first stitch of every round.
Congratulations, your beautiful plush sheep is complete! Enjoy your cuddly new friend!