Crochet Dachshund Puppy Pattern: DIY Tiny Amigurumi Tutorial
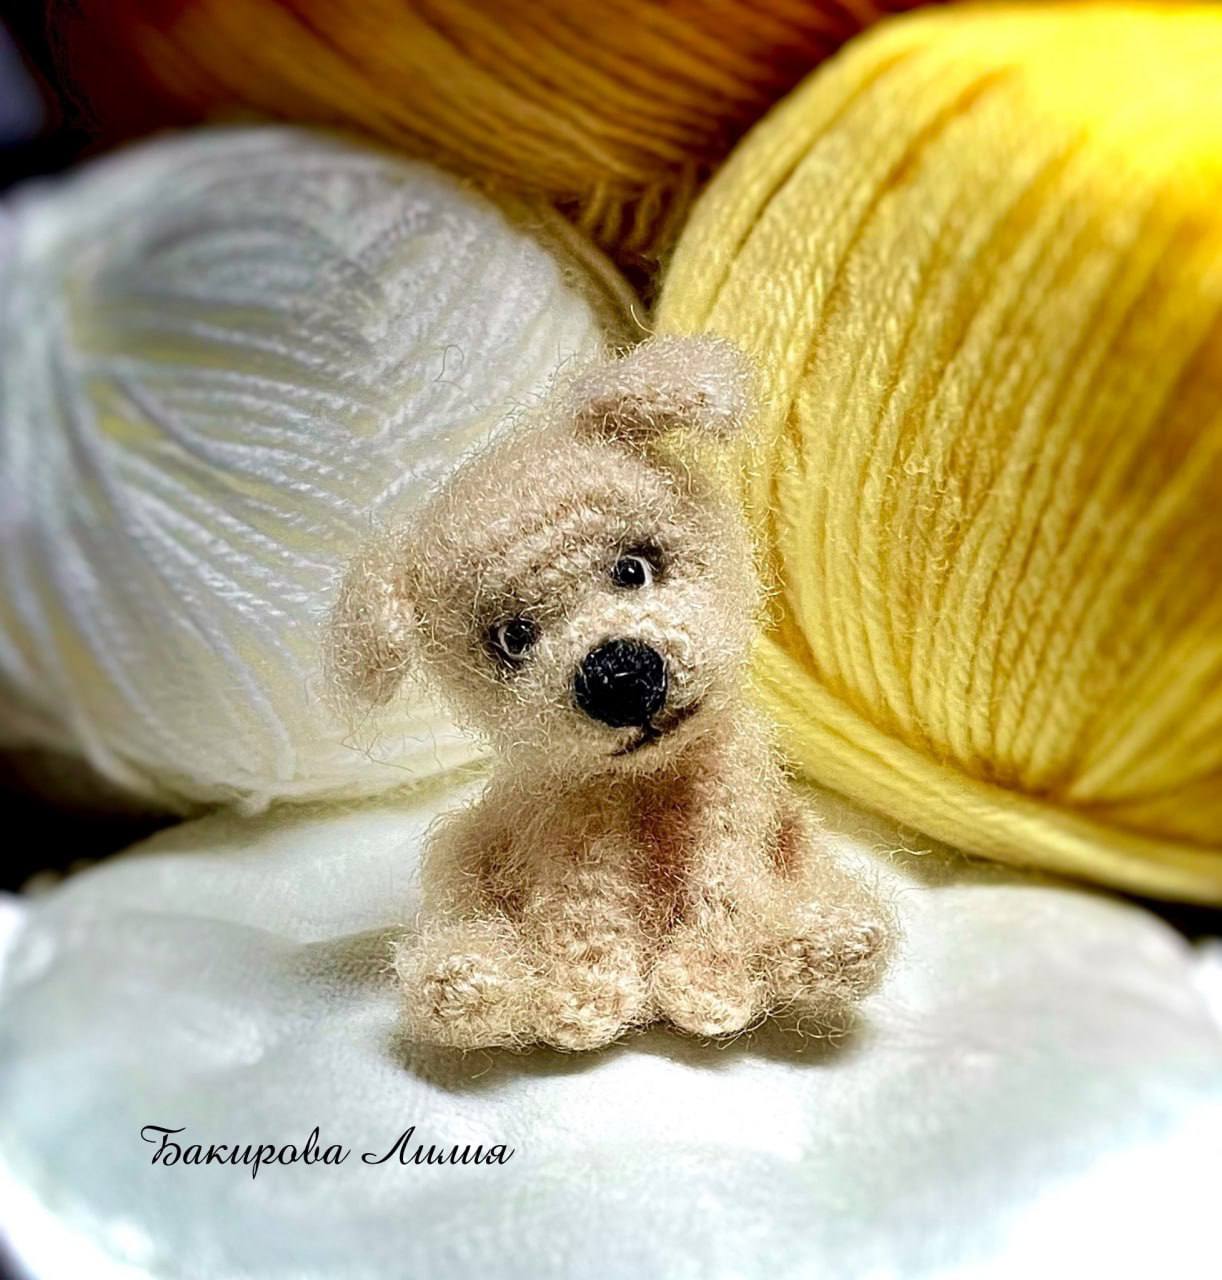
There is nothing quite as charming as a tiny, miniature animal to brighten up your workspace or decorate a nursery shelf. If you are a fan of long-bodied, adorable pups, this crochet dachshund puppy pattern is the perfect project for you. This pattern is designed to create a “micro-amigurumi” effect, resulting in a puppy that is approximately 1.5 inches tall. It is a wonderful project for those who enjoy working with fine textures and delicate details.
Because this puppy is worked with fine yarn and a very small hook, the finished result has a beautiful, fuzzy, “mohair-like” texture that makes it look incredibly lifelike. Whether you are making this as a gift for a dog lover or as a cute keychain accessory, this tutorial will guide you through every stitch to ensure your little dachshund turns out perfectly.
Introduction
This tutorial focuses on creating a miniature dachshund using amigurumi techniques. Amigurumi is the Japanese art of knitting or crocheting small, stuffed yarn creatures. This specific pattern uses a specialized technique of “brushing” the finished piece to create a soft, fuzzy coat, which is a hallmark of high-end collectible plushies.
If you are a beginner, don’t be intimidated by the small size! Working with smaller stitches helps you practice tension and precision. If you are an experienced crocheter, this is a relaxing, quick project that allows you to play with fine yarns and intricate facial sculpting.
Materials & Abbreviations
Required Materials
To achieve the specific look of this dachshund, I recommend using fine, fuzzy yarn. Standard bulky yarn will not work for this micro-style.
- Yarn: A fine, fuzzy yarn such as Alize Angora Gold in a beige or tan color. (You will need approximately 10-15 yards).
- Crochet Hook: 1.4 mm (This is a very small hook, essential for tight stitches in micro-crochet).
- Stuffing: Polyfill or polyester fiberfill.
- Eyes: 2.5 mm black round beads.
- Needle: A fine tapestry needle for sewing parts together and embroidery.
- Embroidery Thread: Black thin thread for the nose and white thread for eye details.
- Makeup/Shading: Dry pastel (pink or light brown) for adding realistic skin tones or shading to the muzzle.
Crochet Abbreviations
Please note that all measurements are in inches and all terms follow US crochet standards.
- MR: Magic Ring
- sc: single crochet
- inc: increase (2 sc in one stitch)
- dec: decrease (sc two stitches together)
- ch: chain
- st(s): stitch(es)
- sl st: slip stitch
- esp: evenly
Step-by-Step Instructions
The Head
The head is worked in a continuous spiral. Remember to use a stitch marker to keep track of your rounds.
Round 1: Create a Magic Ring and work 6 sc into the ring. (6)
Round 2: 6 inc. (12)
Round 3: (4 sc, inc, 2 sc, inc, 4 sc). (14)
Round 4: 14 sc. (14)
Round 5: (5 sc, 4 inc, 5 sc). (18)
Round 6: (2 sc, inc) repeat 6 times. (24)
Round 7: (3 sc, inc) repeat 6 times. (30)
Round 8: 30 sc. (30)
Round 9: 30 sc. (30)
Round 10: (3 sc, dec) repeat 6 times. (24)
Round 11: (2 sc, dec) repeat 6 times. (18)
Round 12: (1 sc, dec) repeat 6 times. (12)
Round 13: 6 dec. (6)
Round 14: Fasten off, leaving a tail for sewing. Pull the opening closed tightly.
The Body
The body is slightly elongated to give that classic dachshund silhouette.
Round 1: Create a Magic Ring and work 6 sc into the ring. (6)
Round 2: 6 inc. (12)
Round 3: (1 sc, inc) repeat 6 times. (18)
Round 4: (2 sc, inc) repeat 6 times. (24)
Round 5: 24 sc. (24)
Round 6: 24 sc. (24)
Round 7: (2 sc, dec) repeat 6 times. (18)
Round 8: 18 sc. (18)
Round 9: 18 sc. (18)
Round 10: (1 sc, dec) repeat 6 times. (12)
Round 11: 12 sc. (12)
Round 12: 12 sc. (12)
Fasten off, leaving a long tail for sewing the body to the head. Stuff the body firmly with fiberfill.
The Front Legs
Make two front legs. These are worked as small tubes.
Round 1: Create a Magic Ring and work 8 sc into the ring. (8)
Round 2: 8 sc. (8)
Round 3: 2 dec, 4 sc. (6)
Round 4-6: 6 sc. (6)
Fasten off. Fold the leg in half and sew the opening shut with your tapestry needle.
The Back Legs
The back legs are slightly different to allow for a “sitting” pose. Make two back legs.
Round 1: Create a Magic Ring and work 8 sc into the ring. (8)
Round 2: 8 sc. (8)
Round 3: 8 sc. (8) – Add a tiny bit of stuffing here.
Round 4: 2 dec, 4 sc. (6)
Round 5: 6 sc. (6)
Round 6: 6 inc. (12)
Round 7: 12 sc. (12)
Round 8: Perform one decrease at the front center of the leg to create a “knee” shape. (11)
Round 9: Perform two decreases: one at the front of the leg and one at the back. (9) – Add more stuffing now.
Round 10: 4 dec. (5) – Close the opening and fasten off.
The Ears
Make two ears. These are worked in rows (flat) rather than in a spiral.
Row 1: Chain 5. Leave a long tail for sewing (about 4-6 inches).
Row 2: From the 2nd chain from the hook, work 4 sc. Turn your work.
Row 3: Ch 1, 4 sc. Turn your work.
Row 4: Ch 1, 4 sc.
Fasten off. Tie the two long yarn tails together in a knot. This will provide a sturdy way to sew the ears to the head.
The Tail
Step 1: Chain 6. Turn your work.
Step 2: From the 2nd chain from the hook, work 5 sc.
Fasten off, leaving a long tail for sewing.
Finishing
The assembly and “grooming” stage is what truly brings your dachshund to life!
Assembly Steps
- Sculpt the Muzzle: Use your fingers to gently press the center of the head to create a snout shape.
- Eyes: Sew the 2.5 mm black beads into the head at Round 5.
- Nose: Use your black embroidery thread to embroider a small, rounded nose on the tip of the snout.
- Connect Head and Body: Sew the head to the top of the body.
- Attach Legs:
- Sew the back legs to the sides of the body.
- Sew the front legs to the front of the body, ensuring they are spaced approximately 2 stitches apart.
- Attach Ears and Tail: Use the long tails left from the ears and tail to sew them securely to the head and rear of the body.
The “Fuzzy” Transformation
To get that realistic, fluffy look, follow these final steps:
- Shading: Use a small brush to apply a tiny amount of dry pastel to the muzzle and around the eyes to create depth.
- Brushing (The most important step!): Using a fine-toothed pet comb or a clean toothbrush, very gently brush the surface of the crochet stitches. This will pull the fibers of the angora yarn outward, hiding the crochet stitches and creating a soft, fuzzy coat. Tip: Be extra careful to brush the chest area where the front legs are attached to help hide the seam.
Tips
Work Tight: When working with such small stitches and fine yarn, ensure your tension is consistent and tight so that the stuffing does not show through the holes.
The Magic of the Hook: If you find a 1.4 mm hook too difficult to handle, you can use a 1.5 mm or 1.75 mm hook, but be aware that your stitches will be slightly larger.
Safety First: Since this is a miniature item with bead eyes, it is intended as a decorative piece or collectible and is not suitable for small children or pets who might swallow the parts.
Have Fun: Don’t worry if your first puppy isn’t perfect. The charm of amigurumi is in its unique, handmade character!