How to Crochet a Cute Amigurumi Goose: Free Cottagecore Pattern
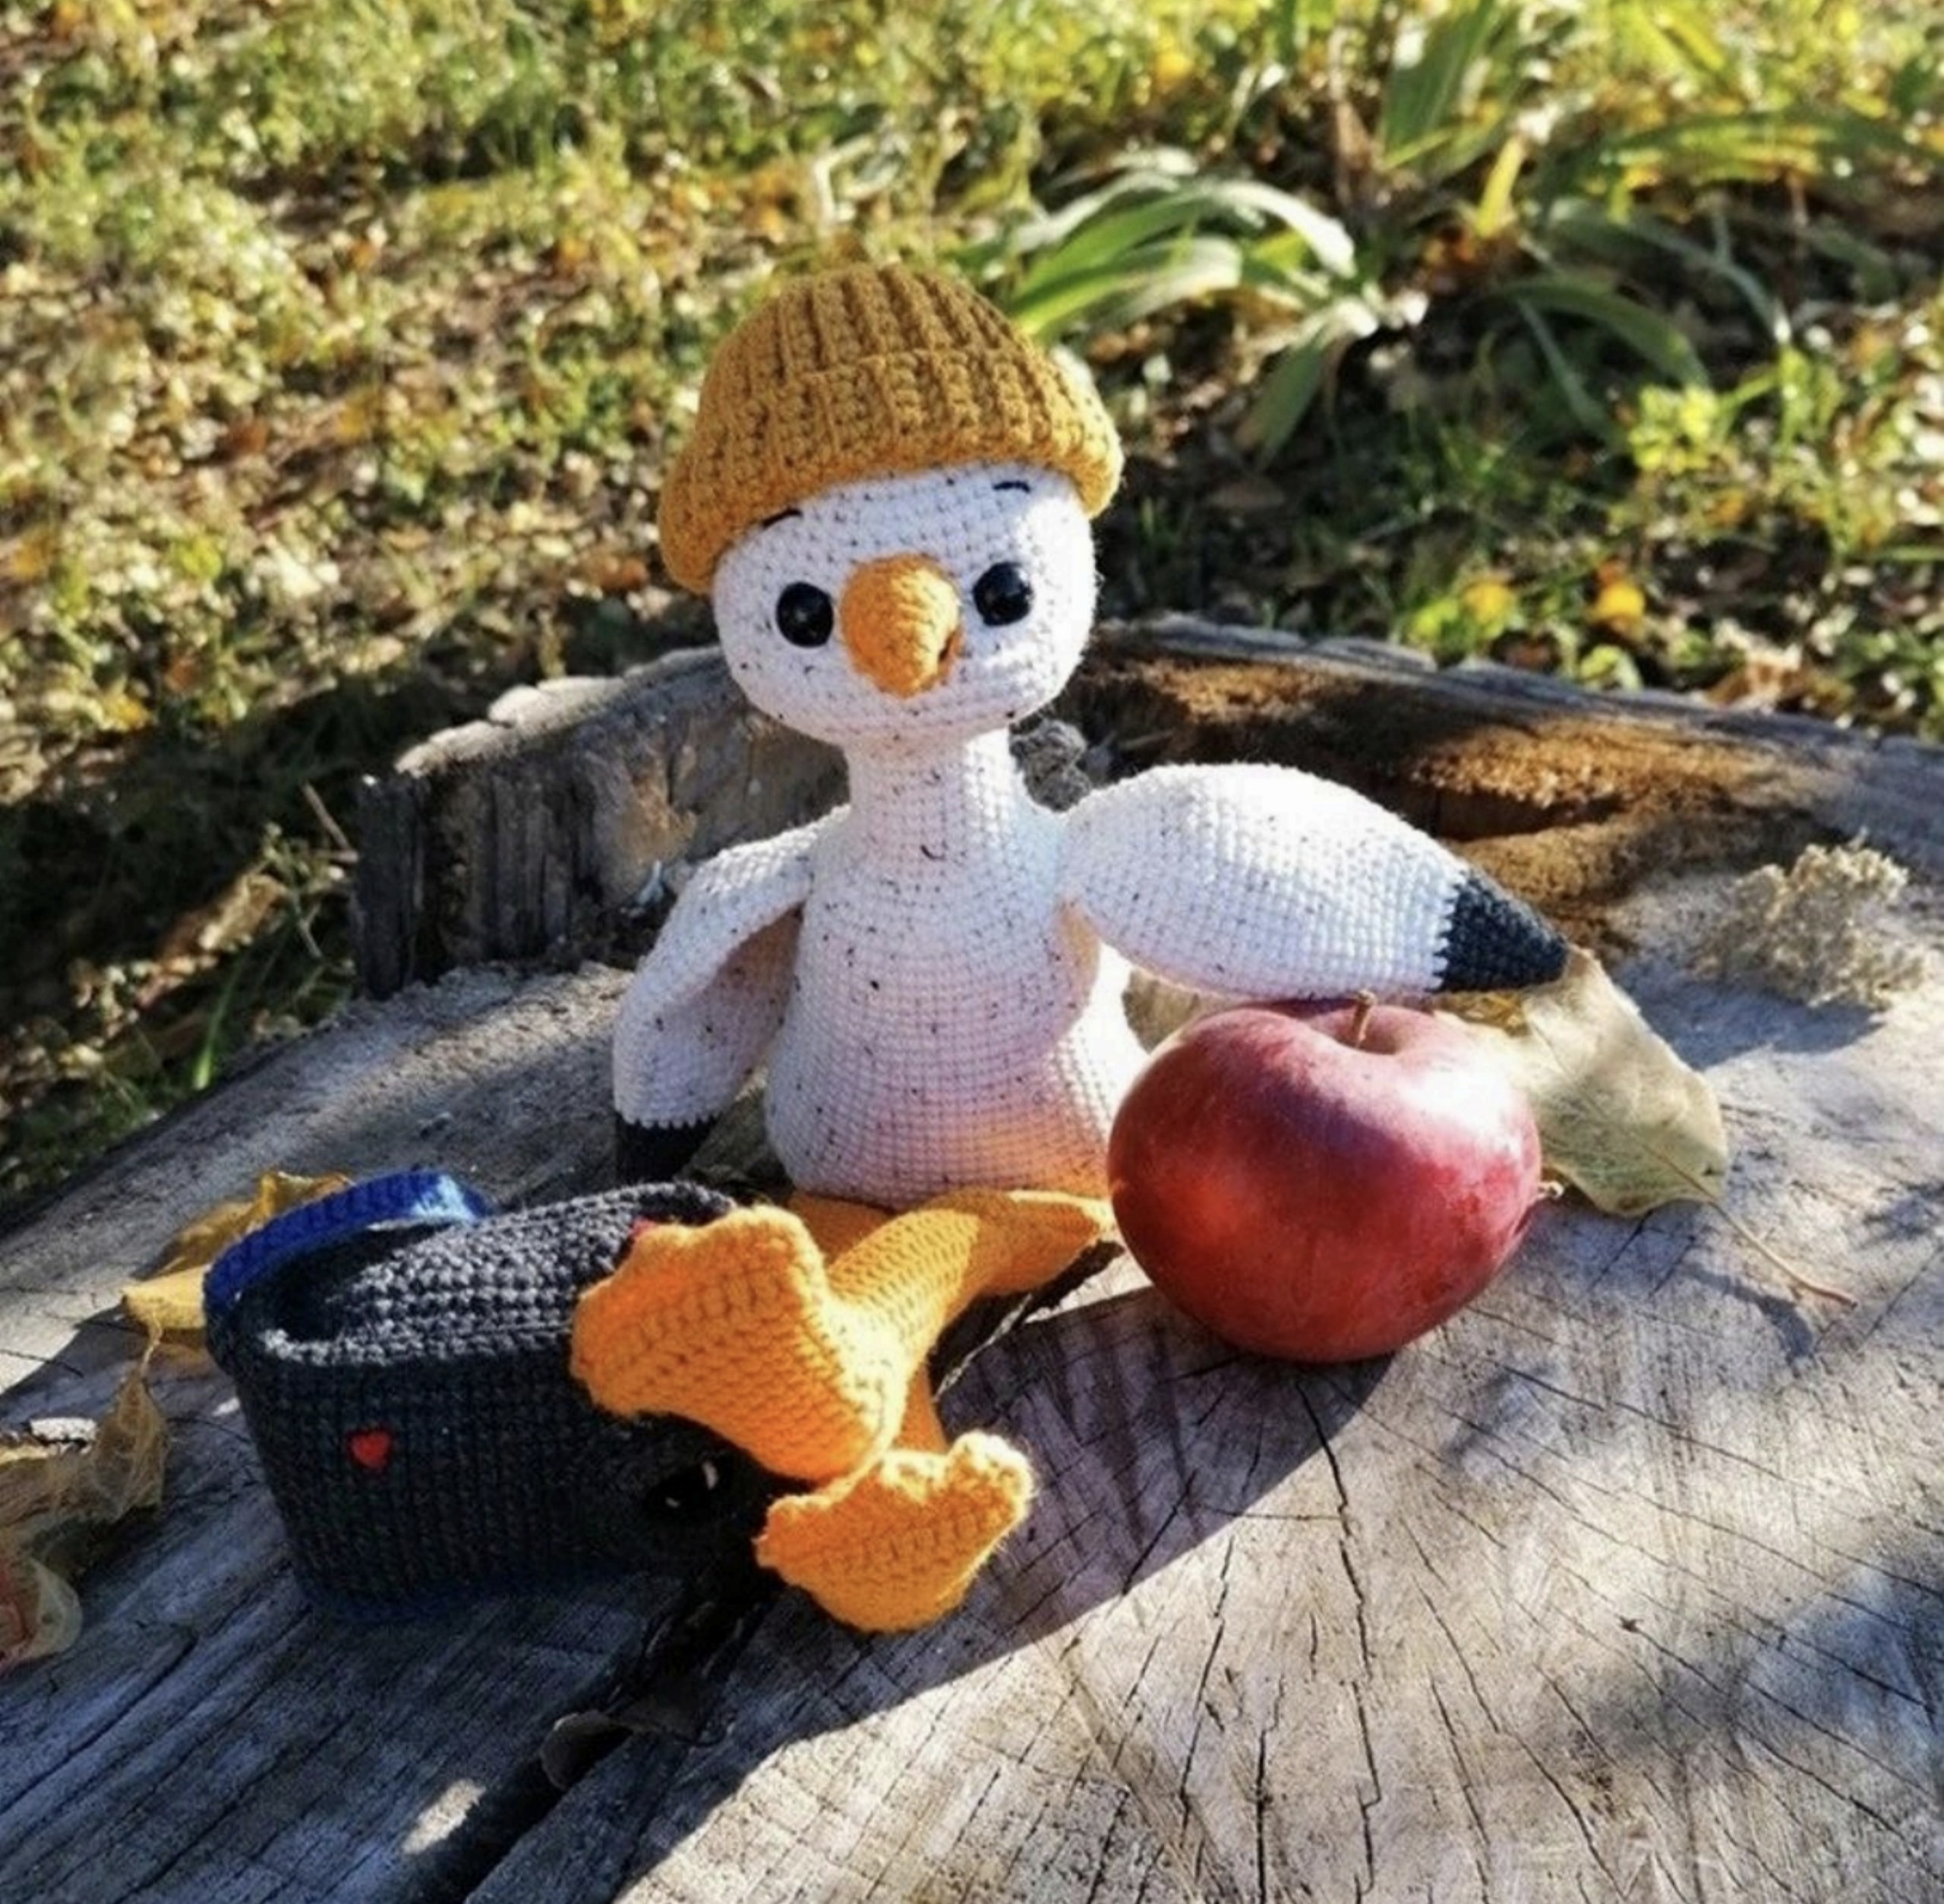
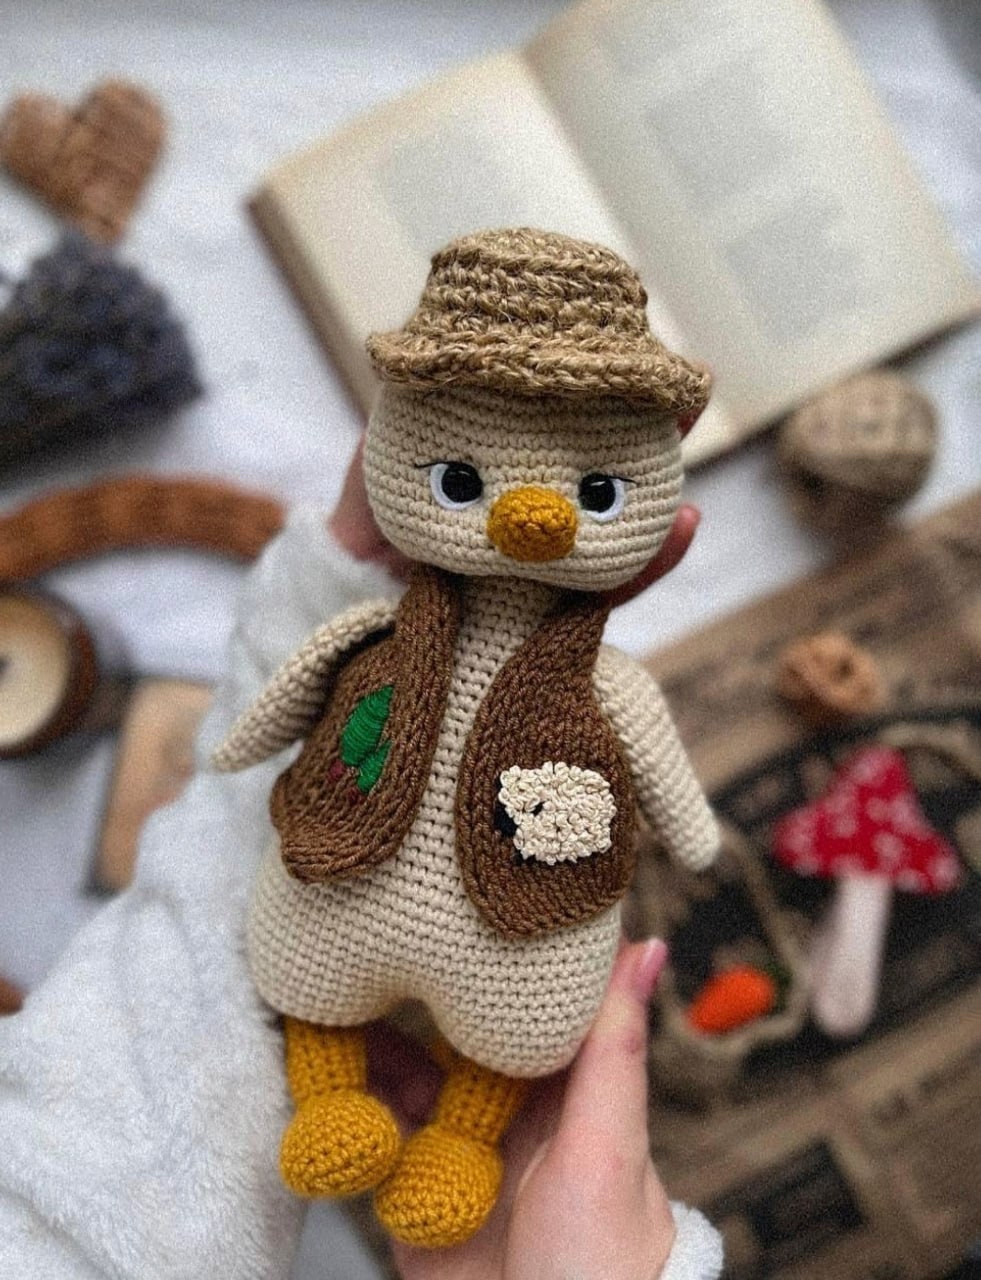
If you love the rustic, cozy charm of cottagecore aesthetics, you are going to fall head over heels for this adorable amigurumi goose! Sporting a tiny rustic jute sunhat and a cozy knit vest adorned with simple embroidery, this little goose is the perfect addition to your handmade collection or a heartwarming gift for a loved one.
In this comprehensive, beginner-friendly tutorial, we will walk you through every step of creating this sweet feathered friend. We will use standard US crochet terms and simple knitting instructions for the vest. Grab your favorite beverage, find a cozy spot, and let’s get crafting!
Materials & Abbreviations
Materials Needed
- Yarn: Sport weight cotton blend yarn (e.g., YarnArt Jeans or similar 60% Cotton / 40% Acrylic blend, approx. 174 yards / 160 meters per 50g skein)
- Main Color (Off-White/Light Beige): 1 skein (approx. 174 yards)
- Beak & Legs Color (Mustard Yellow or Orange): Small amount
- Vest Color (Cozy Brown): Small amount
- Hat Material: Natural jute twine (thin/medium weight suitable for a 2.5 mm hook)
- Crochet Hook: Size 2.5 mm (US B-1 or C-2)
- Knitting Needles: US 0 (2.0 mm) circular or straight needles (for the vest)
- Safety Eyes: 10 mm black safety eyes
- Fiberfill Stuffing: Premium polyester cloud stuffing
- Embroidery & Finishing: Water-soluble stabilizer (optional, for tracing embroidery), embroidery floss (green and white for the tree and sheep details), long tapestry needle (approx. 6 inches / 150 mm), stitch markers, straight pins, and scissors.
Crochet Abbreviations (US Terms)
- MR: Magic Ring
- ch: Chain
- sc: Single Crochet
- inc: Increase (2 single crochets in the same stitch)
- dec: Decrease (invisible single crochet decrease recommended)
- hdc: Half Double Crochet
- BLO: Back Loop Only
- sl st: Slip Stitch
- st(s): Stitch(es)
Knitting Abbreviations (for the Vest)
- CO: Cast On
- BO: Bind Off
- K: Knit
- P: Purl
- edge st: Edge Stitch (Slip the first stitch of the row purlwise, and always purl the very last stitch of the row for clean edges)
- dec: Decrease (Knit 2 together or purl 2 together)
Step-by-Step Instructions
1. The Head
Using your main color (Off-White/Light Beige) yarn and a 2.5 mm crochet hook, we will work in continuous rounds. Use a stitch marker to keep track of the start of each round.
- Round 1: Make 6 sc in a MR (6)
- Round 2: 6 inc (12)
- Round 3: (1 sc, inc) * 6 (18)
- Round 4: (2 sc, inc) * 6 (24)
- Round 5: (3 sc, inc) * 6 (30)
- Round 6: (4 sc, inc) * 6 (36)
- Round 7: (5 sc, inc) * 6 (42)
- Round 8: (6 sc, inc) * 6 (48)
- Round 9: (7 sc, inc) * 6 (54)
- Round 10: (17 sc, inc) * 3 (57)
- Round 11: (18 sc, inc) * 3 (60)
- Rounds 12–21 (10 rounds): sc in each st around (60)
- Eye Placement: Insert your 10 mm safety eyes between Rounds 14 and 15, leaving a space of 11 sc between them. Secure the backings tightly.
- Round 22: (8 sc, dec) * 6 (54)
- Round 23: (7 sc, dec) * 6 (48)
- Round 24: 24 dec (24)
Cut your yarn, leaving a short tail, and weave it in. Stuff the head firmly with fiberfill, but keep it pliable enough so you can perform face sculpting during the finishing stages.
2. The Feet & Legs (Make 2)
We begin by crocheting the boots/feet in Mustard Yellow/Orange, and then transition into the beige legs.
The Foot:
- Round 1: Ch 6. Starting in the second chain from the hook, work 4 sc. Work 3 sc into the last chain stitch. Turn your work to crochet along the opposite side of the chain: work 3 sc, then 1 inc (2 sc in the last stitch) (12)
- Round 2: 5 sc, 3 sc in the next stitch, 5 sc, 3 sc in the next stitch (16)
- Round 3: 6 sc, inc, 7 sc, inc, 1 sc (18)
- Rounds 4–8 (5 rounds): sc in each st around (18)
- Round 9: (1 sc, dec) * 6 (12)
- Rounds 10–12 (3 rounds): sc in each st around (12)
- Stuff the foot lightly with fiberfill as you progress.
- Round 13: 6 dec (6)
Fasten off and pull the opening closed using your tapestry needle. Do not cut the remaining tail yet; we will use it to sculpt the foot shape if needed.
The Leg:
Locate the heel of the foot. Count 3 rounds up from the bottom of the heel. At the 4th round, attach your yellow yarn to begin crocheting the leg upwards in a circle.
- Round 1: Pick up and work 12 sc in a circle around the ankle area (12)
- Rounds 2–6 (5 rounds): sc in each st around (12)
- Change yarn color to Off-White/Light Beige:
- Round 7: 12 inc (24)
- Round 8: (3 sc, inc) * 6 (30)
- Round 9: sc in each st around (30)
For the first leg: Fasten off, weave in the yarn tail, and stuff the leg with fiberfill.
For the second leg: Do not cut the yarn! We will now join both legs together to begin the body.
3. The Body
With your crochet hook still attached to the second leg, align both legs so the feet point forward.
- Round 1: Join to the first leg with a sc, then work 30 sc around the first leg, and 30 sc around the second leg (60)
- Round 2: sc in each st around (60)
- Round 3: (9 sc, inc) * 6 (66)
- Rounds 4–11 (8 rounds): sc in each st around (66)
- Round 12: (9 sc, dec) * 6 (60)
- Round 13: sc in each st around (60)
- Round 14: (8 sc, dec) * 6 (54)
- Rounds 15–16 (2 rounds): sc in each st around (54)
- Round 17: (7 sc, dec) * 6 (48)
- Begin stuffing the body firmly with fiberfill and continue stuffing as you go.
- Rounds 18–19 (2 rounds): sc in each st around (48)
- Round 20: (6 sc, dec) * 6 (42)
- Rounds 21–22 (2 rounds): sc in each st around (42)
- Round 23: (5 sc, dec) * 6 (36)
- Rounds 24–27 (4 rounds): sc in each st around (36)
- Round 28: (10 sc, dec) * 3 (33)
- Rounds 29–30 (2 rounds): sc in each st around (33)
- Round 31: (9 sc, dec) * 3 (30)
- Rounds 32–33 (2 rounds): sc in each st around (30)
- Round 34: (3 sc, dec) * 6 (24)
- Rounds 35–36 (2 rounds): sc in each st around (24)
Fasten off, leaving a long tail for sewing the body to the head.
4. The Wings (Make 2)
Using Off-White/Light Beige yarn. Do not stuff the wings.
- Round 1: Make 6 sc in a MR (6)
- Round 2: (1 sc, inc) * 3 (9)
- Round 3: sc in each st around (9)
- Round 4: (2 sc, inc) * 3 (12)
- Round 5: sc in each st around (12)
- Round 6: (3 sc, inc) * 3 (15)
- Round 7: sc in each st around (15)
- Round 8: (4 sc, inc) * 3 (18)
- Round 9: sc in each st around (18)
- Round 10: (5 sc, inc) * 3 (21)
- Rounds 11–15 (5 rounds): sc in each st around (21)
- Round 16: (5 sc, dec) * 3 (18)
- Round 17: (4 sc, dec) * 3 (15)
- Round 18: (3 sc, dec) * 3 (12)
Fold the opening flat and crochet 6 sc through both layers to close. Fasten off, leaving a long tail for assembly.
5. The Beak
Using Mustard Yellow/Orange yarn. Stuff very lightly with fiberfill before sewing.
- Round 1: Make 6 sc in a MR (6)
- Round 2: (1 sc, inc) * 3 (9)
- Round 3: (2 sc, inc) * 3 (12)
- Round 4: (3 sc, inc) * 3 (15)
Fasten off, leaving a long tail for sewing.
6. The Tail
Using Off-White/Light Beige yarn. Stuff lightly with fiberfill.
- Round 1: Make 6 sc in a MR (6)
- Round 2: 6 inc (12)
- Round 3: sc in each st around (12)
- Round 4: (1 sc, inc) * 6 (18)
- Round 5: 17 sc, 1 sl st (18)
Fasten off, leaving a long tail for sewing.
7. The Rustic Jute Hat
Using your natural jute twine and a 2.5 mm crochet hook, we will make a stiff, rustic sunhat.
- Round 1: Make 6 sc in a MR (6)
- Round 2: 6 inc (12)
- Round 3: (1 sc, inc) * 6 (18)
- Round 4: (2 sc, inc) * 6 (24)
- Round 5: Working in BLO, sc in each st around (24)
- Rounds 6–8 (3 rounds): sc in each st around (24)
- Round 9 (The Brim): Working in BLO, work 24 hdc increases (2 hdc in each stitch) (48 hdc)
Fasten off and weave in your ends. Shape the brim with your fingers to give it a relaxed, rustic look.
8. The Cozy Knit Vest
Using your US 0 (2.0 mm) circular needles and brown yarn, cast on 50 stitches. Remember to slip the first stitch of every row (edge st) and purl the last stitch of every row.
Main Body of Vest:
- Rows 1, 3, 5, 7: edge st, 48 K, P (50)
- Rows 2, 4, 6, 8: edge st, 49 P (50)
- Row 9: edge st, 13 K, bind off the next stitch. Place these first 13 stitches on a stitch holder (this is the first front panel).
- Row 10: Knit 22 stitches for the back panel, then bind off the next stitch. Place the remaining stitches on a separate holder (second front panel).
The Back Panel:
We will now work only on the 22 back stitches in flat rows, decreasing by 1 stitch at the end of each row:
- Row 1: edge st, 19 P, dec (21)
- Row 2: edge st, 18 K, dec (20)
- Row 3: edge st, 17 P, dec (19)
- Row 4: edge st, 16 K, dec (18)
- Row 5: edge st, 15 P, dec (17)
- Row 6: edge st, 14 K, dec (16)
- Row 7: edge st, 13 P, dec (15)
- Row 8: edge st, 12 K, dec (14)
- Row 9: edge st, 11 P, dec (13)
- Row 10: edge st, 10 K, dec (12)
- Work 3 rows flat without any decreases. Bind off all stitches.
The Front Panels (Work 2):
Rejoin your yarn to the stitches on your holder. Work in flat rows, decreasing every other row to create the slanted collar shape:
- Row 1: edge st, 13 P (14)
- Row 2: edge st, 11 K, dec (13)
- Row 3: edge st, 12 P (13)
- Row 4: edge st, 10 K, dec (12)
- Row 5: edge st, 11 P (12)
- Row 6: edge st, 9 K, dec (11)
- Row 7: edge st, 10 P (11)
- Row 8: edge st, 8 K, dec (10)
- Row 9: edge st, 9 P (10)
- Row 10: edge st, 7 K, dec (9)
- Row 11: edge st, 8 P (9)
- Row 12: edge st, 6 K, dec (8)
- Row 13: edge st, 7 P (8)
- Row 14: edge st, 5 K, dec (7)
- Row 15: edge st, 6 P (7)
- Row 16: edge st, 4 K, dec (6)
- Row 17: edge st, 5 P (6)
- Row 18: edge st, 3 K, dec (5)
- Row 19: edge st, 4 P (5)
- Row 20: edge st, 2 K, dec (4)
- Row 21: edge st, 3 P (4)
- Row 22: edge st, 1 K, dec (3)
- Row 23: edge st, 2 P (3)
- Row 24: edge st, dec (2)
- Row 25: Bind off and leave a long tail for shoulder assembly.
Mirror these steps for the opposite front panel so that the straight edges form the center-front opening and the slanted decreases frame the armholes.
Finishing & Assembly
1. Face Sculpting & Details
Before sewing the head to the body, perform a simple needle-sculpting technique to set the eyes deeper into the head. Using your long tapestry needle and a strand of main color yarn, insert the needle from the bottom opening of the head, bring it out right next to the outer edge of the left eye, insert it one stitch over, and bring it back down to the neck opening. Pull gently to create a subtle indent, tie a knot at the neck, and repeat for the right eye. This gives your goose an instantly sweet, expressive face!
Next, sew the beak over Rounds 16–18, centered perfectly between the eyes. Add small embroidered white highlights on the outer edges of the safety eyes using a strand of white embroidery floss, and embroider tiny sleepy eyelashes or eyebrows just above the eyes with a single strand of dark brown or black floss.
2. Body Assembly
- Head to Body: Align the head with the body and sew them together securely using the yarn tail from the body. Add extra stuffing to the neck area right before closing to ensure the head doesn’t wobble.
- Wings: Sew the wings to the sides of the body, approximately 4 rounds down from the neck joint. Only sew the flat top edge of the wings so they can flap naturally!
- Tail: Center the tail on the back of your goose over Rounds 29 and 30, and sew it securely in place.
3. Vest Embroidery & Assembly
Decorate the front of the knit vest with simple embroidery before sewing the shoulders together. Use your water-soluble stabilizer to sketch a tiny evergreen tree on one panel and a fluffy little sheep on the other. Embroider using basic stitches (French knots work wonderfully for a woolly sheep, and satin stitches or straight stitches are perfect for the tree). Rinse away the stabilizer with warm water and let dry.
Sew the shoulder seams of the front and back vest panels together using a tapestry needle. Slip the vest onto your goose!
Tips for Amigurumi Success
- Stitch Tension: Keep your crochet stitches tight so that the polyester stuffing doesn’t peek through. If you tend to crochet loosely, consider dropping down to a 2.0 mm hook.
- Invisible Decreases: When executing a decrease, always use the invisible decrease method (working through the front loops only of the next two stitches). This keeps the texture of your toy smooth and professional.
- Stiffening the Jute Hat: Jute twine can sometimes vary in stiffness. If your hat’s brim is drooping too much, you can apply a light mist of fabric stiffener or starch spray to help it hold its classic sunhat shape.