Tiny Miniature Rabbit Knitting Pattern: A Cute Step-by-Step Tutorial
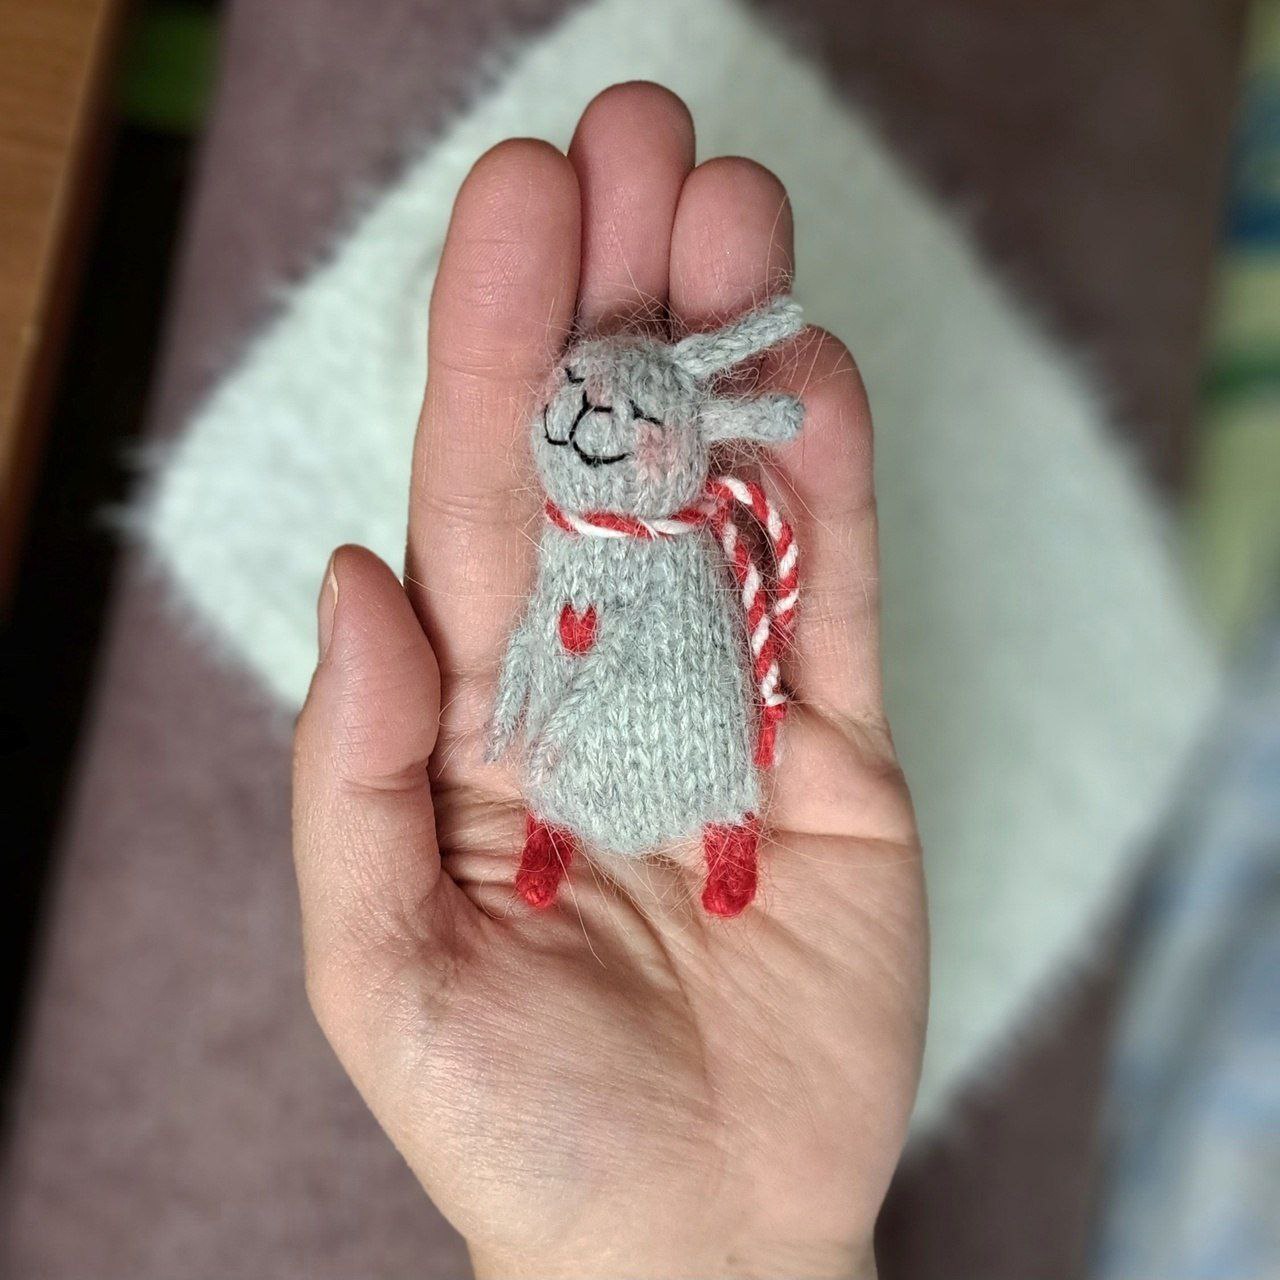
There is something absolutely magical about miniature crafts. Whether you are looking for a unique gift, a tiny companion for a dollhouse, or just a quick project to clear your mind, a tiny knitted bunny is the perfect choice. This little rabbit is designed to be small enough to fit in the palm of your hand, making it an adorable accessory or a charming collectible.
While this project is rated as an intermediate level due to the small scale and the use of double-pointed needles, this tutorial is written to be as beginner-friendly as possible. We will walk through the process of creating the body, the limbs, and even a tiny customized outfit to make your bunny truly special. Grab your smallest needles and let’s get started!
Materials & Abbreviations
To achieve the delicate scale of this rabbit, you will need materials that aren’t too bulky. Using a fingering weight or a thin wool-blend yarn works best to keep the stitches tight and the shape defined.
Materials Needed
- Yarn: Wool or semi-wool blend (approximately 218–328 yards per 100g). You will need white for the main body and various colors for the clothing. A thin mohair or “bunny” yarn can be added as a secondary strand to the body for extra fluffiness.
- Needles: Three double-pointed needles (DPNs) size US 0 or 1 (2.5mm).
- Crochet Hook: US size 0 or 00 (2.0mm) for casting on and starting the I-cords.
- Embroidery Supplies: A sewing needle, a tapestry needle, and thin black embroidery floss (such as stranded cotton or iris thread) for the facial features.
- Stuffing: High-quality polyester fiberfill.
- Extras: Scissors and optional pink blush or eyeshadow for the cheeks.
Abbreviations (US Terms)
- K: Knit
- P: Purl
- Inc: Increase (knit two stitches into one, through both loops)
- Yo: Yarn over
- St(s): Stitch(es)
- I-cord: A knitted tube that creates a seamless, rounded cord.
Step-by-Step Instructions
The Body and Head
The body is worked in the round using double-pointed needles. The stitch counts listed below refer to the number of stitches per needle. Since we are using three needles, multiply the number by three to get your total stitch count.
Starting: Use a crochet hook to create a chain of 3 stitches, or use Judy’s Magic Loop method to cast on 6 stitches. Distribute these evenly so you have 3 stitches on each of the two main needles.
- Round 1: Knit all stitches (3 sts per needle).
- Round 2: Inc, K1, Inc (5 sts per needle).
- Round 3: Knit all stitches (5 sts per needle).
- Round 4: Inc, K3, Inc (7 sts per needle).
- Rounds 5–10: Knit all stitches for 6 rounds (7 sts per needle).
- Round 11 (Neck): Inc, K5, Inc (9 sts per needle).
- Rounds 12–18: Knit all stitches for 7 rounds (9 sts per needle).
- Round 19 (Waist): Inc, K7, Inc (11 sts per needle).
- Rounds 20–27: Knit all stitches for 8 rounds (11 sts per needle).
Stuffing the Body: As you work, begin stuffing the bunny lightly. Be very careful not to overstuff the area between the head and the neck; keeping this area slightly softer allows the head to tilt naturally, giving the bunny more personality.
The Limbs and Tail
The Legs
Using your crochet hook, cast on 3 stitches onto one needle. Knit a small I-cord for 4 rows. Pull the remaining loops tight with a needle to close the end. Run the yarn tail along the length of the leg back to the base of the body and sew it securely to the bottom. Repeat for the second leg.
The Arms
Cut a length of yarn approximately 30 inches long. Thread it through the body and bring it up to the neck area (around Round 11). Use your crochet hook to pick up 2 stitches from the body. Knit an I-cord for 8 to 9 rows. Pull the loops tight, run the yarn back down the arm to the base, and sew it into place. You can position the arms symmetrically or slightly offset to make the bunny look like it is turning.
The Ears
Cut a length of yarn approximately 27 inches long. Insert your needle into the head (approximately the 2nd row from the top) and bring it through to the other side. Using your crochet hook, pick up 2 stitches from the head. Knit an I-cord for 6 rows. Pull the loop tight and sew the ear down the length of the head to the base. You can place one ear slightly higher than the other for a cute, whimsical look.
The Tail
Determine the back of the bunny by looking at the natural curve of the head. On the rear, embroider a small “pom-pom” tail by making several small, tight stitches in one concentrated spot.
Finishing the Bunny
Adding Clothes
You can customize your bunny by changing yarn colors during the body construction or adding separate pieces.
Pants and Shirts
- For Pants: Approximately 3 rows above the waist (Round 19), switch from white yarn to a colored yarn and continue knitting until the end of the body. If you use this same color for the legs, the bunny will look like it is wearing footie pajamas!
- For a Shirt: Switch to a colored yarn from the neck (Round 11) down to the waist.
The Tiny Hat
The hat is worked flat in rows using stockinette stitch (Knit one row, Purl one row).
- Cast on 16 stitches.
- Row 1: Edge stitch, P14, edge stitch (16 sts).
- Row 2: Edge stitch, K3, bind off 2 stitches (this creates the hole for the ear), K4, bind off 2 stitches (second hole), K3, edge stitch (12 sts).
- Row 3: Edge stitch, P3, Yo, P4, Yo, P3, edge stitch (16 sts).
- Rows 4–6: Work in stockinette stitch (16 sts).
Fold the hat in half and use a crochet hook or needle to join the open stitches along the side. Sew the hat onto the head, leaving small ties on the sides if desired.
Facial Details
Use thin black embroidery floss to bring your bunny to life. For the eyes, create two small French knots. For the nose and mouth, use long, slightly drooping stitches that meet in a small “V” shape at the bottom. This creates a peaceful, sleeping expression.
Tips for Success
- Tension is Key: Because this project is so small, keep your tension consistent. If the stitches are too loose, the stuffing may peek through; if they are too tight, you will struggle to move the needles.
- Blocking: After finishing, you can gently steam-block the bunny or lightly wash it to set the stitches.
- Adding Color: To give your bunny a lifelike glow, use a tiny bit of dry pink blush or eyeshadow on a cotton swab and lightly dab the cheeks and the tips of the ears.
- Stability: If your bunny is too light and tips over, you can add a small plastic bead or a tiny bit of poly-pellets to the bottom of the body before closing it.