Colorful Crochet Triangle Multi-Use Bag Pattern
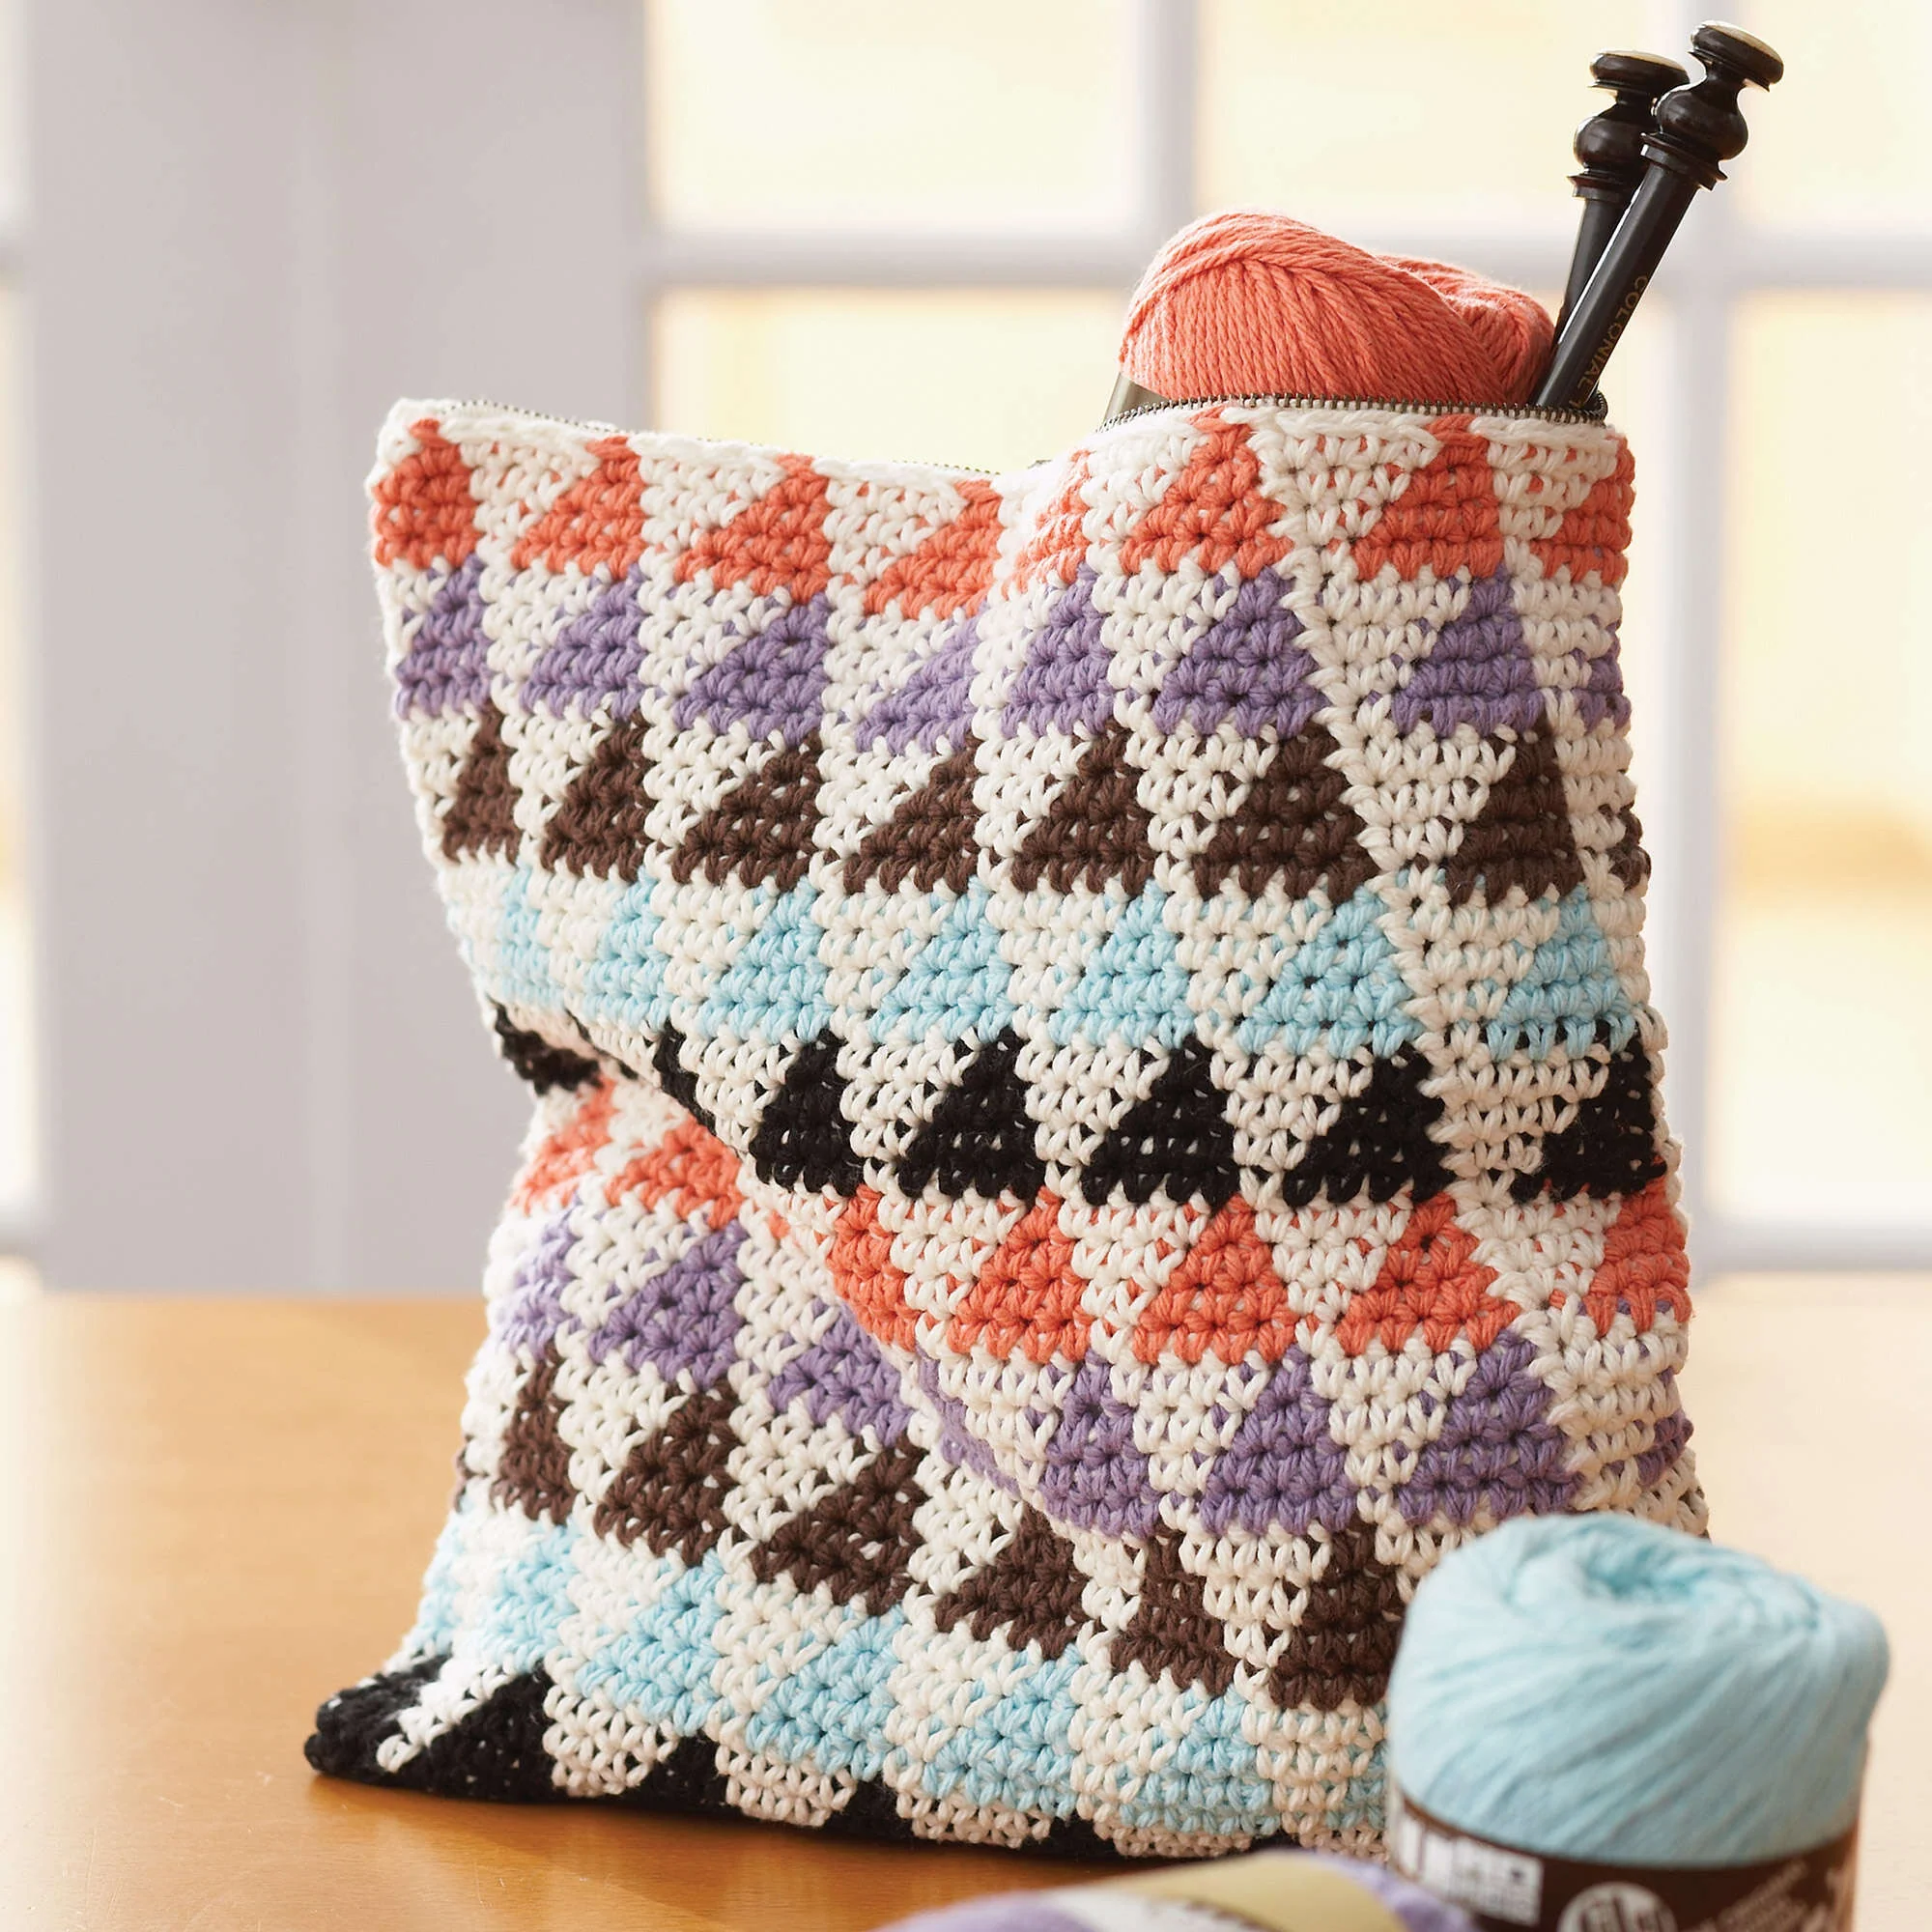
Looking for a fun, vibrant project that combines style and functionality? This crochet triangle multi-use bag is the perfect addition to your handmade collection. Whether you need a chic makeup pouch, a pencil case for your stationery, or a handy organizer for your own crochet hooks and notions, this geometric bag is an ideal choice.
This pattern uses a tapestry-style crochet technique to create a striking zig-zag triangle effect. While it is marked as an intermediate project, the repetitive nature of the stitches makes it very approachable for those looking to practice their color-changing skills. With two size options available, you can customize your bag to be a compact clutch or a deeper utility pouch.
Materials & Abbreviations
To get started, gather the following supplies. For this project, a sturdy cotton yarn is recommended to ensure the bag holds its shape and stands up to daily wear and tear.
Materials
- Yarn: Worsted weight cotton yarn (approximately 120 yards per ball). You will need:
- Main Color (MC): Soft Ecru (Approx. 128 yards for Version A / 64 yards for Version B)
- Contrast A: Black (Approx. 47 yards for Version A / 25 yards for Version B)
- Contrast B: Robin’s Egg Blue (Approx. 34 yards for Version A / 19 yards for Version B)
- Contrast C: Warm Brown (Approx. 29 yards for Version A / 15 yards for Version B)
- Contrast D: Hot Purple (Approx. 39 yards for Version A / 20 yards for Version B)
- Contrast E: Tangerine (Approx. 29 yards for Version A / 15 yards for Version B)
- Crochet Hook: Size H/8 (5 mm) or whatever size is needed to obtain the correct gauge.
- Hardware: One 10-inch zipper.
- Notions: Yarn needle and scissors.
Gauge
13 single crochet (sc) and 14 rows = 4 inches. If your gauge differs, your bag may turn out slightly larger or smaller than the listed measurements.
Abbreviations (US Terms)
- Approx: Approximately
- Ch: Chain
- Cont: Continue
- Rnd: Round
- Rep: Repeat
- Sc: Single crochet
- Sl st: Slip stitch
- St(s): Stitch(es)
Step-by-Step Instructions
This bag is worked in the round, starting from a flat oval base and growing upward to create the walls of the pouch.
Creating the Base
Using Contrast Color A, chain 33.
Round 1: Work 1 sc in the 2nd chain from the hook. Work 1 sc in each chain across until you reach the last chain. In the very last chain, work 3 sc (this allows you to turn the corner). Do not turn your work. Instead, continue working in the remaining loops of the foundation chain, placing 1 sc in each chain until you reach the end. Join with a slip stitch to the first sc. You should now have a total of 65 sc.
Building the Body
The body of the bag is worked in a series of color blocks that create the triangle pattern. To keep your project neat, you will carry the colors you aren’t currently using across the top of the previous round, crocheting over them to hide the strands inside the stitches.
Round 2: With Color A, chain 1. *Work 1 sc in each of the next 4 stitches. Switch to the Main Color (MC) and work 1 sc in the next stitch.* Repeat from * around the entire round. Join with a slip stitch to the first sc. This completes the first row of the pattern chart.
Working the Pattern Chart
Continue working in single crochet, following the geometric triangle pattern. The pattern follows a specific sequence of color shifts over 20 rows. Each color band (Contrast A through E) typically spans 3 to 4 rows, shifting by one stitch each time to create the diagonal “triangle” look.
- For Version B (Smaller Bag): Work the pattern chart one full time (ending on the 20th row).
- For Version A (Larger Bag): Work the pattern chart two full times (ending on the 40th row).
Pro Tip for Color Changes: When switching colors, work the current stitch until there are only two loops left on your hook. Pull the new color through those last two loops to complete the stitch. This ensures a seamless transition and a clean edge.
Once you have reached the final row for your chosen size, fasten off your yarn.
Finishing
Now that the crochet body is complete, it is time to add the closure.
Lay your bag flat and align the 10-inch zipper with the top edge of the pouch. Using a yarn needle and a small amount of matching yarn (or a sewing needle and thread), carefully sew the zipper tape to the top rim of the bag. Ensure the zipper is centered and the stitches are secure to prevent the zipper from pulling away during use.
Weave in all remaining ends and give your bag a light steam or block if necessary to sharpen the geometric lines.
Tips for Success
Managing Your Yarn
Because this project involves multiple colors, your work can quickly become messy with “floats” (long strands of yarn hanging on the inside). To prevent this, always carry the inactive color along the top of the row you just completed and crochet directly over it. This creates a fabric that is thicker and more stable, which is ideal for a bag.
Maintaining Tension
Tapestry crochet can sometimes become tight if you are pulling the carried yarn too firmly. Try to keep your tension relaxed. If you notice the bag starting to pucker or lean, loosen your grip on the yarn you are carrying.
Customizing Your Colors
While the original palette uses a mix of neutrals and brights, this pattern works with any color scheme! Try a monochromatic look with different shades of blue, or a seasonal theme using oranges, reds, and golds for autumn.
Final Measurements
- Version A: Approximately 10 inches wide x 11 inches long.
- Version B: Approximately 10 inches wide x 5.5 inches long.