How to Crochet a Punk Plaid Bag: Easy Step-by-Step Tutorial
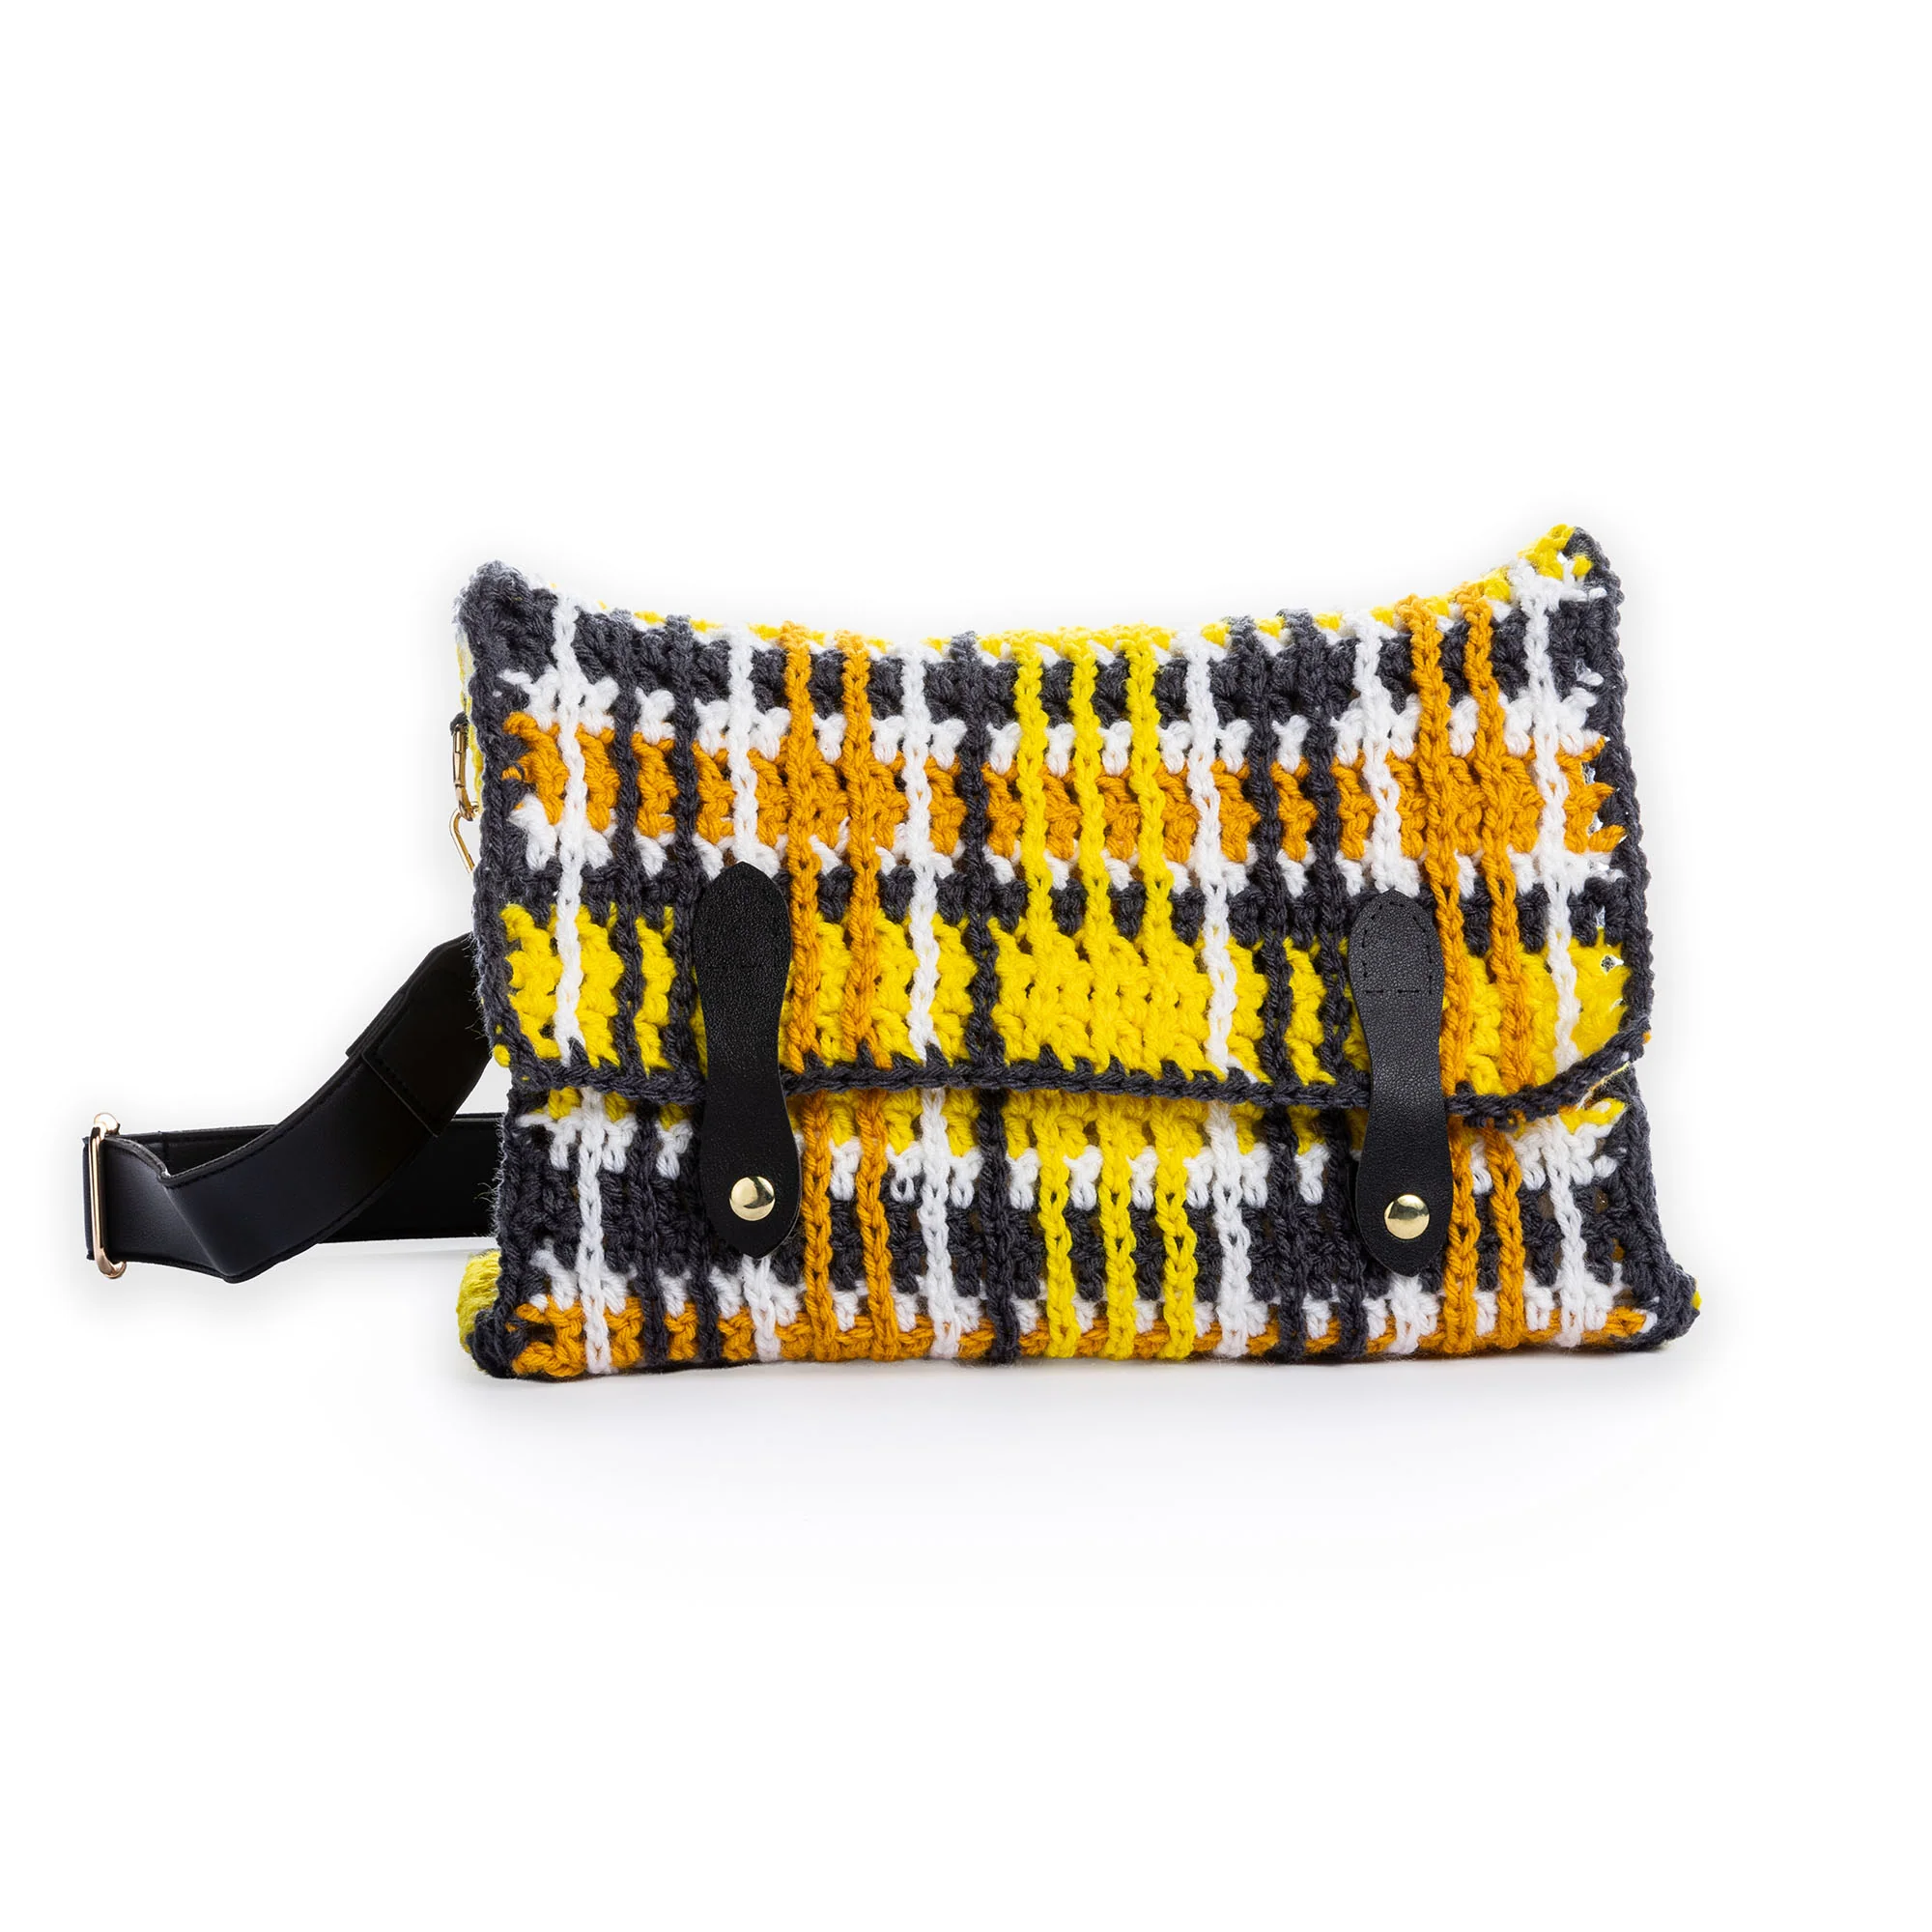
Looking to add a bit of edge to your accessory collection? This Crochet Punk Plaid Bag is the perfect project for anyone who wants a bold, alternative look without needing advanced crochet skills. By combining a simple mesh stitch with a strategic color-changing stripe pattern and vertical surface crochet, you can create a professional-looking “plaid” effect that looks far more complex than it actually is.
Whether you are a beginner looking for a rewarding project or an experienced maker wanting a quick, stylish bag, this tutorial will guide you through every step. This bag is designed to be sturdy, structured, and completely customizable—feel free to swap the bright yellows and charcoal for your own favorite color palette!
Materials & Abbreviations
To get started, gather the following materials. We recommend using a medium-weight acrylic yarn for durability and ease of care.
Supplies Needed
- Yarn: Medium 4 weight acrylic yarn in four contrasting colors:
- Color A: Bright Yellow (approx. 89 yards)
- Color B: Charcoal (approx. 121 yards)
- Color C: Soft White (approx. 85 yards)
- Color D: Gold (approx. 65 yards)
- Crochet Hook: Size I/9 (5.5 mm) or a size that helps you achieve the correct gauge.
- Notions: Yarn needle, sewing needle, and all-purpose thread.
- Hardware: 2 snap bag closures, two 1-inch metal D-rings, and an adjustable bag strap.
- Structure: 7-count plastic canvas (you will need pieces measuring 3.5″ x 12.5″ and two pieces measuring 3.5″ x 9″).
Abbreviations (US Terms)
- Approx: Approximately
- Beg: Beginning
- Ch: Chain
- Dc: Double crochet
- Sc: Single crochet
- Sl st: Slip stitch
- Sp: Space
- St(s): Stitch(es)
- RS: Right side
- WS: Wrong side
- Rep: Repeat
Gauge: 12 sc and 13 rows = 4 inches. For the Mesh Pattern, 13 sts and 7 rows = 4 inches.
Step-by-Step Instructions
Before starting the panels, keep two important notes in mind: first, a chain 3 at the beginning of any row counts as a double crochet (dc). Second, when changing colors, work your current stitch until there are only two loops left on the hook, then pull the new color through those loops to complete the stitch.
The Stripe Pattern
The plaid look is created by repeating a specific sequence of colors. This 11-row sequence is called the “Stripe Pat”:
- Color A: 3 rows
- Color B: 1 row
- Color C: 1 row
- Color D: 2 rows
- Color C: 1 row
- Color B: 2 rows
- Color C: 1 row
Creating the Main Panel
With Color A, chain 41.
Row 1 (RS): Work 1 dc in the 4th chain from the hook (this counts as 2 dc). *Chain 1, skip the next chain, work 1 dc in the next chain. Repeat from * until the last chain. Work 1 dc in the last chain. Turn. (You should have 39 stitches: 21 dc and 18 ch-1 spaces).
Row 2: Chain 3. *Work 1 dc in the next dc, chain 1, and skip the next ch-1 space. Repeat from * until the last 2 dc. Work 1 dc in each of the last 2 dc. Turn.
This second row establishes the “Mesh Pattern.” Continue working in this Mesh Pattern while following the 11-row Stripe Pattern sequence. Repeat the Stripe Pattern 5 times in total (for 55 rows total). Fasten off when complete.
Adding the Plaid Detail (Surface Crochet)
To create the vertical lines of the plaid, we will use surface slip stitches. With the right side (RS) of the Main Panel facing you, join Color C with a slip stitch to the first ch-1 space of the foundation row at the bottom right corner.
Working vertically, chain 1, and then slip stitch into the corresponding ch-1 space of the next row. Repeat this process up to the last row. Chain 1, slip stitch around the chain of the last row, and fasten off.
Repeat this vertical row 17 more times across the panel, changing colors in the following sequence from right to left: 2 rows Color D, 1 row Color C, 2 rows Color B, 1 row Color C, 3 rows Color A, 1 row Color B, 1 row Color C, 2 rows Color D, 1 row Color C, 2 rows Color B, 1 row Color C.
Finishing the Main Panel
Join Color B with a slip stitch to the top right corner of the Main Panel. Chain 1, and work single crochet (sc) evenly around the entire perimeter of the panel, placing 3 sc in each corner to keep the edges rounded. Join with a slip stitch to the first sc and fasten off.
Creating the Side Panels (Make 2)
With Color A, chain 11.
Row 1 (RS): Work 1 dc in the 4th chain from the hook (counts as 2 dc). (Chain 1, skip next ch, 1 dc in next ch) 3 times. Work 1 dc in the last chain. Turn. (9 sts: 6 dc and 3 ch-1 spaces).
Row 2: Chain 3. (1 dc in next dc, ch 1, skip next ch-1 sp) 3 times. Work 1 dc in each of the last 2 dc. Turn.
Continue in the Mesh Pattern while following the Stripe Pattern for a total of 16 rows. Fasten off.
Side Panel Surface Detail & Edging
Join Color A with a slip stitch to the bottom right corner of the Side Panel. Working vertically, chain 1 and slip stitch into the ch-1 spaces of each row until you reach the top. Fasten off. Repeat this for 2 more vertical rows, using Color A for all of them.
Join Color B to the top right corner of the Side Panel. Chain 1, and work sc evenly around the panel, placing 3 sc in each corner. Join with a slip stitch and fasten off.
Finishing the Bag
Now it is time to assemble your pieces and add the structural elements that make this a functional bag.
Assembly
Lay the Main Panel flat with the right side facing up. Align the long edge of the first Side Panel with the last 16 rows of the Main Panel. Using Color B and a yarn needle, start at the top edge. Working through the back loops of the edging rounds, sew the Main Panel and Side Panel together around three sides of the Side Panel. Repeat this process on the opposite side with the second Side Panel, ensuring they are perfectly aligned.
Adding Structure
To prevent the bag from sagging, we use plastic canvas:
- Cut one piece of plastic canvas to 3.5″ x 12.5″ and place it inside the bottom of the bag.
- Cut two pieces of plastic canvas to 3.5″ x 9″ and place them inside along the side panels.
- Using Color B and your yarn needle, whipstitch the top of the plastic canvas to the remaining edge of the Side Panel to secure it in place.
Hardware & Closing
Sew the D-rings to the right side of the Side Panels, approximately 1 inch down from the top edge. Attach your adjustable bag strap to each D-ring.
Finally, fold the remaining section of the Main Panel down to create the flap over the bag opening. Align the snap closures over the flap and sew them securely into place using your sewing needle and thread.
Tips for Success
- Tension is Key: When working the surface slip stitches, be careful not to pull too tightly, or the panel will bunch up. Keep your tension relaxed to ensure the plaid lines stay straight.
- Perfect Color Changes: To get a clean line between your stripes, always change color on the final pull-through of the stitch before the color change.
- Customizing the Look: If you want a more “grunge” look, try using muted tones like olive green, burgundy, and black. For a “pop-punk” look, go for neon pinks and electric blues!
- Sturdy Seams: When sewing the panels together, ensure you are only catching the back loop of the edging. This creates a cleaner seam and allows the bag to maintain its shape.