Adorable Crochet Chicken Pattern: Step-by-Step Amigurumi Tutorial
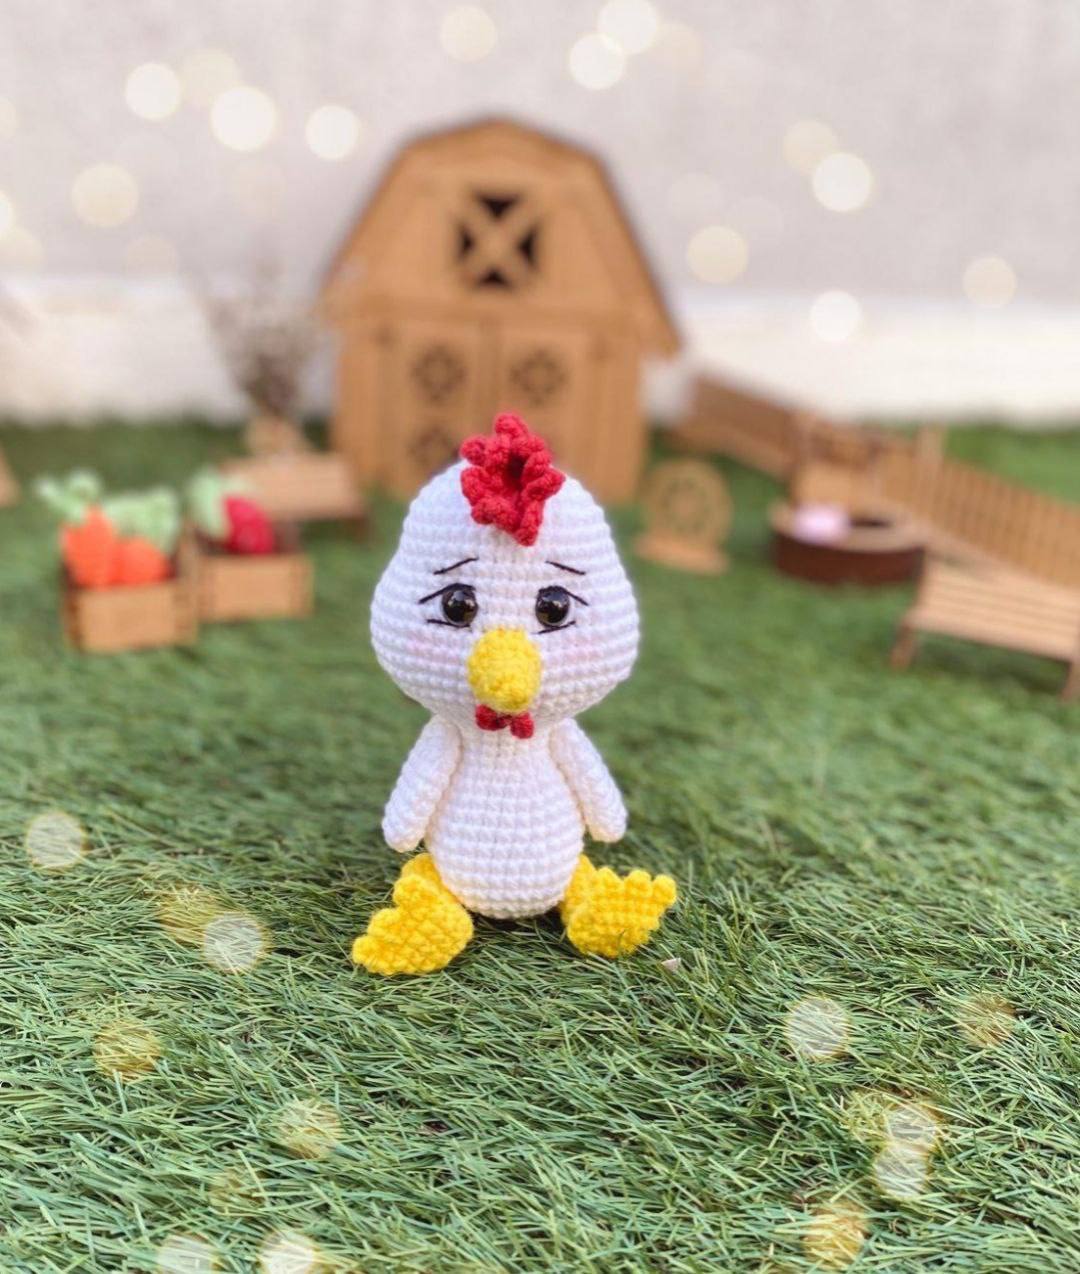
Looking for a delightful new project to add to your crochet collection? This adorable amigurumi chicken is the perfect blend of cute and cozy. Whether you are looking to make a sweet gift for a child, a quirky desk companion, or a farmhouse-style decoration for your home, this little hen is a joy to create. With its plump body, tiny wings, and expressive eyes, this chicken is sure to bring a smile to anyone’s face.
This pattern is designed to be beginner-friendly, utilizing basic amigurumi techniques. We will be working in continuous rounds, creating a seamless, plush toy. Grab your hooks and yarn, and let’s get started on this charming farmyard friend!
Materials & Abbreviations
To create your crochet chicken, you will need the following supplies. We recommend using a cotton or cotton-blend yarn for a clean, defined stitch that holds its shape well.
Materials Needed
- Yarn: Medium weight (Worsted) yarn in White, Yellow, and Red.
- Crochet Hook: 2.0mm (or a size that ensures your stitches are tight enough so the stuffing doesn’t show through).
- Safety Eyes: 9mm black safety eyes.
- Stuffing: High-quality polyester fiberfill.
- Embroidery Tools: Black and white embroidery floss for facial details, a yarn needle, stitch markers, and scissors.
Abbreviations (US Terms)
- MR: Magic Ring
- ch: Chain
- sc: Single crochet
- inc: Increase (two single crochet stitches in one stitch)
- dec: Decrease (invisible decrease recommended)
- sl st: Slip stitch
- FLO: Front Loop Only
- BLO: Back Loop Only
- st(s): Stitch(es)
Step-by-Step Instructions
The Head and Body
The head and body are worked as one continuous piece in white yarn. Start with the head and work your way down.
Head:
Round 1: 6 sc in MR (6)
Round 2: 6 inc (12)
Round 3: [1 sc, inc] x6 (18)
Round 4: [2 sc, inc] x6 (24)
Round 5: [3 sc, inc] x6 (30)
Round 6: [4 sc, inc] x6 (36)
Rounds 7-10: sc in each st around (36)
Round 11: 6 sc, 6 inc, 12 sc, 6 inc, 6 sc (48) — this creates the fullness of the cheeks
Rounds 12-17: sc in each st around (48)
Eye Placement: Place your 9mm safety eyes between rounds 12 and 13. Space them 6 stitches apart, centering them over the increases made in round 11.
Shaping the Head:
Round 18: 6 sc, dec, 12 sc, dec, 6 sc (36)
Round 19: sc in each st around (36)
Round 20: [4 sc, dec] x6 (30)
Round 21: [3 sc, dec] x6 (24)
Round 22: [2 sc, dec] x6 (18)
Stuff the head firmly with fiberfill.
The Body:
Round 23: Working in FLO, sc in each st around (18)
Rounds 24-25: sc in each st around (18)
Round 26: [2 sc, inc] x6 (24)
Round 27: sc in each st around (24)
Round 28: [3 sc, inc] x6 (30)
Rounds 29-31: sc in each st around (30)
Round 32: [4 sc, inc] x6 (36)
Rounds 33-35: sc in each st around (36)
Round 36: [4 sc, dec] x6 (30)
Round 37: [3 sc, dec] x6 (24)
Round 38: [2 sc, dec] x6 (18)
Stuff the body firmly.
Round 39: [1 sc, dec] x6 (12)
Round 40: dec around until the hole is closed (6). Fasten off and weave in the ends.
The Beak & Wattle
Beak (Yellow Yarn):
Round 1: 4 sc in MR (4)
Round 2: [1 sc, inc] x2 (6)
Round 3: sc in each st around (6)
Round 4: 6 inc (12)
Round 5: sc in each st around (12). Fasten off.
Wattle (Red Yarn):
Join red yarn to the last FLO stitch of the beak. Work [6 ch, sl st in the same stitch] x2. Fasten off and leave a tail for sewing.
The Comb
Comb (Red Yarn):
Row 1: 6 ch. Starting in the 2nd ch from the hook, work 5 sc.
Row 2: Work [6 ch, sc] repeatedly around the entire piece to create a ruffled, frilly look. Fasten off and leave a tail for sewing.
The Wings
Wings (White Yarn – Make 2):
Round 1: 6 sc in MR (6)
Round 2: 6 inc (12)
Rounds 3-4: sc in each st around (12)
Round 5: [3 sc, inc] x3 (15)
Rounds 6-7: sc in each st around (15)
Round 8: [3 sc, dec] x3 (12)
Round 9: sc in each st around (12)
Round 10: dec around until closed (6). Fasten off and leave a tail for sewing.
The Legs & Feet
Feet (Yellow Yarn – Make 2):
Round 1: 6 sc in MR (6)
Round 2: 6 inc (12)
Rounds 3-5: sc in each st around (12)
Round 6: Fold the piece in half. Work [4 ch, sc, sc] x3 across the edge to create the toes. Fasten off.
Legs (Yellow Yarn – Make 2):
Round 1: 6 sc in MR (6)
Round 2: [1 sc, inc] x3 (9)
Rounds 3-7: sc in each st around (9).
Lightly stuff the legs. Fasten off and leave a tail for sewing.
The Tail
Tail (White Yarn):
Ch 11, sl st into the first ch. Then work [10 ch, sl st into the first ch] x2 to create a small triple-looped tail. Fasten off and leave a tail for sewing.
Finishing & Assembly
Now comes the fun part: bringing your chicken to life! Use your yarn needle and the tails you left behind to sew the pieces together.
- The Beak: Sew the beak and wattle to the face between rounds 14 and 17.
- The Comb: Attach the red comb to the top of the head between rounds 1 and 6.
- The Wings: Sew the wings to the sides of the body between rounds 26 and 27.
- The Legs: First, sew the leg to the foot between rounds 1 and 3. Then, attach the leg to the body between rounds 35 and 36.
- The Tail: Sew the white tail to the back of the body between rounds 35 and 36.
- Face Details: Use your black embroidery floss to add eyelashes or small eyebrows above the safety eyes to give your chicken a personality!
Tips for Success
To ensure your crochet chicken looks professional and polished, keep these tips in mind:
- Tension is Key: When working with amigurumi, keep your tension tight. If you see gaps between your stitches, try dropping down a hook size.
- The Invisible Decrease: To avoid bumps in your work, use the “invisible decrease” method. Instead of a standard decrease, insert your hook into the front loop of the first stitch and then the front loop of the next stitch, completing the sc.
- Stuffing Technique: Stuff your pieces in small increments. It is easier to add more stuffing than to try and reshape a piece that is overstuffed.
- Symmetry: When sewing the wings and legs, use pins to mark the placement first. This ensures your chicken is balanced and won’t lean to one side.