Knit the Coziest Hat of the Season: The Deluxe Double-Cuff Beanie
How to Knit a Cozy Double-Cuff Beanie: Step-by-Step Pattern
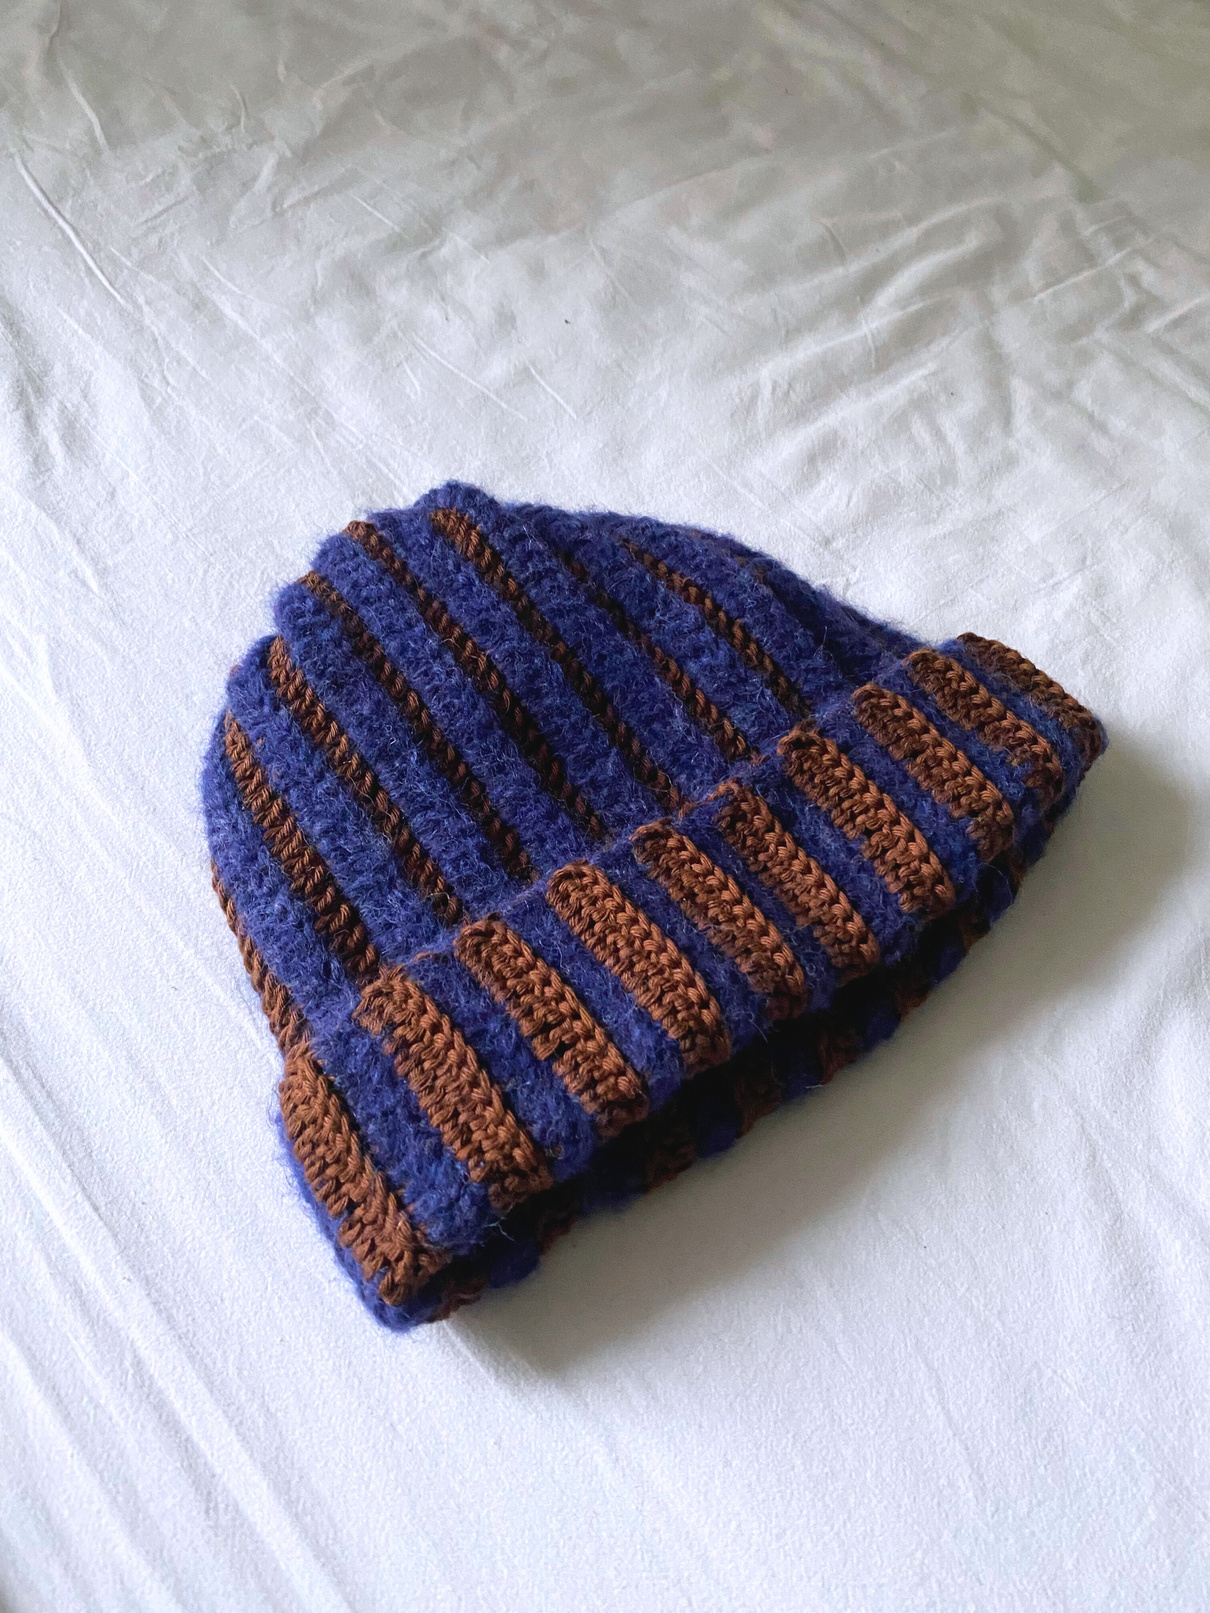
This classic, voluminous beanie is the perfect project for adding warmth and style to your winter wardrobe. Featuring a unique double-folded cuff for extra volume and decorative i-cord detailing, this unisex design is suitable for women, men, and children.
Project Details & Sizing
This pattern is designed for four different sizes to ensure a perfect fit.
- Sizes: (XXS/XS) XS/S (S/M) M/L
- Head Circumference: (49-51) 53-55 (55-57) 58-60 cm / (approx. 19-20) 21 (22) 23 inches
Materials Needed
Yarn
This beanie uses a combination of textures for a professional look:
- Lower Section (Cuff): (50-100) 100 (100) 100g of a boucle-style yarn (e.g., Teddy Dear), worked with a single strand.
- Upper Section (Crown): (50) 50 (50) 50g of a smooth wool or cashmere blend, worked by holding two strands together.
Tools
- 4.5 mm circular needles (40 cm or 80 cm length)
- Double-pointed needles (DPNs) for the crown decreases
- 4.5 mm double-pointed needle for i-cord detailing
- Tapestry needle for finishing
- Stitch markers
Gauge
Using 4.5 mm needles in stockinette stitch: 15 sts / 24 rows = 10 x 10 cm (4 x 4 inches).
Note: Please knit a swatch first, as needle size may vary depending on your tension.
Knitting Abbreviations
- K: Knit
- P: Purl
- K2tog: Knit 2 stitches together (right-leaning decrease)
- SSK: Slip, slip, knit (left-leaning decrease)
- K3tog: Knit 3 stitches together (double decrease)
- M0-M7: Markers 0 through 7
Step-by-Step Instructions
Phase 1: The Body and Cuff
- Cast on (60) 68 (72) 76 stitches using the boucle yarn and 4.5 mm circular needles.
- Join the knitting in the round, being careful not to twist. Place a marker (M0) to indicate the start of the round.
- Knit in stockinette stitch (knit every stitch) until the piece measures (24) 27 (27) 30 cm.
- In the next round, place 7 additional markers (M1-M7) as follows:
(14) 16 (17) 18 K, M1, 1 K, M2, (14) 16 (17) 18 K, M3, 1 K, M4, (14) 16 (17) 18 K, M5, 1 K, M6, (14) 16 (17) 18 K, M7, 1 K.
Phase 2: The Transition
- Switch to the smooth yarn, holding two strands together. Continue using 4.5 mm needles.
- Pro Tip: The beanie is designed so that the reverse side of the boucle yarn faces outward on the cuff for a fluffier appearance.
- Continue knitting in stockinette stitch, but now work 1 purl stitch between the markers:
(14) 16 (17) 18 K, M1, 1 P, M2, (14) 16 (17) 18 K, M3, 1 P, M4, (14) 16 (17) 18 K, M5, 1 P, M6, (14) 16 (17) 18 K, M7, 1 P. - Knit for a total of (10) 12 (15) 17 rounds, which should measure approximately (4) 5 (6) 7 cm.
Phase 3: Shaping the Crown
Work decreases every 2nd round a total of (6) 7 (7) 8 times.
- Round 1 (Decrease Round): K2tog, K until 2 sts before M1, SSK, M1, 1 P, M2, K2tog, K until 2 sts before M3, SSK, M3, 1 P, M4, K2tog, K until 2 sts before M5, SSK, M5, 1 P, M6, K2tog, K until 2 sts before M7, SSK, M7, 1 P.
- Round 2: Knit all stitches, maintaining the 1 purl stitch at each marker.
After the first decrease round, 8 stitches are reduced. As the circumference shrinks, you may switch to double-pointed needles.
Final Decreases:
- For XXS/XS, XS/S, or M/L: Work one more decrease round: K2tog, M1, 1 P, M2, K2tog, M3, 1 P, M4, K2tog, M5, 1 P, M6, K2tog, M7, 1 P, M0.
- For S/M: Work one more decrease round using K3tog: K3tog, M1, 1 P, M2, K3tog, M3, 1 P, M4, K3tog, M5, 1 P, M6, K3tog, M7, 1 P, M0.
Now (8) 8 (8) 8 stitches remain. Cut the yarn, thread it through a needle, pull it through the remaining loops, tighten firmly, and weave in the ends.
Adding the Decorative I-Cord
The decorative seams on the crown are created using i-cord along the purl stitch lines.
- Cast on 3 stitches onto a 4.5 mm double-pointed needle using two strands of the smooth yarn.
- Pick up 1 stitch from the bottom-most purl stitch where the boucle yarn meets the smooth yarn.
- Move the 4 stitches to the opposite end of the needle, K2, SSK.
- Repeat this process, picking up one purl stitch per row as you move up toward the crown.
- Once you reach the top, knit one round of 3 K stitches, then work the i-cord back down the opposite side of the purl line.
- Finish by picking up the final purl stitch at the bottom. Cut the yarn and weave in the ends on the inside of the hat.
- Repeat the process for the final i-cord, starting from the crown intersection to avoid overlap.
Finishing Touches
- Washing: If desired, wash the beanie and allow it to air dry completely.
- The Cuff: Once dry, fold the cuff twice so that the height of the folded edge is approximately (8) 9 (9) 10 cm.
- Securing: Use a needle and thread to stitch the edges of the cuff in place for a secure fit.