Adorable Mini Crochet Lamb Pattern: Step-by-Step Tutorial for a Cute Magnet or Keychain
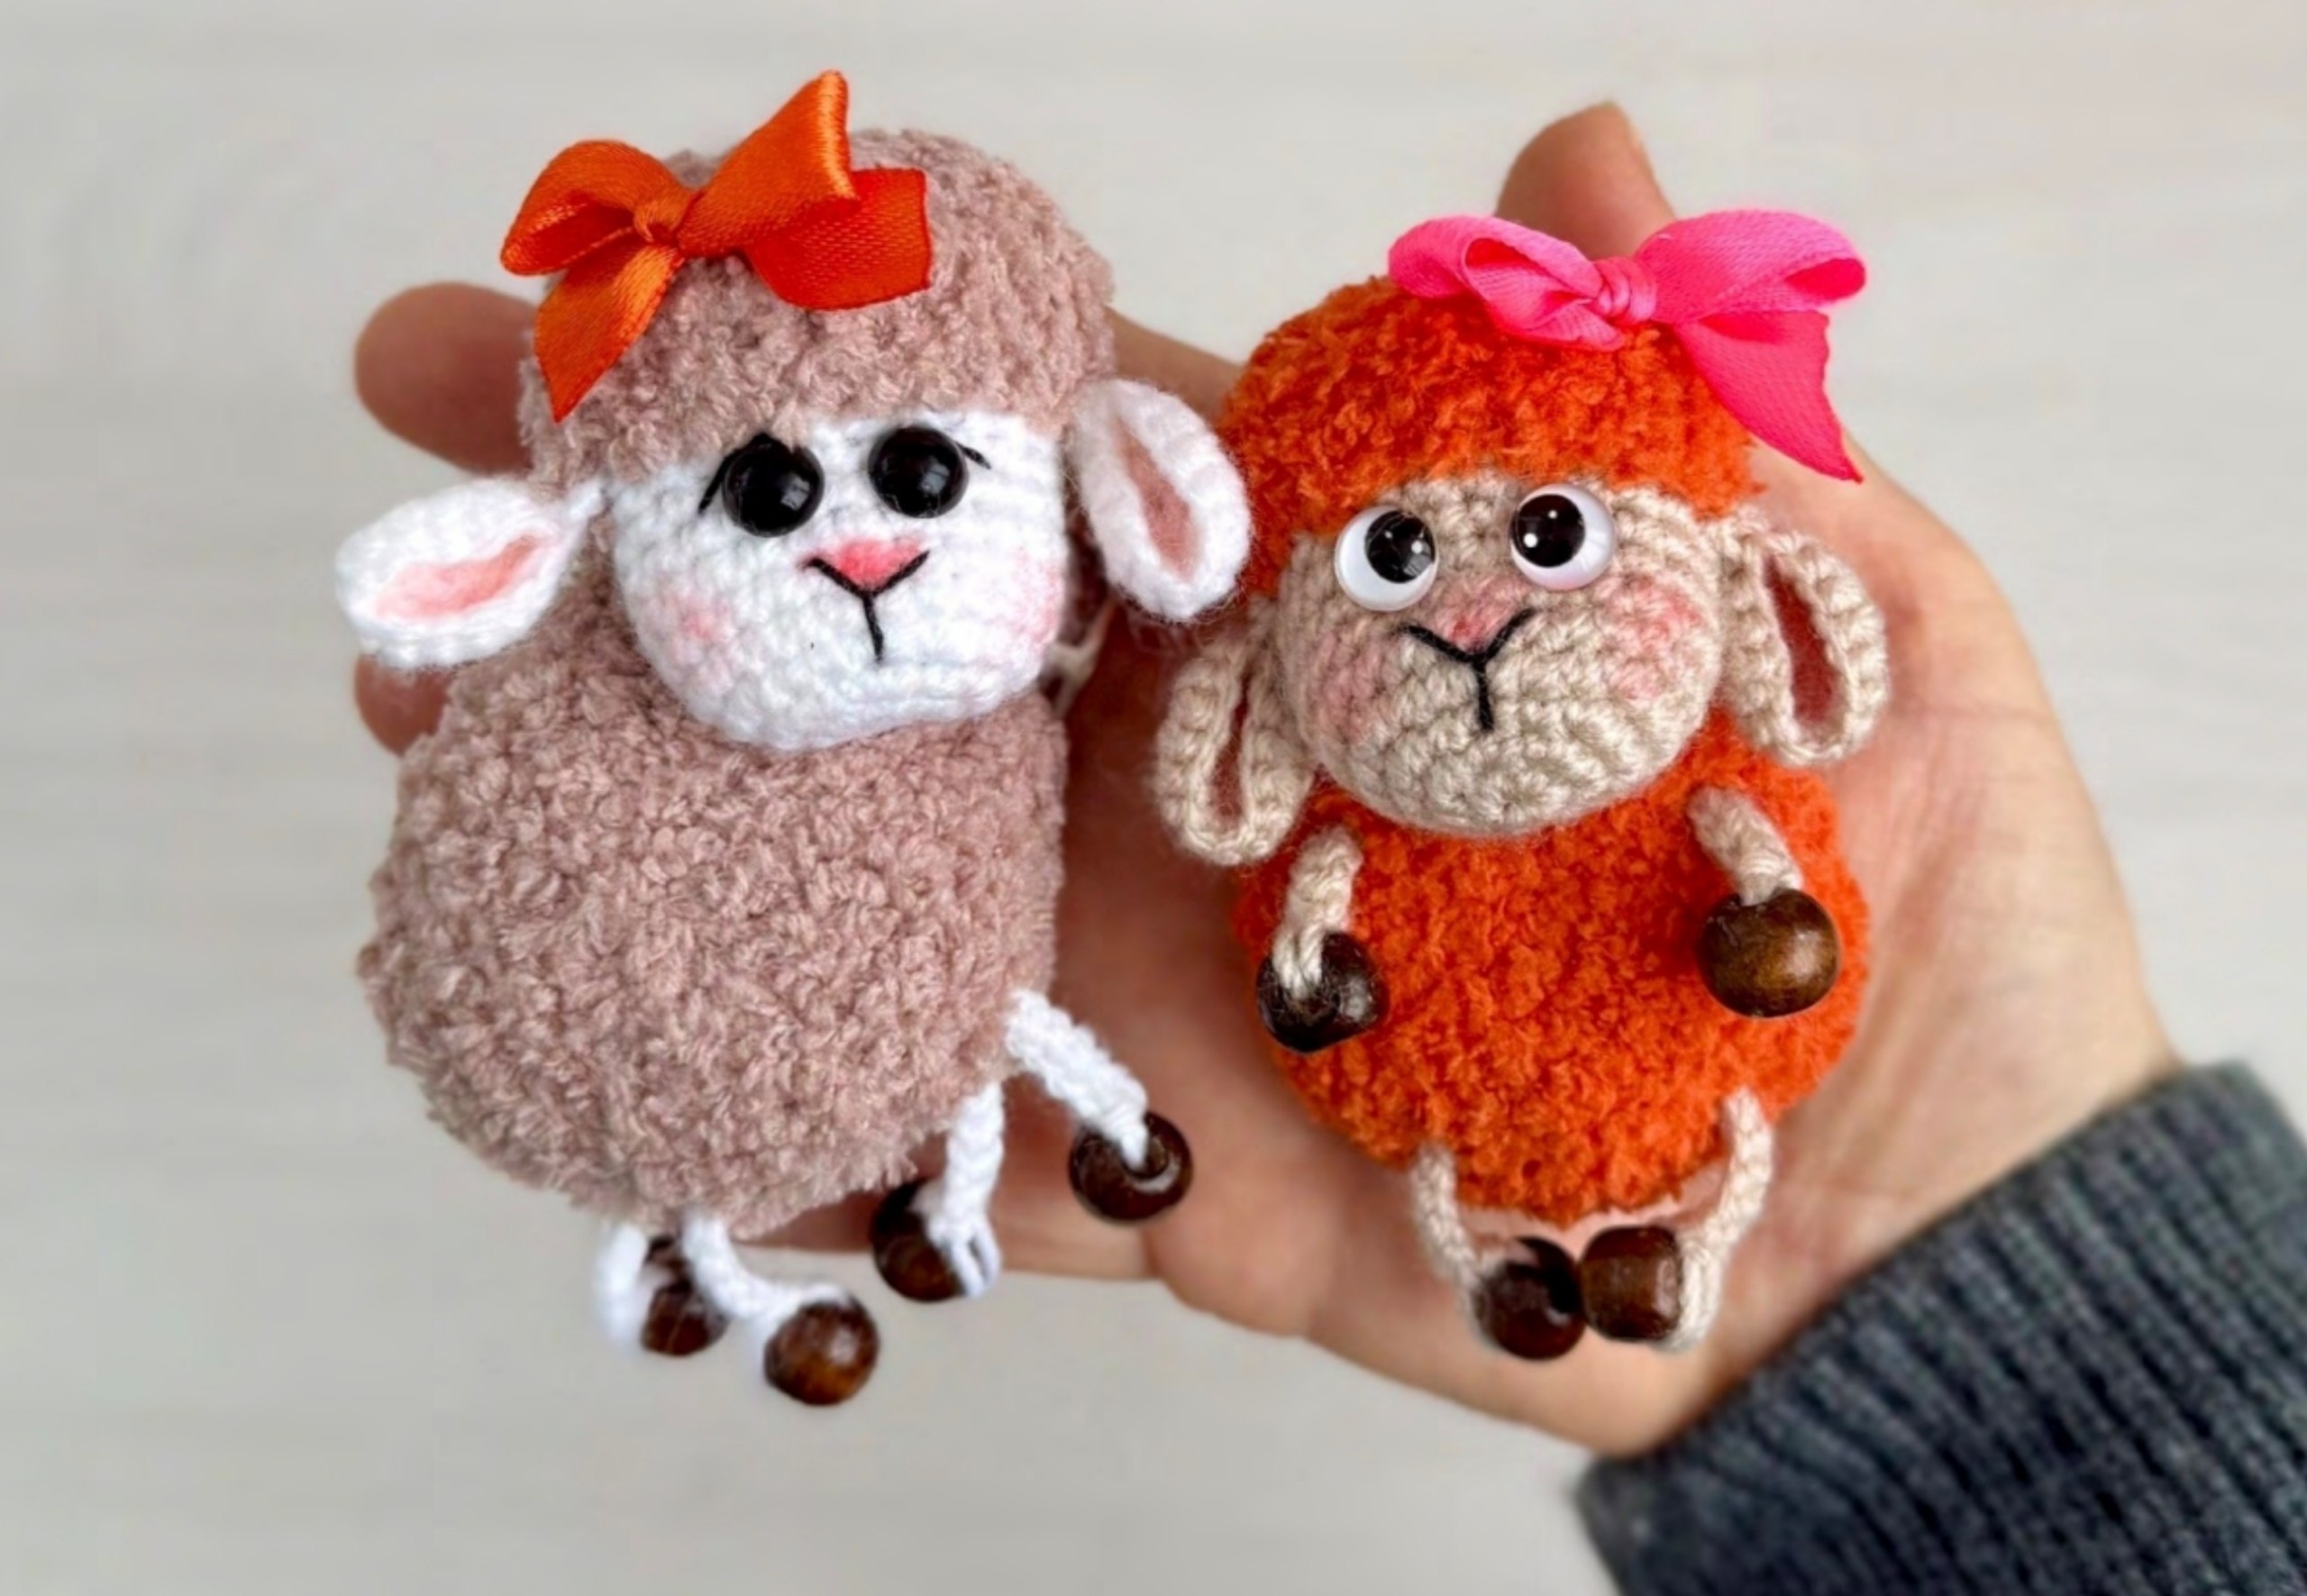
Looking for a quick and delightful project to brighten up your day? This mini crochet lamb is the perfect blend of cozy and cute. Whether you want to create a whimsical refrigerator magnet, a charming keychain, or a tiny desk companion, this little lamb is an ideal project for crafters of all levels. With its soft, fluffy texture and sweet expression, it makes a wonderful handmade gift or a great addition to your amigurumi collection.
In this tutorial, we will guide you through the process of creating this tiny sheep using a combination of smooth cotton-blend yarn for the face and plush chenille yarn for the body to give it that signature “woolly” look. The finished lamb measures approximately 2.4 by 2.8 inches, making it a truly pocket-sized friend.
Materials & Abbreviations
To get started, gather the following supplies. We recommend using a plush yarn for the body to achieve the maximum “fluff” factor!
Supplies Needed
- Plush/Chenille Yarn: (Example: Alize Softi or similar velvet yarn) approximately 3.5 oz / 130 yards.
- Cotton-Blend Yarn: (Example: YarnArt Jeans or a similar sport-weight yarn) for the face and legs.
- Crochet Hooks: 1.7 mm and 2.0 mm for the smooth yarn, and 3.5 mm for the plush yarn.
- Safety Eyes: 8 mm size.
- Wooden Beads: 10 mm (used for the hooves).
- Magnet: Neodymium magnet (10 mm x 3 mm) if making a magnet.
- Stuffing: Polyester fiberfill.
- Tools: Super glue, a large-eye yarn needle, and colored pencils (pink or peach) for adding blush to the cheeks.
US Crochet Abbreviations
- MR: Magic Ring
- sc: Single Crochet
- inc: Increase (two sc in one stitch)
- dec: Decrease (sc two stitches together)
- ch: Chain
- sl st: Slip Stitch
- st: Stitch
- (…) * n: Repeat the instructions inside the parentheses the specified number of times.
Step-by-Step Instructions
The Ears (Make 2)
Use your smooth cotton-blend yarn and a 1.7 mm hook.
- Round 1: 6 sc into a MR (6)
- Round 2: (inc) * 6 (12)
- Round 3: (1 sc, inc) * 6 (18)
Finishing the Ear: Fold the ear in half. Crochet 2 sc through both layers to close the side. This creates a small fold/indentation at the corner, which allows the ear to look more natural when attached to the head.
The Legs (Make 4)
The legs are a unique construction using beads for the hooves.
- Leave a tail of about 2.5 inches (6 cm).
- Chain 7.
- Slide a 10 mm wooden bead onto the chain.
- Working back down the chain, place one slip stitch (sl st) into each chain stitch until you reach the bead. The bead should now be securely trapped in the loop at the end of the leg.
- Fasten off, leaving another 2.5-inch tail. These tails will be used to sew the legs into the body later.
The Face
Start with the smooth cotton-blend yarn and a 1.7 mm hook.
- Round 1: 6 sc into a MR (6)
- Round 2: (inc) * 6 (12)
- Round 3: (1 sc, inc) * 6 (18)
- Round 4: (2 sc, inc) * 6 (24)
- Rounds 5-10: sc in each st around (24)
Switch to plush yarn and a 2.0 mm hook for the top of the head:
- Round 11 (Attaching Ears): 5 sc. Place the first ear against the head and crochet 2 sc through both the ear and the head. 1 inc, 7 sc, 1 inc, 1 sc. Place the second ear against the head and crochet 2 sc through both the ear and the head. 4 sc, 1 inc (27)
- Rounds 12-13: sc in each st around (27)
- Round 14: (7 sc, dec) * 3 (24)
- Round 15: (2 sc, dec) * 6 (18)
- Round 16: (1 sc, dec) * 6 (12)
Stuff the head lightly—do not overstuff, or the face will lose its shape. Finally, complete Round 17 with 6 dec (6). Fasten off and weave in the ends.
The Body
Use the plush yarn and a 3.5 mm hook.
- Round 1: 6 sc into a MR (6)
- Round 2: (inc) * 6 (12)
- Round 3: (1 sc, inc) * 6 (18)
- Round 4: (2 sc, inc) * 6 (24)
- Round 5: (3 sc, inc) * 6 (30)
- Rounds 6-9: sc in each st around (30)
- Round 10: (3 sc, dec) * 6 (24)
- Round 11: (2 sc, dec) * 6 (18)
Important Step: Before stuffing, sew the four legs into the bottom of the body using the tails left from the leg construction.
- Round 12: (1 sc, dec) * 6 (12)
Stuffing Tip: If you are making a magnet, stuff the body loosely and flatten it slightly. If you are making a keychain, stuff it firmly for a rounder look.
- Round 13: (dec) * 6 (6)
Fasten off and close the hole tightly.
Finishing Touches
Assembly and Details
- Attaching the Head: Sew the head to the body. You can center the head for a classic look (flattening the body slightly so the head sits on top) or sew it slightly to the side for a more whimsical, “leaning” appearance.
- The Eyes: Place the safety eyes one row above where the nose will be, leaving 2 sc spaces between them.
- Embroidering the Nose: Using a dark thread, count 4-5 rows down from the plush “cap” of the head. Stitch a small triangle (about 2 stitches wide and 1 row high). Then, stitch a small vertical line (about 2 rows long) extending downward from the center of the triangle.
- Adding Color: Use a colored pencil to lightly shade the ears, the tip of the nose, and the cheeks to give your lamb a soft, blushing glow.
- The Magnet: If creating a magnet, use a drop of super glue to attach the neodymium magnet to the center of the lamb’s back.
- Accessories: Feel free to add a tiny ribbon bow to the top of the head for extra cuteness!
Tips for Success
- Tension Control: When working with plush yarn, be careful not to pull too tight, as the stitches can stretch or the yarn may split.
- Hiding the Magic Ring: Since this is a small project, ensure your magic ring is pulled very tight to avoid any gaps where the stuffing might peek through.
- Customization: This pattern is a great base for other animals! Change the ear shape or the yarn color to make a mini pig, a teddy bear, or a colorful fantasy creature.
- Yarn Substitutes: If you don’t have chenille yarn, you can use a bulky wool or acrylic blend, though the “fluffy” look will differ.