How to Crochet a Rainbow Rabbit: A Cute and Easy Amigurumi Tutorial
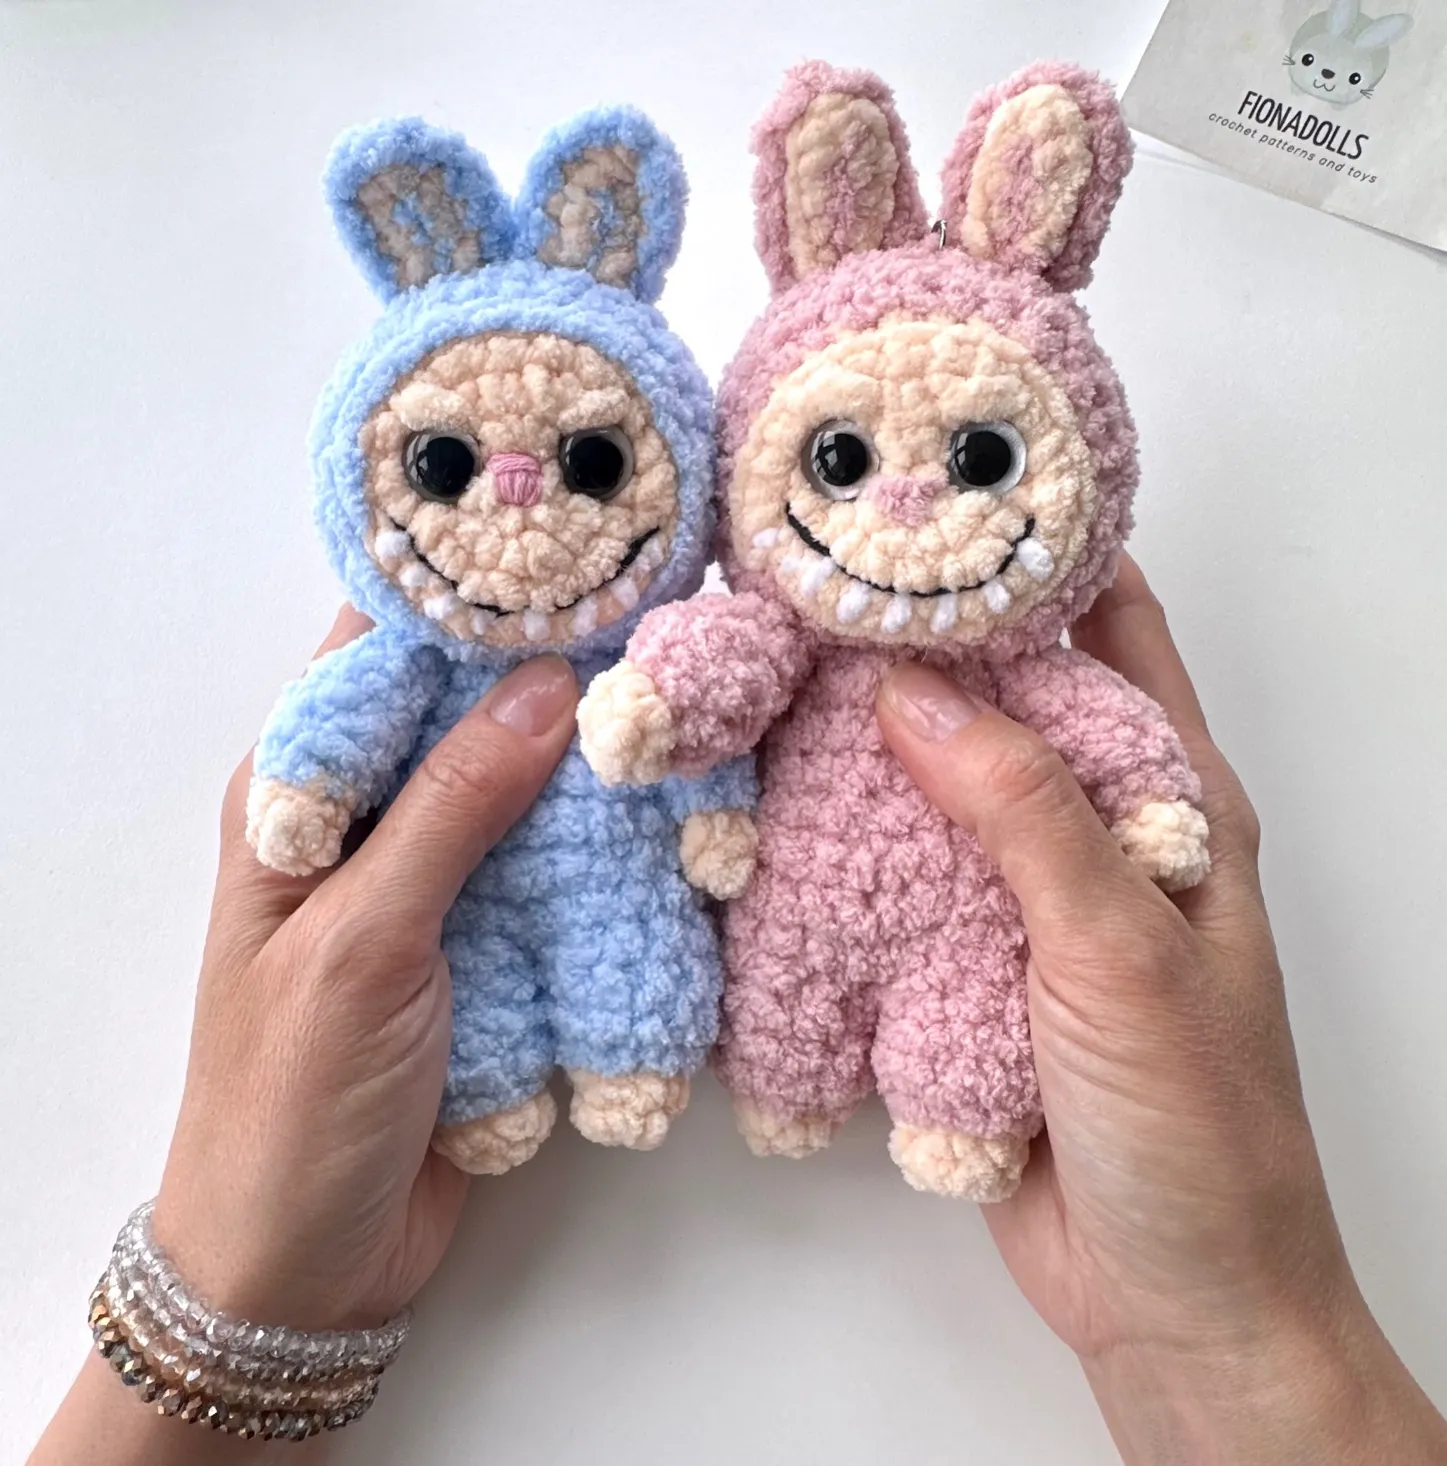
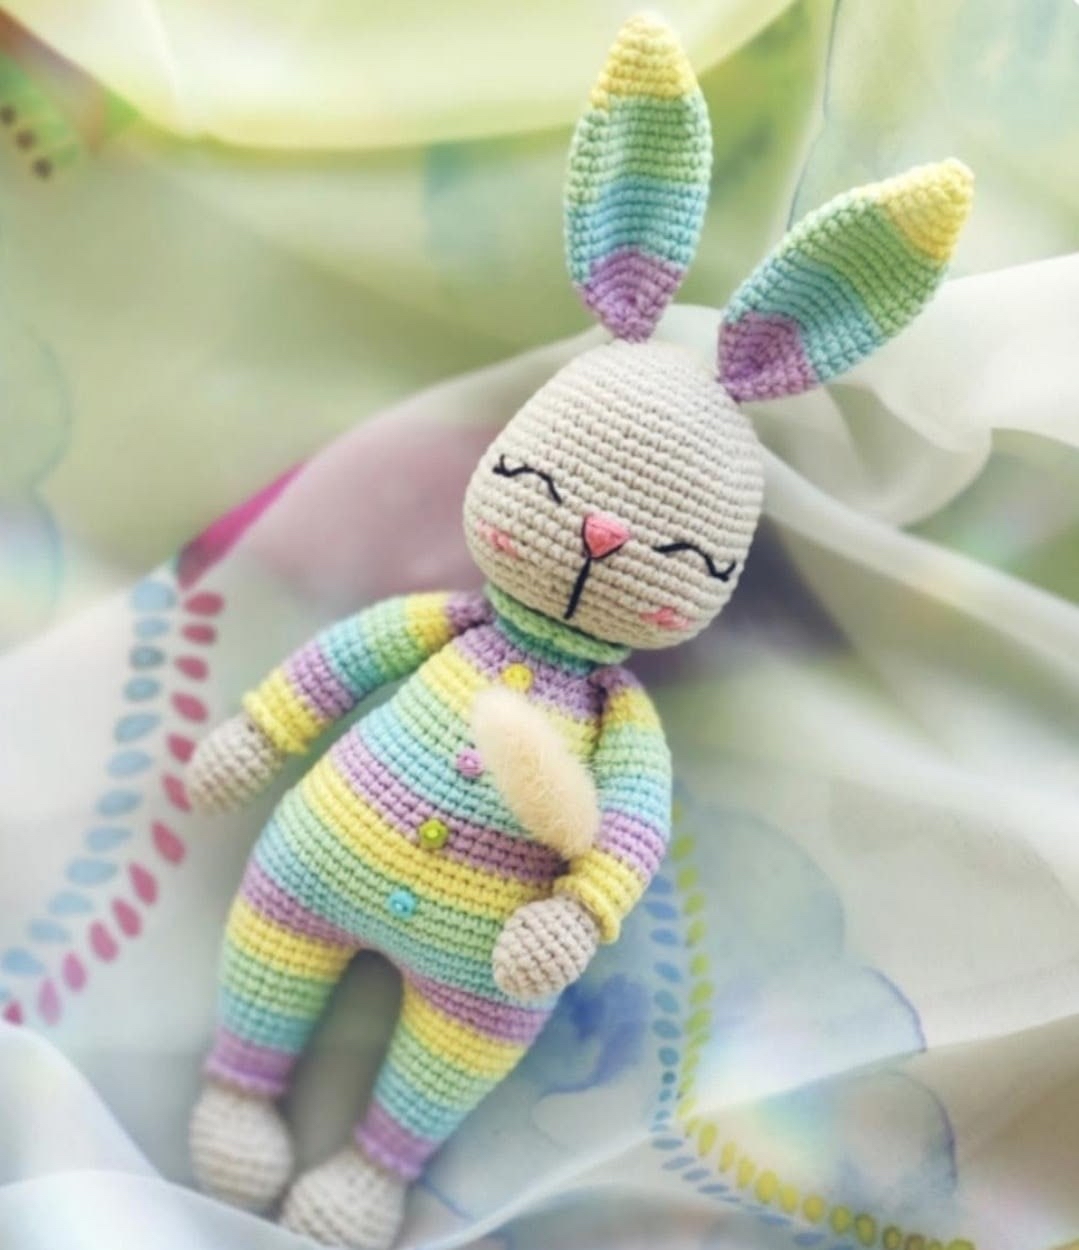
If you are looking for your next adorable crochet project, look no further! This Rainbow Rabbit is the perfect blend of whimsical colors and cozy vibes. This amigurumi project is designed with a soft, pastel rainbow palette that makes it an instant favorite for nurseries, children’s rooms, or even as a colorful gift for a fellow crafter. Best of all, this pattern is categorized as “easy,” making it an excellent choice for beginners who are comfortable with basic stitches or for experienced crocheters looking for a relaxing, meditative project.
Once finished, your little bunny will stand approximately 11 inches tall, making it the perfect size to cuddle or display on a shelf. Follow along with this detailed guide to create your very own sleeping rainbow rabbit!
Materials & Abbreviations
To ensure your rabbit turns out exactly like the one in the photos, it is important to use the right weight of yarn. We recommend using a fine-weight cotton/acrylic blend to achieve the tight, clean stitches necessary for amigurumi.
What You Will Need
- Yarn (Weight: Fine/Lightweight, 55% Cotton, 45% Polyacrylic): You will need one ball or less of each of the following colors:
- Grey (for the head, arms, and legs)
- Purple
- Blue
- Yellow
- Green
- Crochet Hook: 2.25mm (or the size required to get a tight tension).
- Stuffing: Synthetic fiberfill.
- Embroidery Thread: Black and pink thread for the eyes, nose, and cheeks.
- Assembly Tools: A yarn needle, scissors, and colored buttons (optional, if you want to add little buttons to the bunny’s pajamas).
- Stitch Marker: To keep track of the start of each round.
Abbreviations (US Terms)
This pattern uses standard US crochet terminology. Please review these before you begin:
- ch: chain
- MR: magic ring (or amigurumi ring)
- sl st: slip stitch
- sc: single crochet
- dc: double crochet
- BLO: worked into back loop only
- FLO: worked into front loop only
- inc: increase (2 sc stitches in the same stitch)
- dec: decrease (2 sc stitches worked together)
- (…)xn: repeat the instructions inside the parentheses n times
- …N: total number of stitches in the round
Step-by-Step Instructions
The Head
We will start the head using your grey yarn. Remember to work in continuous rounds.
- 6 sc into MR (6)
- 6 inc (12)
- (1 sc, inc) x 6 (18)
- 1 sc, inc, (2 sc, inc) x 5, 1 sc (24)
- (3 sc, inc) x 6 (30)
- 2 sc, inc, (4 sc, inc) x 5, 2 sc (36)
- (5 sc, inc) x 6 (42)
- (13 sc, inc) x 3 (45)
- 45 sc (45)
- (14 sc, inc) x 3 (48)
- 11-13. 48 sc (48)
- 14. (7 sc, inc) x 6 (54)
- 15-16. 54 sc (54)
- 17. (8 sc, inc) x 6 (60)
- 18-20. 60 sc (60)
- 21. 4 sc, dec, (8 sc, dec) x 5, 4 sc (54)
- 22. (7 sc, dec) x 6 (48)
- 23. 3 sc, dec, (6 sc, dec) x 5, 3 sc (42)
Note on Embroidery: Before you finish stuffing the head, we need to add the face. Between rounds 15 and 16, embroider the sleeping eyes. Ensure the distance between the two eyes is exactly 7 loops. While you are at it, embroider the small pink nose and the cute little cheeks.
- Begin stuffing the head firmly.
- (5 sc, dec) x 6 (36)
- (1 sc, dec) x 12 (24)
- (2 sc, dec) x 6 (18)
Fasten off, leaving a long tail for sewing the head to the body.
The Ears (Make 2)
The ears feature a beautiful rainbow gradient. Start with yellow yarn.
- 6 sc into MR (6)
- (1 sc, inc) x 3 (9)
- (2 sc, inc) x 3 (12)
- 12 sc (12)
- (3 sc, inc) x 3 (15)
- (4 sc, inc) x 3 (18)
Switch to green yarn:
- (5 sc, inc) x 3 (21)
- 21 sc (21)
- (6 sc, inc) x 3 (24)
- 10-12. 24 sc (24)
Switch to blue yarn:
- 13-17. 24 sc (24)
Switch to purple yarn:
- (6 sc, dec) x 3 (21)
- (5 sc, dec) x 3 (18)
- (4 sc, dec) x 3 (15)
- (3 sc, dec) x 3 (12)
- 12 sc (12)
Fasten off, leaving a long tail. Fold the eyelet in half and sew the two sides together. Sew the ears onto the head between rounds 4 and 5.
The Arms (Make 2)
Use grey yarn for the base of the arms.
- 6 sc into MR (6)
- 6 inc (12)
- (3 sc, inc) x 3 (15)
- 4-6. 15 sc (15)
- (3 sc, dec) x 3 (12)
- (2 sc, dec) x 3 (9)
- (2 sc, inc) x 3 (12)
Switch to yellow yarn:
- 10. FLO: (3 sc, inc) x 3 (15)
- 11-12. 15 sc (15)
Switch to purple yarn:
- 13-15. 15 sc (15)
Switch to blue yarn:
- 16-17. 15 sc (15)
- 18. 6 sc, 2 dec, 5 sc (13)
Switch to green yarn:
- 19. 2 inc, 11 sc (15)
- 20-21. 15 sc (15)
Switch to yellow yarn:
- (3 sc, dec) x 3 (12)
- 23-24. 12 sc (12)
Switch to purple yarn:
- 25-26. 12 sc (12)
Important: Stuff the arms lightly, but do not overstuff them, or they will stick out awkwardly from the sides of the body. Fold the part in half, attach the two sides, and crochet 6 sc across the opening. To attach to the body later, go back to round 10 and use a yellow thread to tie the arm to the front of that round.
The Legs (Make 2)
Start the first leg with grey yarn. Chain 6, then work from the second loop from the hook:
- inc, 3 sc, 3 sc in one loop, 4 sc (12)
- 2 inc, 3 sc, 3 inc, 3 sc, inc (18)
- (1 sc, inc) x 2, 3 sc, (1 sc, inc) x 3, 4 sc, inc (24)
- 4-6. 24 sc (24)
- 7. 8 sc, (1 sc, dec) x 3, 7 sc (21)
- 8. 9 sc, 3 dec, 6 sc (18)
- 9. (1 sc, dec) x 6 (12)
- 10-11. 12 sc (12)
Switch to purple yarn:
- 12. BLO: (3 sc, inc) x 3 (15)
- 13. 15 sc (15)
- 14. (4 sc, inc) x 3 (18)
Switch to blue yarn:
- 15-16. 18 sc (18)
- 17. (5 sc, inc) x 3 (21)
Switch to green yarn:
- 18-19. 21 sc (21)
- 20. (6 sc, inc) x 3 (24)
Switch to yellow yarn:
- 21-23. 24 sc (24)
Fasten off and weave in the ends. For the second leg, repeat everything up to round 22. In round 23, you can choose to crochet between 16 and 19 sc to adjust the fit. When you eventually connect them, position the feet so they are slightly turned inward.
The Body
To create the body, we will join the two legs together.
- Switch to purple yarn on the first leg: 13 sc, chain 3, connect to the second leg, then crochet 24 sc along the chain, 3 sc along the chain, and 11 sc on the first leg (54).
- (6 sc, inc) x 2, 1 sc, inc, 6 sc, inc, 10 sc, inc, 6 sc, inc, 1 sc, (inc, 5 sc) x 2 (62)
- 3. 62 sc (62)
Switch to blue yarn:
- 4-6. 62 sc (62)
Switch to green yarn:
- 7. 62 sc (62)
- 8. 6 sc, dec, 18 sc, dec, 34 sc (60)
- 9. (13 sc, dec) x 4 (56)
Switch to yellow yarn:
- 10. 10 sc, dec, 6 sc, dec, 36 sc (54)
- 11. 54 sc (54)
- 12. (7 sc, dec) x 6 (48)
Switch to purple yarn:
- 13. 48 sc (48)
- 14. (6 sc, dec) x 6 (42)
- 15. 42 sc (42)
Switch to blue yarn:
- 16-18. 42 sc (42)
Switch to green yarn:
- 19. (5 sc, dec) x 6 (36)
- 20-21. 36 sc (36)
Switch to yellow yarn:
- 22-23. 36 sc (36)
- 24. (4 sc, dec) x 6 (30)
Switch to purple yarn:
- 25. 30 sc (30)
- 26. (3 sc, dec) x 6 (24)
- 27. 24 sc (24)
Switch to blue yarn:
- 28. 24 sc (24)
- 29. (2 sc, dec) x 6 (18)
- 30. 18 sc (18)
Fasten off and weave in the ends.
The Collar
To add a little extra charm, we’ll make a small collar. Attach green thread to the middle of the bunny’s back. Make 1 chain, then crochet the following using the back loop only (BLO): (3 dc in one loop, 1 sc) x 9, and finish with a slip stitch (sl st) into a chain. Fasten off and weave in the ends.
Finishing
Toy Assembly
Now it is time to bring your rainbow rabbit to life! Use your yarn needle to sew the pieces together:
- The Head: Sew the head onto the top of the body. Make sure you are attaching it to the front loops only of the 30th round of the body.
- The Arms: Sew the arms between the 27th and 28th rounds of the body.
- Decoration: If you want a little extra personality, you can sew small colored buttons onto the bunny’s “pajamas” (the body).
Tips & Care
To keep your Rainbow Rabbit looking beautiful for years to come, follow these simple care instructions:
- Sunlight: Avoid leaving your toy in direct sunlight for long periods, as this can fade the beautiful rainbow colors.
- Cleaning: If your bunny gets dusty, use a soft brush to gently remove it. For deeper cleaning, hand wash in water that does not exceed 86°F. Use a mild detergent, such as a delicate fabric shampoo or baby clothes detergent. Never use bleach or stain removers!
- Drying: Gently squeeze the toy to remove excess water (do not wring or twist it). Lay it flat to dry in a well-ventilated room or in the shade outdoors. Do not hang the toy to dry.
- Pro-Tip for Dust Mites: Because this toy uses natural materials, it is a good idea to periodically deep-clean it by placing it in the freezer for 48 hours at a temperature of 14°F to eliminate any dust mites.
Happy crocheting!