Funny Bag Crochet Pattern: A Quirky Amigurumi Backpack
The Cutest Little Bag You’ll Ever Make
Hello, my creative crochet friend! Have you ever looked at a bag and thought, “You know what this needs? A personality!”? Well, today is your lucky day.
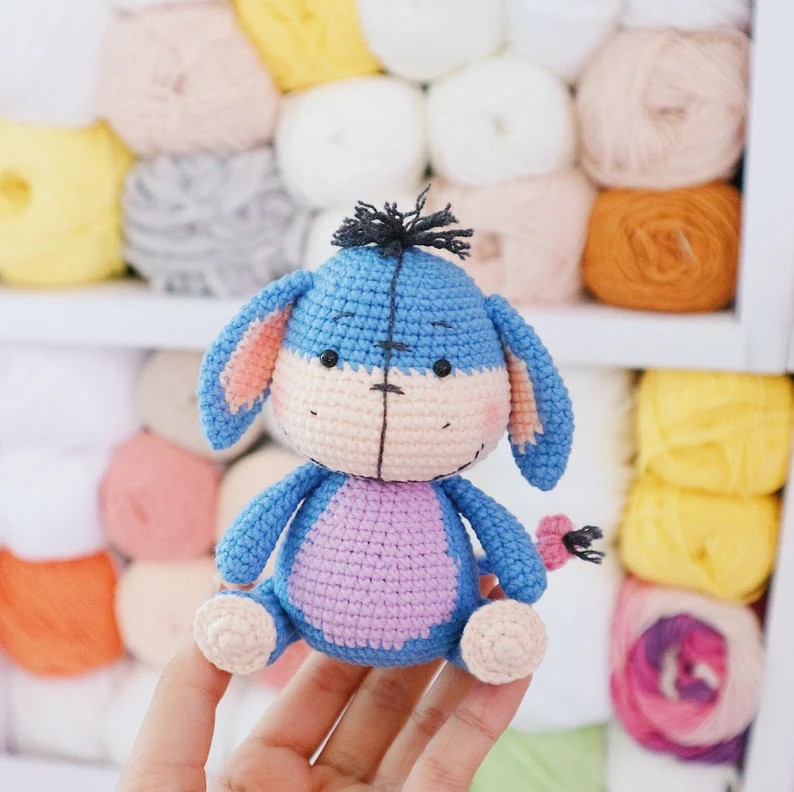
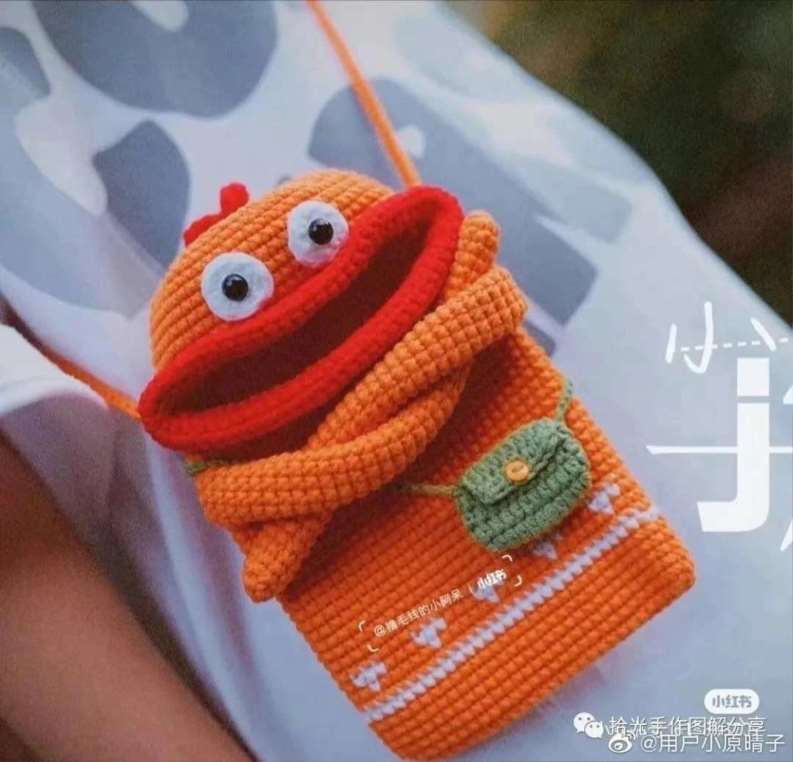
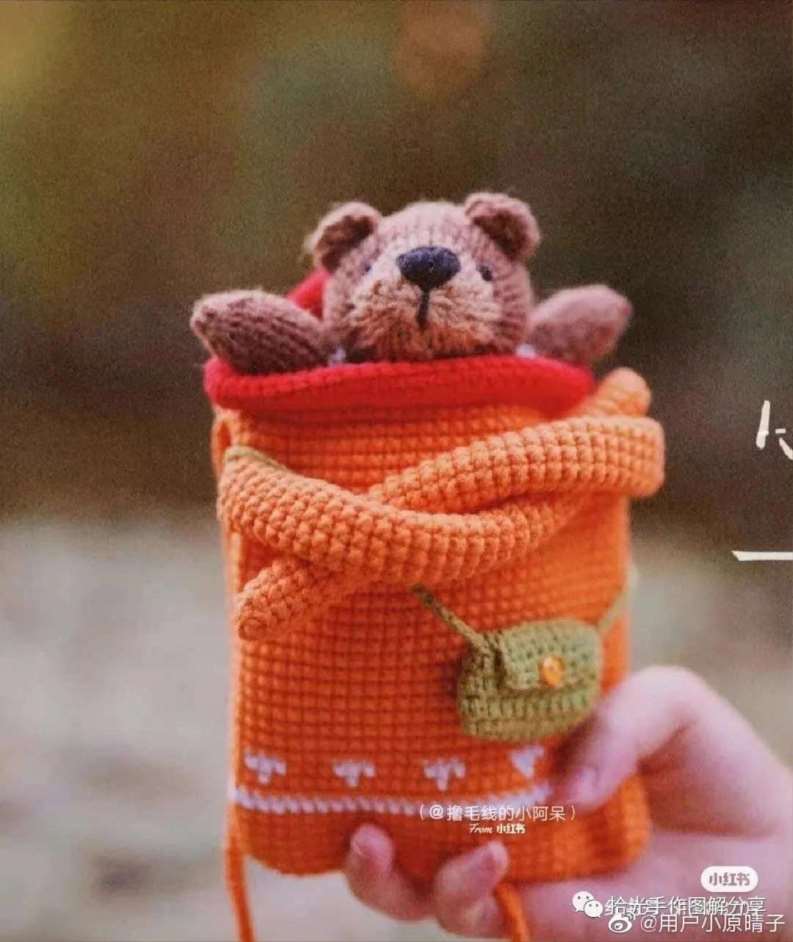
Meet the Funny Bag – an adorable, amigurumi-style backpack that is equal parts practical and absolutely ridiculous in the best way possible. With its big innocent eyes, cute little arms, bright yellow “sausage” mouth, and even a tiny backpack of its own, this bag is guaranteed to make everyone smile.
This pattern was originally translated by Anasa_Zel (check out their wonderful translations on VK and Telegram), and I am so excited to share it with you today. Whether you are making it for a child, a quirky friend, or yourself (because why not?), this bag works up quickly with a 3.0 mm hook and your favorite cotton or acrylic yarn.
The best part? The bag has a practical opening at the top – so it is actually usable! Tuck your phone, keys, or a little lip balm inside, sling the long strap over your shoulder, and go show off your new hilarious accessory.
So grab your hook, pick your favorite colors, and let’s make something wonderfully weird together
Materials You’ll Need
- Yarn (main color): Any worsted weight or DK yarn (cotton or acrylic) – about 50-100g
- Yarn (white): Small amount for the eye whites
- Yarn (yellow): Small amount for the “sausage” mouth
- Crochet hook: 3.0 mm
- Stuffing: Hollow fiber or polyfil (for the arms and to lightly stuff the top)
- Yarn needle: For sewing parts
- Two small buttons: For the tiny backpack straps
Abbreviations (US Terms)
| Abbreviation | Meaning |
|---|---|
| MR | Magic ring |
| sc | Single crochet |
| inc | Increase (2 sc in one stitch) |
| dec | Decrease (sc two together) |
| sl st | Slip stitch |
| ch | Chain |
| BLO | Back loop only |
| (…) | Repeat instructions in parentheses |
Part 1: The Main Bag Body
Work with your main color yarn.
Bottom Shaping
- Round 1: Ch 21. Starting from 2nd chain from hook: 19 sc, 3 sc in one stitch (this is the curved end), 18 sc, inc (this is the other curved end) – (42)
- Round 2: inc, 18 sc, 3 inc, 18 sc, 2 inc (48)
- Round 3: BLO – 48 sc (48) – this creates a clean fold line for the bottom
- Rounds 4-6 (3 rounds): 48 sc (48)
Color Change Stripes (Creating the Face Pattern)
- Round 7: Change to white – 48 sc (48)
- Round 8: Change back to main color – 48 sc (48)
The Face Pattern (White “Cheek” Dots)
- Round 9: 6 sc, 1 sc in white, 4 sc, 1 sc in white, 4 sc, 1 sc in white, 13 sc, 1 sc in white, 4 sc, 1 sc in white, 4 sc, 1 sc in white, 7 sc (48)
- Round 10: 5 sc, 3 sc in white, 2 sc, 3 sc in white, 2 sc, 3 sc in white, 11 sc, 3 sc in white, 2 sc, 3 sc in white, 2 sc, 3 sc in white, 6 sc (48)
- Round 11: 6 sc, 1 sc in white, 4 sc, 1 sc in white, 4 sc, 1 sc in white, 13 sc, 1 sc in white, 4 sc, 1 sc in white, 4 sc, 1 sc in white, 7 sc (48)
The white stitches create three little “cheek” dots on each side of the face
Main Body (Continue with Main Color Only)
- Rounds 12-35 (24 rounds): 48 sc (48)
Creating the Bag Opening
- Round 36: 4 sc, ch 20, skip 20 stitches, 24 sc (48) – this creates the opening at the top of the bag!
- Rounds 37-40 (4 rounds): 48 sc (48) – work sc into each chain as you go around
Decreasing to Close the Top
- Round 41: (6 sc, dec) × 6 (42)
- Round 42: (5 sc, dec) × 6 (36)
- Round 43: (4 sc, dec) × 6 (30)
- Round 44: (3 sc, dec) × 6 (24)
- Round 45: (2 sc, dec) × 6 (18)
- Round 46: (1 sc, dec) × 6 (12)
- Rounds 47-48: 12 sc (12)
- Round 49: 12 sc (12) – fasten off and close the opening
Lightly stuff the very top of the bag (the “head” area) so it holds its shape. The bottom and middle remain unstuffed so you can actually use it as a bag
Part 2: The “Sausage” Mouth (Yellow)
This is the funniest part! We are making a squiggly “sausage” that wraps around the front of the bag like a mouth.
- Round 1: Attach yellow yarn into the opening from Round 36 (the chain-20 space). Work: 20 sc along the chain, sc, 20 sc along the other side, sc – (42)
- Round 2: 20 sc, inc, 20 sc, inc (44)
- Round 3: 2 inc, 18 sc, 4 inc, 18 sc, 2 inc (52)
- Round 4: 2 dec, 18 sc, 4 dec, 18 sc, 2 inc (44) – leave a 30 cm tail
Assembly: Fold the sausage mouth in half (lengthwise) and sew it down along the first row of the mouth opening. This creates a plump, squiggly smile
Part 3: Arms (Make 2)
Work with main color yarn.
- Round 1: 6 sc in MR (6)
- Rounds 2-29 (28 rounds): 6 sc (6)
*Lightly stuff the arms so they hold their shape but remain floppy. Sew the arms to the sides of the bag, around Rounds 20-25.*
Part 4: Eyes (Make 2)
Work with white yarn.
- Round 1: 6 sc in MR (6)
- Round 2: 6 inc (12)
Fasten off, leaving a long tail for sewing.
Placement: Sew the eyes to the front of the bag, above the mouth – positioned between Rounds 9-11, right where the white “cheek” dots are. Add a small black pupil with embroidery thread or a tiny safety eye if desired
Part 5: The Tiny Backpack (On the Back of the Bag)
Yes – this bag has its own tiny backpack. It is absolutely ridiculous and wonderful.
- Round 1: Ch 7. Starting from 2nd chain from hook: 5 sc, inc, 4 sc, 2 inc – now working in the round (16)
- Rounds 2-5 (4 rounds): 16 sc (16)
- Round 6: BLO – 7 sc (7) – switching to back loops only for the flap
- Rows 7-8 (2 rows): Turn, 7 sc – work back and forth
- Round 9: 2 sc, dec, 3 sc (6)
- Round 10: 2 sc, ch 2, skip 2 stitches (buttonhole), 2 sc (6)
Finishing: Sew two small buttons onto the tiny backpack flap. Attach the tiny backpack to the back of the main bag (centered, around Rounds 15-20).
Part 6: The Long Strap
Work with main color yarn.
- Ch 200 (or longer if you want a crossbody strap)
- Join into a ring with sl st (make sure the chain is not twisted!)
- Round 1: 200 sc (200) – work sc into each chain
Leave a 30 cm tail. Sew the strap to the back of the bag – attach it to the back loops (the “rear” side) so the bag hangs properly.
Optional: You can make the strap shorter for a shoulder bag, or even make two short handles. 200 chains makes a nice crossbody length for most adults
Assembly and Finishing Touches
- Sew the eyes onto the front of the bag, above the mouth.
- Embroider or attach pupils – tiny black circles, safety eyes, or French knots all work beautifully.
- Sew the arms to the sides of the bag, positioned so they stick out cutely.
- Attach the tiny backpack to the back of the main bag.
- Sew the strap to the back loops of the bag (so the front remains smooth).
- Weave in all ends!
Optional: Add a little blush to the cheeks using pink embroidery thread or a dab of fabric paint. You can also add eyelashes for extra personality
Congratulations Your Funny Bag Is Complete
You did it! Your Funny Bag is finished, and it is guaranteed to be the most hilarious accessory in your collection – or the best gift you give all year.
This little guy is perfect for:
- A child’s backpack (just shorten the strap)
- A quirky purse for phone, keys, and lip balm
- A gift for someone who loves amigurumi AND functional items
- A conversation starter wherever you go
The best part? You can customize the colors completely! Make a pink unicorn version, a monster green version, or even a rainbow-striped bag. The “sausage” mouth can be any color – red for a tongue, pink for a silly smile, or keep it yellow for that classic hot-dog look.
Thank you for crocheting with me today. I would love to see your Funny Bags – share your photos and tag the original translator community (Anasa_Zel on VK and Telegram) so they can see their wonderful pattern brought to life all around the world
Now go show off your new hilarious friend. Happy crocheting