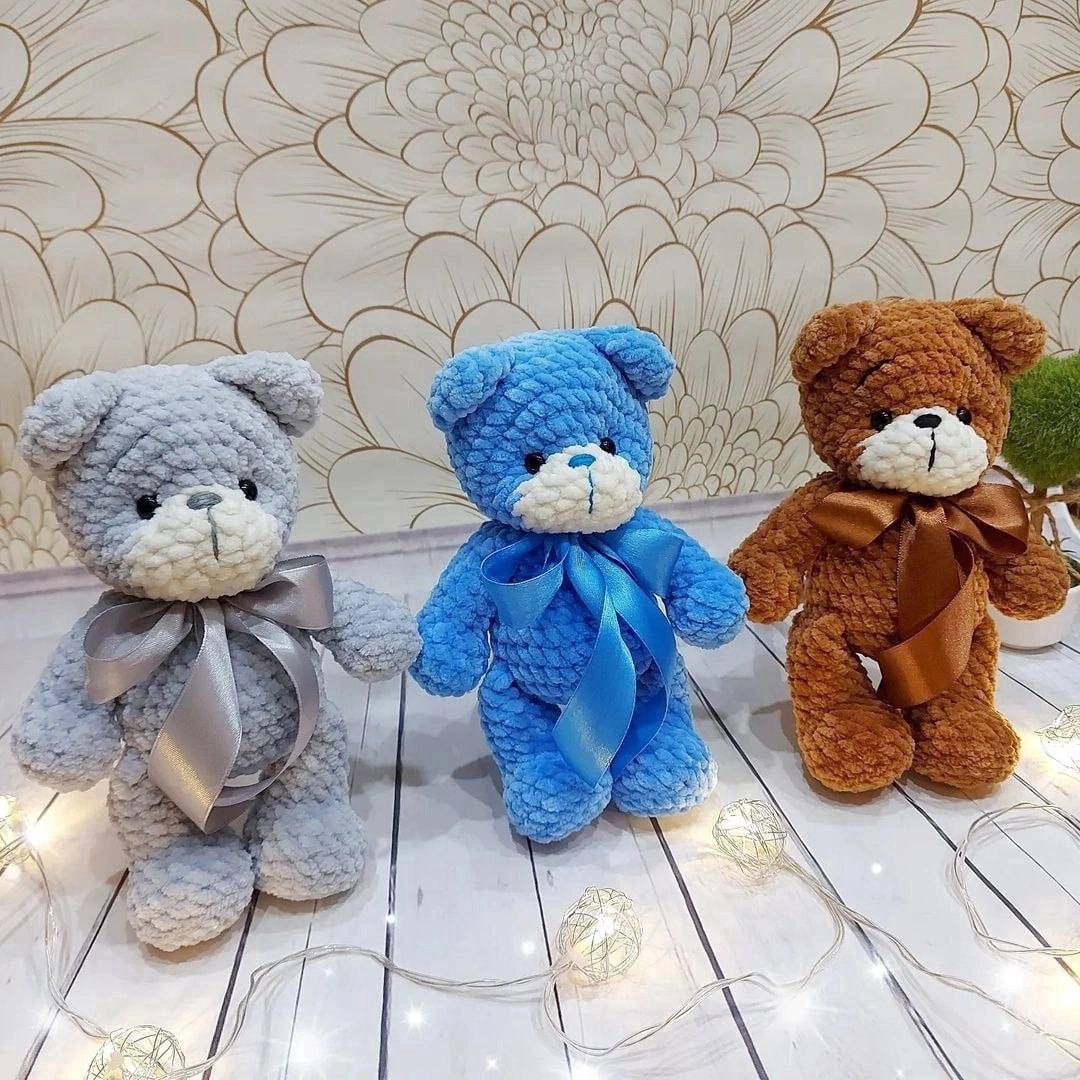
Adorable Plush Crochet Teddy Bear Pattern: A Beginner-Friendly Guide
There is nothing quite as heartwarming as a handmade teddy bear. Whether you are looking to create a cozy nursery decoration, a soft companion for a newborn, or a thoughtful gift for a loved one, a plush crochet bear is a timeless project. This pattern is designed specifically for those who love the “chunky” aesthetic, utilizing soft, chenille-style yarn to create a bear that is incredibly huggable and sweet.
If you are new to amigurumi (the Japanese art of knitting or crocheting small, stuffed creatures), don’t be intimidated! This pattern uses basic stitches and a straightforward construction method. By the end of this tutorial, you will have a cuddly little friend ready to join your collection.
Materials and Abbreviations
To ensure your teddy bear turns out as soft and professional as the photos, I recommend using high-quality chenille or velvet-style yarn. These yarns work up quickly and create that signature “plush” look.
Materials Needed
- Plush/Chenille Yarn: A medium-to-bulky weight chenille yarn in your choice of color (e.g., grey, sky blue, or chocolate brown).
- Embroidery Thread: A small amount of dark thread for the nose and eyebrows.
- Crochet Hook: A 4mm or 4.5mm crochet hook (depending on your tension and yarn thickness).
- Safety Eyes: 9mm black safety eyes.
- Stuffing: High-quality polyester fiberfill.
- Other Tools: A tapestry needle for sewing and stitch markers to keep your place.
Abbreviations (US Terms)
- MR: Magic Ring
- sc: Single crochet
- inc: Increase (2 sc in the same stitch)
- dec: Decrease (sc 2 stitches together)
- BLO: Back loops only
- dc: Double crochet
- sl st: Slip stitch
- st(s): Stitch(es)
Step-by-Step Instructions
The Ears (Make 2)
The ears are worked as flat pieces that are later folded to create shape.
- 6 sc in a Magic Ring (6)
- 6 inc (12)
- 12 sc
Note: Stop crocheting, fold the circle in half so it looks like a semi-circle, and sc through both layers to close it.
The Head
The head features a color-change section to create a beautiful, contrasting muzzle.
- 6 sc in a Magic Ring (6)
- 6 inc (12)
- (1 sc, inc) x 6 (18)
- 18 sc
Muzzle Color Change: Switch to a lighter color for the muzzle section.
- 6 sc, 6 inc, 6 sc (24)
- 6 sc, (1 sc, inc) x 6, 6 sc (30)
- (4 sc, inc) x 6 (36)
- 8-10. 36 sc (3 rounds total)
Attaching the Ears: While working the next round, you will join the ears directly to the head.
- 10 sc, 6 sc (including the ear), 4 sc, 6 sc (including the ear), 10 sc (36)
- 36 sc
- (4 sc, dec) x 6 (30)
- (3 sc, dec) x 6 (24)
- (2 sc, dec) x 6 (18)
- (1 sc, dec) x 6 (12)
- 6 dec (6)
Fasten off, leaving a long tail for sewing. Stuff the head firmly.
The Lower Legs (Make 2)
- 6 sc in a Magic Ring (6)
- 6 inc (12)
- (1 sc, inc) x 6 (18)
- 18 sc in BLO (Back Loops Only)
- 18 sc
- (1 sc, dec) x 3, 9 sc (15)
- (1 sc, dec) x 3, 6 sc (12)
- 8-12. 12 sc (5 rounds total)
To finish the leg: Crochet 11 sc, fold the piece in half, and sc through both layers for the remaining 6 stitches.
The Upper Legs (Make 2)
- 6 sc in a Magic Ring (6)
- 6 inc (12)
- 3-4. 12 sc (2 rounds total)
- (3 sc, dec) x 3 (9)
- 6-12. 9 sc (7 rounds total)
The Body
The body is the largest part and is where you will attach the limbs.
- 6 sc in a Magic Ring (6)
- 6 inc (12)
- (1 sc, inc) x 6 (18)
- (1 sc, inc) x 6 (24)
- (2 sc, inc) x 6 (36)
- 6 sc (including the arm/leg attachment), 12 sc, 6 sc (including the arm/leg attachment), 4 sc, 5 dc in one stitch, 7 sc (36)
- 7-8. 36 sc (2 rounds total)
- (2 sc, dec) x 6 (27)
- 27 sc
- (1 sc, dec) x 6 (18)
- 12-13. 18 sc (2 rounds total)
- (4 sc, dec) x 3 (15)
- 4 sc (including the leg attachment), 4 sc, 4 sc (including the leg attachment), 3 sc, 1 sl st (to close)
Finishing
Once all your pieces are crocheted and stuffed, it is time to bring your bear to life!
Assembly
Using a tapestry needle and the yarn tails, carefully sew the head to the body. Position the arms and legs symmetrically. Since the body pattern includes instructions for joining the limbs, ensure you sew them securely to the corresponding spots on the body to prevent them from wobbling.
Face Details
This is the most important step for personality! Insert your 9mm safety eyes between rounds 10 and 11 of the head. Once the eyes are secure, use your embroidery thread to stitch a small, cute nose on the muzzle and add two tiny lines above the eyes to create eyebrows. This gives your bear a gentle, sleepy expression.
Final Flourish
To complete the look, tie a satin ribbon around the bear’s neck. A bow in a contrasting color (like silver, bright blue, or brown) adds a professional, boutique-style finish.
Tips for Success
Tension and Yarn Choice
When working with plush or chenille yarn, it can sometimes be tricky to see your stitches. I highly recommend using a stitch marker at the beginning of every round. If your stitches are too loose, the stuffing might peek through; if they are too tight, the bear will feel hard. Aim for a medium tension that feels firm but squishy.
Stuffing Technique
Don’t be afraid to over-stuff! For amigurumi, you want the shapes to be smooth and rounded. Stuff the head and body firmly, but be careful with the limbs—stuff the legs and arms enough so they hold their shape, but not so much that the seams start to stretch.
Color Changes
When changing colors for the muzzle, finish the last stitch of the old color in the last pull-through of the final stitch of that round. This creates a much cleaner line between the main color and the muzzle color.