Adorable Crochet Baby Dragon Pattern: A Step-by-Step Amigurumi Tutorial
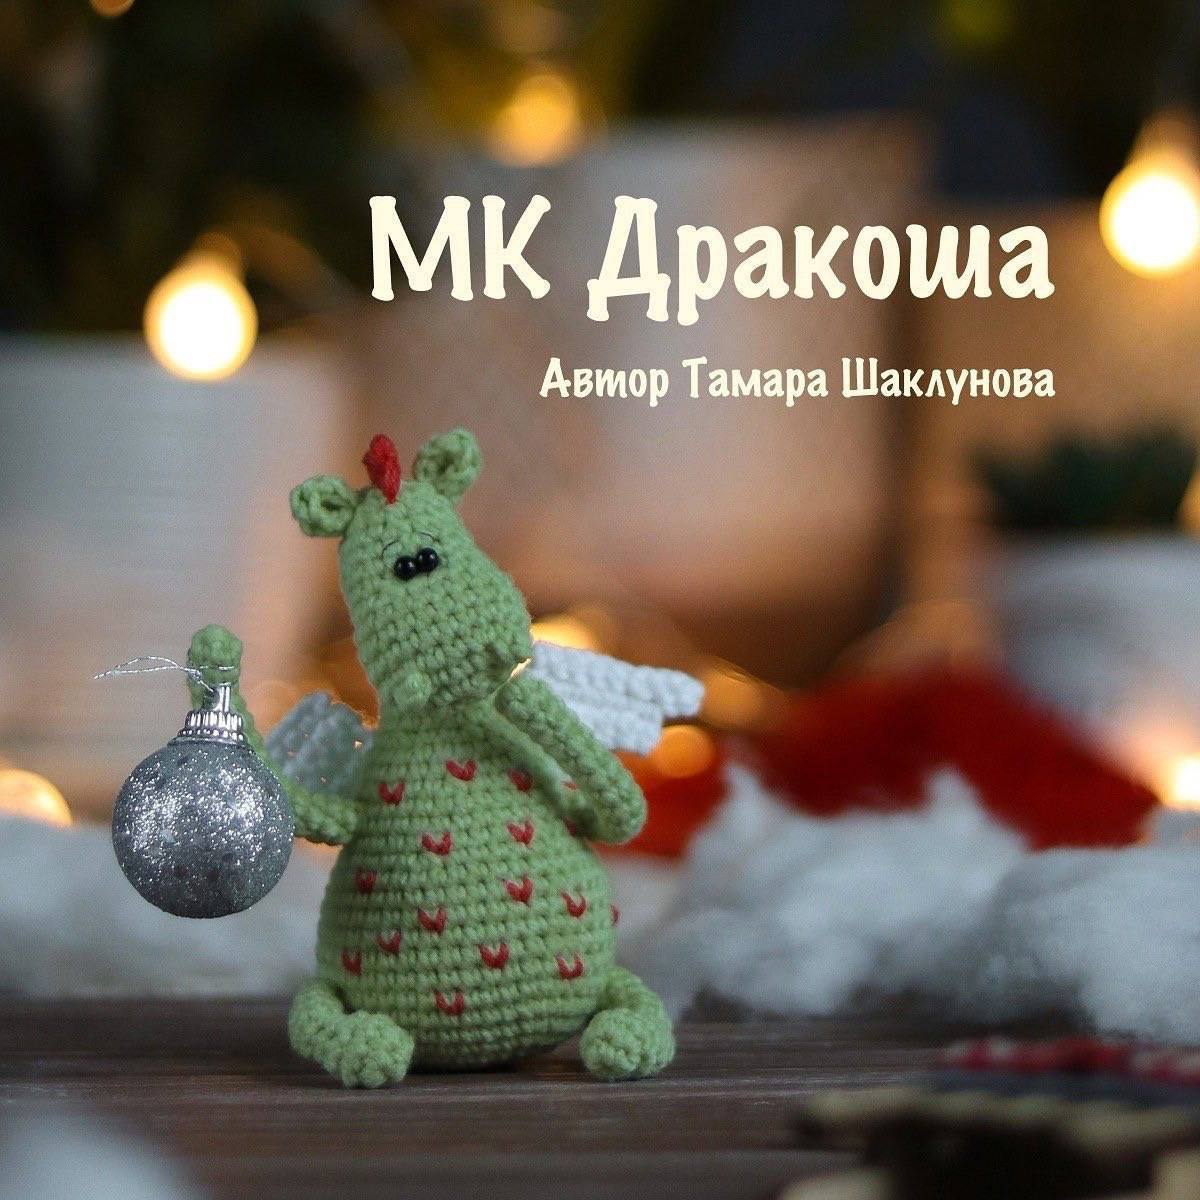
Looking for a magical new project to add to your crochet queue? This cute baby dragon amigurumi is the perfect blend of whimsical and cozy. Whether you are looking to create a unique handmade gift or a charming companion for a child, this little dragon is an absolute joy to make. With its chubby belly and tiny wings, it is designed to be beginner-friendly while resulting in a professional, boutique-style plushie.
In this detailed tutorial, we will walk you through every stitch needed to bring your dragon to life. We have translated the pattern into standard US crochet terms and imperial measurements to make your crafting experience as smooth as possible. Grab your favorite shade of green yarn, and let’s get started!
Materials & Abbreviations
To achieve the tight, sturdy stitches required for amigurumi (which prevents the stuffing from peeking through), it is important to use a hook slightly smaller than what the yarn label suggests.
Supplies You Will Need
- Yarn: Sport weight cotton blend yarn (Green for the body, White for the wings, and a small amount of Red for the crest).
- Crochet Hook: 1.75mm hook.
- Eyes: 4mm black beads or safety eyes.
- Structure: 1.5mm (approx. 0.06 inch) craft wire for the neck/head support.
- Stuffing: High-quality polyester fiberfill.
- Tools: Yarn needle, scissors, and stitch markers.
US Crochet Abbreviations
- MR: Magic Ring
- Ch: Chain
- Sc: Single Crochet
- Hdc: Half Double Crochet
- Dc: Double Crochet
- Tr: Treble Crochet
- Inc: Increase (2 sc in the same stitch)
- Dec: Decrease (sc 2 together)
- Sl st: Slip Stitch
- St: Stitch
Step-by-Step Instructions
The Arms (Make 2)
The arms are simple tubes that give the dragon its huggable appearance. Work in continuous rounds.
- Round 1: 6 sc into MR. (6)
- Rounds 2-14: Sc in each stitch around. (6)
Fasten off, leaving a long tail for sewing the arms to the body.
The Legs (Make 2)
The legs are slightly wider at the base to help the dragon sit comfortably.
- Round 1: 6 sc into MR. (6)
- Round 2: Inc in every stitch around. (12)
- Round 3: Sc in each stitch around. (12)
- Round 4: Dec 4 times, sc 4. (8)
- Round 5: Dec 2 times, sc 4. (6)
- Round 6: (2 sc, inc) x 2. (8)
- Rounds 7-11: Sc in each stitch around. (8)
Fasten off, leaving a tail for sewing.
The Tail
The tail is worked in an oval shape, gradually increasing to create a plump, tapered look.
- Round 1: 6 sc into MR. (6)
- Round 2: Sc in each stitch around. (6)
- Round 3: Inc, 5 sc. (7)
- Round 4: Inc 2 times, 5 sc. (9)
- Round 5: Inc 4 times, 5 sc. (13)
- Round 6: Sc in each stitch around. (13)
- Round 7: (1 sc, inc) x 4, 5 sc. (17)
- Round 8: Sc in each stitch around. (17)
- Round 9: (2 sc, inc) x 4, 5 sc. (21)
- Round 10: (3 sc, inc) x 4, 5 sc. (25)
- Round 11: (4 sc, inc) x 4, 5 sc. (29)
- Round 12: (5 sc, inc) x 4, 5 sc. (33)
Fasten off and leave a tail for sewing.
The Ears (Make 2)
The ears are worked in a single round to create a leaf-like shape.
- Round 1: In MR, work: 1 sc, 1 hdc, 1 dc, 1 tr, 1 dc, 1 hdc, 1 sc.
Fasten off, leaving a tail for sewing to the head.
Nostrils (Make 2)
- Round 1: 2 sc into MR.
Fasten off, leaving a tail for sewing to the muzzle.
The Wings (Make 2)
Switch to white yarn. These wings are worked in rows rather than rounds.
- Foundation: Ch 9.
- Row 1: Starting in the 2nd ch from hook, work 8 sc. Ch 1, turn.
- Row 2: 6 sc, ch 1, turn.
- Row 3: 6 sc, ch 1, turn.
- Row 4: 4 sc, ch 1, turn.
- Row 5: 4 sc.
Fasten off, leaving a tail for sewing to the back.
The Body
The body is the largest part of the project. Be sure to stuff it firmly as you go.
- Round 1: 6 sc into MR. (6)
- Round 2: Inc in every stitch around. (12)
- Round 3: (1 sc, inc) x 6. (18)
- Round 4: (2 sc, inc) x 6. (24)
- Round 5: (3 sc, inc) x 6. (30)
- Round 6: (4 sc, inc) x 6. (36)
- Round 7: (5 sc, inc) x 6. (42)
- Rounds 8-13: Sc in each stitch around. (42)
- Round 14: 18 sc, dec, (2 sc, dec) x 2, 14 sc. (39)
- Round 15: 18 sc, dec, (2 sc, dec) x 2, 11 sc. (36)
- Round 16: (4 sc, dec) x 6. (30)
- Rounds 17-19: Sc in each stitch around. (30)
- Round 20: (3 sc, dec) x 6. (24)
- Rounds 21-22: Sc in each stitch around. (24)
- Round 23: (2 sc, dec) x 6. (18)
- Rounds 24-31: Sc in each stitch around. (18)
Fasten off, leaving a tail of about 4 inches.
The Muzzle & Head
The head is created by first making a muzzle and then joining it to the body.
- Foundation: Ch 4.
- Row 1: Starting in 2nd ch from hook: inc, 1 sc, 3 sc in the next st. On the other side of the chain, work 2 sc. (8)
- Row 2: 2 inc, 1 sc, 3 inc, 1 sc, inc. (14)
- Row 3: (1 sc, inc) x 2, 1 sc, (1 sc, inc) x 3, 2 sc, inc. (20)
- Rounds 4-6: Sc in each stitch around. (20)
- Round 7: (3 sc, dec) x 4. (16)
- Round 8: Sc in each stitch around. (16)
Joining to the Body: Now we fuse the muzzle to the top of the body.
- Round 9: 4 sc, dec (one loop from the muzzle and one loop from the body), 12 sc, dec (one loop from the body and one loop from the muzzle), 6 sc. (24)
- Round 10: Sc in each stitch around. (24)
Note: At this point, insert your craft wire into the neck area to provide stability. Be careful not to let the wire poke through the fabric.
- Round 11: (2 sc, dec) x 6. (18)
- Round 12: Sc in each stitch around. (18)
- Round 13: (1 sc, dec) x 6. (12)
- Round 14: Dec 6 times. (6)
Fasten off and weave in the ends.
Finishing
Now it is time to assemble your baby dragon!
- The Face: Sew the 4mm beads or safety eyes between the muzzle and the head. Sew the small nostrils to the very tip of the muzzle.
- The Crest: Using red yarn, create a small “mohawk” on top of the head. You can do this by chaining 4, working 3 hdc back down the chain, and sewing it firmly to the top of the skull.
- The Limbs: Sew the arms to the sides of the body and the legs to the bottom.
- The Details: Attach the tail to the back and sew the white wings just above the arm placement.
Tips for Success
- Stitch Markers: Since amigurumi is worked in continuous spirals, always use a stitch marker at the beginning of each round to avoid losing your count.
- Tension: Keep your tension consistent. If you notice gaps where stuffing is showing, try going down a hook size.
- Invisible Decrease: For a cleaner look, use the “invisible decrease” method (inserting the hook into the front loops only of the next two stitches).
- Customization: Feel free to change the colors! This pattern works great for a blue water dragon or a red fire dragon.