Easy Free Crochet Bird Pattern: Cute Amigurumi Little Bird Tutorial
Introduction
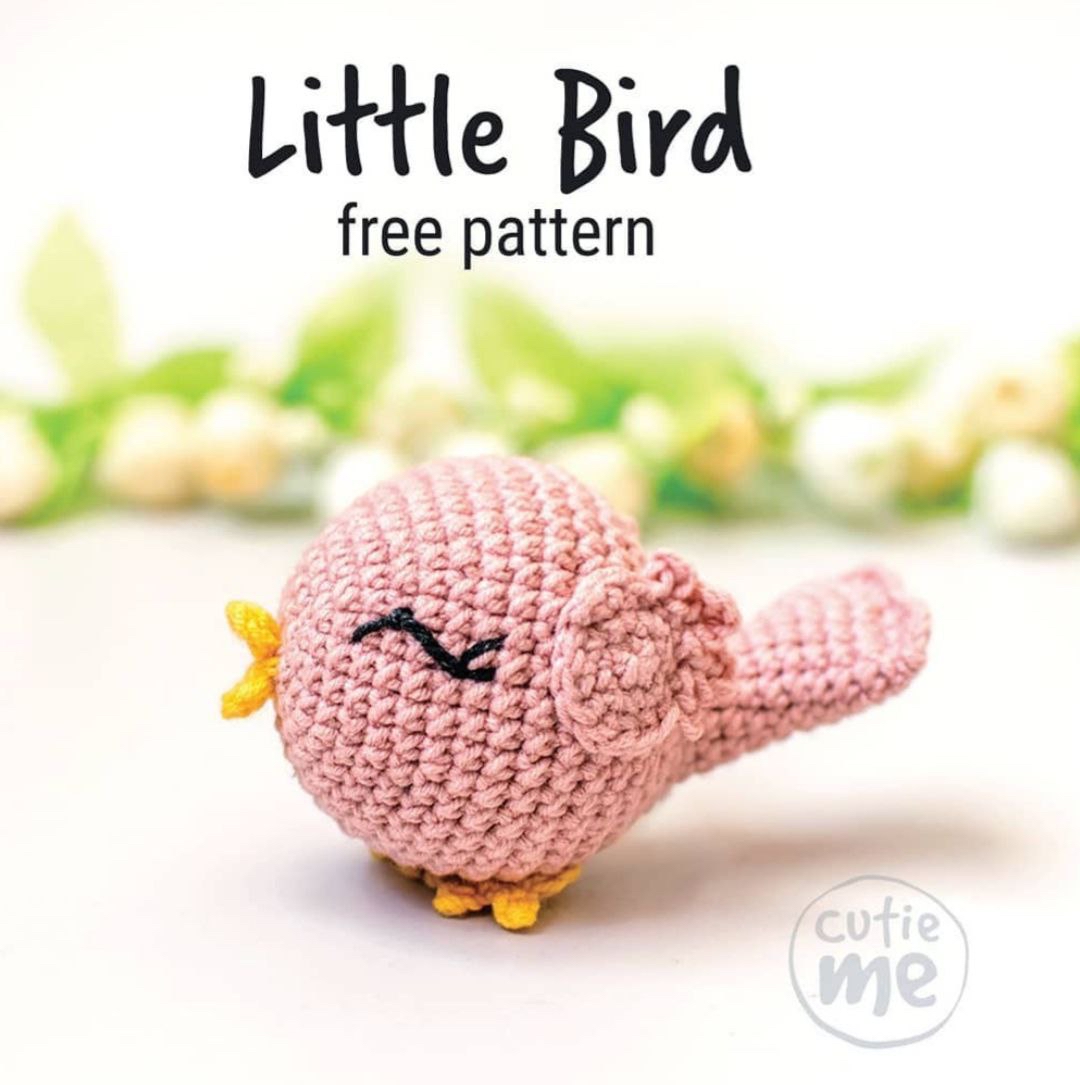
Looking for a quick, adorable crochet project that brings a splash of springtime joy into your home? This cute amigurumi bird pattern is perfect for crocheters of all skill levels! Measuring approximately 2.5 inches tall when completed, this sweet little songbird makes a delightful gift, desk companion, bag charm, or nursery decoration.
Whether you are brand new to amigurumi or an experienced maker searching for a fun stash-busting project, this step-by-step tutorial will guide you through every stitch. Using basic single crochet techniques along with simple shaping, you will craft a charming feathered friend complete with sweet little wings, tiny feet, and a cute embroidered expression.
Materials & Abbreviations
Materials Needed
- Yarn: Sport weight or Fine (Category 2) cotton or cotton-blend yarn in three colors:
- Color A (Main Body/Wings): Soft Pink – approximately 35 yards (10g)
- Color B (Beak/Legs): Yellow – approximately 17 yards (5g)
- Accent: Small scrap of black yarn or embroidery floss for the eyes
- Crochet Hook: Size B-1 / 2.25 mm hook
- Stuffing: Polyester fiberfill polyfill
- Notions: Tapestry needle, stitch markers, and sewing pins
Crochet Terms & Abbreviations (US Terms)
- ch: chain
- sc: single crochet
- hdc: half double crochet
- dc: double crochet
- slst: slip stitch
- inc: increase (work 2 single crochet stitches into the same stitch)
- dec: decrease (single crochet 2 stitches together)
- 2dc cluster: 2 double crochet worked together into the same stitch with one finished top
- rnd / rnds: round / rounds
- st / sts: stitch / stitches
- ( ) Nx: repeat the sequence inside parentheses N times
Step-by-Step Instructions
Body and Tail
Worked from the front of the head down to the tip of the tail using Color A (Soft Pink). Work in continuous rounds without joining unless instructed.
- Rnd 01: Start with 6 sc into a magic ring. (6 sts)
- Rnd 02: (inc) 6 times. (12 sts)
- Rnd 03: (sc, inc) 6 times. (18 sts)
- Rnd 04: (2 sc, inc) 6 times. (24 sts)
- Rnd 05: (3 sc, inc) 6 times. (30 sts)
- Rnd 06: sc in each st around. (30 sts)
- Rnd 07: (4 sc, inc) 6 times. (36 sts)
- Rnd 08: sc in each st around. (36 sts)
- Rnd 09: (5 sc, inc) 6 times. (42 sts)
- Rnds 10–14: sc in each st around. (42 sts across 5 rounds)
- Rnd 15: (4 sc, dec) 6 times, 6 sc. (36 sts)
- Rnd 16: (3 sc, dec) 6 times, 6 sc. (30 sts)
- Rnd 17: (2 sc, dec) 6 times, 6 sc. (24 sts)
Stuff the head and main body firmly with polyfill stuffing at this point. Continue adding stuffing as you work the next few rounds.
- Rnd 18: (sc, dec) 6 times, 6 sc. (18 sts)
- Rnd 19: (dec) 6 times, 6 sc. (12 sts)
- Rnds 20–24: sc in each st around. (12 sts across 5 rounds)
- Rnd 25: (inc, 5 sc) 2 times. (14 sts)
- Rnd 26: (inc, 6 sc) 2 times. (16 sts)
- Rnd 27: (inc, 7 sc) 2 times. (18 sts)
- Rnd 28: (inc, 8 sc) 2 times. (20 sts)
- Rnd 29: 6 sc, then stop this round here. (6 sts)
Add a light amount of stuffing into the base of the tail, leaving the tip unstuffed so it can lay flat.
Tail Edge Trim: Flatten the end of the tail horizontally. Working through both opposing layers of stitches to seal the opening, crochet across the edge: (sc, hdc, dc, hdc, slst) 2 times. (10 sts total across the tail tip). Fasten off, cut yarn, and weave in loose end.
Wings (Make 2)
Use Color A (Soft Pink).
- Rnd 01: Start with 6 sc in a magic ring. (6 sts)
- Rnd 02: (inc) 6 times. (12 sts)
- Rnd 03: (sc, inc) 2 times, sc, slst, ch 3, slst into the 1st ch, (slst, ch 5, slst into the 1st ch) 2 times, slst, ch 3, slst into the 1st ch, slst, sc, inc. (15 sts)
Fasten off, leaving a long tail for sewing.
Beak
Use Color B (Yellow).
- Rnd 01: In a magic adjustable ring, work:
(ch 2, 2dc cluster, ch 2, slst)2 times. Pull the center tail tight to close the ring. (6 sts)
Fasten off, leaving a long tail for sewing.
Legs and Feet (Make 2)
Use Color B (Yellow).
- Rnd 01: Start with 6 sc into a magic ring. (6 sts)
- Rnd 02: 2 inc,
(slst, ch 3, slst into the 2nd ch from hook and next ch—creating a toe)3 times, inc. (15 sts)
Fasten off, leaving a long tail for sewing.
Finishing & Assembly
Follow these assembly steps carefully using your tapestry needle and pins to hold parts in place before stitching:
- Attach the Beak: Sew the beak centered over the start point of the body (Rnd 1).
- Attach the Legs: Place the legs on the bottom of the body between Round 11 and Round 14. Stitch the circular bases down securely, leaving the three small toe points loose.
- Attach the Wings: Pin the wings to the sides of the body between Round 11 and Round 16. Sew around the inner circular part of the wing, leaving the outer feather tips free for texture.
- Embroider the Eyes: Using a length of black yarn or embroidery thread, embroider sleeping or curved eye lines on both sides of the head between Round 5 and Round 10. Ensure the eyes are spaced roughly 10 single crochet stitches apart across the front of Round 5.
Tips for Amigurumi Success
- Maintain Tight Tension: Amigurumi requires firm, tight stitches so the polyfill stuffing doesn’t show through the gaps. If you notice large holes, try switching to a smaller hook size.
- Use Stitch Markers: Since the body is worked in continuous rounds, place a stitch marker in the first stitch of every round to avoid losing your place.
- Pin Before You Sew: Positioning small pieces like wings and beaks with sewing pins allows you to check symmetry before permanently attaching them.