Magical Crochet Golden Snitch Pattern: A Beginner-Friendly Amigurumi Tutorial
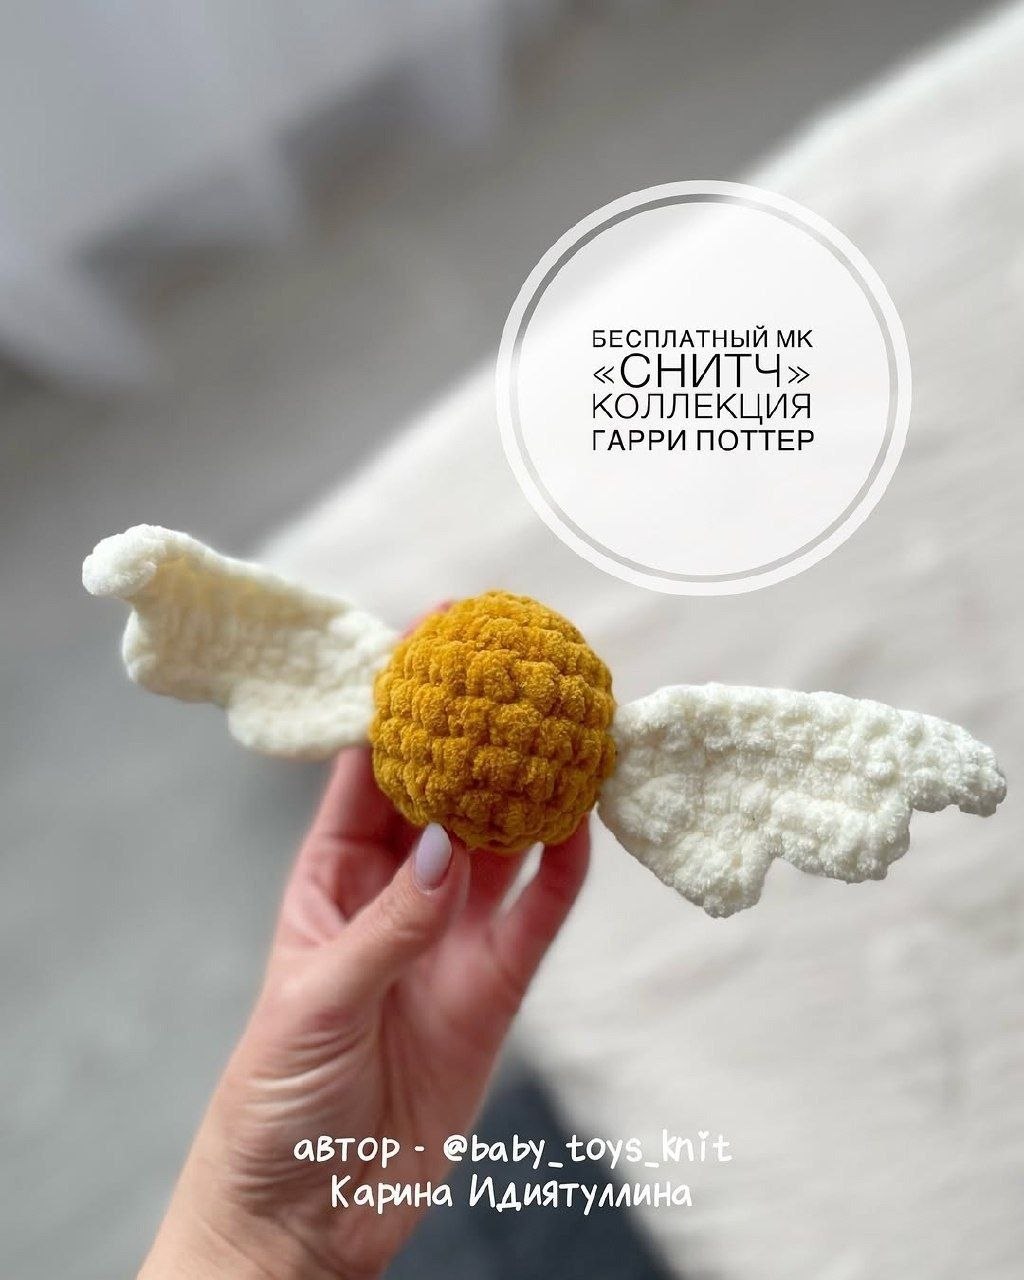
Are you a fan of the wizarding world looking for a quick, magical crochet project? Whether you are decorating a themed nursery, creating a unique keychain, or looking for the perfect gift for a book lover, this Crochet Golden Snitch is the ultimate project. This amigurumi-style Snitch is small, adorable, and incredibly satisfying to make. Because it uses plush, velvet-style yarn, the finished piece has a soft, high-end look that feels professional even if you are just starting your crochet journey.
In this tutorial, we will walk you through every single step, from creating the perfect golden sphere to shaping those iconic delicate wings. This pattern is designed to be accessible for beginners, focusing on basic stitches like single crochet and simple increases and decreases. Grab your hook, and let’s fly!
Materials & Abbreviations
To ensure your Snitch looks as magical as possible, choosing the right materials is key. While the original design uses specific velvet yarns, you can achieve wonderful results with any plush or chenille-style yarn available in your local craft store.
Required Materials
- Plush/Velvet Yarn: You will need two colors. One “Mustard” or deep golden yellow for the ball, and one “Milky” or creamy white for the wings. Velvet yarn is highly recommended because its texture hides any small gaps between your stitches, making the stuffing invisible.
- Crochet Hook: A 5 mm (approximately H-8) crochet hook. Using a slightly smaller hook than suggested on your yarn label can help keep your stitches tight, which is vital for amigurumi.
- Fiberfill Stuffing: Use high-quality polyester stuffing to ensure your Snitch maintains its round shape.
- Tapestry Needle: A large-eye needle is essential for weaving in ends and sewing the wings to the ball.
- Stitch Markers: Since we are working in continuous rounds for the ball, a stitch marker is indispensable to keep track of your starting point.
- Scissors: For trimming your yarn ends.
US Crochet Abbreviations
Please note that this pattern uses US terminology. If you are used to UK terms, be sure to convert your stitches accordingly!
- MR: Magic Ring (or Magic Circle)
- ch: Chain
- sc: Single Crochet
- inc: Increase (2 sc in the same stitch)
- dec: Decrease (sc 2 stitches together)
- st(s): Stitch(es)
- ( ): The number in parentheses at the end of a row indicates the total stitch count for that round.
- * : The number after an asterisk indicates how many times to repeat the sequence within the parentheses.
Step-by-Step Instructions
Let’s dive into the magic! We will start by crafting the golden ball, which serves as the body of the Snitch, and then move on to the wings.
Part 1: The Golden Ball
Using your golden/mustard colored yarn, begin working in continuous rounds. Do not join the rounds with a slip stitch; instead, use a stitch marker to mark the first stitch of every round.
- Round 1: Create a Magic Ring (MR) and work 6 sc into the ring. (6)
- Round 2: Work 6 inc (one increase in every stitch). (12)
- Round 3: (1 sc, 1 inc) repeat 6 times. (18)
- Rounds 4-6: Work 1 sc in each stitch for 3 rounds total. (18)
- Round 7: (1 sc, 1 dec) repeat 6 times. (12)
Stop here to stuff! Before you close the ball, begin adding your fiberfill stuffing. Pro tip: Distribute the stuffing evenly from the center out toward the edges. You want a firm, even sphere without any lumps or soft spots. Once the ball is comfortably full, proceed to the final round.
- Round 8: Work 6 dec. (6)
Part 2: The Ethereal Wings
Switch to your milky/white yarn. Unlike the ball, the wings are worked in rows rather than continuous rounds. This means you will work to the end of the row, chain, and turn your work.
Starting the base: Begin by making a foundation chain of 10 ch. Starting in the second chain from your hook, begin the following:
- Row 1: Work 9 sc across the chain.
- Row 2: ch 1, turn, work 6 sc.
- Row 3: ch 1, turn, work 6 sc.
- Row 4: ch 1, turn, work 3 sc.
- Row 5: ch 1, turn, work 3 sc.
Shaping the wing edges: Now we need to taper the wings to give them that aerodynamic look. On the short side of the wing (the side with fewer stitches), perform 3 decreases (dec). After those decreases, ch 1, turn, and work one “triple decrease” (dec3tog—working three stitches together as one). Fasten off the yarn, leaving a long tail of several inches. This tail will be necessary for sewing the wings to the ball.
Finishing & Assembly
Now that you have your components, it is time to bring the Snitch to life! Assembly is the most important part of making amigurumi look “professional.”
Closing the Ball
If you have any trouble closing the hole at the end of Round 8, use your tapestry needle. Thread the needle with a piece of the golden yarn and weave it through the remaining 6 stitches. Pull the yarn tight to close the hole completely, then work a few small stitches to secure it before hiding the yarn tail inside the ball.
Attaching the Wings
Place your two wings on opposite sides of the golden ball. To ensure the Snitch looks balanced, align the base of the wings with the stitches from Round 4 and Round 5 of the ball.
Using your tapestry needle and the long yarn tails left from the wings, sew the wings securely to the ball. Use a “whip stitch” to catch the edge of the wing and the surface of the ball. Once they are firmly attached, weave all remaining yarn tails into the inside of the ball and trim them close to the surface. Your Snitch is now ready to fly!
Tips for Success
Crocheting with velvet yarn is a different experience than using standard cotton or acrylic. Here are a few expert tips to help you avoid common mistakes:
- Don’t be afraid of the “Lost Stitch”: Velvet yarn is notoriously difficult to see. It is very easy to accidentally skip a stitch or add an extra one. Always use your stitch marker and occasionally count your stitches to ensure you are staying on track.
- Tension is everything: If you find that your stuffing is peeking through the holes in your stitches, try using a smaller crochet hook. A tighter tension is your best friend when making amigurumi.
- The Magic Ring Hack: If you struggle with the Magic Ring (MR) using thick velvet yarn, you can alternatively chain 2 and work your first round of stitches into the first chain. It is slightly less “tight,” but it works well for beginners.
- Make it a Keychain: If you want to take your Snitch on adventures, simply loop a metal keychain ring through the center of the ball during the stuffing process, or sew it onto the top of the ball after assembly.