How to Crochet an Adorable Plush Chinchilla: A Step-by-Step Amigurumi Guide
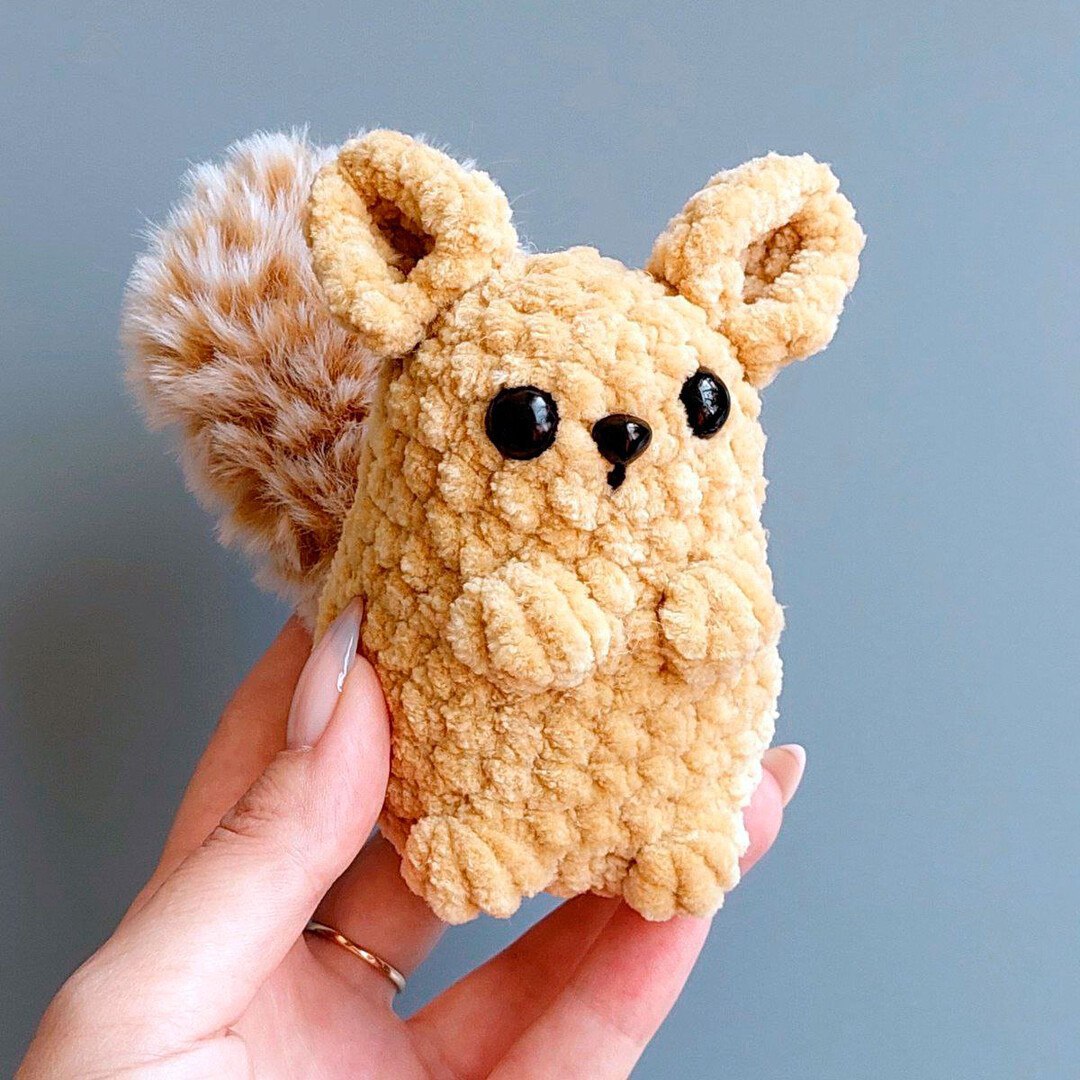
If you are looking for your next cozy crochet project, look no further! There is something incredibly charming about the soft, round features of a chinchilla, and this amigurumi version captures that magic perfectly. Using ultra-soft plush yarn and a touch of faux fur, this little woodland friend is as fun to make as it is to cuddle.
This pattern is designed to be beginner-friendly. While it introduces a fun texture stitch called the bobble stitch, the construction is straightforward, working from the bottom up to create a seamless body. Whether you are making a gift for a little one or adding a cute companion to your own shelf, this plush chinchilla is sure to become a favorite.
Materials & Abbreviations
To ensure your chinchilla turns out perfectly, it is important to use the right yarn weights and hook sizes. Because we are working with both plush and faux fur yarn, you will need two different hooks to manage the textures effectively.
Materials Needed
- Plush Yarn: Approximately 131 yards (100g) of chenille or velvet-style plush yarn for the body.
- Faux Fur Yarn: Approximately 60 yards (100g) of long-pile faux fur yarn for the tail.
- Crochet Hooks: 3.75mm (E/F) hook for the plush yarn and a 5mm (H) hook for the faux fur yarn.
- Safety Eyes: 8mm safety eyes.
- Nose: 6x8mm glue-on nose.
- Stuffing: High-quality polyester fiberfill.
- Extras: Stitch marker, tapestry needle, black embroidery thread, and fabric glue.
US Crochet Abbreviations
Please note that these terms are written in standard US terminology:
- MR: Magic Ring
- Sc: Single crochet
- Inc: Increase (2 sc in one stitch)
- Dec: Decrease (invisible decrease recommended for amigurumi)
- Bobble: Work 4 dc into a single stitch, then dc into the top of the bobble
- Sl st: Slip stitch
- Ch: Chain
- Tc: Turning chain
Step-by-Step Instructions
Before we begin the main body, we need to prepare the two separate components: the fluffy tail and the adorable ears. Once these are ready, we will join them to the main body during the crochet process.
The Fluffy Tail
Use the faux fur yarn and the 5mm hook. Stuff lightly as you go.
- Round 1: 6 sc in a Magic Ring (6)
- Round 2: 6 inc (12)
- Rounds 3-4: 12 sc (12)
- Round 5: (1 sc, 1 dec) repeat 4 times (8)
- Round 6: 8 sc (8)
- Round 7: 4 dec (4)
- Round 8: 4 sc (4)
To finish the tail, fold the piece in half so the opening is closed. Work 2 sc through both layers together to seal the end. Set this aside.
The Ears
Use the plush yarn and the 3.75mm hook. These are worked in rows rather than rounds.
- Row 1: Ch 2. In the 2nd chain from the hook, work 4 sc. At the end of the row, ch 1 (turning chain) and turn your work.
- Row 2: 4 inc, ch 1, turn (8)
- Row 3: (1 sc, 1 inc) repeat 4 times (12)
Fasten off, leaving a long tail for sewing. When assembling, use the tail to join the corners of the ear together to give it a slight shape before sewing it to the head.
The Body and Head
This is worked in one continuous piece starting from the bottom and working upwards. Use the plush yarn and the 3.75mm hook. Remember to stuff firmly as you progress.
- Round 1: 8 sc in a Magic Ring (8)
- Round 2: 8 inc (16)
- Round 3: (3 sc, 1 inc) repeat 4 times (20)
- Round 4: (4 sc, 1 inc) repeat 4 times (24)
- Round 5: 5 sc, 1 inc, 1 Bobble, 3 sc, 1 Bobble, 1 inc, (5 sc, 1 inc) repeat 2 times (28)
- Round 6: 22 sc, then work 2 sc together with the TAIL (joining it to the body), then 4 sc (28)
- Rounds 7-8: 28 sc (28)
- Round 9: (5 sc, 1 dec) repeat 4 times (24). At the end of the round, work 1 sl st to close the gap.
- Round 10: 4 sc, 1 dec, 1 Bobble, 2 sc, 1 Bobble, 1 dec, (4 sc, 1 dec) repeat 2 times (20)
- Rounds 11-13: 20 sc (20)
- Round 14: (3 sc, 1 dec) repeat 4 times (16)
- Round 15: 16 sc (16)
- Round 16: (2 sc, 1 dec) repeat 4 times (12). Stop here to insert the 8mm safety eyes between rounds 14 and 15.
- Round 17: 6 sc (6). Fasten off, weave the tail through the remaining stitches, and close the hole completely.
Finishing
Now that the crochet work is complete, it is time for the assembly phase! This is where your chinchilla truly comes to life.
First, take your ears. Remember to use the long yarn tails to pull the corners of each ear slightly toward each other to create a realistic shape. Use your tapestry needle to sew them securely to the top of the head.
Next, address the face. Position your safety eyes in the space between rounds 14 and 15. Once the eyes are secure, use your black embroidery thread to stitch a small “bridge” or line between the eyes and down toward the nose area. This gives the chinchilla its characteristic facial expression.
Finally, use your fabric glue to attach the 6x8mm nose to the center of the face. Give the toy a final squeeze to ensure the stuffing is evenly distributed, and your plush chinchilla is ready for its new home!
Tips for Success
To make your amigurumi look professional, keep these extra tips in mind:
Master the Bobble Stitch
The bobble stitch is what gives your chinchilla its cute, textured “cheek” look. To ensure they look uniform, try to work all your double crochets into the exact same stitch. If your bobbles feel too loose, try tightening your tension slightly during that specific round.
Tension and Stuffing
When working with plush yarn, it is easy to accidentally create gaps. Try to keep your tension tight so that the white stuffing doesn’t peek through the stitches. When stuffing, use small chunks of fiberfill at a time and push them into the corners of the head and body to prevent lumps.
Invisible Decreases
For the smoothest look, I highly recommend using the “invisible decrease” method. Instead of inserting your hook into the top of the two stitches, insert it into the front loops only of the next two stitches, then yarn over and pull through. This prevents visible holes in your work.
Happy crocheting!