Crochet Amigurumi Little Deer Pattern: A Step-by-Step Tutorial
Introduction
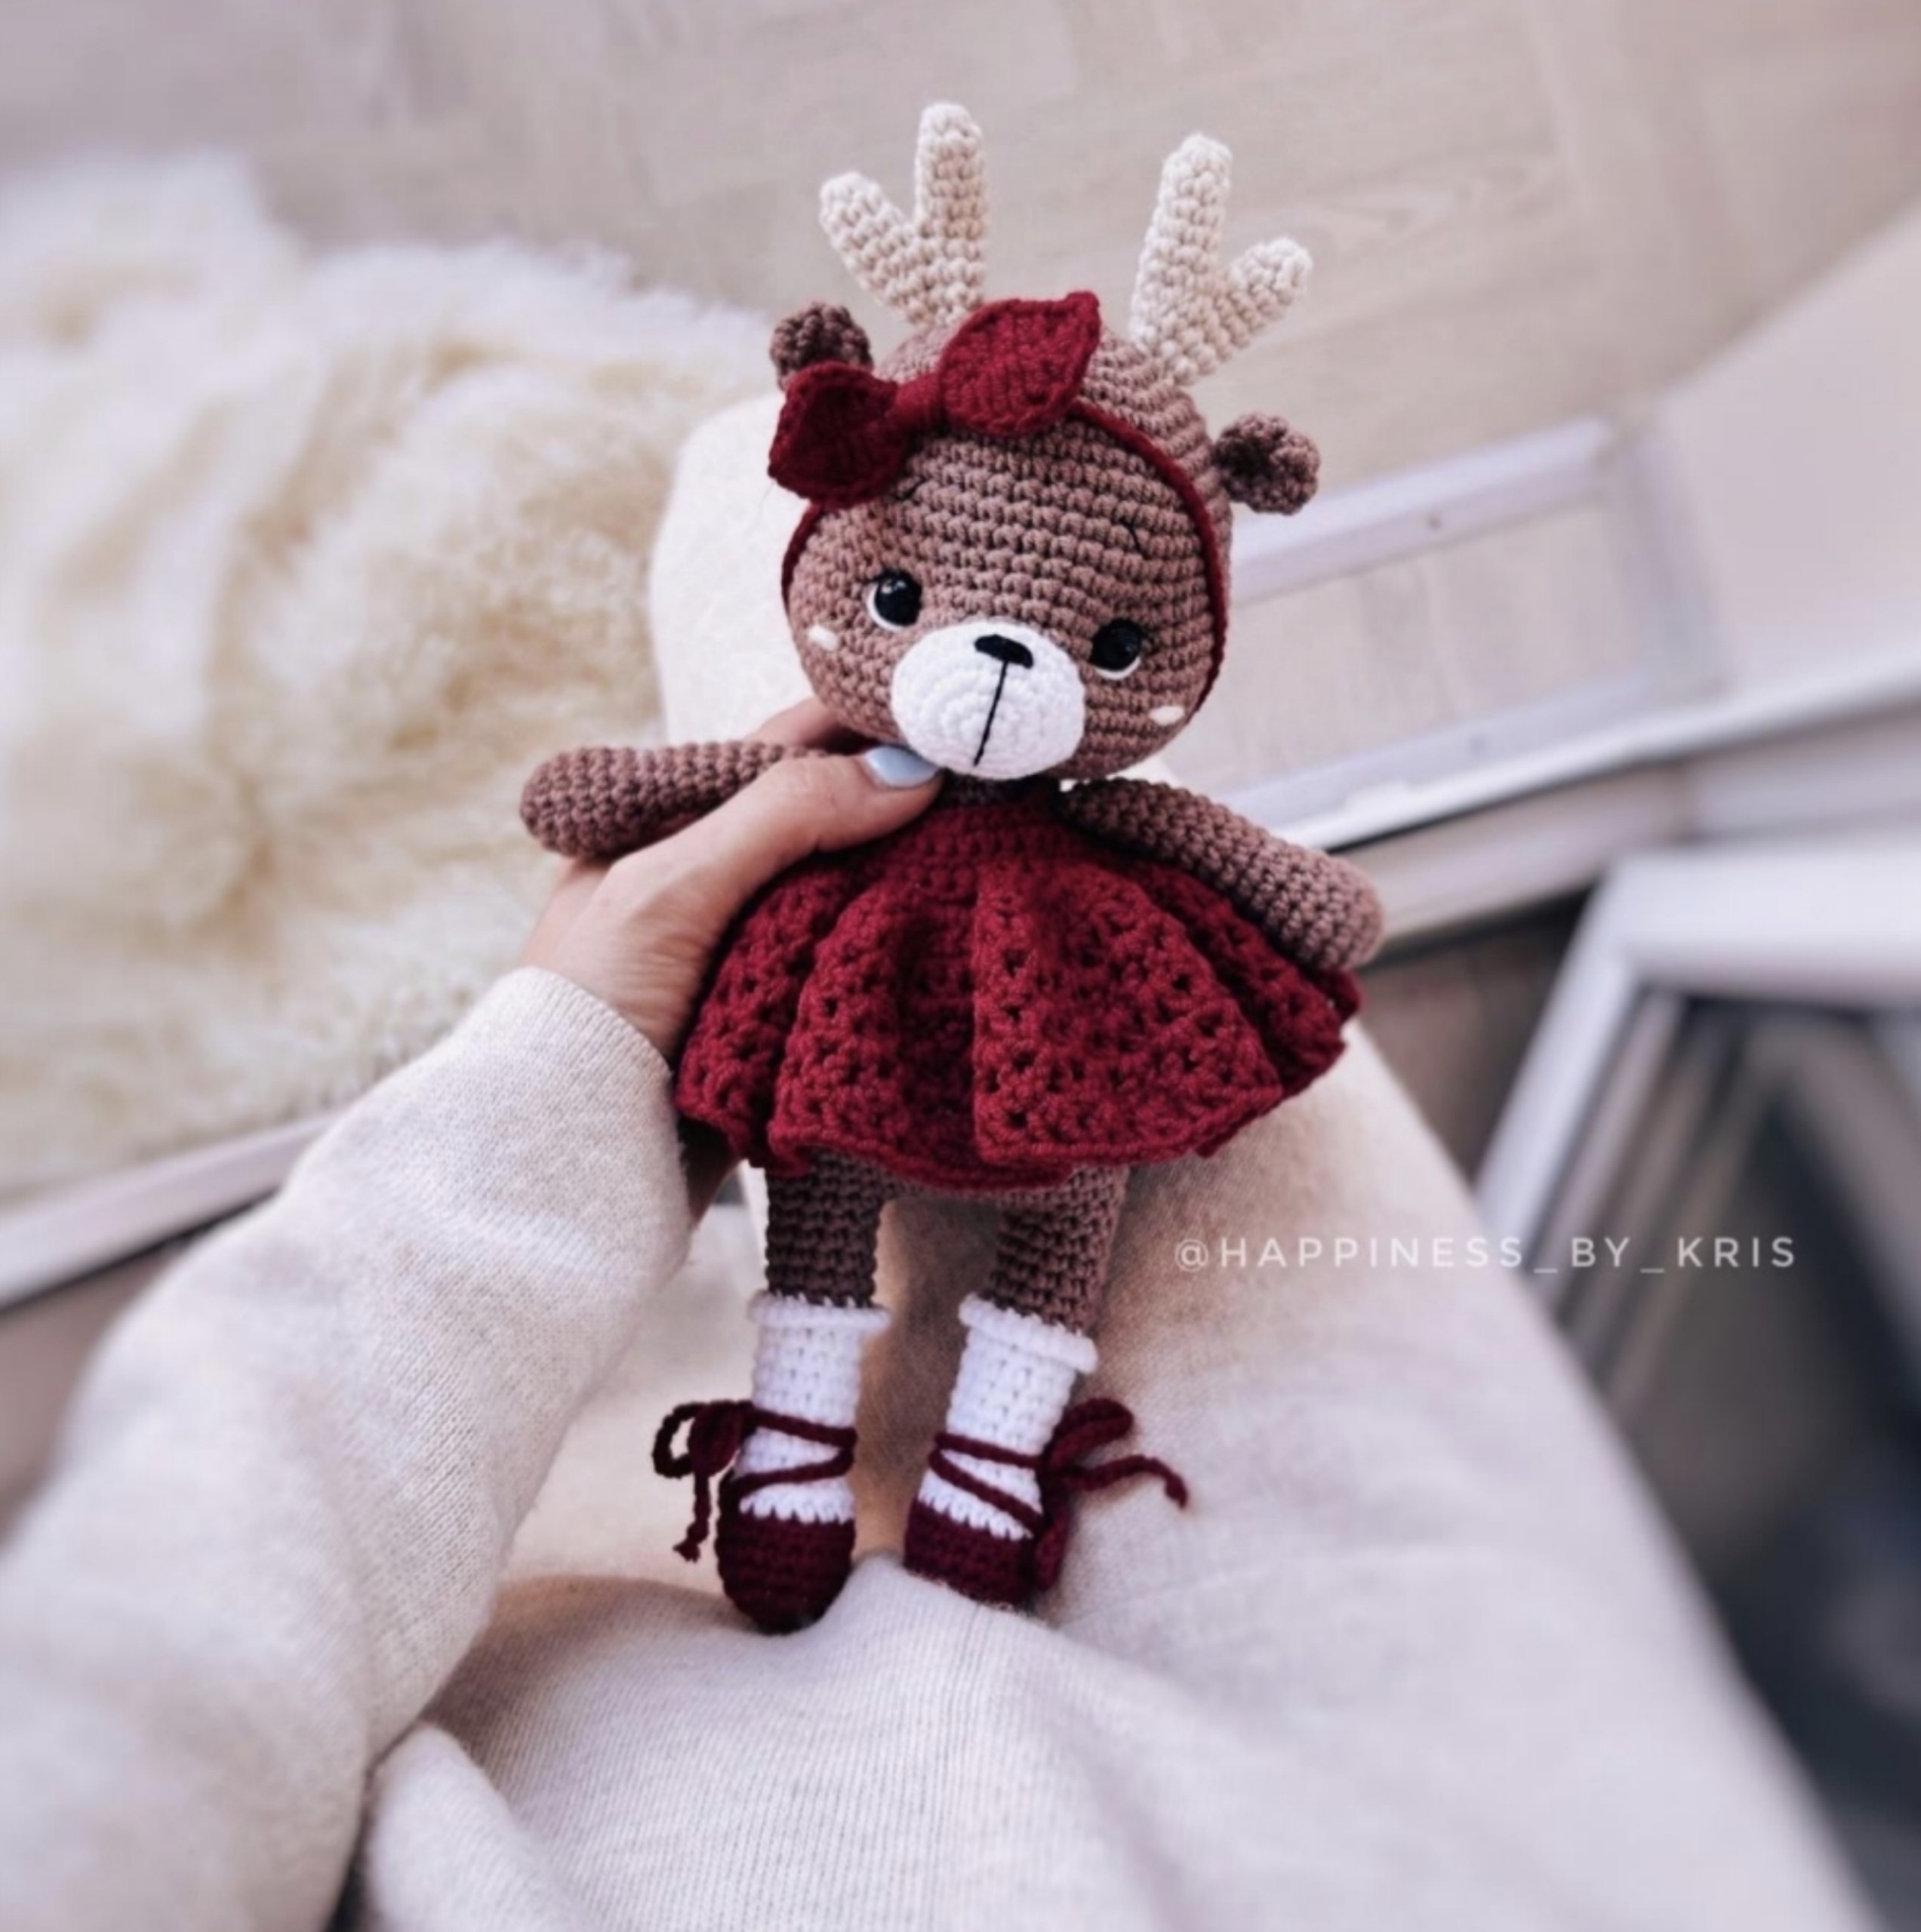
If you are looking for the perfect intermediate amigurumi project, look no further! This adorable little crochet deer (or fawn) is a heartwarming creation that makes for a wonderful nursery decoration, a sweet gift for a child, or a charming addition to your own crochet collection. With its oversized head, sweet expression, and stylish burgundy dress, this little character is sure to capture hearts.
In this detailed tutorial, we will walk through every single step, from shaping the tiny legs to the delicate process of “pulling” the eyes to create those signature chubby cheeks. While this pattern is designed to be beginner-friendly, it does involve color changes and some assembly work, which is great for practicing your amigurumi skills. Grab your favorite hook and some cozy yarn, and let’s get started on making your very own little deer!
Materials and Abbreviations
Materials Needed
- Yarn: A medium weight cotton/acrylic blend (like Yarn Art Jeans) works best for clean stitch definition. You will need the following colors:
- Cocoa/Brown: For the main body, head, arms, and ears.
- Burgundy/Deep Red: For the dress, shoes, and headband.
- White: For the socks, snout, and eye details.
- Light Beige: For the horns and cheeks.
- Black: For the eyelashes and eyebrows.
- Hook: A small hook is essential to keep stitches tight. Use a 1.75mm or 2.0mm hook. If you tend to crochet very tightly, you may want to move up to a 2.25mm hook.
- Safety Eyes: 9mm diameter.
- Stuffing: High-quality polyester fiberfill.
- Tools: A blunt-ended tapestry needle for sewing, a long needle for the eye-pulling technique, scissors, and stitch markers.
Crochet Abbreviations (US Terms)
- MR: Magic Ring
- sc: Single crochet
- inc: Increase (2 sc in one stitch)
- dec: Decrease (sc 2 stitches together)
- ch: Chain
- hdc: Half double crochet
- dc: Double crochet
- tr: Treble crochet
- sl st: Slip stitch
- st(s): Stitch(es)
Step-by-Step Instructions
The Legs and Body
We begin by working the legs and the body in one continuous piece to ensure stability. We will start with the burgundy color for the feet.
Starting with Burgundy:
- 6 sc in MR (6)
- 6 inc (12)
- (3 sc, inc) x 3 (15)
- (4 sc, inc) x 4 (18)
- Rounds 5-6: 18 sc (18).
Switching to White (for the socks):
Cut the burgundy yarn and join the white yarn. To make a seamless transition, work 18 sc through the back loops only (BLO) for round 7.
- 7: 18 sc through BLO (18)
- 8: (4 sc, dec) x 3 (15)
- 9: (3 sc, dec) x 3 (12)
- Rounds 10-16: 12 sc (12). At the end of round 16, work 3 extra sc to create a turning chain/offset, then switch to the Cocoa color. Do not cut the white yarn; pull it through to the inside to hide it.
Continuing with Cocoa (for the body):
- 17: 12 sc through BLO (12). At this stage, begin stuffing the legs firmly.
Joining the legs:
After completing the first leg, do not cut the yarn. Continue to the second leg. Work 6 sc around the second leg, then 7 ch. Insert your hook into the first leg (into the first stitch of the new round) and work 12 sc around the first leg. Work 7 sc along the chain you just made, then 6 sc around the second leg. (Total: 38 stitches). Place a stitch marker at the start of the round.
- 24: 18 sc, inc, 18 sc, inc (40)
- 25: (9 sc, inc) x 4 (44)
- 26: 44 sc (44)
- 27: (10 sc, inc) x 4 (48)
- 28: 48 sc (48)
- 29-31: 48 sc (48)
- 32: (22 sc, dec) x 2 (46)
- 33: (21 sc, dec) x 2 (44)
- 34: 44 sc (44)
- 35: (20 sc, dec) x 2 (42)
- 36: 42 sc (42)
- 37: (19 sc, dec) x 2 (40)
- 38: (18 sc, dec) x 2 (38)
- 39: (17 sc, dec) x 2 (36)
- 40: (16 sc, dec) x 2 (34)
- 41: (15 sc, dec) x 2 (32)
- 42: (14 sc, dec) x 2 (30)
- 43: (13 sc, dec) x 2 (28)
- 44: (12 sc, dec) x 2 (26)
- 45: (11 sc, dec) x 2 (24)
- 46: (2 sc, dec) x 6 (18). Fasten off, leaving a long tail for sewing the head to the body.
Note: Stuff the body firmly as you work. For the shoes, you can create small ties by working 55 ch with burgundy yarn and tying them in a bow around the ankle.
The Head
The head is worked in a spiral. For a professional look, ensure your tension is consistent.
- 6 sc in MR (6)
- 6 inc (12)
- (1 sc, inc) x 6 (18)
- (2 sc, inc) x 6 (24)
- (3 sc, inc) x 6 (30)
- (4 sc, inc) x 6 (36)
- (5 sc, inc) x 6 (42)
- 42 sc (42)
- (13 sc, inc) x 3 (45)
- (14 sc, inc) x 3 (48)
- 11-13: 48 sc (48)
- 14: (15 sc, inc) x 3 (51)
- 15: (16 sc, inc) x 3 (54)
- 16: (8 sc, inc) x 6 (60)
- 17-22: 60 sc (60)
Inserting the Eyes:
Place your 9mm safety eyes between rounds 16 and 17, approximately 9 to 10 stitches apart.
The Eye-Pulling Technique (For Chubby Cheeks):
To give your deer that adorable, expressive face, follow these steps carefully using a long needle and cocoa-colored yarn:
- Step 1: Insert the needle into the center of the neck area and bring it out through the center of the outer part of the first eye.
- Step 2: Insert the needle into the center of the inner part of that same eye, and pull it back out through the same spot on the neck. Pull the yarn slightly to create a dimple.
- Step 3: Repeat this for the second eye, moving one stitch over on the neck each time. Pulling the yarn from both sides will create a beautiful, rounded cheek shape.
- (8 sc, dec) x 6 (54)
- (7 sc, dec) x 6 (48)
- (6 sc, dec) x 6 (42)
- (5 sc, dec) x 6 (36)
- (4 sc, dec) x 6 (30)
Important: Start stuffing the head very firmly around round 17 to ensure the cheeks hold their shape.
- (3 sc, dec) x 6 (24)
- (2 sc, dec) x 6 (18). Fasten off and weave in ends.
The Snout, Horns, Ears, and Arms
The Snout
- 6 sc in MR (6)
- 6 inc (12)
- (1 sc, inc) x 6 (18)
- (2 sc, inc) x 6 (24)
- 24 sc, sl st (24). Fasten off.
The Horns (Make 2)
Large Piece:
- 6 sc in MR (6)
- (inc, 5 sc) (7)
- 3-5: 7 sc (7). Fasten off.
Small Piece:
- 6 sc in MR (6)
- (inc, 6 sc) (7)
- 3-4: 7 sc (7). Do not cut the yarn. Insert your hook into the large piece (the stitch following the last sl st) and work 7 sc around the large piece, then 7 sc around the small piece (14).
- 6: (5 sc, dec) x 2 (12)
- 7: (4 sc, dec) x 2 (10)
- 8: (3 sc, dec) x 2, sl st (6). Leave a tail for sewing.
The Ears (Make 2)
- 6 sc in MR (6)
- 6 inc (12)
- 12 sc (12)
- (4 sc, dec) x 2 (10)
Fold the ear in half and crochet 4 sc through both layers. Fold it again and crochet through both layers once more to flatten it, then sew to the head.
The Arms (Make 2)
- 6 sc in MR (6)
- 6 inc (12)
- (5 sc, inc) x 2 (14)
- 4-5: 14 sc (14)
- 6: (5 sc, dec) x 2 (12)
- 7: (4 sc, dec) x 2 (10)
Stuff the bottom half of the arm. From round 8 onwards, do not stuff. Fold the arm and crochet 4 sc through both sides. Fasten off, leaving a tail for sewing.
The Ruffled Burgundy Dress
This dress is worked in rows (turning your work) to create the sleeve shape.
- Ch 37.
- Row 2: Starting in the 2nd ch from hook: 5 sc, ch 7, skip 7 ch, 12 sc, ch 7, skip 7 ch, 5 sc (36).
- Row 3: Ch 1, 5 sc, 7 sc in the chain, 12 sc, 7 sc in the chain, 5 sc (36).
- 4-5: 36 sc (36).
- 6: Ch 1, (2 sc, inc) x 12 (48).
- 7: Ch 2, inc using 3 dc in every stitch (48).
The Ruffle Skirt:
- Ch 2, (dc, ch, dc) in the same stitch, skip 1 sc, (dc, ch, dc) in next stitch. Repeat to the end.
- 9: Work the (dc, ch, dc) pattern into the chain spaces of the previous row to create a full, tiered ruffle effect.
Dress Ties: Ch 36. Join to the side of the dress with a sl st and work around the neckline to create straps. Sew the straps to the top of the dress.
The Headband and Bow
Headband: Ch 68 (or enough to fit around the head comfortably) and join with a sl st to form a loop.
Bow: Ch 22. Starting in the 2nd ch from hook: sl st, 1 sc, 1 hdc, 1 dc, 2 tr in one stitch, 1 tr, 1 dc, 1 hdc, 1 sc, sl st, 1 sc, 1 hdc, 1 dc, 2 tr in one stitch, 1 tr, 1 dc, 1 hdc, 1 sc, sl st, 1 ch. Work the other side of the chain similarly. Flatten the bow and sew it to the headband.
Assembly Guide
- Snout: Sew the white snout between rounds 18 and 23 of the head. Use black yarn to embroider a small nose between rounds 4 and 5 of the snout.
- Eyes & Face: Embroider white eye shines and black eyelashes/brows at the level of round 12. Use light beige yarn to embroider soft cheeks between rounds 19 and 20.
- Horns: Sew the horns between rounds 4 and 6 of the head, with the larger part facing the center.
- Ears: Sew the ears at the level of rounds 10 and 11.
- Arms: Sew the arms between rounds 44 and 45 of the head/body junction.
- Dress: Slide the dress over the body and secure it.
Finishing Tips
- Stuffing: When sewing the head to the body, ensure the neck area is packed very tightly with stuffing to prevent the head from wobbling.
- Smooth Edges: Use your tapestry needle to hide all yarn ends deep inside the stuffing.
- The Bow: To make the bow look extra professional, you can lightly press it with an iron (use a pressing cloth to avoid melting the yarn!).
- Symmetry: When pulling the eyes to create cheeks, check them in a mirror to ensure they are even.