Crochet Beaver Pattern: An Easy Amigurumi Tutorial for Beginners
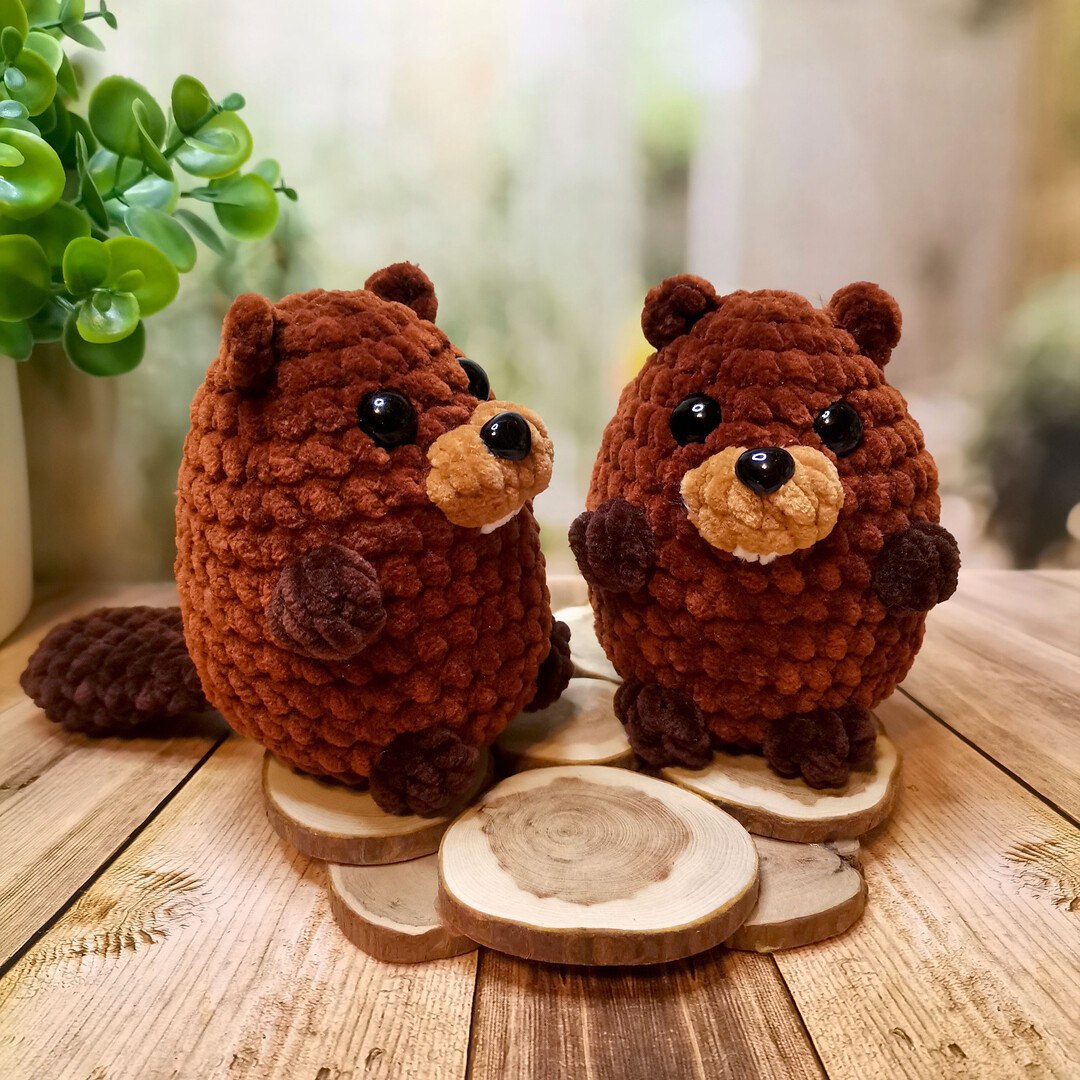
Are you looking for a quick, adorable, and incredibly soft project to add to your crochet collection? Look no further! This plush beaver is the perfect “palm-sized” companion. Whether you are looking to make a cute gift for a child, a charming addition to a nursery, or even small items to sell at a local craft fair, this pattern is designed to be fast, fun, and beginner-friendly.
What makes this pattern special is its streamlined construction. Unlike many amigurumi projects that require you to crochet dozens of tiny pieces and sew them all together, this beaver is designed to be worked almost entirely in one piece. The tail is crocheted directly onto the body, the ears are worked onto the finished shape, and the tiny teeth are simply embroidered on at the end. This means less time fiddling with a needle and more time enjoying the satisfying texture of plush yarn!
The finished beaver stands approximately 4 inches tall, making it the ideal size for “pocket pals” or display pieces. Let’s dive into everything you need to know to create your very own cuddly woodland friend.
Materials & Abbreviations
To achieve that ultra-soft, “squishy” look seen in the photos, I highly recommend using a plush or chenille-style yarn. This type of yarn hides your stitches beautifully and gives the toy a professional, high-end boutique feel.
What You Will Need
- Plush Yarn: Approximately 120 yards (100g) of bulky plush yarn.
- Main Color: A rich brown (suggested: Wolans BannyBaby #60).
- Secondary Color (for Muzzle): A lighter tan or beige (suggested: Wolans Banny Baby #18).
- Accent Color (for Tail and Paws): A slightly different shade of brown (suggested: Yarn Art Dolce #775).
- Crochet Hook: 4 mm (G/4) crochet hook.
- Safety Eyes: 10/12 mm safety eyes.
- Nose: 0.4-inch x 0.45-inch (10×11 mm) adhesive nose (or you can embroider a nose).
- Stuffing: Polyester fiberfill (polyfill).
- Embroidery Thread: White thread for the teeth.
- Other Tools: Tapestry needle, scissors, and stitch markers.
Abbreviations (US Terms)
Please ensure you are using US terminology for this pattern. If you are used to UK terms, be sure to convert your stitches accordingly!
- MR: Magic Ring
- sc: Single crochet
- inc: Increase (2 sc in one stitch)
- dec: Decrease (sc 2 together)
- ch: Chain
- sl st: Slip stitch
- dc: Double crochet
- tr: Treble crochet
- st(s): Stitch(es)
- Bobble Stitch (Puff): For this pattern, the muzzle, arms, and legs are made using a bobble stitch. For the muzzle and arms, work 4 dc into a single stitch. For the legs, work 3 tr into a single stitch.
Step-by-Step Instructions
The Tail
We will start by crocheting the tail using your accent color. This piece will be worked separately and then joined to the body later.
- 6 sc in a Magic Ring (6)
- 6 inc (12)
- 3-4. 12 sc (2 rounds total)
- (1 dec, 5 sc) repeat twice (10)
- 10 sc
- (1 dec, 4 sc) repeat twice (8)
Note: Do not stuff the tail. Once you reach the end, fold the tail in half and crochet 4 sc through both layers to close it up. Set this aside.
The Body
Now, switch to your main color to begin the body. This section is where the magic happens, as we will incorporate the muzzle, arms, and legs directly into the rounds.
- 6 sc in a Magic Ring (6)
- 6 inc (12)
- (1 sc, inc) repeat 6 times (18)
- (2 sc, inc) repeat 6 times (24)
- 24 sc
- (3 sc, inc) repeat 6 times (30)
- 14 sc, [Muzzle: Work a bobble stitch (4 dc) in one stitch, then work another bobble stitch in the next stitch using your secondary color], 14 sc (30)
- 30 sc
- 1 sc, inc, 8 sc, [Arm: Work a bobble stitch (4 dc) in one stitch], 8 sc, [Arm: Work a bobble stitch (4 dc) in one stitch], 8 sc, inc, 1 sc (32)
Important: Before continuing, insert your safety eyes between rounds 5 and 6. Place them approximately 4 stitches apart, centered between the “legs” area.
- 10-13. 32 sc for 4 rounds total
- 2 sc, 1 dec, 9 sc, [Leg: Work a bobble stitch (3 tr) in one stitch], 4 sc, [Leg: Work a bobble stitch (3 tr) in one stitch], 9 sc, 1 dec, 2 sc + 2 sc from the tail (30)
- 2 sc + 2 sc from the tail, 1 sc, 1 dec, (3 sc, 1 dec) repeat 5 times (24)
- 12 dec (12)
- 12 sl st to close
Note: As you work Round 14 and 15, make sure to incorporate the stitches from the tail that you joined earlier to ensure the body stays continuous.
The Ears
The ears are worked directly onto the finished body to give the beaver its signature rounded look.
- Hold the toy facing you. Join your yarn to an existing stitch on the 4th row from the top.
- Ch 3.
- In the 3rd chain from your hook, work 1 dc.
- Then, work 1 sc into the same stitch in the 3rd row.
- Fasten off and weave in your ends.
- Repeat the same process for the second ear.
Finishing
Now that your structural crochet is complete, it’s time for the personality! This is where your beaver truly comes to life.
- The Nose: Using your adhesive nose, carefully position it centered just below the muzzle area. Press firmly to secure.
- The Teeth: This is the most important part for a beaver! Using white embroidery thread, stitch a few small vertical lines just below the nose to represent the iconic front teeth.
- Final Cleanup: Go through your work with a tapestry needle and weave in every single loose end. Make sure they are tucked deep into the stuffing so they don’t pop out later.
Tips for Success
Crocheting with plush yarn can be a bit different than using standard cotton or acrylic. Here are a few pro-tips to help you get a professional finish:
- Watch Your Tension: Plush yarn can be slippery. Try to maintain a consistent tension so your stuffing doesn’t show through the gaps in your stitches.
- Use Stitch Markers: Because the stitches in plush yarn can be hard to see, always use a stitch marker to identify the beginning of your rounds. This prevents mistakes in your increases and decreases.
- Stuffing Technique: When stuffing your beaver, use small clumps of polyfill at a time. This allows you to push the stuffing into the corners (like the bottom and near the arms) so the toy looks smooth and rounded rather than lumpy.
- The Bobble Stitch: If you are a beginner, practice your bobble stitch on a scrap piece of yarn first. Since we are using these for the arms and legs, you want them to be firm and well-defined.
Congratulations! You have just completed a handmade, adorable plush beaver. Whether you keep him as a desk buddy or gift him to a loved one, you should be very proud of your beautiful work!