Crochet Winnie the Pooh and Honey Pot Pattern: A Cute Amigurumi Tutorial
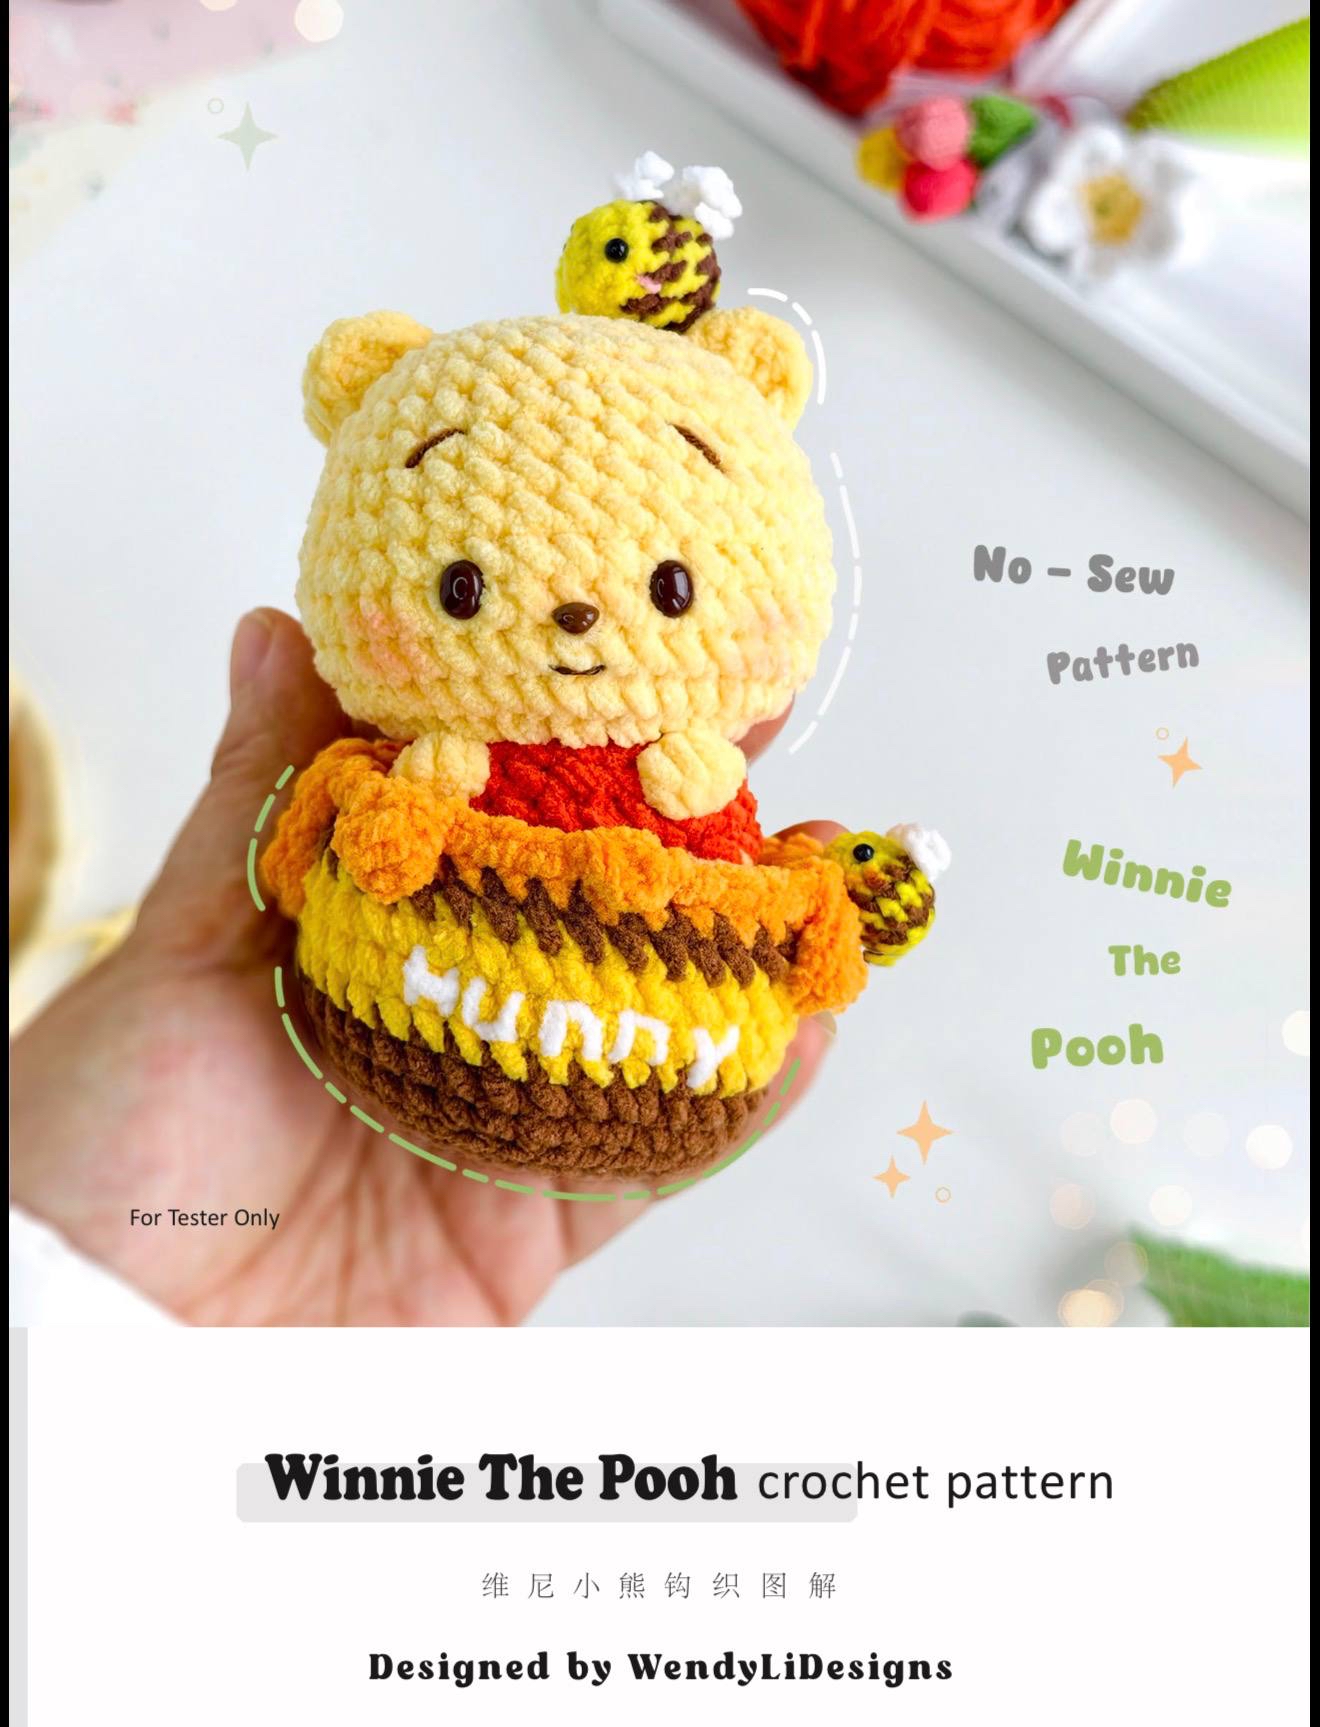
If you are looking for your next adorable amigurumi project, look no further! This charming crochet pattern allows you to create a miniature, cuddly version of a beloved classic: a little bear sitting inside a sweet honey pot, complete with a tiny buzzing friend. This project is perfect for fans of classic nursery themes and makes for an incredible gift, a nursery decoration, or a whimsical addition to your own crochet collection.
This tutorial is designed to be beginner-friendly, focusing on simple shapes and manageable rounds. While it involves some specialty stitches like the bobble stitch, the instructions are broken down step-by-step to ensure you achieve that professional, high-quality finish. Grab your favorite chenille yarn and let’s get started on this sweet adventure!
Materials & Abbreviations
Materials Needed
To ensure your finished plushies look like the photos, I recommend using a soft chenille yarn. This gives the pieces a velvety, high-end texture that is perfect for amigurumi.
For Winnie the Pooh and the Honey Pot:
- Chenille Yarn: You will need approximately 50g (about 90m) in the following colors: Almond Yellow, Red, Brown, Yellow, and Orange.
- Crochet Hook: 3 mm.
- Safety Eyes: Brown oval eyes (approx. 0.2″ x 0.25″).
- Safety Nose: Brown flat-backed nose (approx. 0.15″ x 0.2″).
- Embroidery Details: Brown cotton yarn or embroidery thread for facial features.
- White Chenille Yarn: A finer weight for stitching the “HUNNY” text.
- Stuffing: Polyester fiberfill.
- Other: Tapestry needle, transparent glue, and stitch markers.
For the Little Bee:
- Chenille Yarn: Approximately 40g (about 145m) in Brown, White, and Yellow.
- Crochet Hook: 2 mm.
- Eyes: 3mm black straight-post eyes.
- Stuffing: Polyester fiberfill.
- Other: Tapestry needle and transparent glue.
Finished Sizes (Approximate):
- Bear: 3.35 inches tall.
- Honey Pot: 1.77 inches tall.
- Bee: 0.8 inches tall.
Abbreviations (US Terms)
- ch: chain
- st(s): stitch(es)
- slst(s): slip stitch(es)
- sc: single crochet (Note: Use the X-shaped method for a cleaner look!)
- hdc: half double crochet
- dc: double crochet
- inc: increase (2 single crochets in one stitch)
- dec: decrease (single crochet 2 stitches together)
- FLO: front loops only
- BLO: back loops only
- […]: work stitches in brackets all into the same stitch
- (…)*x: repeat the instruction in brackets x times
Step-by-Step Instructions
Making the Bear Body
Work in spiral rounds.
R1: Start with almond yellow yarn. Create a magic ring and work 8 sc into the ring. [8]
R2: 8 inc. [16]
R3: (1 sc, 1 inc) repeat 8 times. [24]
R4: (5 sc, 1 inc) repeat 4 times. [28]
R5: 8 sc, a 5-dc bobble, 7 sc, a 5-dc bobble, 9 sc, a 6-dc bobble, 1 sc. [28]
R6-7: Change to red yarn. Work 28 sc for each of these two rounds. [28]
R8: 1 sc, (1 dec, 5 sc) repeat 3 times, 1 dec, 4 sc. [24]
R9: 7 sc, a 5-dc bobble in almond yellow, 1 sc, 1 dec, 2 sc, a 5-dc bobble in almond yellow, 8 sc, 1 dec. [22]
R10: 3 sc, 1 dec, 10 sc, 1 dec, 5 sc. [20]. Stuff the body firmly with polyester fiberfill.
R11: Working in BLO, (1 sc, 1 dec) repeat 2 times, 6 sc, (1 dec, 1 sc) repeat 2 times, 2 sc. [16]
Fasten off, leaving a tail for assembly.
Creating the Bear Head
Work in spiral rounds.
R1: Using almond yellow yarn, work into the unused front loops (FLO) of Round 10 on the body. Join the yarn in the first available loop, ch 1, and work 20 inc. [40]
R2-5: 40 sc for four rounds. [40]
R6: 3 sc, 1 dec, 5 sc, 1 dec, 11 sc, 1 dec, 5 sc, 1 dec, 8 sc. [36]
R7: 36 sc. [36]
Note: Place the safety eyes between Rounds 4 and 5, ensuring they are 5 stitches apart.
R8: 3 sc, 1 dec, 3 sc, 1 dec, 11 sc, 1 dec, 3 sc, 1 dec, 8 sc. [32]
R9: 32 sc. [32]. Continue stuffing the head as you go.
R10: 4 sc, 1 dec, 6 sc, 1 dec, 7 sc, 1 dec, 5 sc, 1 dec, 2 sc. [28]
R11: 1 sc, 1 dec, 4 sc, 1 dec, 6 sc, 1 dec, 4 sc, 1 dec, 5 sc. [24]
R12: (1 sc, 1 dec, 1 sc) repeat 6 times. [18]
R13: (1 sc, 1 dec) repeat 6 times. [12]
R14: 6 dec. [6]
Cut the yarn, leaving a long tail. Use a tapestry needle to weave the tail through the front loops of the remaining stitches and pull tightly to close. Weave in your ends.
Adding Facial Features & Ears
Facial Details: Glue the safety nose into place. Using brown cotton yarn, embroider two simple lines for eyebrows at Round 8. Finally, use brown embroidery thread to create a small, sweet smile between the nose and the bottom of the face.
The Ears: Use pins to mark two stitches on each side of the head between Rounds 9 and 12.
Left & Right Ear: Insert your hook into the first marked point. With almond yellow yarn, pull up a loop and ch 1. Work 5 hdc into the second marked point. Work 1 slst into the third marked point. Fasten off and weave in ends. Repeat for the other side.
Crafting the Honey Pot
Work in spiral rounds.
R1: Start with brown yarn. Create a magic ring and work 8 sc. [8]
R2: 8 inc. [16]
R3: (1 sc, 1 inc) repeat 8 times. [24]
R4: (3 sc, 1 inc) repeat 6 times. [30]
R5: (2 sc, 1 inc, 2 sc) repeat 6 times. [36]
R6: Working in BLO, 36 sc. [36]
R7: (4 sc, 1 inc, 4 sc) repeat 4 times. [40]
R8-10: Change to yellow yarn. Work 40 sc for three rounds. [40]
R11: Change to brown yarn. Work 40 sc. [40]
R12: Change to orange yarn. 4 sc, 1 dec, (8 sc, 1 dec) repeat 3 times, 3 sc, 1 slst. [36]
The Honey Drips: Without cutting your orange yarn, you will work rows into the pot to create drips.
Row 1: Ch 4. Starting in the 3rd ch from hook, work 1 dc, 1 hdc. Skip the first stitch of R12 and slst into the next stitch. Work 4 slsts to finish the drip. [Repeat for all drips as instructed by the pattern rows.]
After completing the drips, glue them to the pot and use fine white yarn to stitch the word “HUNNY” onto the front.
Making the Little Bee
Work in spiral rounds.
R1: Start with yellow yarn. Magic ring 8 sc. [8]
R2: (3 sc, 1 inc) repeat 2 times. [10]
R3: (2 sc, 1 inc, 2 sc) repeat 2 times. [12]
R4: Change to brown. 12 sc. [12]
R5: Change to yellow. 12 sc. [12]
R6: Change to brown. 12 sc. Stuff with fiberfill. [12]
R7: Change to yellow. 6 dec. [6]
Fasten off and close. Attach the 3mm black eyes between Rounds 2 and 3, about 4 stitches apart.
The Wings: Work these directly onto Round 5 of the bee’s body, leaving 1 stitch between them.
Left & Right Wing: Pull up a loop with white yarn. Ch 5. Starting in the 4th ch from the hook, work 1 dc and 1 sc. Join with a slst to the same stitch where you started. Fasten off and weave in ends. Embroider small pink cheeks onto the bee for extra cuteness!
Finishing
Once all pieces are crocheted, assemble them carefully. Place the bear inside the honey pot. You can use a little bit of glue to secure the bear into the pot if you want him to stay upright. Finally, place your little bee on top of the bear’s head or perched on the edge of the pot. Your adorable amigurumi set is complete!
Tips for Amigurumi Success
- The X-Stitch: For the cleanest look, always use the X-shaped single crochet method (yarn under the hook). This prevents gaps in your stuffing.
- Stuffing Strategy: Stuff your pieces in small increments. If you stuff too much at once, it can become difficult to shape and might cause your stitches to stretch or open.
- Use Stitch Markers: When working in spirals, it is incredibly easy to lose your place. Always use a stitch marker to identify the first stitch of every round.
- Bobble Technique: When working a bobble with a color change, ensure you pull through all loops with the *original* color at the very end to secure the texture.