Adorable Crochet Fruit Pants Pattern for Amigurumi Animals
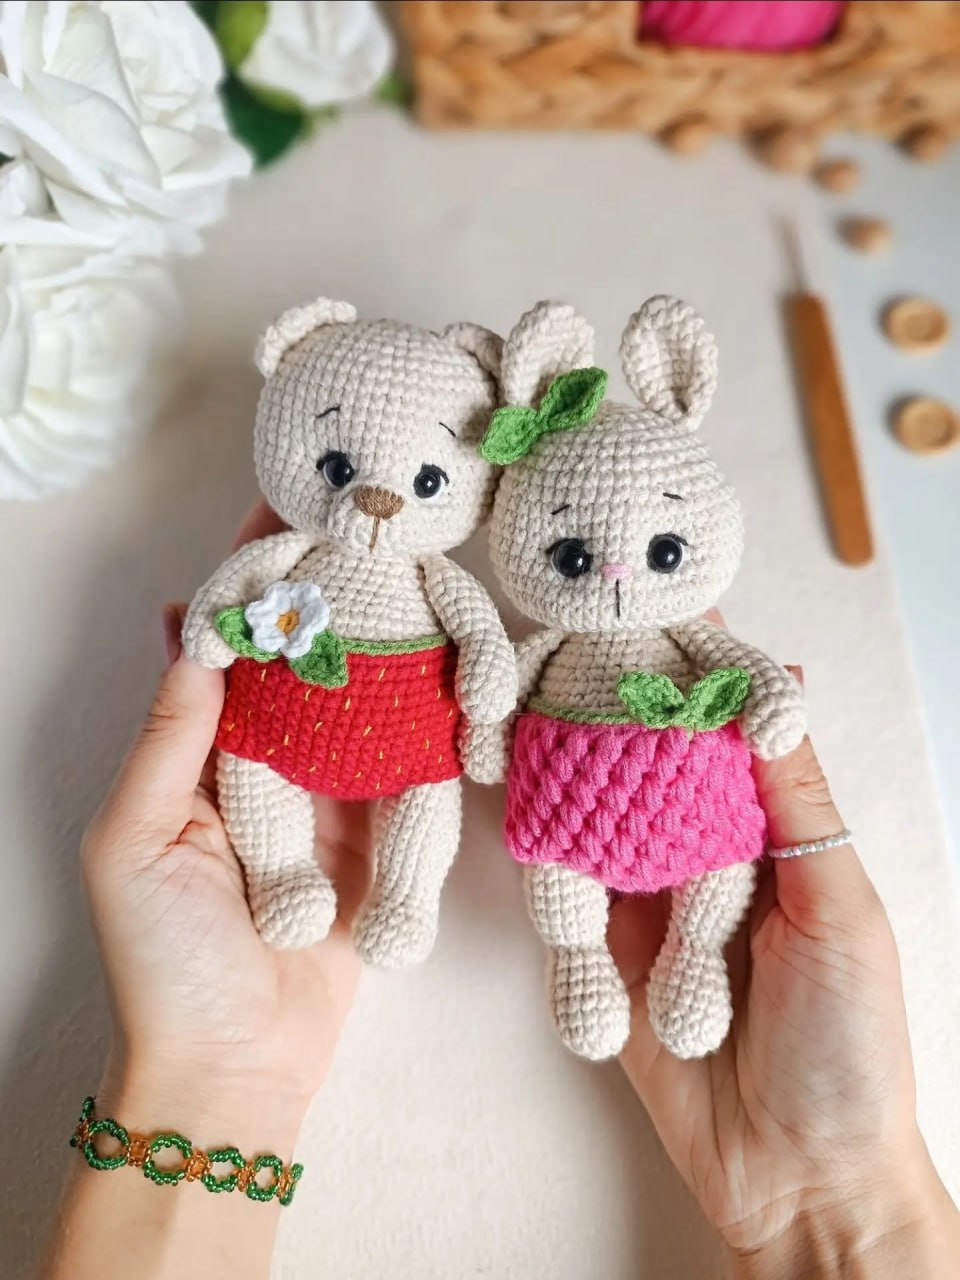
Who doesn’t love adding a little extra personality to their amigurumi creations? If you have a collection of crochet bears, bunnies, or kittens, giving them a wardrobe update is the perfect way to make them stand out. These tiny fruit-themed pants—designed as a sweet strawberry and a plump raspberry—are the ultimate accessory for your handmade friends. They are quick to make, beginner-friendly, and add an instant burst of color and cuteness to any plushie.
Whether you are looking for a small project to use up your scrap yarn or a charming gift addition for a child’s toy, these fruit bottoms are a fantastic choice. In this tutorial, we will walk you through the process of creating both the strawberry and raspberry versions, along with the tiny floral accents that make them truly special.
Materials & Abbreviations
To get started, you will need a few basic supplies. While the original design uses a sport-weight cotton blend, any similar yarn will work perfectly. For the best results, use a hook size that ensures your stitches are tight so the stuffing of your animal doesn’t peek through the outfit.
Materials Needed:
- Yarn: Sport weight cotton or cotton-blend yarn in the following colors:
- Bright Red (for the strawberry)
- Deep Pink (for the raspberry)
- Leaf Green (for the stems and leaves)
- White and Yellow (small amounts for the flower)
- Crochet Hook: 2.0mm to 2.5mm (depending on your tension)
- Notions: Yarn needle, scissors, and stitch markers
Abbreviations (US Terms):
- ch: chain
- sc: single crochet
- hdc: half double crochet
- dc: double crochet
- sl st: slip stitch
- MR: magic ring
- Bobble: A cluster stitch created by working three unfinished double crochets into one stitch and finishing them all together with one final loop.
Step-by-Step Instructions
We will begin with the decorative accents before moving on to the main outfits. These small details provide the “pop” that makes the fruit theme recognizable.
Crafting the Tiny Flower
The flower adds a delicate touch to the strawberry outfit. It is worked in a spiral.
- Center: Using yellow yarn, work 6 sc into a magic ring. Join with a slip stitch and fasten off.
- Petals: Join white yarn to any stitch of the yellow center. To create one petal, work the following sequence into a single stitch: (1 sc, 2 dc, 1 sc).
- Repeat this petal sequence in each of the remaining 5 stitches around the center.
- Sl st to the first petal, fasten off, and weave in your ends.
Crochet a Cute Leaf
The leaves are used for both the strawberry and raspberry tops. They are worked in a small oval shape.
- Chain 8.
- Starting in the second chain from the hook, work along one side of the chain: 1 sl st, 1 sc, 1 hdc, 1 dc, 1 hdc, 1 sc, 1 sl st.
- Immediately turn and work back along the opposite side of the foundation chain: 1 sl st, 1 sc, 1 hdc, 1 dc, 1 hdc, 1 sc, 1 sl st.
- Fasten off, leaving a long tail for sewing.
The Strawberry Outfit
The strawberry pants are created by working in the round to form a tube, then adding leg openings.
- The Base: Using red yarn, chain 48. Join the chain into a ring with a slip stitch to form a circle.
- Work 48 sc in the round for 5 rows.
- The Leg Gap: In Row 6, chain 5, skip 5 sc, then continue working sc in the remaining 43 stitches of the row.
- Building Height: Continue working 48 sc per round for the next 6 rows.
- Finish with a slip stitch and fasten off.
- Creating the Legs: Attach your red yarn to the center of the front gap you created. Work 4 rows of 10 sc each to create the front of the leg. Fasten off.
- Repeat this process on the back side of the garment: attach yarn and work 4 rows of 10 sc.
- Closing the Legs: Sew the front and back leg sections together along the sides to create two separate leg holes.
- The Top Trim: Join green yarn to the top edge of the pants. Work a round of slip stitches (sl st) all the way around the waistband to create a clean, green stem edge.
The Raspberry Outfit
The raspberry uses bobble stitches to mimic the bumpy texture of a real berry.
- The Base: Using pink yarn, chain 44. Join into a ring with a slip stitch.
- Work 44 sc in the first round.
- The Texture: Work the next 3 rows entirely in bobble stitches.
- The Tail Hole: In the next row, chain 3 and skip one bobble stitch (this creates a small hole for a stem or “tail”). Work bobble stitches in all remaining stitches of the row.
- Continue working bobble stitches for another 3 rows.
- Finish with a slip stitch and fasten off.
- The Legs: Attach pink yarn to the center of the front of the pants. Work 1 row of 4 bobble stitches. Fasten off.
- Repeat this on the back side: work 1 row of 4 bobble stitches.
- Closing: Sew the front and back leg sections together.
- The Top Trim: Join green yarn to the top edge and work 44 slip stitches around the waistband to finish the look.
Finishing and Assembly
Now that all the pieces are complete, it is time to put them together. This is where your outfit really starts to look like a piece of fruit!
For the strawberry, sew the green leaf onto the top edge of the waistband. Once the leaf is secure, sew the tiny yellow and white flower on top of the leaf to create a blooming strawberry blossom. For the raspberry, simply center the leaf on the waistband and sew it firmly in place.
Slide the pants onto your amigurumi animal. Since these are worked in a tube with specific leg holes, they should fit snugly around the waist and thighs of most standard small-to-medium plushies.
Expert Tips for Perfect Results
To make your fruit outfits look professional, keep these few tips in mind:
- Tension Control: When working bobble stitches for the raspberry, be careful not to pull the yarn too tight, or the “bumps” will flatten out. Keep your tension relaxed for a plump, berry-like appearance.
- Invisible Seams: When sewing the leg openings, use a whip stitch or a mattress stitch for a seamless look that won’t irritate the fabric of the toy underneath.
- Custom Sizing: If your amigurumi animal is larger than average, simply increase the starting chain count. For the strawberry, adding 4-8 chains (maintaining a multiple that allows for the 5-stitch gap) will give you a wider fit.
- Yarn Choice: For a more “fuzzy” look, you can try a chenille or velvet yarn, though you may need to increase your hook size to accommodate the thicker fiber.