Easy Crochet Fox Keychain Pattern: A Step-by-Step Amigurumi Tutorial
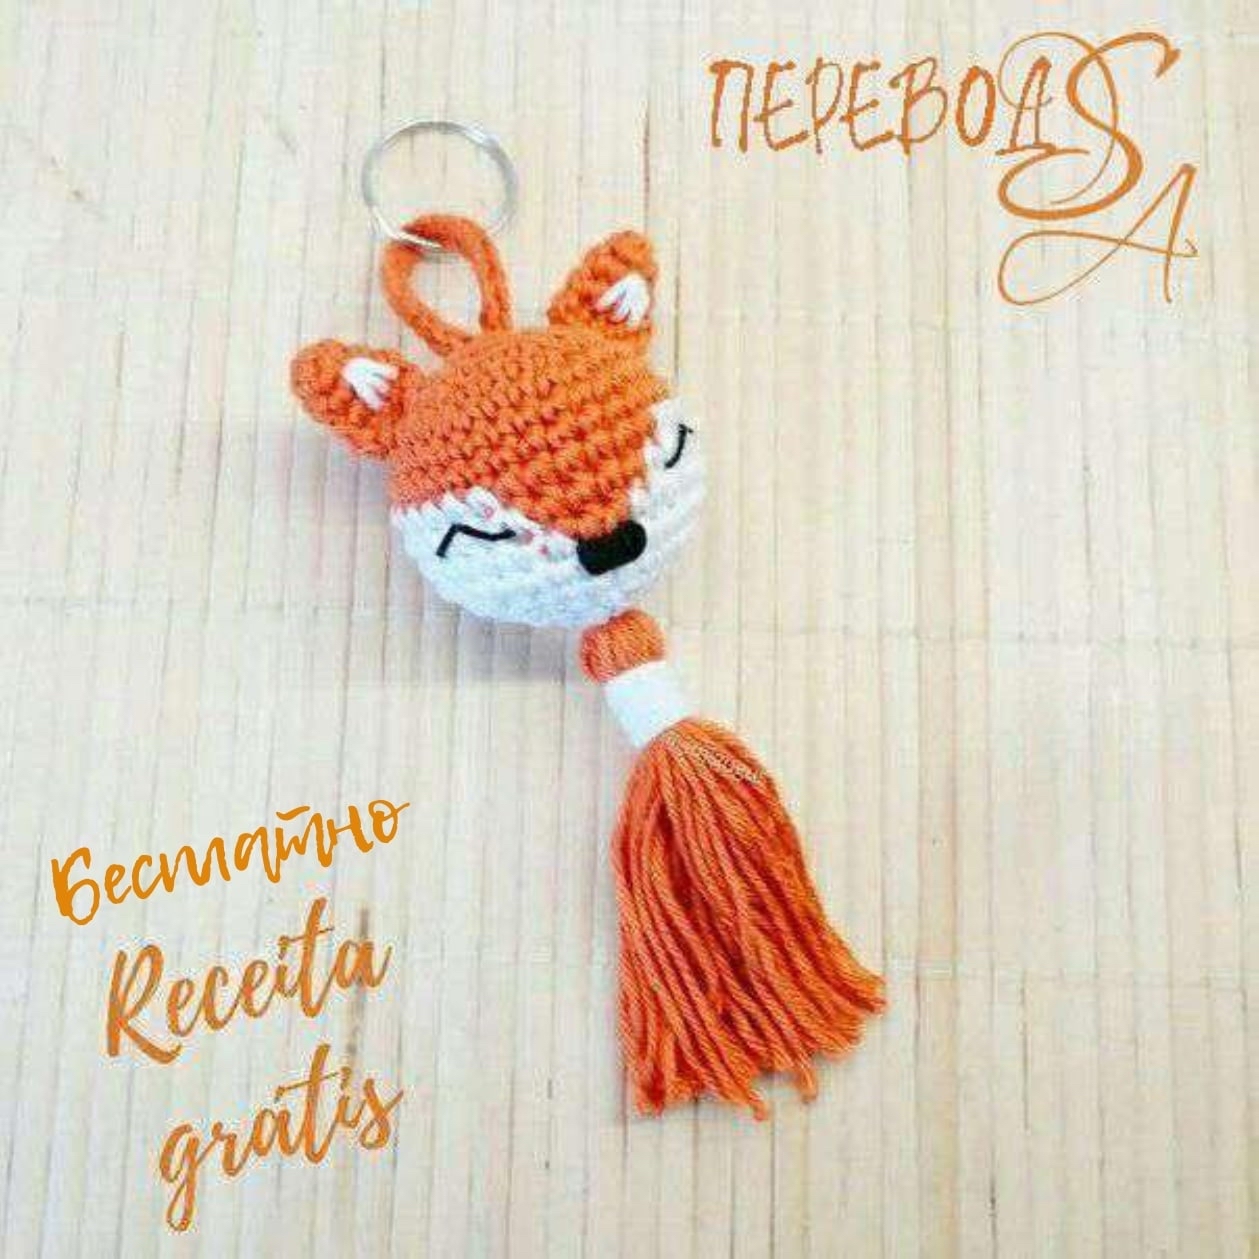
Are you looking for a quick, adorable, and useful crochet project? Look no further! This DIY crochet fox keychain is the perfect project for both beginners and seasoned amigurumi enthusiasts. Whether you want to decorate your keys, add some charm to your backpack, or create a small handmade gift for a friend, this little forest friend is sure to bring a smile to anyone’s face.
Crocheting small items like keychains is a fantastic way to practice your tension and master color changes without committing to a massive project. In this tutorial, we will walk through every single step, from making the magic ring to crafting that signature fluffy tassel. Grab your hook and some yarn, and let’s get started!
Materials & Abbreviations
Before we dive into the stitches, let’s make sure you have everything you need on your crafting table. Since this is a small project, you won’t need a massive stash of yarn, but having the right colors is key to getting that classic fox look.
What You’ll Need:
- Yarn: Medium weight (worsted) yarn in three colors: Orange, White, and Black. You will also need a small amount of White for the tassel wrap.
- Crochet Hook: A hook appropriate for your yarn weight (typically a 3.5mm or 4.0mm hook works well for amigurumi to keep stitches tight).
- Stuffing: Polyester fiberfill to give your fox head its shape.
- Tapestry Needle: A blunt-ended needle for weaving in ends and sewing the parts together.
- Scissors: For cutting your yarn.
- Keychain Hardware: A metal split ring or a lobster clasp.
- Optional: A small notepad or piece of cardboard (to help make the tassel).
Abbreviations (US Terms):
- MR: Magic Ring
- sc: Single crochet
- inc: Increase (2 sc in the same stitch)
- dec: Decrease (sc 2 stitches together)
- sl st: Slip stitch
- ch: Chain
Step-by-Step Instructions
When working on amigurumi, remember to keep your tension relatively tight. This ensures that the stuffing doesn’t peek through the holes in your stitches. We will be working in continuous spirals, so try not to lose your place!
The Fox Head
We will begin the head using the orange yarn. This will form the top and ears of the fox.
- Round 1: Make a Magic Ring and work 6 sc into it (6).
- Round 2: 6 inc (12).
- Round 3: (1 sc, inc) repeat 6 times (18).
- Round 4: 1 sc, inc, (2 sc, inc) repeat 5 times, 1 sc (24).
- Round 5: (3 sc, inc) repeat 6 times (30).
- Rounds 6–7: 30 sc (30). Work 2 rounds of 30 sc each.
Now, we will introduce the white yarn to create the fox’s face. This involves color changes. Pay close attention to the stitch counts for the orange sections to ensure the facial markings are symmetrical.
Adding the Face (Color Changes)
- Round 8: 10 sc in white, 6 sc in orange, 14 sc in white (30).
- Round 9: 11 sc in white, 4 sc in orange, 15 sc in white (30).
- Round 10: 12 sc in white, 2 sc in orange, 16 sc in white (30).
- Round 11: 30 sc in white (30).
Now that we have completed the colorwork, we will begin shaping the head to close it off.
- Round 12: (3 sc, dec) repeat 6 times (24).
- Round 13: 1 sc, dec, (2 sc, dec) repeat 5 times, 1 sc (18).
- Round 14: (1 sc, dec) repeat 6 times (12).
- Round 15: 6 dec (6).
Important: When you reach Round 13 or 14, stop and stuff your fox head firmly with polyester fiberfill. Once stuffed, fasten off the orange yarn. Using your tapestry needle, weave the yarn tail through the front loops of the remaining 6 stitches and pull tight to close the hole completely.
The Ears (Make 2)
Use the orange yarn for both ears.
- Round 1: Make a Magic Ring and work 6 sc into it (6).
- Round 2: 6 sc (6).
- Round 3: (2 sc, inc) repeat 2 times (8).
- Round 4: (3 sc, inc) repeat 2 times (10).
Fasten off, leaving a long tail for sewing. To finish the ear shape, use a slip stitch to close the opening if desired.
The Keychain Loop
Using your orange yarn, chain 25. Once you reach the end of the chain, join it back to the beginning of the chain with a slip stitch to form a loop. Pro tip: As you join the loop, make sure it doesn’t twist or overlap awkwardly so it lays flat against your keychain.
The Fluffy Tassel
The tassel adds a lovely bit of movement and texture to your fox. Here is how to make it:
- Find a base of your desired size (a small notepad or a piece of cardboard about 1-2 inches wide works perfectly).
- Wrap your orange yarn around the base several times. The more times you wrap it, the fluffier your tassel will be!
- Slide the yarn off the base and cut the loops on only one side.
- Gather the cut strands and fold them in half.
- Take your white yarn and wrap it tightly around the folded “neck” of the yarn bundle. Pull it very snug to ensure the tassel stays together.
Finishing & Assembly
Now comes the fun part—bringing your fox to life! Assembly is what turns separate pieces into a character.
Step 1: Sewing the Ears
Using your tapestry needle and the orange yarn tails, sew the two ears onto the top of the head. Try to place them symmetrically so your fox looks balanced.
Step 2: Embroidering the Face
For the most aesthetic look, use a very thin black thread for the facial features. This prevents the eyes and nose from looking bulky.
- Eyes: Embroider two small, slightly curved lines to represent closed, sleeping eyes.
- Nose: Embroider a small black triangle or oval in the center of the white section.
- Ear Details: You can use white yarn to embroider a small patch inside the orange ears for added detail.
Step 3: Final Touches
Sew the finished tassel to the very bottom of the fox head. Finally, attach your keychain ring through the orange loop you created earlier.
Tips for Success
To make your crochet fox look professional, keep these expert tips in mind:
- Consistent Tension: Especially when working with the small rounds at the start of the head, try to keep your stitches uniform. This prevents “gaps” where stuffing might show.
- Mastering Color Changes: When switching from white to orange in Rounds 8-10, pull the new color through the last two loops of the previous stitch to create a clean transition.
- Stuffing Technique: Stuff the head in small increments. If you try to shove a large clump of stuffing in at once, you might distort the shape of the head.
- Symmetry is Key: When sewing the ears and embroidering the eyes, take a moment to step back and look at the fox from a distance to ensure everything is even.
Congratulations! You have successfully created a charming crochet fox keychain. This little guy is ready to go on many adventures with you!