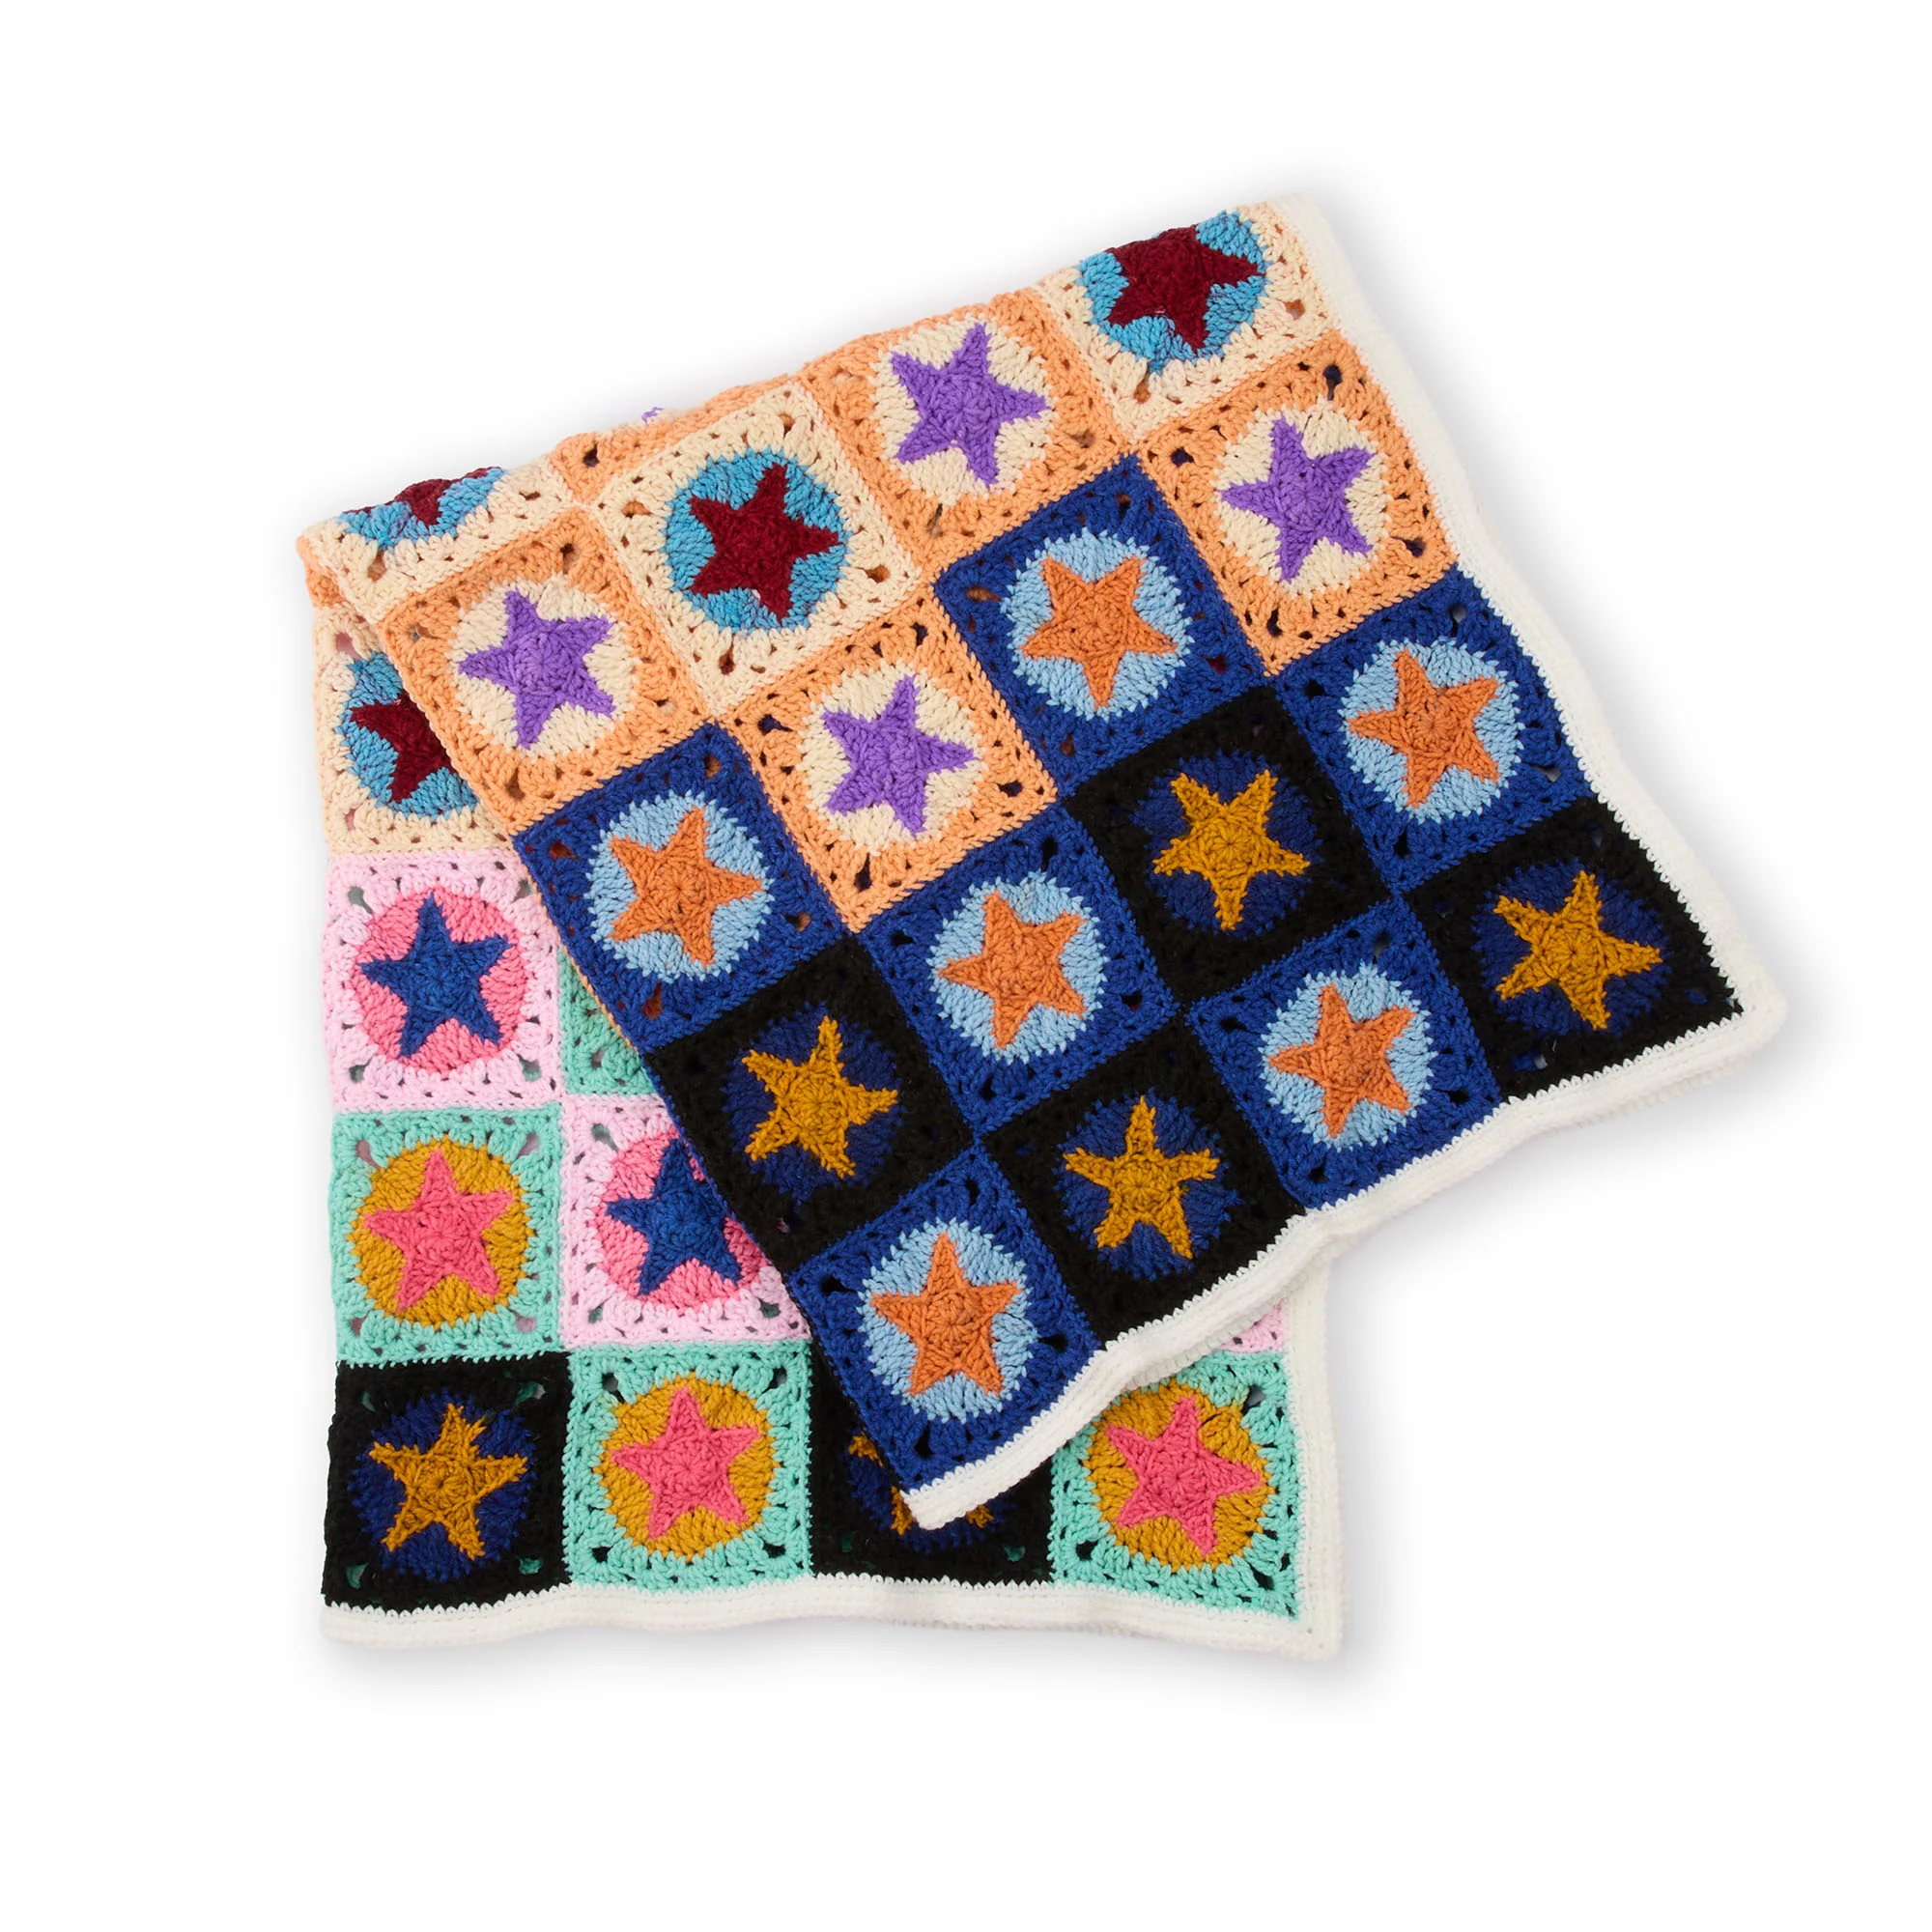
Starry Spectrum Crochet Blanket: A Vibrant Celestial Crochet Pattern
Are you looking for a crochet project that is as bold and beautiful as a clear night sky? The Starry Spectrum Crochet Blanket is a stunning, multi-colored masterpiece that combines geometric precision with a whimsical, celestial feel. Whether you are looking to create a cozy throw for your living room or a unique, handmade gift, this blanket is designed to impress.
This project is categorized as an “easy” skill level, making it a perfect candidate for crocheters who are looking to move beyond basic squares and into the world of textured motifs and colorwork. By working with a variety of contrasting hues, you will create a mosaic of stars that seem to dance across the fabric. In this tutorial, we will walk you through every step, from crafting the individual star motifs to assembling the final blanket and adding a crisp, clean border.
Materials & Abbreviations
To ensure your blanket turns out with the intended dimensions and drape, it is important to use the correct yarn weight and hook size. This pattern utilizes medium weight (Category 4) yarn to create a sturdy yet comfortable fabric.
Materials Needed
- Medium Weight Yarn (Category 4): You will need six different colors for the star motifs and one additional color for the border.
- Motif Colors: You will create 12 motifs for each of the following six colors (labeled A through F):
- Contrast A
- Contrast B
- Contrast C
- Contrast D
- Contrast E
- Contrast F
- Border Color: One ball of a contrasting light color (e.g., Soft White) for the final border.
- Crochet Hook: U.S. size I/9 (5.5 mm), or a size that helps you achieve the required gauge.
- Other Tools: A yarn needle for sewing and weaving in ends.
Gauge
To ensure the motifs fit together perfectly, aim for the following gauge:
- Standard Gauge: 12 single crochet (sc) and 15 rows = 4 inches.
- Motif Size: Each finished star motif should measure approximately a 6-inch square.
Abbreviations
Please ensure you are familiar with these US crochet terms before beginning:
- Beg: Beginning
- Ch: Chain(s)
- Dc: Double crochet
- Hdc: Half double crochet
- Long Tr2tog: A special decrease: (Yarn over twice and draw up a loop in the indicated stitch. Yarn over and draw through 2 loops on hook, twice) twice.
- Rem: Remaining
- Rep: Repeat
- Rnd(s): Round(s)
- Sc: Single crochet
- Sl st: Slip stitch
- Sp(s): Space(s)
- St(s): Stitch(es)
- Tr: Treble crochet
- Yoh: Yarn over hook
Step-by-Step Instructions
Making the Star Motifs
You will need to make a total of 72 motifs (12 of each color A through F). Each motif uses three different colors. Always begin with the color that has the shortest yardage requirements (Color 1) to avoid wasting yarn. Leave a 4-inch tail at the start to weave in later.
Round 1: Using Color 1, ch 4. Join with a sl st to the first ch to form a ring. Ch 3 (counts as a dc). Work 9 dc into the ring. Join with a sl st to the top of the beginning ch-3. Total: 10 dc.
Round 2: Using Color 1, we will now create the “Star Points.” Work into the bumps at the back of the chains (the back bump). *Ch 5. In the 2nd ch from the hook, work 1 sc. In the next ch, work 1 hdc. In the next ch, work 1 dc. In the last ch, work 1 tr. Skip the next dc from Round 1. Sl st in the next dc. Rep from * 4 more times, ending with a sl st into the top of the first dc of Round 1. Color 1 is now complete.
Round 3: Using Color 2, work in the back loops only (BLO) on both edges of the Star Points. Sl st in each of the next 2 ch. Ch 4. *1 dc in the next ch. 1 hdc in the next ch. 1 sc in the turning ch. 1 hdc in the next st. 1 dc in the next st. 1 tr in the next st. Perform a Long Tr2tog over the next st and the first ch of the next Star Point. Rep from * 3 more times, then from * to the end of the instruction, noting that the last leg of the Long Tr2tog will work into the same space as your first sl st. Join. Color 2 is complete.
Round 4: Using Color 3, ch 4. *2 dc in the next st. Ch 1. 1 dc in the next st. 1 hdc in the next st. 1 sc in the next st. Ch 1. 1 sc in the next st. 1 hdc in the next st. 1 dc in the next st. Ch 1. 2 dc in the next st. 1 tr in the next st. Ch 3 (for the corner). 1 tr in the next st. Rep from * 2 more times, then from * to the end. 1 dc in the top of the ch-4 to join.
Round 5: Sl st around the post of the joining dc. Ch 2. Work 3 hdc around the post of the joining dc. *(Ch 1. 3 hdc) in each ch-1 space to the next ch-3 space. Ch 1. (3 hdc, ch 3, 3 hdc) in the next ch-3 space. Rep from * twice more, then from * to ** once. 3 hdc around the post of the joining dc. Ch 3. Join. Fasten off, leaving a 24-inch tail for seaming.
Assembling the Blanket
Once all 72 motifs are complete, it is time to bring them together. Lay your motifs out according to the assembly diagram. You will create an 8-column by 9-row grid. Follow the specific pattern for which letter (A through F) goes in which slot to ensure the color spectrum flows correctly.
Using the remaining tails from your motifs and a yarn needle, sew the motifs together. It is best to sew them with the right sides (RS) facing each other to ensure a clean finish. Ensure the end of the 5th round is positioned in the top-left corner of each motif as you sew.
Adding the Border
The border gives the blanket a professional, finished look. Use your Contrast G (Soft White) yarn.
Round 1: With the right side facing, join your border yarn with a sl st to the top-left corner ch-3 space. Ch 1. Work 3 sc in the same space. Work sc evenly around the entire perimeter of the blanket, making sure to work 3 sc in each corner for a smooth turn. Join with a sl st.
Rounds 2 and 3: Ch 1. Working in the back loops only (BLO), work 1 sc in each stitch around the blanket. Ensure you work 3 sc in each corner stitch to maintain the shape. Join at the end of each round. Fasten off after the third round.
Finishing
The final step is the most important for longevity: weaving in your ends. Using your yarn needle, carefully weave the remaining tails from the motifs and the border into the stitches. Make sure to go back and forth through several stitches to ensure the tails are secure and won’t pop out after washing.
Tips for Success
- Manage Your Color Changes: If you find you have too much yarn left at the end of a round, pull back a few stitches and loosen your tension slightly to finish at the color change. If you are running short, tighten your tension slightly to stretch the yarn further.
- Tension is Key: Because this blanket is made of many small parts, keeping your tension consistent is vital. If one motif is much larger than the others, the blanket will look wavy rather than flat.
- Work in a Bright Space: The intricate stitches in Rounds 3 and 4 require good visibility. If you are working in the evening, ensure you have adequate lighting to avoid mistakes in your stitch counts.
- The “Back Bump”: When working in the back loops, look for the little horizontal bar on the back of the stitch. This is the “bump.” Working into this bar will create a beautiful ridge that defines the star shapes.