Easy Granny Square Dishcloth Crochet Pattern for Beginners
There is nothing quite as satisfying as a handmade addition to the kitchen. Whether you are looking to reduce your reliance on paper towels or you want to create a thoughtful, practical gift for a housewarming party, a crochet dishcloth is the perfect project. This Granny Square Dishcloth combines the timeless charm of the classic granny square with the durability of cotton yarn, making it both beautiful and highly functional.
If you are new to crochet, this pattern is a fantastic way to practice working in the round and changing colors. The square shape is a staple in the crochet world, and once you master this basic construction, you can use the same logic to make blankets, coasters, or even bags. Let’s dive into how to create your own absorbent, colorful kitchen companion!
Materials & Abbreviations
To get started, you will need materials that can withstand frequent washing and scrubbing. Cotton yarn is the gold standard for kitchen items because it is absorbent and doesn’t melt or stretch as much as acrylic.
Supplies Needed
- Yarn: Medium weight (4) 100% cotton yarn. You will need one ball of your Main Color (MC) and one ball of Contrast Color A. (Example: Lily Sugar’n Cream is a great, affordable choice).
- Crochet Hook: 6.00 mm (US size J-10).
- Other Tools: Yarn needle for weaving in ends and a pair of scissors.
Abbreviations (US Terms)
- ch: chain
- dc: double crochet
- sl st: slip stitch
- sp: space
- rnd: round
- MC: Main Color
- A: Contrast Color A
Important Pattern Note: Throughout this project, the chain 5 (ch 5) at the beginning of each round counts as one double crochet and a chain-2 corner space.
Step-by-Step Instructions
The Base Round
Using your Main Color (MC), start by chaining 4 and joining with a slip stitch to the first chain to form a small ring. Now, we will create the foundation for our square:
Chain 5. In the center of the ring, work 3 double crochets, chain 2, and then 3 double crochets. Repeat this sequence (3 dc, ch 2) three more times in the ring. To finish the round, work 2 double crochets into the ring. Finally, slip stitch into the 3rd chain of your starting ch 5. Fasten off and break your MC yarn.
Round 1: Introducing Color A
Join your Contrast Color A with a slip stitch into the next chain space. This is where the square starts to take shape.
Chain 5. Work 3 dc into the same space. *Chain 1, skip the next 3 dc, then work (3 dc, ch 2, 3 dc) into the next space to create the corner. Repeat from * twice more to finish the other three corners. Finally, chain 1, skip the next 3 dc, and work 2 dc into the ch-2 space from the beginning of the round. Slip stitch into the 3rd chain of the starting ch 5. Fasten off and break your Color A yarn.
Round 2: Returning to the Main Color
Join your Main Color (MC) with a slip stitch into the next chain space. We are now adding more “sides” to our square to keep it flat.
Chain 5. Work 3 dc into the same space. *Chain 1, skip the next 3 dc, work 3 dc in the next space, chain 1, skip the next 3 dc, then work (3 dc, ch 2, 3 dc) into the next space to make the corner. Repeat from * twice more. Then, repeat the sequence from * to the second asterisk (the side section) one more time. To close the round, work 2 dc into the ch-2 space from the start. Slip stitch into the 3rd chain of the starting ch 5. Fasten off and break the MC yarn.
Round 3: Building Depth with Color A
Join Contrast Color A with a slip stitch into the next chain space. This round establishes the rhythm you will follow for the rest of the project.
Chain 5. Now, work (ch 1, skip 3 dc, 3 dc in next space) repeatedly until you reach the corner. When you hit the corner, chain 1, skip 3 dc, and work (3 dc, ch 2, 3 dc) into the corner space. Repeat this pattern for the remaining corners and sides. Finish by working 2 dc into the ch-2 space from the start of the round. Slip stitch into the 3rd chain of the starting ch 5. Fasten off and break your Color A yarn.
Rounds 4 through 11: Finishing the Square
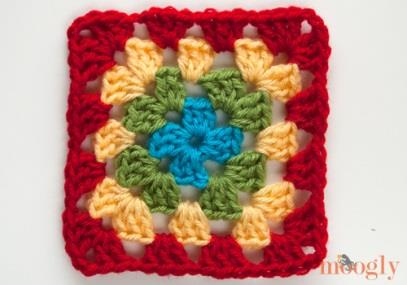
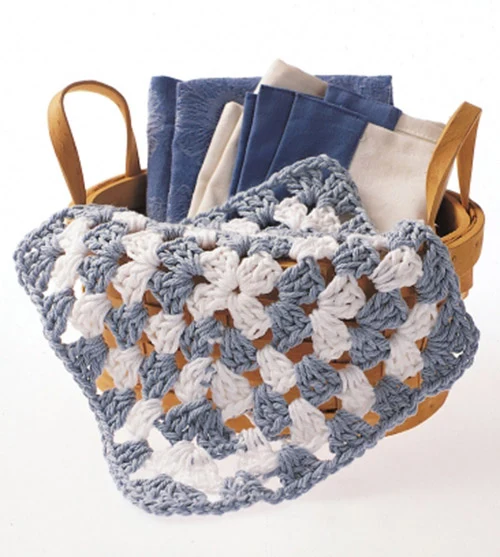
For the remaining rounds, you will simply repeat the logic of Round 3. Continue working in the round, alternating between your Main Color (MC) and Contrast Color A for every single round. This creates the beautiful striped, concentric square effect.
Once you complete Round 11, slip stitch into the starting chain, fasten off your yarn, and weave in all remaining ends using your yarn needle.
Finishing and Care
To ensure your dishcloth looks professional and stays square, it is important to handle the finishing process correctly. Cotton can sometimes “pull” or shrink slightly after the first wash.
Blocking: If your square looks a bit skewed, you can “block” it. Dampen the dishcloth with water, lay it flat on a towel, and gently stretch it into a perfect square. Let it air dry completely. This sets the stitches and gives it a clean, store-bought look.
Washing Instructions: Because this is a hardworking kitchen item, it needs to be durable. You can machine wash or hand wash this dishcloth in cool water using a mild soap. Avoid using bleach, as it can break down the cotton fibers and fade your colors. To dry, squeeze gently to remove excess water (do not wring harshly) or tumble dry on a low setting for a short time, then reshape and lay flat to dry.
Tips for a Perfect Dishcloth
Choose Your Colors Wisely
If you want a modern look, try a high-contrast pairing like charcoal grey and cream. For a farmhouse vibe, go with a soft sage green and off-white. Just remember that some dark cotton yarns may bleed during the first wash, so it is a good idea to wash your finished cloth separately the first time.
Maintain Your Tension
The most common mistake beginners make with granny squares is pulling the yarn too tight, which can cause the square to curl or “bowl” instead of lying flat. Keep your tension relaxed, especially in the corner (ch 2) spaces. If the corners feel too tight, try adding an extra chain to the corner space.
Customizing the Size
While this pattern goes up to Round 11, you can easily customize the size. If you want a small coaster, stop at Round 3. If you want a large scrubbing towel, continue alternating colors until the piece reaches your desired dimensions!