How to Crochet an Adorable Spring Bunny: A Step-by-Step Amigurumi Tutorial
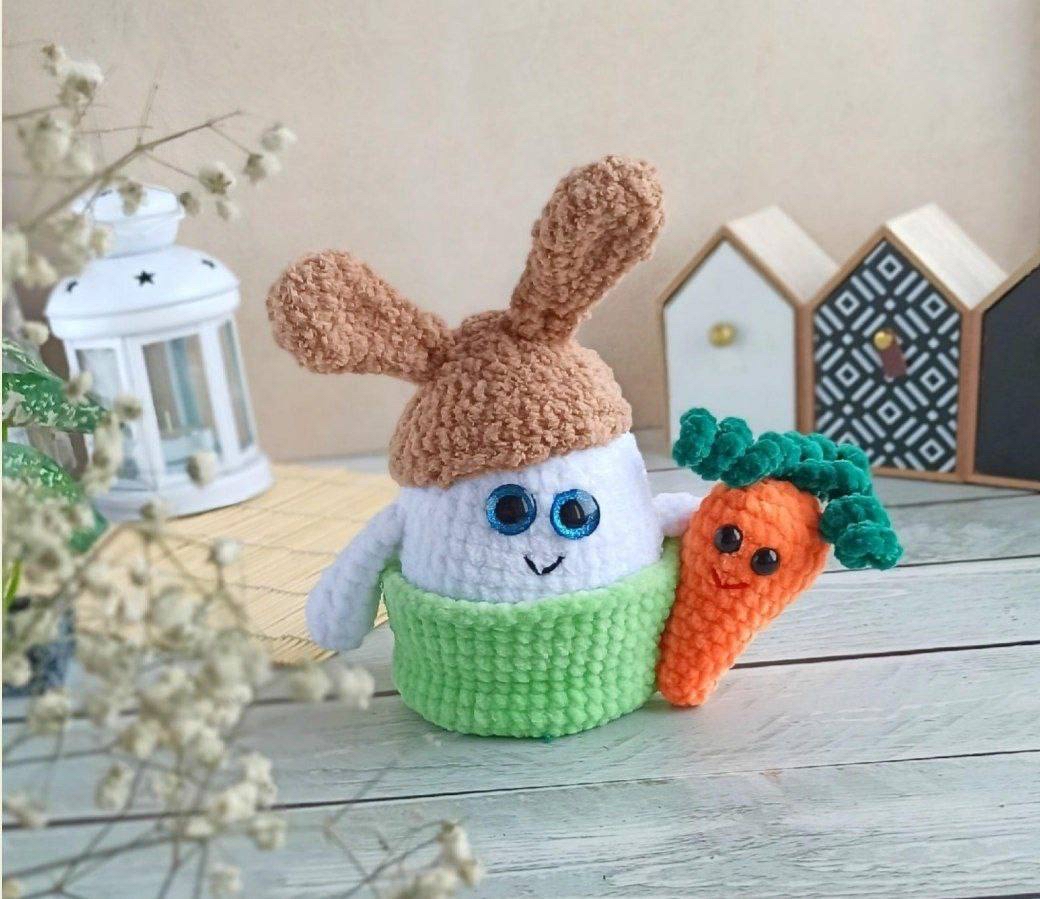
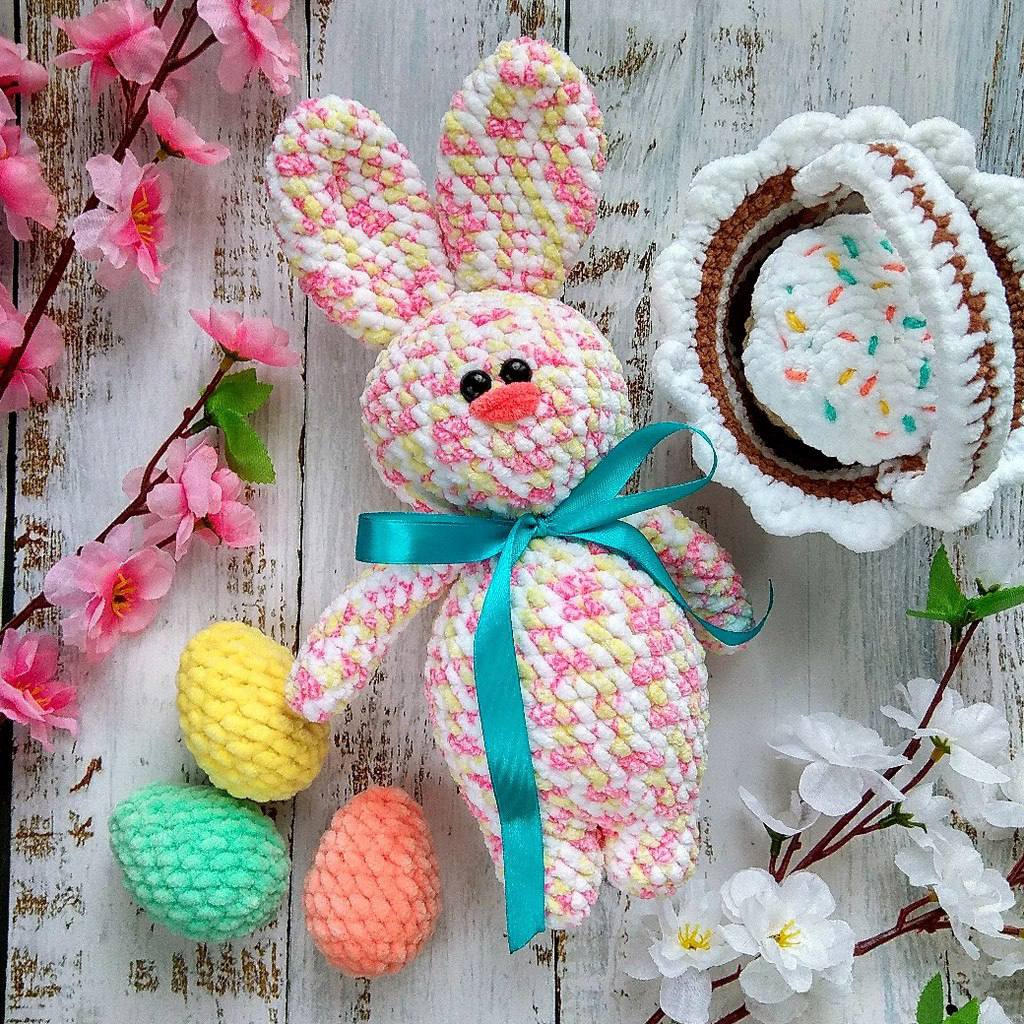
Spring is just around the corner, and there is no better way to celebrate the season of rebirth and blooming flowers than by creating something soft, cuddly, and sweet. If you are looking for your next crochet project, look no further! This adorable Spring Bunny is the perfect addition to your nursery decor, a charming gift for a loved one, or a delightful companion for a child’s playroom.
This pattern is designed specifically for those who love the “chunky” amigurumi aesthetic. By using a soft, chenille-style yarn, you will create a bunny that is incredibly velvety to the touch. Whether you are a seasoned crochet artist or a beginner looking to practice your amigurumi skills, this detailed guide will walk you through every stitch to ensure your bunny turns out perfectly.
Introduction
Amigurumi, the Japanese art of knitting or crocheting small, stuffed yarn creatures, has taken the crafting world by storm. This Spring Bunny pattern focuses on simple shapes and repetitive stitches, making it an accessible project for those still mastering the art of working in the round. The use of bulky, textured yarn makes the process go quickly, providing that satisfying feeling of seeing your project come to life in just a few sittings.
In this tutorial, we will work from the bottom up, starting with the feet and joining them to create the body. We will then transition seamlessly into the head, craft the limbs and ears, and finally bring the whole character to life with embroidery and assembly. Grab your hook and get ready to meet your new favorite crochet friend!
Materials & Abbreviations
Before we dive into the stitches, let’s make sure you have everything you need on your crafting table. Using the right materials is key to achieving that professional, high-quality finish.
Materials Needed:
- Yarn: 1 skein of bulky/chenille weight yarn (such as Himalaya Dolphin Baby). For this project, a multi-colored or pastel variegated yarn works beautifully to give the bunny a whimsical, spring-like appearance.
- Safety Eyes: 9mm safety eyes. These provide a professional look, but please ensure they are used under adult supervision if gifting to very young children.
- Stuffing: Polyester fiberfill to ensure your bunny is firm and holds its shape.
- Sewing Supplies: A sturdy needle and strong thread for joining the pieces.
- Embroidery Thread: A small amount of yarn in a color matching your main body color to embroider the nose.
- Crochet Hook: A hook suitable for your bulky yarn (typically 4.5mm to 5.5mm, depending on your tension).
- Stitch Marker: Essential for keeping track of the beginning of your rounds.
Abbreviations (US Terms):
- ch: chain
- sc: single crochet
- inc: increase (2 sc in the same stitch)
- dec: decrease (sc 2 stitches together)
- sl st: slip stitch
- BLO: back loops only
- Rnd: round
- \* : repeat the instructions within the parentheses the specified number of times
Step-by-Step Instructions
When working with chenille yarn, try to keep your tension consistent. It can be a bit more “fuzzier” than standard cotton, so don’t worry if you can’t see every individual stitch clearly—just follow the stitch counts!
Making the Body and Head
We begin our journey at the very bottom of the bunny: the feet.
The Feet
Make two identical feet using the following steps:
- Rnd 1: Ch 2, then work 6 sc into the second chain from the hook. (6 sc)
- Rnd 2: 6 inc. (12 sc)
- Rnd 3: 12 sc in BLO (back loops only). This creates a flat base for the feet.
- Rnd 4-7: 12 sc.
Joining the Feet to Form the Body
Once both feet are complete, it is time to join them to create the torso.
- Rnd 8: Work 12 sc around the first foot, then continue with 12 sc around the second foot, joining them together. Place your stitch marker at the start of this round.
- Rnd 9: (3 sc, inc) * 6. (30 sc)
- Rnd 10: (4 sc, inc) * 6. (30 sc)
- Rnd 11: 36 sc.
- Rnd 12: (5 sc, inc) * 6. (36 sc)
- Rnd 13-16: 42 sc.
- Rnd 17: (5 sc, dec) * 6. (36 sc)
- Rnd 18: 36 sc.
- Rnd 19: (4 sc, dec) * 6. (30 sc)
- Rnd 20: 30 sc.
- Rnd 21: (3 sc, dec) * 6. (24 sc)
- Rnd 22-23: 24 sc.
- Rnd 24: (2 sc, dec) * 6. (18 sc)
- Rnd 25: (1 sc, dec) * 6. (12 sc)
Stop here to stuff the body firmly with polyester fiberfill.
The Head
Without cutting your yarn, continue working upwards to form the head.
- Rnd 26: 12 inc. (24 sc)
- Rnd 27: (3 sc, inc) * 6. (30 sc)
- Rnd 28: (4 sc, inc) * 6. (30 sc)
- Rnd 29: (5 sc, inc) * 6. (36 sc)
- Rnd 30-34: 42 sc.
Note on Eye Placement: Between rounds 33 and 34, insert your 9mm safety eyes. Space them approximately one stitch apart for a cute, wide-eyed look.
- Rnd 35: (5 sc, dec) * 6. (36 sc)
- Rnd 36: (4 sc, dec) * 6. (30 sc)
- Rnd 37: (3 sc, dec) * 6. (24 sc)
- Rnd 38: (2 sc, dec) * 6. (18 sc)
- Rnd 39: (1 sc, dec) * 6. (12 sc)
- Rnd 40: 6 dec. (6 sc)
Fasten off, pull the tail through the remaining hole to close it tightly, and weave in your ends.
Crafting the Arms
Make two arms:
- Rnd 1: Ch 2, 6 sc in the second chain from the hook. (6 sc)
- Rnd 2: (1 sc, inc) * 3. (9 sc)
- Rnd 3-11: 9 sc.
- Rnd 12: (1 sc, dec) * 3. (6 sc)
- Rnd 13: 6 sc.
Stuff the arm about 1/3 of the way full. Fold the arm in half so the open ends meet, and sc through both layers to close the limb. Repeat for the second arm.
Shaping the Ears
The ears give your bunny its character! Make two ears:
- Rnd 1: Ch 2, 6 sc in the second chain from the hook. (6 sc)
- Rnd 2: 6 sl st.
- Rnd 3: (5 sc, inc) * 2. (12 sc)
- Rnd 4: (6 sc, inc) * 2. (14 sc)
- Rnd 5: (7 sc, inc) * 2. (16 sc)
- Rnd 6-10: 18 sc.
- Rnd 11: (7 sc, dec) * 2. (16 sc)
- Rnd 12: (6 sc, dec) * 2. (14 sc)
- Rnd 13: (5 sc, dec) * 2. (12 sc)
- Rnd 14: (4 sc, dec) * 2. (10 sc)
Do not stuff the ears. Fasten off, leaving a long tail for sewing.
The Tiny Tail
- Rnd 1: Ch 2, 6 sc in the second chain from the hook. (6 sc)
- Rnd 2: (1 sc, inc) * 3. (9 sc)
- Rnd 3: 9 sc.
Fasten off, leaving a tail for sewing.
Finishing
Now comes the magical part—assembly! This is where your individual pieces transform into a bunny.
- Attach the Ears: Using your sewing needle and yarn, sew the ears to the top of the head. Depending on your preference, you can make them stand straight up or flop slightly to the sides.
- Attach the Arms: Sew the arms to the sides of the body, just below the head area.
- Attach the Tail: Sew the tiny tail to the back of the body.
- Embroider the Nose: Using your matching color yarn, embroider a small, cute nose centered between the eyes.
- Final Cleanup: Weave in all remaining loose ends carefully so they are hidden inside the stuffing.
Tips for Success
To ensure your Spring Bunny looks its absolute best, keep these pro-tips in mind:
- Tension is everything: When working with bulky chenille yarn, try not to pull too tightly, or you might struggle to insert your hook. However, don’t go too loose, or the stuffing might show through the stitches.
- Use Stitch Markers: In amigurumi, it is incredibly easy to lose your place when working in a continuous spiral. Always use a marker at the start of every round.
- Stuffing Technique: When stuffing, push the fiberfill into the corners of the limbs and head to avoid lumps. If you find the shape is getting distorted, add a little more stuffing.
- The “Invisible Decrease”: For a much cleaner look, try using the “invisible decrease” method (inserting the hook into the front loops only of the next two stitches) instead of a standard decrease. This prevents visible gaps in your work.
Happy crocheting, and enjoy your beautiful new Spring Bunny!