Cute Crochet Mini Penguin Pattern: A Beginner-Friendly Tutorial
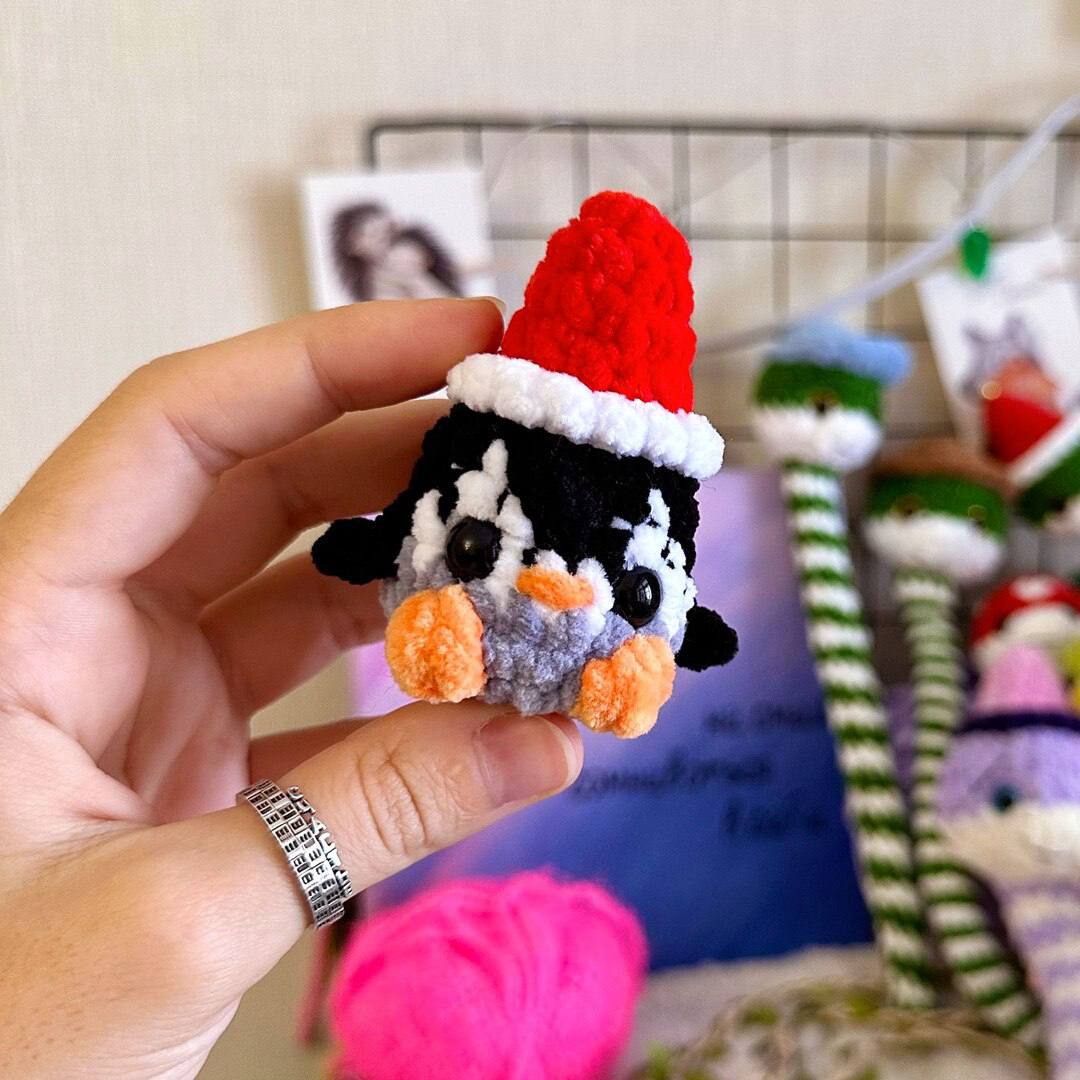
Looking for a quick, adorable project to brighten up your day or create a handmade gift? This mini crochet penguin is the perfect project for crafters of all levels. Whether you are looking for a festive holiday ornament or just a cute little desk companion, this tiny penguin in a cozy hat is sure to charm everyone who sees it.
Amigurumi (the Japanese art of knitting or crocheting small, stuffed yarn creatures) can sometimes feel intimidating, but this pattern is designed to be straightforward and rewarding. Because of its small size, it is an excellent “palette cleanser” project between larger makes, or a great way to use up scrap yarn from your stash.
In this tutorial, we will walk you through every step of creating your own little penguin, from the tiny red hat down to the little orange feet. Let’s grab our hooks and get started!
Materials & Abbreviations
To make this penguin, you will need a few basic supplies. Since this is a mini project, using a smaller hook and thinner yarn will help you achieve that tiny, cute look, but you can scale this up by using bulkier yarn.
Materials Needed
- Yarn: A medium-weight (worsted) or DK yarn in the following colors: Red (for the hat), White (for the hat trim and belly), Black (for the body), and Grey (for the base). You will only need a few yards of each color.
- Crochet Hook: A 3.25mm (D) or 3.5mm (E) hook.
- Stuffing: A small handful of polyester fiberfill or scrap yarn remnants.
- Safety Eyes: 6mm black safety eyes (or black embroidery thread/beads if you prefer to sew them on).
- Tapestry Needle: For weaving in ends and embroidering the beak.
- Scissors: To trim your yarn.
- Stitch Marker: Highly recommended for keeping track of your rounds in amigurumi.
Abbreviations (US Terms)
- MR: Magic Ring (or Magic Circle)
- Ch: Chain
- Sc: Single Crochet
- Hdc: Half Double Crochet
- Dc: Double Crochet
- Inc: Increase (2 sc in the same stitch)
- Dec: Decrease (sc 2 stitches together)
- Sl st: Slip Stitch
- FLO: Front Loop Only
- BLO: Back Loop Only
- ( ): The number in parentheses indicates the total stitch count at the end of the round.
- *n: Repeat the instructions inside the parentheses “n” times.
Step-by-Step Instructions
This penguin is worked in a continuous spiral. Do not join your rounds with a slip stitch unless specified; instead, use a stitch marker to mark the first stitch of each round.
Part 1: The Festive Hat
We start with the hat, which is crocheted directly onto the head of the penguin. We will begin with red yarn.
Round 1: Create a MR and work 6 sc into the ring. (6)
Round 2: (1 sc, inc) * 3. (9)
Round 3: Sc in each stitch around. (9)
Round 4: (2 sc, inc) * 3. (12)
Now, we switch to White yarn to create the fluffy trim of the hat.
Round 5: Sc in each stitch around. (12)
Round 6: Working in the FLO (Front Loop Only): (1 sc, inc) * 6. (18)
Part 2: The Body
Now we switch to Black yarn. To create the seamless transition from the hat to the head, we will work into the remaining loops of the previous round.
Round 7: Working in the BLO (Back Loop Only) of Round 5: (1 sc, inc) * 6. (18)
Round 8: 7 black sc, 1 white sc, 3 black sc, 1 white sc, 6 black sc. (18)
Round 9: 7 black sc, 2 white sc, 2 black sc, 2 white sc, 5 black sc. (18)
Round 10: 6 black sc, work a Wing, 8 white sc, 1 black sc, work a Wing, 3 black sc. (18)
How to crochet the Wing: Ch 2, work 1 hdc in the second chain from the hook, then work 1 hdc into the base of the sc from which the chain emerged. Sl st to secure.
Part 3: The Base and Feet
Now we switch the yarn color to Grey to finish the bottom of our penguin.
Round 11: Sc in each stitch around. (18)
Pause here to stuff your penguin firmly with fiberfill. If you are using safety eyes, insert them now between rounds 8 and 10, centered on the white belly area. If you are gluing or sewing them, you can wait until the end.
Round 12: 8 sc, work a Leg, 4 sc, work a Leg, 4 sc. (18)
How to crochet the Leg: Work 3 or 4 dc into a single stitch to create a small, rounded “bobble” or puff. This creates the look of a little penguin foot.
Round 13: (1 sc, dec) * 6. (12)
Round 14: 6 dec. (6)
Finishing Touches
Once you have completed Round 14, cut your yarn, leaving a tail of about 6 inches. Use your tapestry needle to weave the tail through the front loops of the remaining 6 stitches and pull tight to close the hole. Secure the yarn with a knot and hide the end inside the body.
To give your penguin its personality, use a small piece of orange yarn or embroidery floss to stitch a tiny triangle for the beak. Position the beak centered just below the eyes. You can also add a tiny stitch of white yarn to the tip of the red hat to create a pom-pom effect if desired.
Tips for Success
To ensure your mini penguin looks professional and polished, keep these tips in mind:
- Tension is Key: Amigurumi requires tight stitches so that the stuffing doesn’t peek through. If you notice gaps, try dropping down a half-size in your crochet hook.
- Color Changes: When switching colors (like from black to white on the belly), make the change on the last stitch of the previous color for a cleaner seam.
- Customization: While this pattern uses a red hat for a holiday theme, you can use any color you like! A blue hat makes a winter penguin, while a pink or yellow one makes a colorful spring friend.
- The Magic Ring: If you struggle with the magic ring, you can alternatively ch 2 and work 6 sc into the first chain, though the magic ring provides a tighter closure for the top of the hat.