Adorable Long Neck Capybara Crochet Pattern: A Step-by-Step Guide
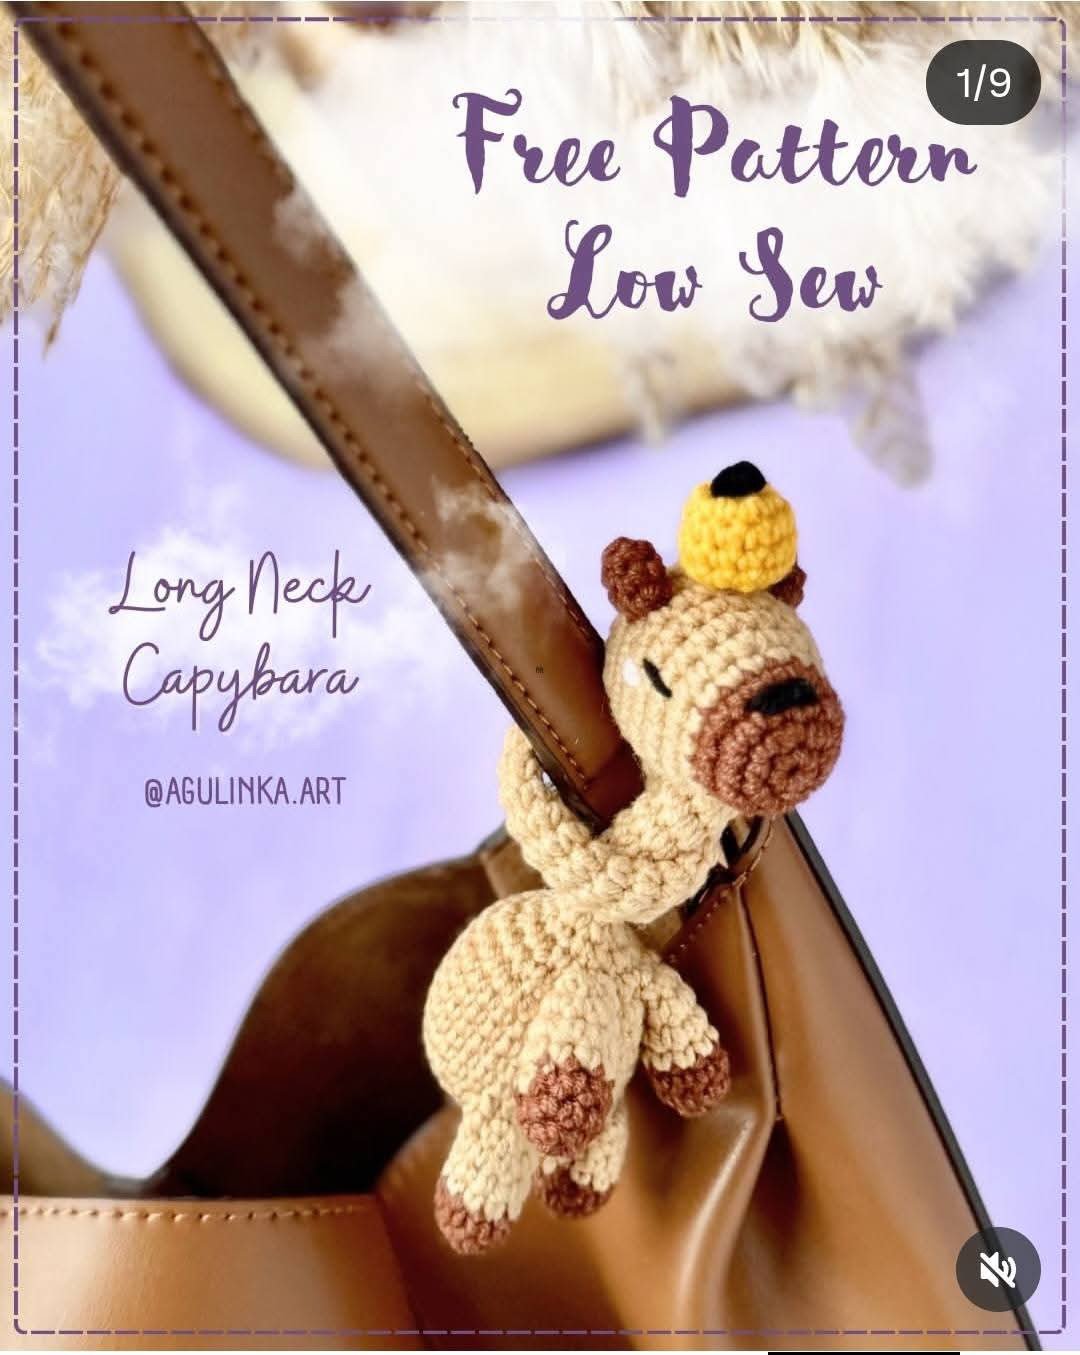
If you are looking for a project that combines the internet’s favorite chill animal with a whimsical twist, you have come to the right place! This Long Neck Capybara amigurumi is the perfect blend of cute and quirky. Whether you want to create a unique gift for a friend or a charming accessory to hang from your favorite handbag, this low-sew pattern is designed to be beginner-friendly and rewarding.
Unlike traditional amigurumi patterns that require hours of tedious sewing, this design integrates several pieces directly into the crochet process. The result is a sturdy, adorable capybara with a signature long neck that gives it a funny, endearing personality. Grab your hook and some brown yarn, and let’s get started!
Materials & Abbreviations
To create your Long Neck Capybara, you will need a few basic supplies. Since this is a smaller amigurumi, we use a smaller hook to ensure the stuffing doesn’t peek through the stitches.
Materials Needed:
- Crochet Hook: 1.5mm
- Yarn: Medium weight or sport weight yarn in Light Brown (main body), Dark Brown (details), and Orange (for the little hat).
- Embroidery Thread: Small amounts of black and pink thread for the facial features.
- Stuffing: Polyester fiberfill or any craft stuffing.
- Tools: Yarn needle, scissors, and a stitch marker (highly recommended for working in rounds).
Abbreviations (US Terms):
- MR: Magic Ring
- SC: Single Crochet
- INC: Increase (2 SC in one stitch)
- DEC: Decrease (SC 2 stitches together)
- CH: Chain
- SL ST: Slip Stitch
- R: Round
Step-by-Step Instructions
We will work this project in several small pieces before assembling them into one long-necked friend.
The Legs (Make 4)
You will make four identical legs, but we will differentiate them during the final round. Start with Dark Brown yarn.
- R1: 6 SC in a Magic Ring (6)
- R2: (SC, INC) x3 (9)
- R3: SC in each stitch around (9)
Now, change your yarn color to Light Brown.
- R4-6: SC in each stitch around for 3 rounds (9)
Add a small amount of stuffing to the bottom of the legs. Now, depending on which leg you are making, follow one of these two options for the final round:
- For the Lower Legs (Make 2): R7: 4 SC, DEC, 3 SC (8)
- For the Upper Legs (Make 2): R7: (SC, DEC) x3 (6)
The Ears (Make 2)
Use Dark Brown yarn for the ears.
- R1: 5 SC in a Magic Ring (5)
- R2: INC, 3 SC, INC (7)
- R3: SC in each stitch around (7)
Fasten off, leaving a long tail for sewing later.
The Head
Start with Dark Brown yarn to create the snout area.
- R1: 6 SC in a Magic Ring (6)
- R2: 6 INC (12)
- R3: (SC, INC) x6 (18)
- R4: SC in each stitch around (18)
Change your yarn color to Light Brown.
- R5: SC in each stitch around (18)
- R6: (2 SC, INC) x6 (24)
- R7-11: SC in each stitch around for 5 rounds (24)
- R12: (2 SC, DEC) x6 (18)
Begin stuffing the head firmly with fiberfill.
- R13: (SC, DEC) x6 (12)
- R14: 6 DEC (6)
Close the hole securely and weave in your ends.
The Body & Neck
Use Light Brown yarn for the entire body. This part is where the “low sew” magic happens as we attach the legs while crocheting.
- R1: 6 SC in a Magic Ring (6)
- R2: 6 INC (12)
- R3: (SC, INC) x6 (18)
- R4: (2 SC, INC) x6 (24)
- R5: (3 SC, INC) x6 (30)
Attaching the Lower Legs (R6)
To attach the legs, fold the leg in half and insert your hook through both loops of the leg and the body stitch simultaneously.
- R6: 12 SC, 3 SC into the first lower leg, 4 SC, 3 SC into the second lower leg, 8 SC (30)
- R7-11: SC in each stitch around for 5 rounds (30)
- R12: (3 SC, DEC) x6 (24)
Attaching the Upper Legs (R13)
- R13: (2 SC, DEC) x2, 1 SC, DEC, 2 SC into the first upper leg, DEC, 1 SC, 2 SC into the second upper leg, 2 SC, DEC (18)
Add stuffing to the body now. Continue shaping the neck:
- R14: (SC, DEC) x6 (12)
- R15: 5 DEC, 2 SC (7)
- R16-50: SC in each stitch around for 35 rounds (7)
Fasten off, leaving a long thread to sew the neck to the head.
The Tail
Attach Dark Brown yarn to the back of the body at the middle of Round 6.
- Step 1: Chain 4.
- Step 2: Starting from the second chain from the hook, work 3 SC.
- Step 3: Insert hook into the next stitch of the body and work a slip stitch to secure it.
The Orange Hat
To give your capybara some extra flair, let’s make a little orange candle hat! Use Orange yarn.
- R1: 6 SC in a Magic Ring (6)
- R2: 6 INC (12)
- R3-5: SC in each stitch around for 3 rounds (12)
Stuff the hat lightly, then finish with R6: 6 DEC (6). Fasten off and leave a long tail.
The Wick
Join Black yarn to the very top of the orange hat.
- Step 1: Chain 3.
- Step 2: Work 2 SL ST back down the chain.
- Step 3: Fasten off.
Finishing Touches
Now it is time to put everything together and bring your capybara to life!
- Ears: Sew the ears onto the head between rounds 9 and 12, leaving a distance of about 5 SC between them.
- Assembly: Sew the top of the long neck securely to the bottom of the head.
- Face: Using your black embroidery thread, sew two small eyes and a larger oval nose. For an extra touch of cuteness, use pink thread to add small blush marks under the eyes.
- Hat: Sew the orange candle hat onto the top of the head.
Tips for Success
- Tension is Key: Because the neck is very long and thin, keep your tension consistent. If the neck feels too floppy, you can insert a pipe cleaner or a piece of floral wire inside the stuffing for extra support.
- Use Markers: Since you are working in continuous spirals, always use a stitch marker in the first stitch of every round to avoid miscounting.
- Stuffing: Make sure to stuff the head and the base of the body firmly so the capybara holds its shape when hanging from a bag.
- Customization: Feel free to change the colors! A “strawberry” capybara in pink or a “mint” capybara in green would be equally adorable.