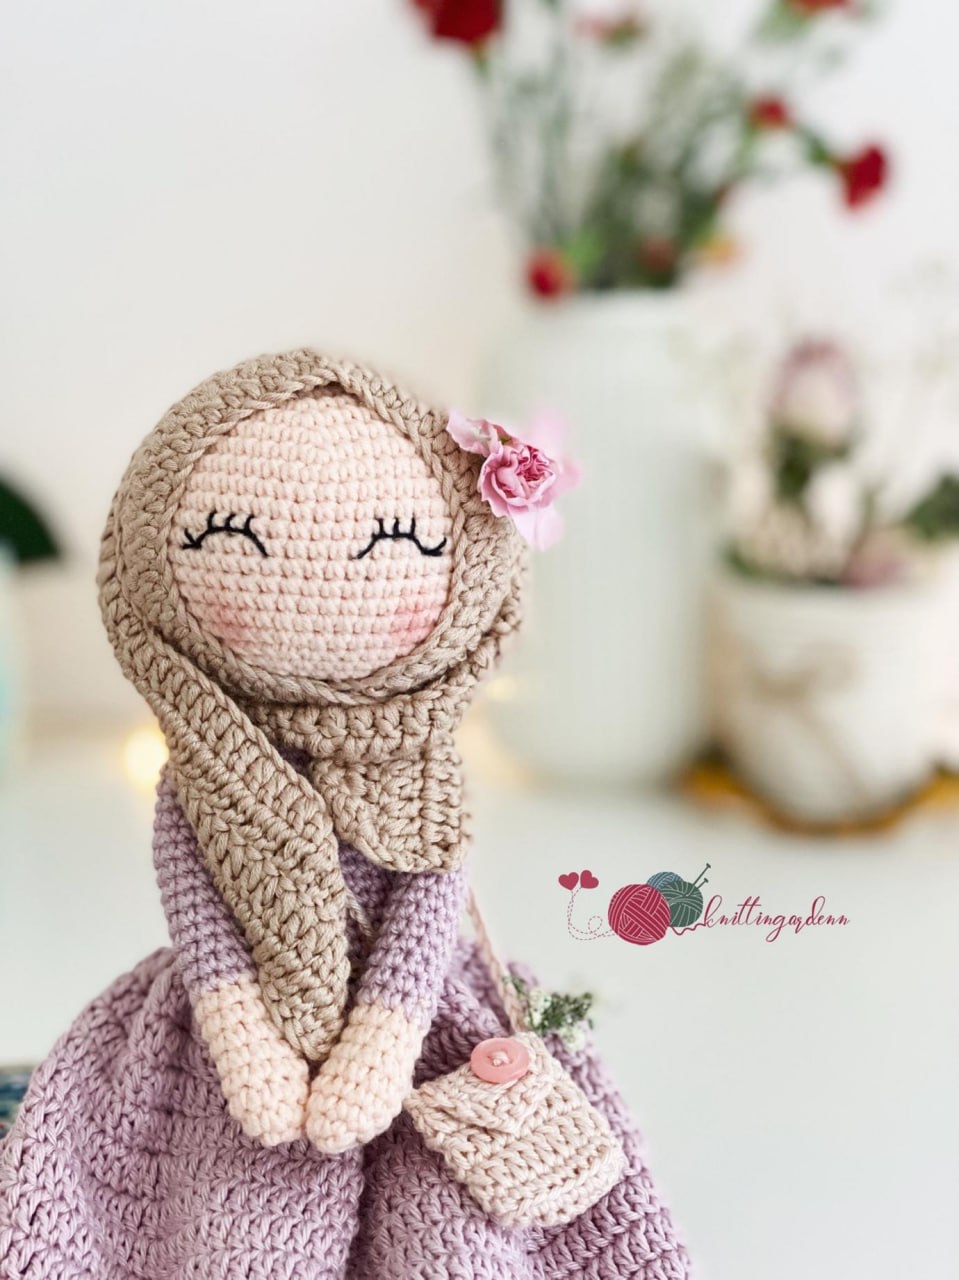
Crochet Doll Hijab Pattern: A Step-by-Step Amigurumi Tutorial
Are you looking to add a touch of personality and unique style to your amigurumi creations? Whether you are dressing up a specific doll or creating a completely original character, a tiny, beautifully crocheted hijab is a wonderful accessory that adds depth and character to your doll’s wardrobe. In this tutorial, we will walk you through the process of creating a delicate, perfectly-sized headscarf for your crochet dolls.
This pattern is designed to be beginner-friendly. We will cover two different styles depending on the yarn weight you choose, and I will even share my secret for customizing the size so that it fits any doll head perfectly, no matter its circumference. Let’s grab our hooks and get started!
Materials & Abbreviations
Before we dive into the stitches, let’s make sure you have everything you need on your crochet tray. Because this is a small accessory, you don’t need much, but choosing the right yarn weight is key to getting that lovely drape.
Required Materials
- Crochet Hook: 2.20 mm (or a size that creates a tight, even fabric).
- Yarn Option 1 (Classic Cotton): A fine cotton yarn (similar to La Mia Cottony). For the pink version shown in the photos, use a soft pastel pink.
- Yarn Option 2 (Elegant Shimmer): A very fine, slightly thinner yarn with a bit of luster (similar to Alize Diva). This works beautifully for a more sophisticated, “fancy” look.
- Stitch Markers: I highly recommend using two different colored markers to help you keep track of your placement.
- Tapestry Needle: For weaving in ends and sewing the piece to the doll.
- Scissors.
US Crochet Abbreviations
This pattern uses standard US crochet terminology. If you are used to UK terms, please make sure to convert them before starting!
- ch: chain
- dc: double crochet
- dc dec: double crochet decrease (working two stitches together)
- 3-dc dec: triple double crochet decrease (working three stitches together into one)
- (…) * x: repeat the instructions inside the parentheses the specified number of times.
Step-by-Step Instructions
The construction of the hijab consists of two main parts: a long rectangular strip that wraps around the head, and a smaller curved piece that forms the back of the headscarf. Depending on the yarn you use, the stitch counts will vary slightly.
Option 1: The Classic Cotton Hijab (Medium Weight)
This version uses a standard cotton yarn and results in a slightly thicker, more structured look. The finished strip should be approximately 21.5 inches long.
Part 1: The Main Wrap
Important Tip: When making your initial chain, keep your tension very loose! You want the fabric to be soft and flexible, not stiff. This allows the piece to wrap comfortably around the doll’s head.
- Start with a chain of 130 (the total length should be approximately 22.5 inches).
- Work in double crochet (dc) starting from the 4th chain from your hook (this means you will have 127 stitches total).
- At the end of the row, ch 2 and turn to work the next row.
- Repeat the row: 127 dc, ch 2, turn.
- Once you have completed your rows, fasten off the yarn.
Part 2: The Back Piece
To create the shape that covers the back of the head, we need to mark specific points on our strip.
- Lay your strip flat. Place your first stitch marker in the 68th stitch and your second marker in the 114th stitch.
- Locate the 68th stitch. Attach your yarn here and ch 2 to start your new section.
- Row 1: (dc, 3-dc dec) repeat 6 times, then 1 dc, then 2 dc dec. (You should have 27 stitches).
- Row 2: 5 dc, dc dec, 5 dc, 2 dc dec, 5 dc, dc dec, 4 dc. (23 stitches).
- Row 3: 10 dc, 3-dc dec, 10 dc. (21 stitches).
- Fasten off, leaving a long tail (about 35 inches) for sewing the piece to the doll.
Option 2: The Elegant Shimmer Hijab (Fine Weight)
If you prefer a thinner, more delicate look, use a fine yarn with a bit of shimmer. This version uses fewer stitches to achieve a similar scale.
Part 1: The Main Wrap
- Start with a chain of 150 (approximately 22.5 inches).
- Work in double crochet (dc) starting from the 5th chain from your hook (total of 145 stitches).
- At the end of the row, ch 2 and turn.
- Work a total of 4 rows.
- Fasten off.
Part 2: The Back Piece
- Place your first marker in the 15th stitch of your 4th row and your second marker in the 67th stitch.
- Attach your yarn at the 67th stitch and ch 2.
- Row 1: (6 dc, dc dec) repeat 6 times, 3 dc, then 1 dc dec. (46 stitches).
- Row 2: (5 dc, dc dec) repeat 6 times, then 4 dc. (40 stitches).
- Row 3: (3 dc, dc dec) repeat 6 times, then (dc dec, 3 dc) repeat 4 times. (32 stitches).
- Row 4: (dc, dc dec) repeat 5 times, then (dc dec, dc) repeat 5 times, then 1 dc dec. (21 stitches).
- Fasten off, leaving a long tail for sewing.
Finishing
Now that you have both pieces, it is time to assemble the hijab on your doll. This is where the magic happens!
- Place the long strip around the doll’s head. Ensure that the “right side” (the smoother side) of your starting chain is facing outward toward the doll’s face. This is crucial for a professional look.
- Position the strip so it sits comfortably, leaving a bit of extra length to drape over the shoulders.
- Take your second, smaller piece (the back section) and align it with the back of the doll’s head.
- Using your tapestry needle and the long tails you left earlier, sew the edges of the back piece to the main strip.
- Carefully sew the entire assembly onto the doll’s head, following the natural curve of the skull.
Tips for Success
Mastering the 3-dc Decrease
The 3-dc decrease can be a little tricky if you haven’t done it before. Here is the easiest way to visualize it:
- Yarn over and insert your hook into the first stitch. Pull up a loop (you now have 2 loops on your hook). Do not complete the stitch yet!
- Yarn over again, insert your hook into the second stitch, and pull up a loop. (Now you have 3 loops on your hook).
- Yarn over again, insert your hook into the third stitch, and pull up a loop. (Now you have 4 loops on your hook).
- Finally, yarn over and pull the thread through all 4 loops on your hook at once. This turns three stitches into one single stitch!
Customizing the Size for Any Doll
Don’t have the specific doll this pattern was designed for? No problem! You can adapt this for any head size using this simple logic:
- Measure the circumference of your doll’s head. Let’s say it is 39 inches.
- Add about 1.2 inches to that measurement to allow for a little wiggle room. In this example, you would make a chain that is 40.2 inches long. The length of the chain is more important than the number of stitches!
- Work 3 or 4 rows of double crochet.
- Wrap the strip around the head to see where it sits. Use pins to mark the “arc” where you want the back piece to start.
- The back piece should be positioned slightly closer to the shoulder area for a realistic drape.
Happy crocheting! Your amigurumi dolls are going to look absolutely stunning with their new hijabs!