Adorable Mini Crochet Chicken Pattern: A Step-by-Step Amigurumi Tutorial
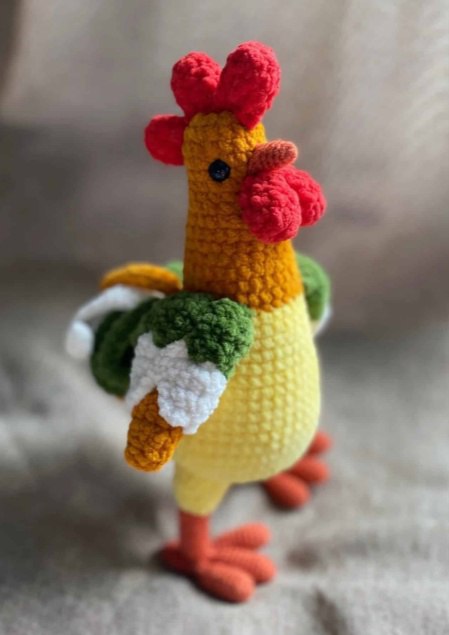
Whether you are looking to create a charming addition to a spring bouquet, a cute fridge magnet, or a tiny companion for your desk, this mini crochet chicken is the perfect project. These little hens are small in size but big on personality, making them an ideal project for beginners and experienced crocheters alike.
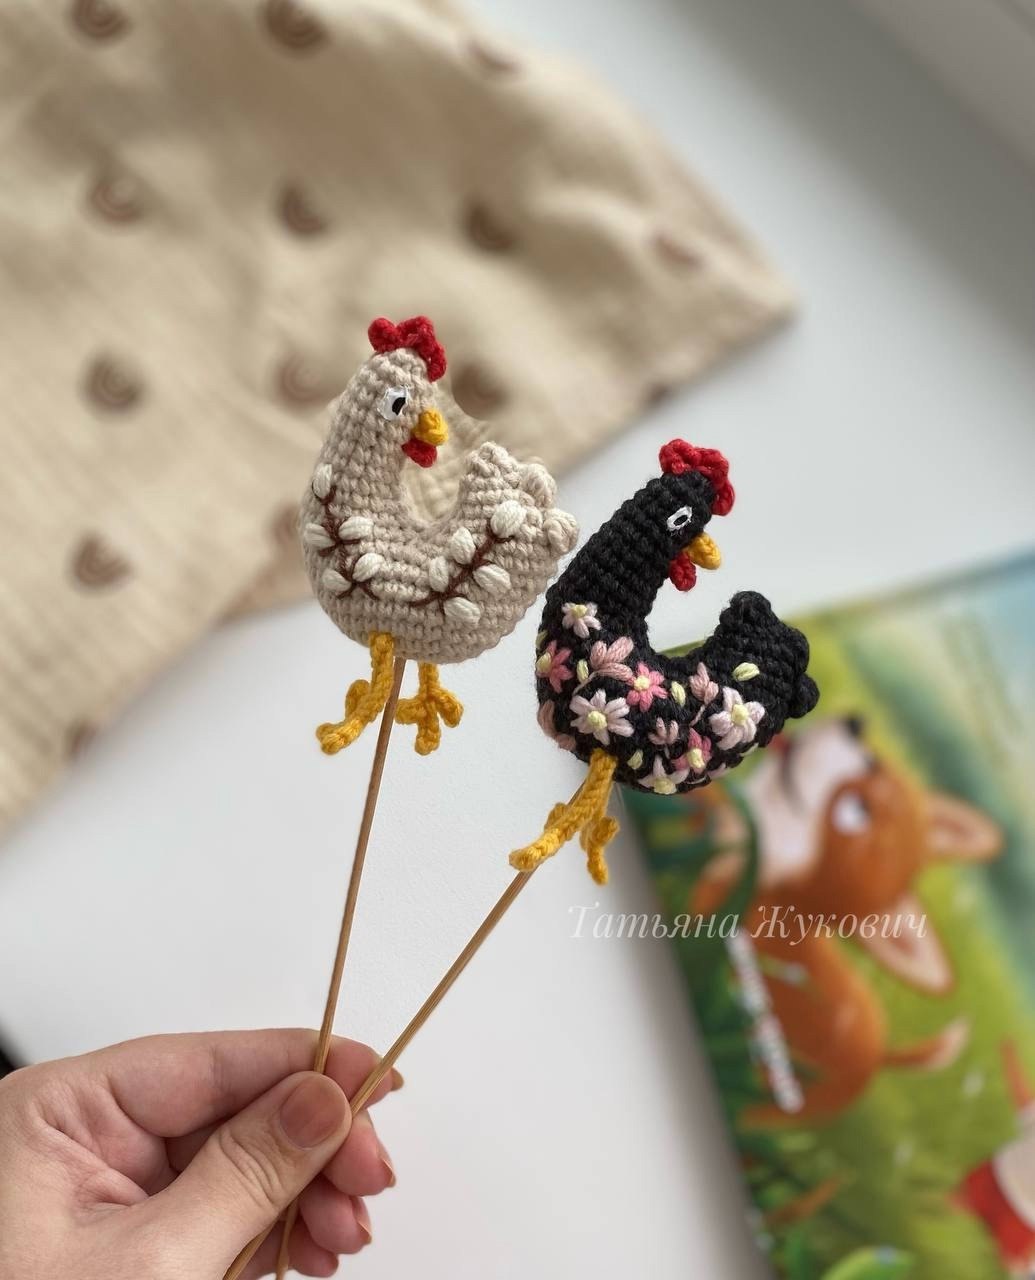
In this tutorial, we will walk you through the process of creating a tiny, stylized hen. We will cover everything from the plump little body and the curved neck to the tiny details like the comb and beak. Because these are so small, they make wonderful gifts or “desk pets” that bring a smile to anyone’s face. Let’s dive in and start crafting!
Materials & Abbreviations
To get the best results and ensure your chicken keeps its shape, I recommend using a cotton or cotton-blend yarn. This provides the necessary stitch definition for such a small project.
Supplies Needed
- Yarn: DK weight cotton blend (such as YarnArt Jeans) in the following colors:
- Main Color: Cream or Graphite (for the body)
- Accents: Yellow (for beak and legs), Red (for comb and wattle)
- Embroidery Thread: Various colors for decorative floral or leaf patterns
- Crochet Hook: 1.75mm (or a size that prevents stuffing from showing through)
- Stuffing: Polyester fiberfill
- Tools: Yarn needle, scissors, stitch markers (or a piece of contrasting thread)
- Finishing Touches: Black and white acrylic paint (for the eyes)
- Mounting: Wooden skewers (for bouquets) or small magnets
US Crochet Abbreviations
- ch: chain
- sc: single crochet
- inc: increase (2 sc in one stitch)
- dec: decrease (sc 2 together)
- dc: double crochet
- sl st: slip stitch
- MR: magic ring
- Bobble Stitch: 5 dc in one stitch, closed together at the top
Finished Size: Approximately 2.4 inches (6 cm) tall, excluding the legs.
Step-by-Step Instructions
The Body and Tail
The body is worked starting from a foundation chain to create an oval shape, which then transitions into the tail.
Start by chaining 9. Starting in the 2nd chain from the hook, work as follows:
- Round 1: Inc, 6 sc, 4 sc in the last chain. Now working along the opposite side of the chain: 6 sc, inc. (20 sts)
- Round 2: Inc, 8 sc, 2 inc, 8 sc, inc. (24 sts)
- Round 3: 3 sc in the next stitch, 11 sc, 3 sc in the next stitch, 11 sc. (28 sts)
- Round 4: 1 sc, 3 sc in the next stitch, 13 sc, 3 sc in the next stitch, 12 sc. (32 sts)
- Round 5: 32 sc.
- Round 6: 2 sc, 3 sc in the next stitch, 15 sc, 3 sc in the next stitch, 13 sc. (36 sts)
- Round 7: 36 sc.
- Round 8: 3 sc, 3 sc in the next stitch, 17 sc, 3 sc in the next stitch, 14 sc. (40 sts)
Forming the Tail
Now we will isolate a portion of the body to create the curved tail.
- Round 9: 14 sc, skip the next 20 stitches, join with a sc in the 21st stitch, then 6 sc. (20 sts)
- Round 10: 12 sc, 2 dec, 4 sc. (18 sts)
- Round 11: 4 sc, 1 Bobble Stitch, 6 sc, 2 dec, 3 sc. (16 sts)
- Round 12: 3 sc, 2 dec, 3 sc, 2 dec, 2 sc. (12 sts)
- Round 13: 3 sc, 1 Bobble Stitch, 8 sc. (12 sts)
- Round 14: 2 sc, 2 dec, 6 sc. (10 sts)
- Round 15: 5 dec. (5 sts)
Fasten off and weave in the ends. Stuff both the tail and the main body firmly.
The Neck and Head
To begin the neck, count 10 stitches away from the tail section on the main body. Join your yarn at this point.
- Round 1: 8 sc, 2 dec, 8 sc. (18 sts)
- Round 2: 7 sc, 2 dec, 7 sc. (16 sts)
Stuff the neck lightly.
- Round 3: 16 sc.
- Round 4: 6 sc, 2 dec, 6 sc. (14 sts)
- Rounds 5-7: 14 sc for 3 rounds.
- Round 8: dec, 12 sc. (13 sts)
- Round 9: 13 sc.
- Round 10: dec, 11 sc. (12 sts)
- Round 11: 12 sc.
- Round 12: 6 dec. (6 sts)
Stuff the head firmly, fasten off, and close the opening securely.
The Comb, Beak, and Wattle
These tiny details give the chicken its character!
The Comb
Using red yarn, join to the top of the head. Chain 5, then slip stitch back into the head. Repeat this sequence two more times (for a total of three little “points”). Fasten off and hide the ends.
The Beak
Using yellow yarn, chain 3. Starting in the 2nd chain from the hook, work 1 sl st and 1 sc (2 sts). Sew this small piece to the 4th round of the head.
The Wattle
Using red yarn, chain 6 and join to form a small loop. Sew this loop directly beneath the beak.
The Legs
Using yellow yarn, work the following for each leg:
Chain 12. Starting in the 2nd chain from the hook: 3 sl st. Chain 4, starting in 2nd chain from hook: 3 sl st, then 1 sl st into the join. Chain 4, starting in 2nd chain from hook: 3 sl st. Now, work 8 sl st back along the original foundation chain. Fasten off.
Sew the legs to the bottom of the body, aligned with the 3rd round of the body.
Finishing
Now that the structure is complete, it’s time for the artistic touches:
- Eyes: Use a tiny dot of white acrylic paint, followed by a smaller black dot in the center to create a cute, polished look.
- Embroidery: This is where you can get creative! Use a needle and colorful embroidery floss to add small flowers, dots, or leaf patterns to the chicken’s side and tail.
- Mounting: If you are making a bouquet, carefully insert a wooden skewer into the bottom of the body. If you want a fridge magnet, glue a strong neodymium magnet to the back of the body.
Tips for Success
Maintaining Shape
Because this project is so small, your tension is key. If you notice the stuffing poking through, try dropping down a hook size (e.g., from 1.75mm to 1.5mm). Make sure to stuff the head and tail firmly so they hold their curved shape over time.
Customizing Your Hen
While we used cream and graphite, you can make an entire farmyard! Try a reddish-brown yarn for a Rhode Island Red hen, or a white yarn for a Leghorn. You can also vary the embroidery—try simple geometric shapes for a more modern look or tiny hearts for a romantic theme.
Perfecting the Bobble Stitch
The bobble stitch in the tail adds a lovely texture. To ensure it “pops,” pull the final loop of the bobble tight. If the bobble looks too flat, you can gently nudge it outward with your crochet hook after finishing the round.