Adorable Crochet Sunflower Doll Pattern: A Step-by-Step Guide
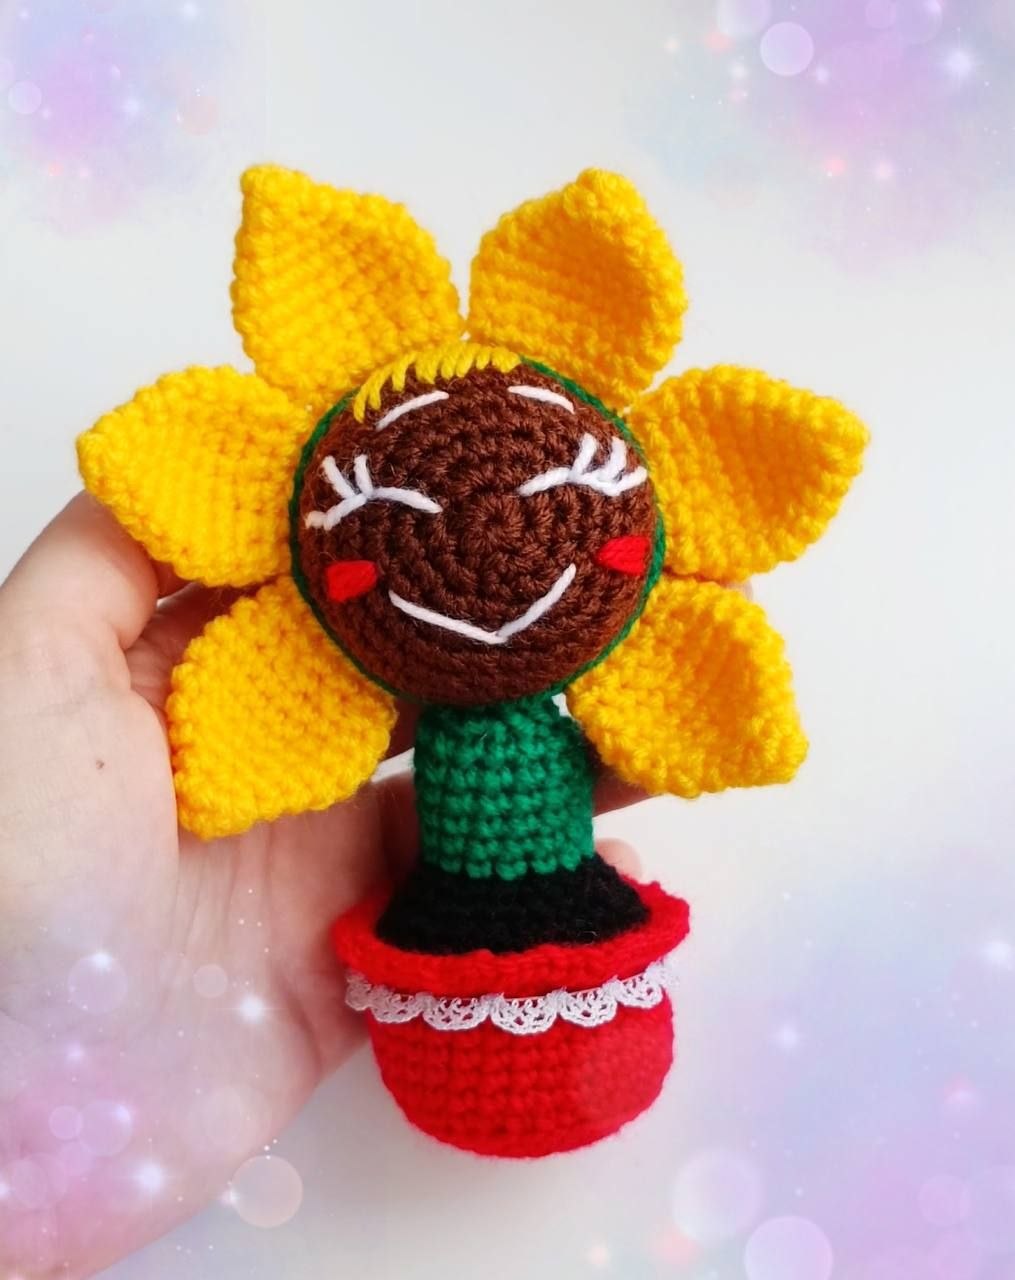
Bring a little bit of sunshine into your home or gift a ray of happiness to a loved one with this darling Crochet Sunflower Doll! This amigurumi project combines the cheerfulness of a sunflower with the sweetness of a small doll, making it a perfect desk companion or a unique handmade gift. Whether you are looking for a quick weekend project or a cute way to use up your scrap yarn, this pattern is designed to be accessible and rewarding.
This project is worked in the round and uses basic amigurumi techniques. If you can make a magic ring and a single crochet, you have all the skills needed to complete this sunny little friend. Let’s dive into the details and start stitching!
Materials & Abbreviations
To get started, gather the following materials. We recommend using a tight-stitching cotton yarn for a professional look, but acrylic works just as well for a softer feel.
Materials Needed:
- Yarn: Medium weight (4) yarn in the following colors:
- Brown (for the head)
- Yellow (for the petals)
- Green (for the stem and head accent)
- Black (for the pot detail)
- Red (for the pot)
- White and Red embroidery thread (for the face and lace trim)
- Crochet Hook: 2.5mm or 3.0mm (use a size smaller than your yarn suggests to ensure the stuffing doesn’t peek through).
- Stuffing: High-quality polyester fiberfill.
- Tools: Yarn needle, scissors, and stitch markers.
Abbreviations (US Terms):
- MR: Magic Ring
- Sc: Single Crochet
- Inc: Increase (2 sc in one stitch)
- Dec: Decrease (sc 2 together)
- BLO: Back Loop Only
- Sl st: Slip Stitch
- St: Stitch
Step-by-Step Instructions
The Head
Start with your brown yarn. This part of the doll is worked in a continuous spiral; do not join rounds unless specified.
- Round 1: Create a MR and work 6 sc into the ring. (6 sts)
- Round 2: Inc in each stitch around. (12 sts)
- Round 3: (1 sc, inc) repeat 6 times. (18 sts)
- Round 4: (2 sc, inc) repeat 6 times. (24 sts)
- Round 5: (3 sc, inc) repeat 6 times. (30 sts)
- Round 6: (4 sc, inc) repeat 6 times. (36 sts)
- Rounds 7-8: Sc in each stitch around. (36 sts)
Color Change: Now, switch to your green yarn for the head’s base/collar.
- Round 9: Work in BLO: Sc in each stitch around. (36 sts)
Detailing: To create a clean edge, go back to the front loops left over from Round 8 and work a round of 36 slip stitches around the edge.
- Rounds 10-12: Sc in each stitch around. (36 sts)
- Round 13: (4 sc, dec) repeat 6 times. (30 sts)
- Round 14: (3 sc, dec) repeat 6 times. (24 sts)
Note: Stop here to stuff the head firmly with fiberfill.
- Round 15: (2 sc, dec) repeat 6 times. (18 sts)
- Round 16: (1 sc, dec) repeat 6 times. (12 sts)
- Round 17: Dec 6 times. (6 sts)
Fasten off and weave in the ends. You will embroider the face in the finishing section.
The Petals (Make 6)
Switch to your yellow yarn. Each petal is worked as a separate piece.
- Round 1: Create a MR and work 4 sc into the ring. (4 sts)
- Round 2: (1 sc, inc) repeat 2 times. (6 sts)
- Round 3: (1 sc, inc) repeat 3 times. (9 sts)
- Round 4: (2 sc, inc) repeat 3 times. (12 sts)
- Round 5: (1 sc, inc) repeat 6 times. (18 sts)
- Rounds 6-8: Sc in each stitch around. (18 sts)
- Round 9: (1 sc, dec) repeat 6 times. (12 sts)
- Round 10: Sc in each stitch around, ending with a sl st. (12 sts)
Fasten off, but leave a long tail of yarn for sewing the petals to the head.
The Pot and Stem
Start with your red yarn for the base of the pot.
- Round 1: Create a MR and work 6 sc into the ring. (6 sts)
- Round 2: Inc in each stitch around. (12 sts)
- Round 3: (1 sc, inc) repeat 6 times. (18 sts)
- Round 4: (2 sc, inc) repeat 6 times. (24 sts)
- Round 5: (3 sc, inc) repeat 6 times. (30 sts)
- Round 6: Work in BLO: Sc in each stitch around. (30 sts)
- Rounds 7-12: Sc in each stitch around. (30 sts)
Color Change: Switch to black yarn for the pot’s rim.
- Round 13: Work in BLO: Sc in each stitch around. (30 sts)
Detailing: To create the flared rim of the pot, work into the front loops left from Round 12 and work an increase (2 sc) into every single stitch around.
- Round 14: (4 sc, dec) repeat 6 times. (24 sts)
- Round 15: (3 sc, dec) repeat 6 times. (18 sts)
Note: Stuff the pot portion now with fiberfill.
- Round 16: (2 sc, dec) repeat 6 times. (12 sts)
Color Change: Switch to green yarn for the stem.
- Rounds 17-22: Sc in each stitch around. (12 sts)
- Round 23: (1 sc, dec) repeat 6 times. (6 sts)
Fasten off, leaving a long tail for sewing the stem to the head.
Finishing
Embroidering the Face
Using a yarn needle and the specified colors, give your sunflower a personality! Based on the design:
- Eyes: Use white yarn to create two curved, closed “sleeping” eyes with tiny lashes poking out from the sides.
- Mouth: Stitch a wide, happy white smile directly under the eyes.
- Cheeks: Use red yarn or a small amount of pink blush to add two soft circles on the cheeks for a cute, flushed look.
Assembly
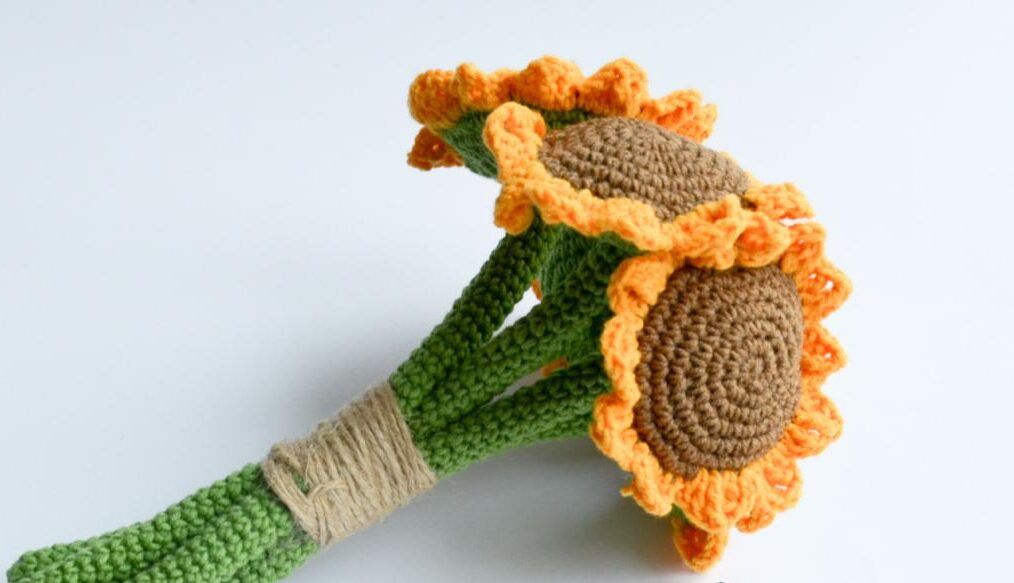
- Petals: Space the six yellow petals evenly around the top and sides of the brown head. Sew them securely using the long tails you left.
- Stem to Head: Sew the top of the green stem to the bottom of the head’s green collar.
- Potting: Ensure the stem is centered and sew the bottom of the stem securely into the base of the pot.
- Final Touch: Using white yarn or a piece of white lace trim, add a decorative border around the middle of the red pot for an extra touch of elegance.
Tips for Success
- Stitch Tension: Keep your tension tight. If you see holes where the stuffing is showing through, try dropping down a hook size.
- Invisible Decreases: To make your decreases seamless, work the “invisible decrease” by inserting your hook into the front loop of the first stitch and then the front loop of the next stitch before completing the sc.
- Stitch Markers: Because we are working in spirals, it is very easy to lose your place. Use a stitch marker at the start of every round.
- Symmetry: When sewing the petals, pin them in place first to make sure they are evenly spaced before you start sewing.