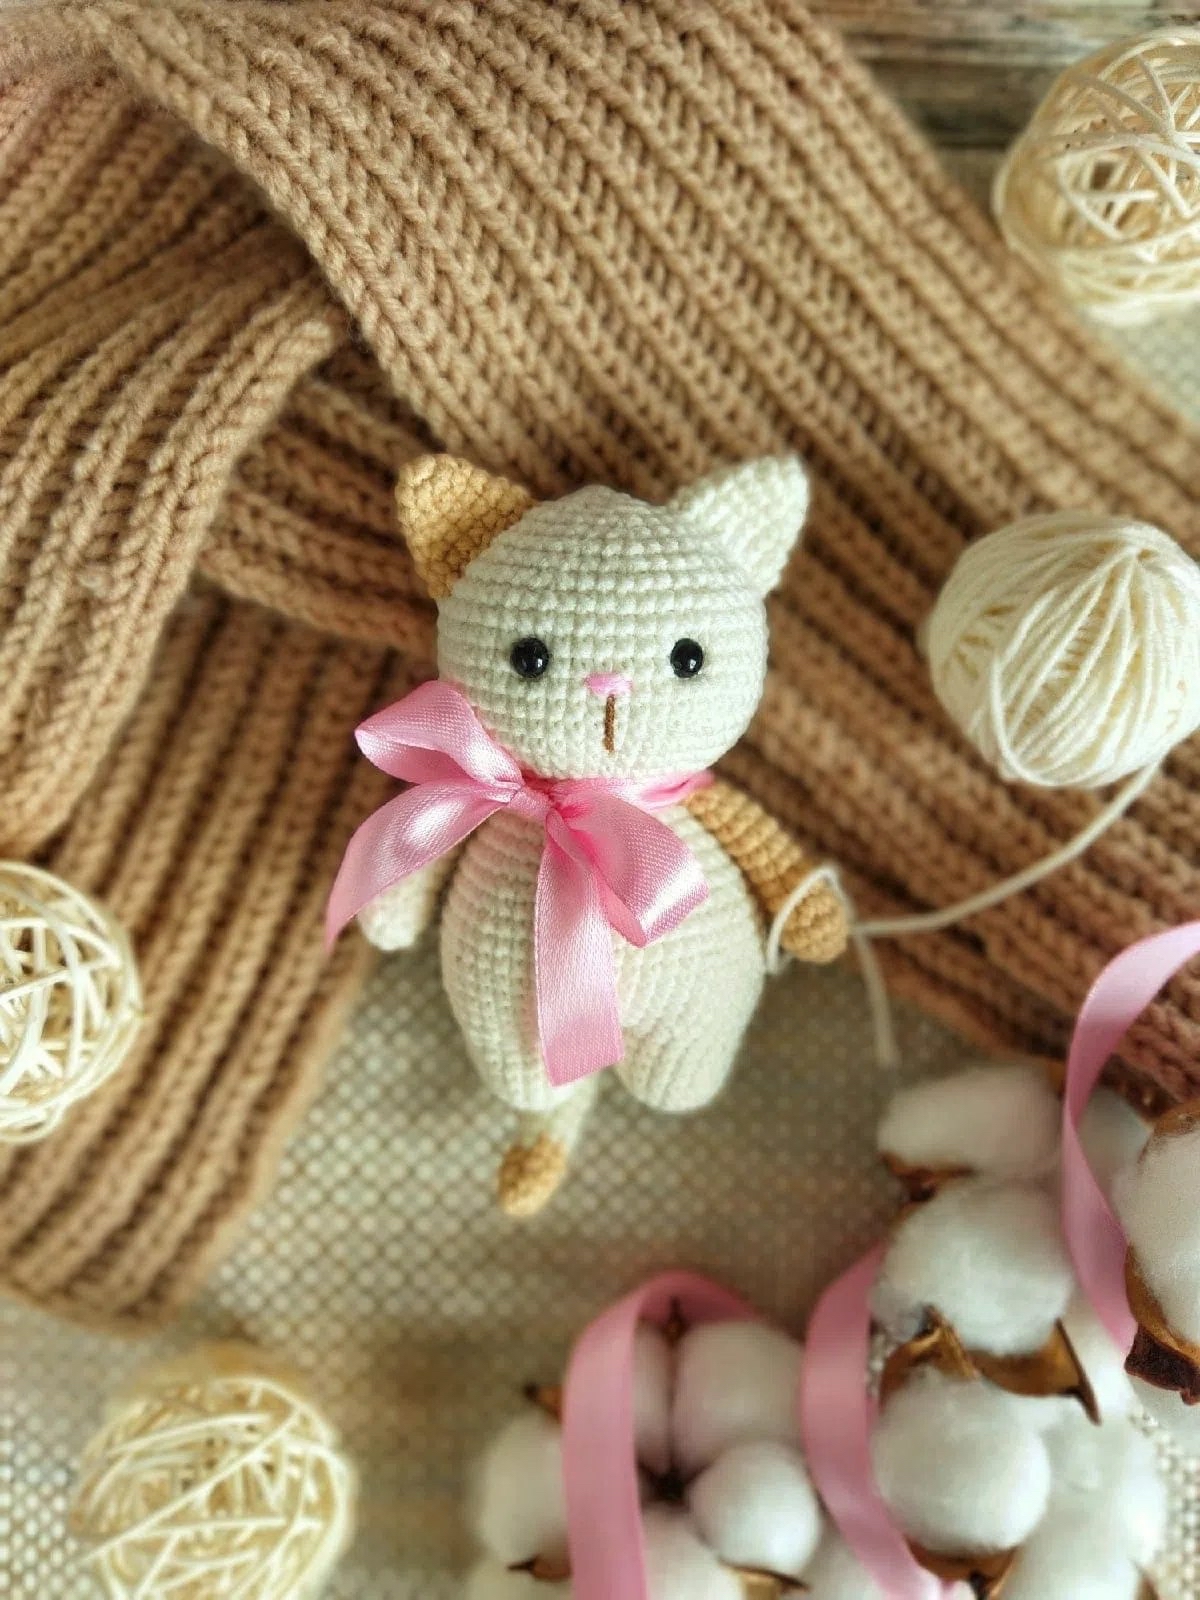
Adorable Amigurumi Kitty Crochet Pattern: A Beginner-Friendly Tutorial
There is nothing quite as heartwarming as a tiny, handmade crochet kitten. Whether you are looking to create a sweet nursery decoration, a unique gift for a cat lover, or a small companion to sit on your desk, this amigurumi kitty is the perfect project. This pattern is designed to be approachable, making it an excellent choice for beginners who have mastered the basic stitches and are ready to tackle a full 3D character.
This little kitty features a soft, rounded body, tiny expressive ears, and a charming two-tone tail. With a little bit of pink ribbon and some safety eyes, you will transform simple yarn into a character full of personality. In this guide, we will walk you through every single step, from the magic ring to the final stitch, ensuring your new feline friend turns out perfectly.
Materials and Tools
To ensure your kitty looks professional and holds its shape, it is important to use the right materials. For this project, we recommend using a smooth cotton or cotton-blend yarn, which provides excellent stitch definition.
- Yarn: A fingering weight or light worsted weight cotton yarn. You will need cream or white for the main body, a tan or light brown for the accents (ears/paws), and a darker brown for the base of the tail.
- Fiberfill: High-quality polyester stuffing to make the kitty firm and bouncy.
- Safety Eyes: 6mm (approximately 1/4 inch) safety eyes.
- Crochet Hook: A hook size appropriate for your yarn (typically between 2.0mm and 3.0mm). Using a slightly smaller hook than the yarn suggests helps keep the stitches tight so the stuffing doesn’t peek through.
- Ribbon: A small piece of pink satin ribbon for the neck bow.
- Notions: A tapestry needle (for sewing and weaving in ends), scissors, and stitch markers.
Crochet Abbreviations
This pattern uses standard US crochet terminology. Please ensure you are using US terms to avoid confusion with stitch heights.
- MR: Magic Ring
- sc: Single crochet
- inc: Increase (2 single crochets in one stitch)
- dec: Decrease (invisible decrease is recommended for amigurumi)
- sl st: Slip stitch
- [ ] * n: Repeat the instructions inside the brackets n times
Step-by-Step Crochet Instructions
The Body and Legs
In this pattern, the legs and the body are worked as one continuous piece. This creates a sturdy, seamless base for your kitty.
We begin by making the legs. Note that you will make the first leg, then immediately join it to the second leg to form the body.
Leg 1:
1) 6 sc in MR (6)
2) inc in each st around (12)
3) [1 sc, inc] * 6 (18)
4-7) 18 sc (18)
Leg 2 and Body Transition:
8) On the first leg, fasten off the yarn. On the second leg, do not fasten off! Instead, continue working around the second leg and then immediately begin working into the stitches of the first leg to join them. Work 18 sc around the second leg, then 18 sc around the first leg (36 total). Use a stitch marker to keep track of your rounds; place it at the back of the piece.
Continuing the Body:
9) [2 sc, inc] * 12 (48)
10-16) 48 sc (48)
17) [6 sc, dec] * 6 (42)
18) 42 sc (42)
19) [5 sc, dec] * 6 (36)
20) 36 sc (36)
21) [4 sc, dec] * 6 (30)
22) 30 sc (30)
23) [3 sc, dec] * 6 (24)
24) 24 sc (24)
Tip: As you reach round 20, begin stuffing the legs and the bottom of the body firmly with fiberfill.
The Head
The head is worked separately and will be sewn onto the body later.
25) 24 inc (48)
26) 8 sc, [7 sc, inc] * 4, 8 sc (52)
27-35) 52 sc (52)
Eye Placement:
Insert your 6mm safety eyes between rounds 31 and 32. Make sure there are about 6 to 7 single crochets between the eyes to give your kitty a cute, wide-eyed look.
36) 8 sc, [7 sc, dec] * 4, 8 sc (48)
37) 3 sc, dec, [6 sc, dec] * 5, 3 sc (42)
38) [5 sc, dec] * 6 (36)
39) 2 sc, dec, [4 sc, dec] * 5, 2 sc (30)
40) [3 sc, dec] * 6 (24)
41) 1 sc, dec, [2 sc, dec] * 5, 2 sc (18)
42) dec, [1 sc, dec] * 5, 1 sc (12)
43) dec (6)
Fasten off, leaving a long tail for sewing. Stuff the head firmly before closing the hole.
The Tiny Arms
Make two arms. These should remain un-stuffed to keep them flexible.
1) 5 sc in MR (5)
2) inc in each st around (10)
3) [1 sc, inc] * 5 (15)
4) [1 sc, dec] * 5 (10)
5) dec, 8 sc (9)
6-12) 9 sc (9)
Fold the arm in half and crochet 4 sc through both layers to close the end. Do not stuff the arms. Sew or crochet the arms into the body at round 23.
The Ears
Make two ears using your accent color.
1) 6 sc in MR (6)
2) [1 sc, inc] * 3 (9)
3) 3 sc, inc, 4 sc, inc (11)
4) 4 sc, inc, 4 sc, inc, 1 sc (13)
5) 4 sc, inc, 5 sc, inc, 2 sc (15)
6) 4 sc, inc, 6 sc, inc, 3 sc (17)
Finish the edge by working 3 sc and then a slip stitch. Leave a long tail for sewing.
The Two-Tone Tail
The tail is worked in two sections and then joined.
Brown Section:
1) 6 sc in MR (6)
2) [1 sc, inc] * 3 (9)
3-4) 9 sc (9)
White Section:
5-19) 9 sc (9)
To finish, fold the two sections together and crochet 4 sc through both layers to join them into one tail.
Finishing Touches
Now comes the best part—bringing your kitty to life!
- Assembly: Using your tapestry needle and the tails left from your pieces, sew the head onto the body. Center it carefully. Attach the ears to the top of the head and the tail to the bottom of the body.
- Face Details: If you want to add a little nose, you can use a tiny bit of pink embroidery thread or a small dab of fabric paint to create a sweet little pink triangle between the eyes.
- The Bow: Tie your pink ribbon around the neck of the kitty. This adds a lovely pop of color and a “finished” boutique look.
- Cleanup: Weave in all loose yarn ends securely inside the body.
Pro Tips for Amigurumi Success
Crocheting small toys requires a bit of finesse. Here are a few tips to help you achieve the best results:
- Use the Invisible Decrease: Instead of a standard decrease, work your decrease through the front loops only of the next two stitches. This prevents “holes” in your work and makes the surface look much smoother.
- Watch Your Tension: Try to keep your tension consistent. If your stitches are too loose, the stuffing will show through; if they are too tight, you might struggle to insert your hook.
- Stitch Markers are Essential: In amigurumi, it is very easy to lose track of where a round begins. Always use a stitch marker at the first stitch of every round.
- Stuffing Technique: When stuffing, push the fiberfill into the corners and crevices of the toy. This prevents the “lumpy” look and ensures a smooth, professional shape.