Easy Crochet Donut Pattern: A Cute and Squishy Amigurumi Tutorial
Are you looking for a quick, adorable, and incredibly satisfying crochet project? Look no further! There is something uniquely charming about amigurumi treats, and nothing says “sweet” quite like a colorful, plush crochet donut. Whether you want to decorate a kitchen nook, create a whimsical gift for a child, or simply practice your stitches with a fun new shape, this crochet donut pattern is the perfect project for you.
This pattern is designed with a focus on texture and simplicity. By using a soft, chenille-style bulky yarn, you can create a donut that is wonderfully squishy and looks almost good enough to eat! This tutorial is written in a beginner-friendly style, making it an excellent choice if you are just starting your amigurumi journey. Grab your favorite hook and let’s get baking!
Materials & Abbreviations
Before we dive into the stitches, let’s make sure you have everything you need on your crochet table. Because this project uses bulky, velvet-style yarn, the stitches will grow quickly, and the finished product will be lovely and soft.
What You Will Need
- Bulky Weight Yarn: You will need two main colors. One color for the “dough” (a tan, beige, or light brown) and one color for the “glaze” (any fun color like pink, mint, or chocolate). You will also need small scraps of various bright colors for the sprinkles.
- Crochet Hook: A 5.0mm (H) or 6.0mm (J) hook is recommended to accommodate the bulky yarn, though you should adjust based on your tension to ensure the stuffing doesn’t show through.
- Stuffing: Polyester fiberfill is the standard choice for amigurumi to give your donut that plump, professional look.
- Yarn Needle: A large-eye blunt needle for weaving in ends and embroidering the sprinkles.
- Scissors: For clean cuts on your yarn.
Abbreviations (US Terms)
This pattern uses standard US crochet terminology. Please ensure you are using US terms to avoid confusion with stitch heights.
- ch: chain
- sc: single crochet
- inc: increase (2 single crochets worked into the same stitch)
- st(s): stitch(es)
- sl st: slip stitch
- MR: magic ring (though this pattern uses a chain ring method)
Step-by-Step Instructions
When working with bulky chenille yarn, it can sometimes be difficult to see the “loops.” Don’t get discouraged! Work slowly, use your fingers to feel for the stitches, and remember that your tension might feel different than it does with cotton yarn.
Making the Donut Base
We will start by creating the dough part of our donut. This is worked in a continuous spiral. It is highly recommended to use a stitch marker to keep track of the beginning of your rounds.
- Round 1: Start by making a chain of 12 (12 ch). Join the chain into a ring by slip stitching into the first chain. Work 12 single crochets (12 sc) into the ring. (12 sts)
- Round 2: Perform an increase in every stitch around. (12 inc = 24 sc)
- Round 3: [1 sc, 1 inc] repeat 12 times. (36 sc)
- Rounds 4-5: Work 1 sc in each stitch around for two full rounds. (36 sc)
Once you have completed Round 5, fasten off your yarn, leaving a tail for sewing, and cut the yarn.
Creating the Glaze
The “glaze” is the colorful top layer of our donut. To make it look realistic, we will work it on the opposite side of our base.
- Preparation: Turn your donut base inside out. Take your chosen “glaze” color and join the yarn inside the donut base.
- Round 1: Work 12 increases into the stitches. (12 inc = 24 sc)
- Round 2: [1 sc, 1 inc] repeat 12 times. (36 sc)
- Rounds 3-4: Work 1 sc in each stitch around for two full rounds. (36 sc)
At this point, you should have two flat circles: one tan “dough” circle and one colorful “glaze” circle, both with a hole in the center.
Bringing it All Together
Now comes the fun part—assembling your creation! This step turns two flat pieces into a 3D donut.
- Place the glaze circle on top of the dough circle, ensuring the holes align perfectly.
- Using your crochet hook and your original dough color (or a matching color), join the two pieces together by working single crochet stitches through both layers.
- Work 36 single crochets around the entire circumference of the donut.
- Important: As you are crocheting the two pieces together, begin stuffing the donut with your polyester fiberfill. Make sure to stuff it firmly enough to hold its shape, but leave enough room to finish the final round. Be careful not to overstuff, or the donut might lose its “donut” shape and become too round!
- Once you have completed the round, fasten off and weave the remaining yarn tail securely into the inside of the donut using your yarn needle.
Finishing Touches
A donut isn’t complete without sprinkles! This is where you can get really creative and add personality to your project.
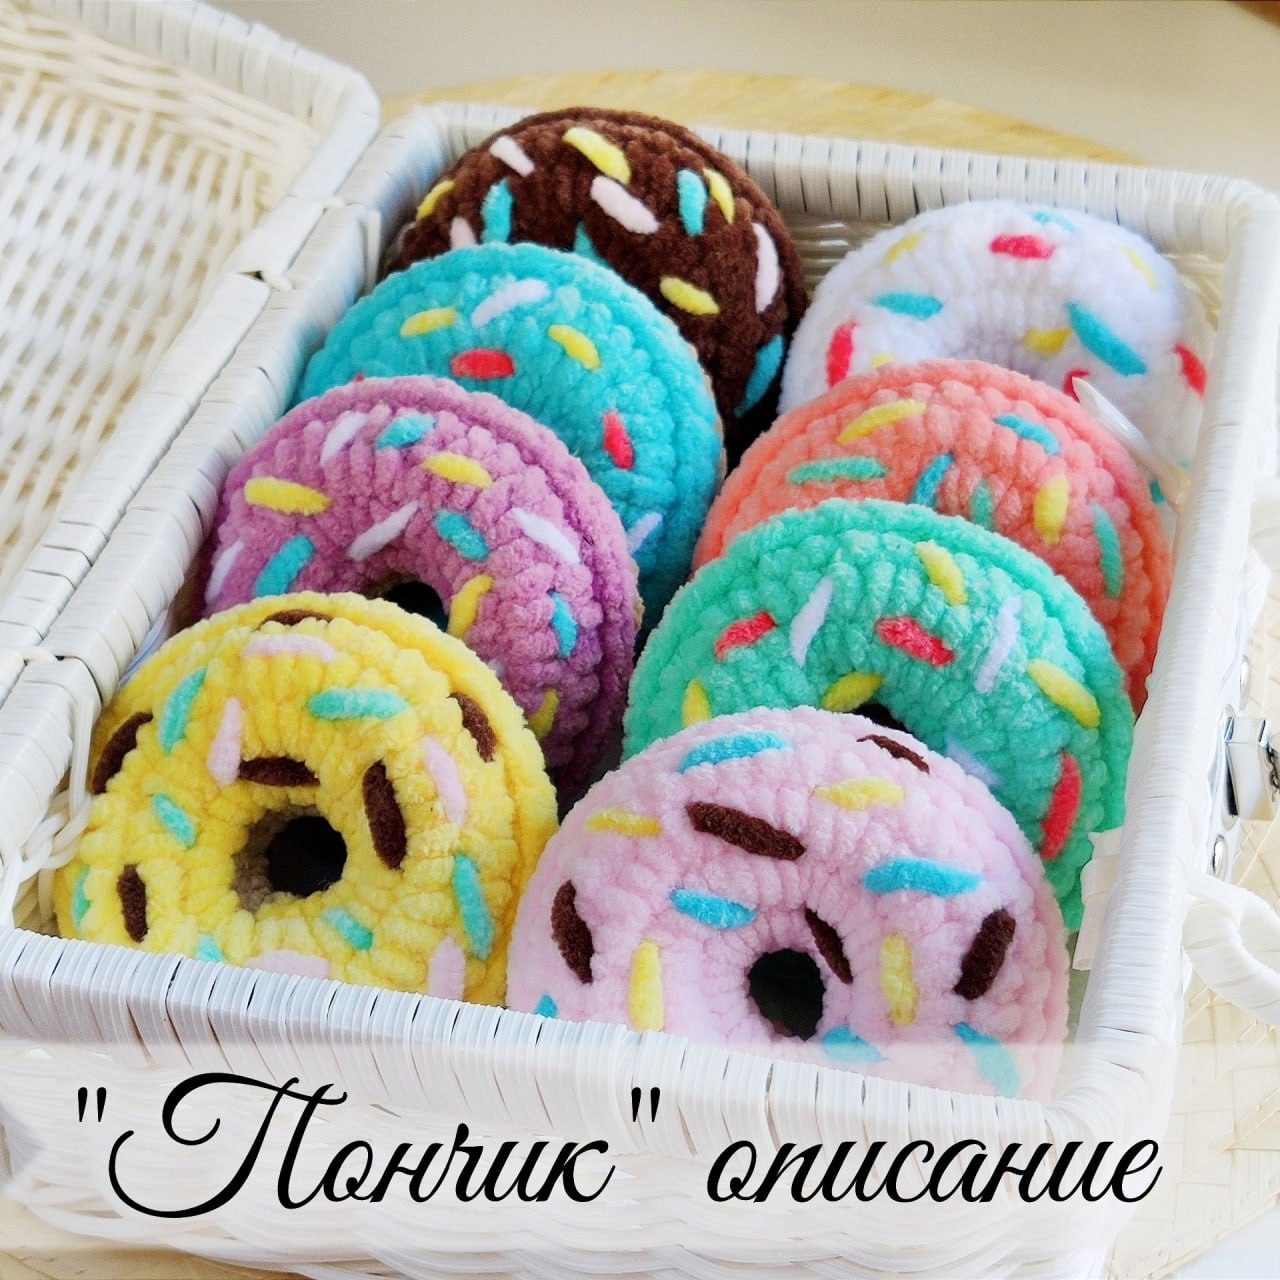
Take small scraps of contrasting colored yarn and your yarn needle. Simply “embroider” short, straight lines across the surface of the glaze. You can place them randomly or in patterns. Since you are using bulky yarn, these “sprinkles” will look thick and delicious. Once you are happy with the placement, weave in the ends of your sprinkle yarn on the underside of the donut.
Tips for Success
To ensure your crochet donut turns out perfectly, keep these professional tips in mind:
Mind Your Tension
When working with bulky or chenille yarns, it is easy to accidentally create gaps. If you find that you can see the white stuffing through your stitches, try using a slightly smaller hook or slowing down to ensure each stitch is tight and secure.
The “Invisible” Increase
For a cleaner look in amigurumi, many crafters prefer the “invisible increase” method. Instead of putting two stitches into the front loop of the stitch, you put one into the front loop and one into the back loop of the same stitch. This prevents large, unsightly bumps on the surface of your donut.
Make a Collection!
The best part about this pattern is how easily it can be customized. Try making a “box of assorted donuts” by using different glaze colors and sprinkle combinations. You can make chocolate donuts, strawberry donuts, or even matcha-flavored green donuts! They make wonderful decor for a themed nursery or a sweet addition to a crochet gift basket.
Happy crocheting!