Adorable Princess Snake Crochet Pattern: A Step-by-Step Amigurumi Tutorial
Are you looking for your next heartwarming crochet project? Look no further! This adorable Princess Snake amigurumi is the perfect blend of whimsical charm and beginner-friendly technique. Whether you are looking to create a unique nursery decoration, a sweet gift for a child, or simply want to add a magical creature to your own crochet collection, this little snake is destined to steal your heart.
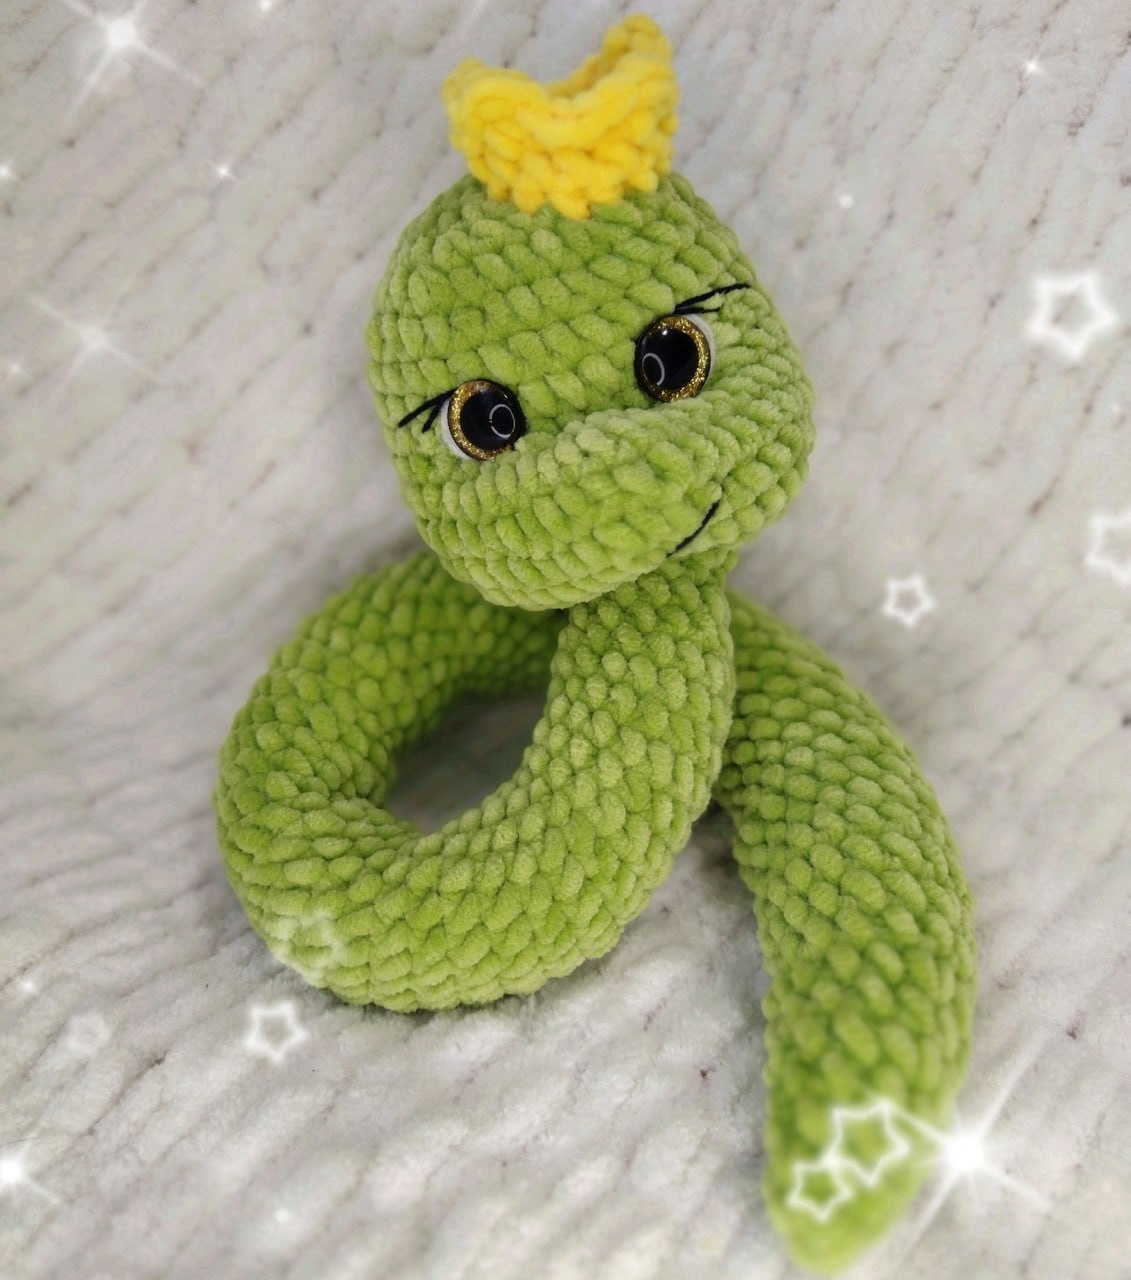
This pattern results in a soft, squishy, and expressive little character featuring a tiny golden crown. Because we use plush yarn, the finished toy is incredibly tactile and huggable. In this detailed tutorial, I will walk you through every single stitch to ensure your princess turns out absolutely perfect. Grab your hook, settle into your favorite crochet chair, and let’s get started!
Materials & Abbreviations
Before we dive into the stitches, let’s make sure you have everything you need on your crafting table. To achieve the look seen in the photos, I recommend using a velvet or chenille-style yarn, which gives the snake that premium, soft texture.
What You Will Need:
- Plush/Chenille Yarn: A bright green for the body and a sunny yellow for the crown. You will also need a small amount of black and white yarn (or embroidery floss) for the eyes.
- Crochet Hook: A size appropriate for your yarn (typically 3.5mm to 4.5mm for plush yarn) to ensure your stitches are tight enough to hold the stuffing.
- Safety Eyes: Approximately 10mm to 12mm in size.
- Fiberfill Stuffing: High-quality polyester stuffing to make your snake plump and bouncy.
- Tapestry Needle: For sewing the crown and embroidering facial details.
- Scissors: For clean yarn cuts.
Abbreviations (US Terms):
Please ensure you are using US crochet terms to follow this pattern accurately:
- MR: Magic Ring
- sc: Single Crochet
- inc: Increase (2 sc in the same stitch)
- dec: Decrease (Invisible decrease is highly recommended for amigurumi)
- ch: Chain
- sl st: Slip Stitch
- dc: Double Crochet
- st(s): Stitch(es)
Step-by-Step Instructions
Note: When working on amigurumi, it is best to work in continuous rounds. Do not join each round with a slip stitch unless specifically instructed, as this helps maintain a seamless look.
The Head and Body
We will begin by creating the base of the snake, which transitions from the head into a long, elegant body.
- Round 1: Create a Magic Ring and work 6 sc into the ring. (6)
- Round 2: [1 sc, 1 inc] repeat 3 times. (9)
- Round 3: 2 sc, 1 inc repeat 3 times. (12)
- Round 4: 12 sc. (12)
- Round 5: 3 sc, 1 inc repeat 3 times. (15)
- Round 6: 15 sc. (15)
- Round 7: 4 sc, 1 inc repeat 3 times. (18)
- Rounds 8-57: 18 sc in each round. (50 rounds total)
Pro Tip: As you reach the halfway point of the body, begin stuffing the snake firmly with fiberfill to ensure it holds its shape.
Shaping the Face
Now, we will create the “bulge” that forms the snake’s adorable snout and facial area.
- Round 58: 4 sc, 3 dec. (15)
- Round 59: 15 sc. (15)
- Round 60: 3 sc, 3 dec. (12)
- Round 61: 12 sc. (12)
- Round 62: 12 inc. (24)
- Round 63: 3 sc, 6 inc. (30)
- Round 64: 4 sc, 6 inc. (36)
- Round 65: 5 sc, 6 inc. (42)
- Rounds 66-68: 42 sc in each round. (3 rounds total)
- Round 69: 15 sc, 6 dec, 15 sc. (36)
Important: Eye Placement! Before proceeding to the next round, insert your safety eyes between rounds 69 and 70. Position them exactly where the decreases occurred in Round 69 to give the snake its wide-eyed, cute expression.
- Rounds 70-73: 36 sc in each round. (4 rounds total)
- Round 74: 4 sc, 6 dec. (30)
- Round 75: 3 sc, 6 dec. (24)
- Round 76: 2 sc, 6 dec. (18)
- Round 77: 1 sc, 6 dec. (12)
- Round 78: Sl st in each stitch around to close.
Fasten off the yarn, leaving a long tail. Pull the tail tight to close the hole completely. Use your tapestry needle to sculpt the face by gently pulling the area around the eyes inward to create a snout effect.
Making the Royal Crown
No princess is complete without her crown! This tiny accessory is worked separately and then sewn onto the head.
- Using yellow yarn, create a Magic Ring and work 12 ch to form a loop, then join with a sl st to the first ch to create a ring.
- Round 1: Ch 1 (rising ch), work 12 sc around the ring. Join with sl st to the first sc.
- Round 2: Ch 1, work 12 sc around the ring. Join with sl st.
- Round 3 (The Scalloped Edge): This round creates the points of the crown. Work as follows: 1 sl st, ch, 1 dc, ch, 2 sl st, ch, 1 dc, ch, 2 sl st, ch, 1 dc, ch, 2 sl st, ch, 1 dc, ch, 1 sl st.
Fasten off, leaving a tail for sewing. Pull the loop tight to shape the crown and sew it securely to the top of the snake’s head.
Finishing
The final steps are where the magic truly happens! Once your crown is attached, it is time to bring your Princess Snake to life with her facial features.
- Embroider the Eyes: Using black and white yarn, embroider the whites of the eyes and delicate eyelashes. This adds a huge amount of personality and makes her look “awake” and sweet.
- Final Inspection: Check all seams to ensure there are no gaps where stuffing might leak out. If you find a gap, simply use your tapestry needle to weave in a few stitches and secure it.
Tips for Success
To ensure your amigurumi looks professional, keep these beginner-friendly tips in mind:
Master the Invisible Decrease
When working on rounds where you need to reduce the stitch count, use the “invisible decrease” method. Instead of inserting your hook into the entire stitch, insert it only into the front loops of the next two stitches. This prevents large, unsightly gaps in your work, which is especially important when using plush yarn.
Watch Your Tension
Amigurumi requires slightly tighter tension than a standard scarf or blanket. You want the fabric to be dense so that the white stuffing doesn’t peek through the stitches. If you notice gaps, try using a slightly smaller hook than the yarn label suggests.
Sculpting is Key
Don’t be afraid to use your fingers to “mold” the stuffing. By pulling the thread at the base of the eyes or the snout, you can create a much more realistic and expressive face. This step transforms a simple tube into a character!
Happy crocheting! We can’t wait to see your beautiful Princess Snake!