How to Crochet a Cute Plush Baby Goat: A Beginner-Friendly Amigurumi Pattern
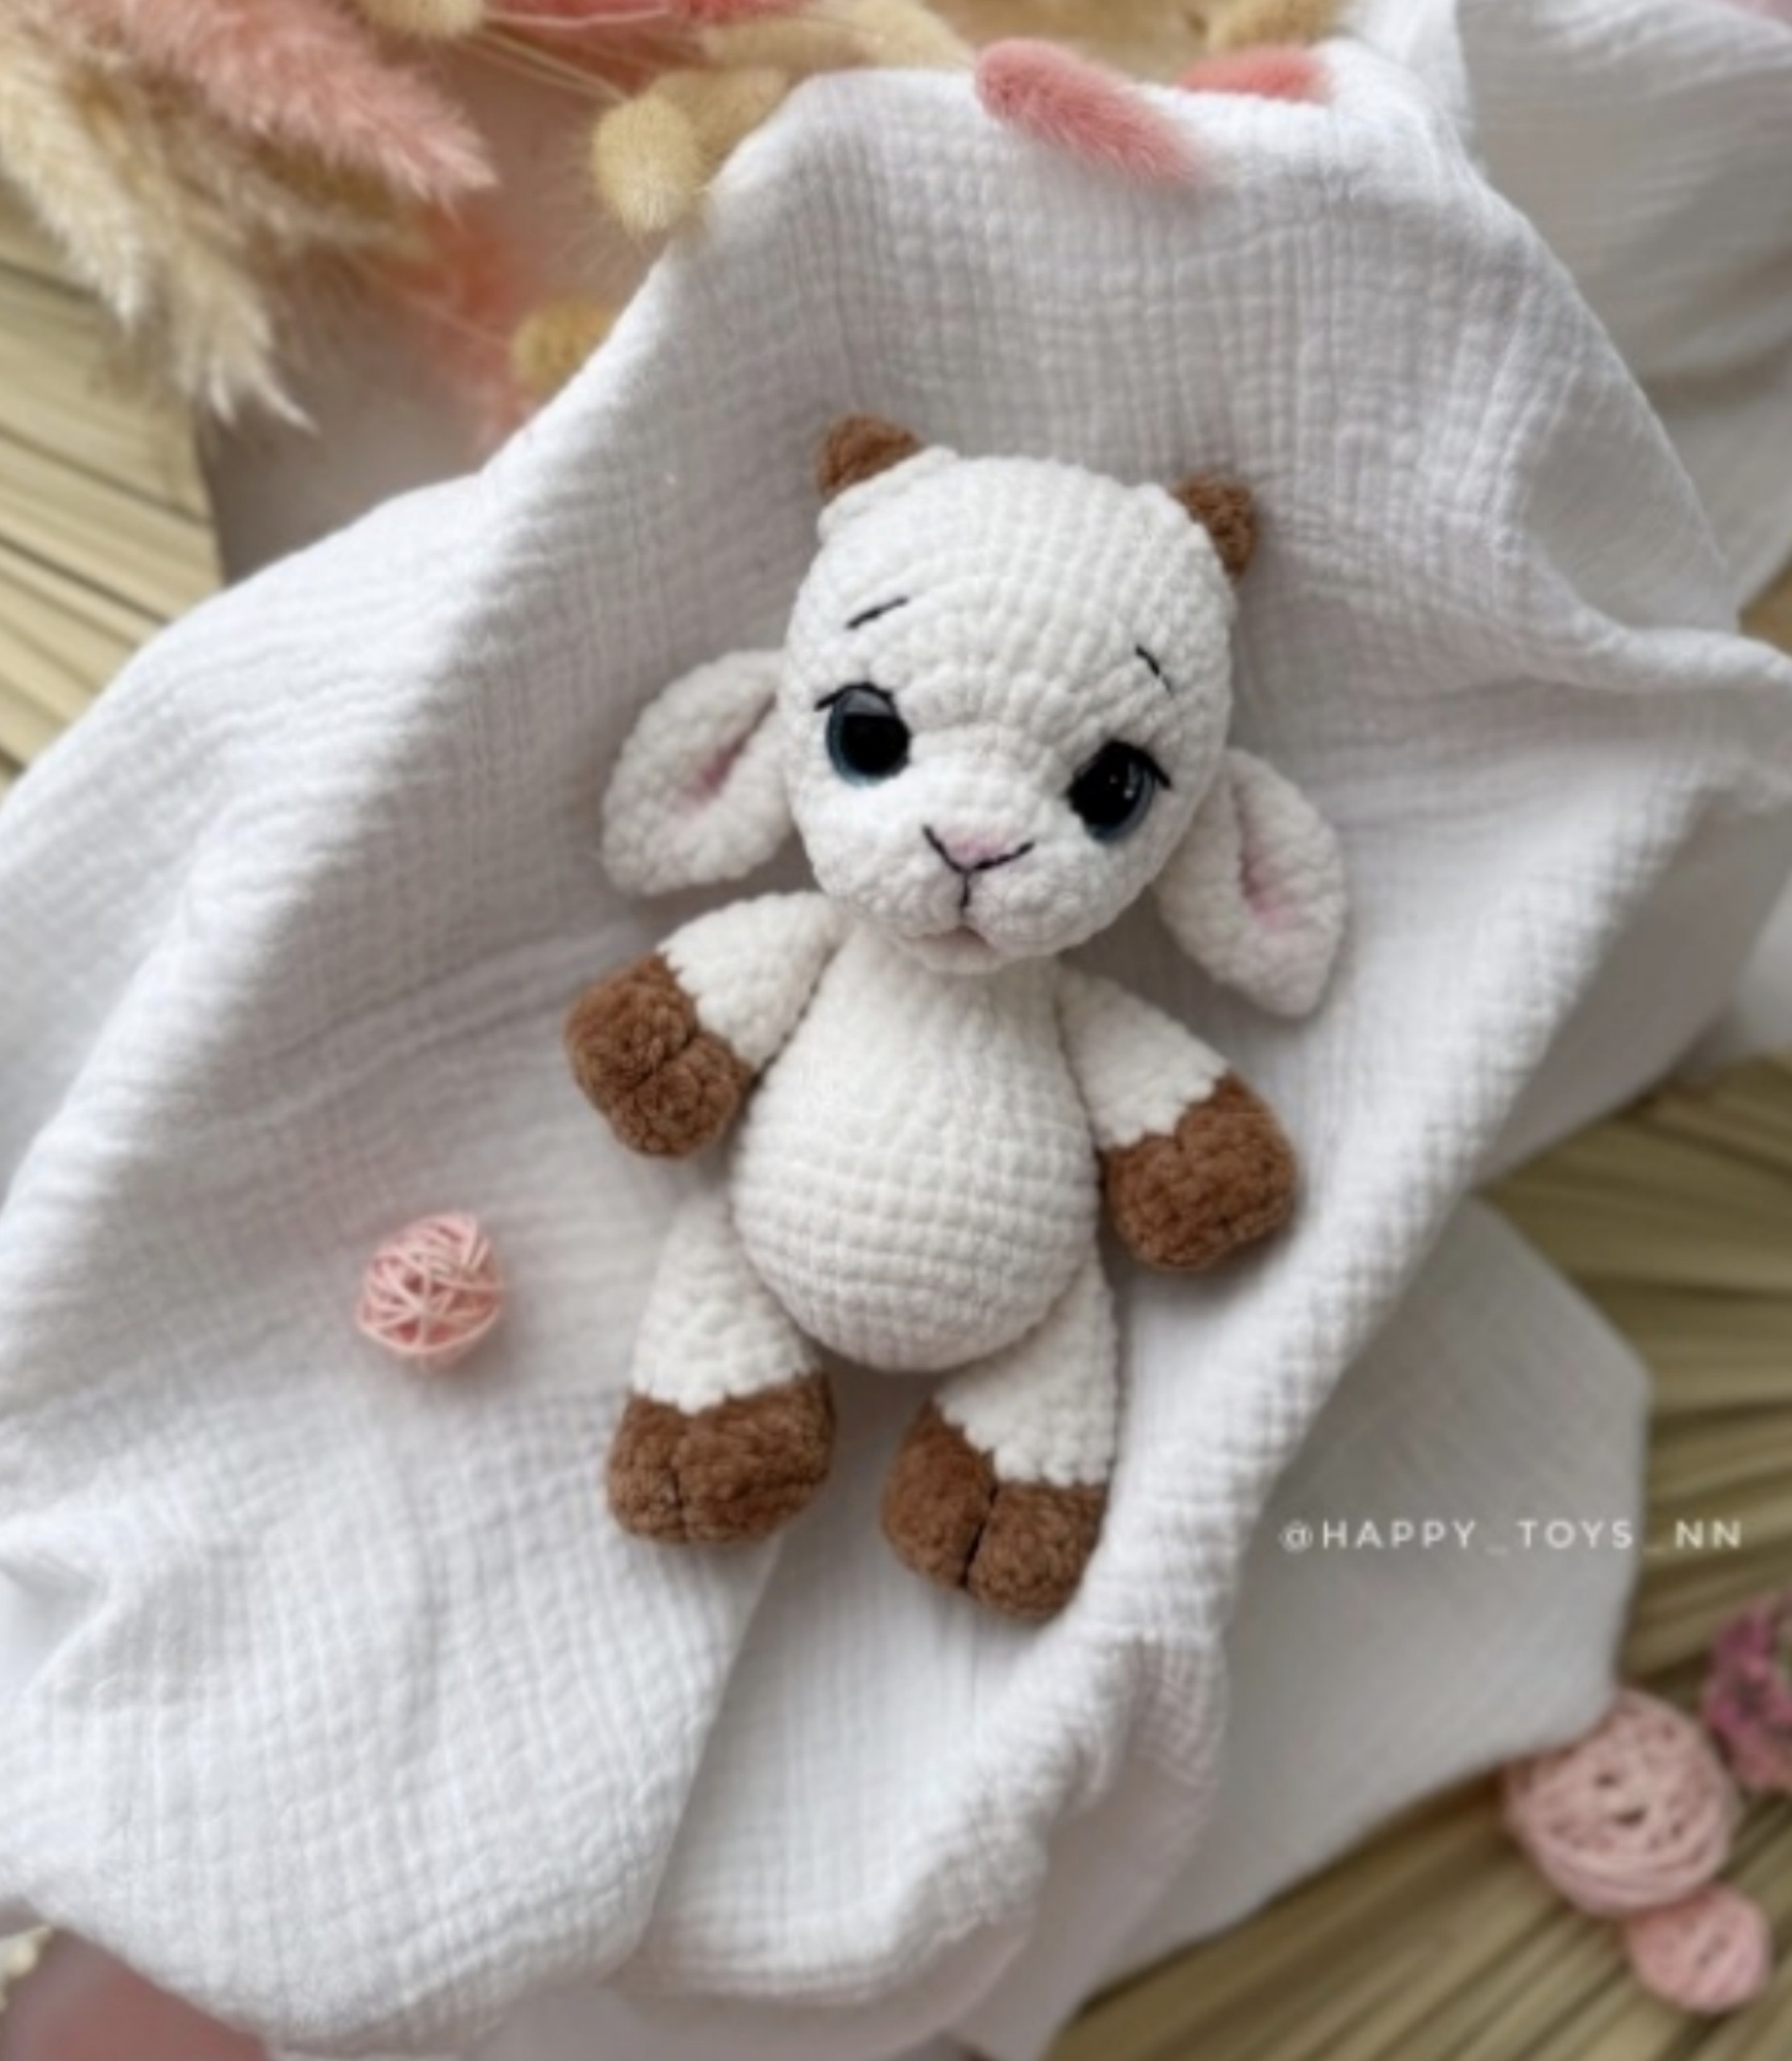
Are you looking for your next adorable crochet project? This plush baby goat is the perfect addition to any nursery, a sweet gift for a baby shower, or a charming companion for anyone who loves amigurumi! This little goat features soft, velvety textures and a sweet, expressive face that makes it absolutely irresistible.
This pattern is designed to be beginner-friendly, especially if you are comfortable with basic amigurumi techniques. By using plush chenille-style yarn, you will create a toy that is incredibly soft to the touch and has a professional, high-end look. Follow this detailed tutorial to bring your very own little goat to life!
Materials & Abbreviations
To ensure your goat turns out exactly like the photos, I recommend using high-quality plush yarn and following the measurements closely. The finished toy will stand approximately 8 inches tall (excluding the horns).
Materials Needed
- Plush Yarn: Approximately 3/4 of a skein of your main body color (examples: Himalaya Dolphin Baby, YarnArt Dolce, or Wolans Bunny Baby).
- Contrast Yarn: A small amount of plush yarn in a different color for the hooves and horns.
- Detail Yarn: A small amount of thin black embroidery thread or fine yarn for the facial features and hoof details.
- Safety Eyes: 18 mm safety eyes.
- Crochet Hook: 4 mm (G) crochet hook.
- Stuffing: High-quality polyester fiberfill (poly-fill).
- Optional: 1.2-inch (30 mm) cotter pin and disk (if you prefer a rotating head), pink dry pastel for blushing the nose and ears, and a long embroidery needle.
- Tools: Pliers (if using a cotter pin) and scissors.
Abbreviations (US Terms)
- mr: magic ring
- ch: chain
- sc: single crochet
- inc: increase (2 sc in one stitch)
- dec: decrease (sc2tog)
- hdc: half double crochet
- dc: double crochet
- sl st: slip stitch
- BLO: back loop only
- sk: skip
Step-by-Step Instructions
Bottom Legs
Note: Start with the color used for the hooves. Always place your stitch marker in the middle of the back of the leg.
Ch 3. Working into the 2nd chain from the hook:
- Round 1: 1 sc, 4 sc in the next stitch, turn, 1 sc, 4 sc in the last stitch (10)
- Round 2: 1 sc, 4 inc, 1 sc, 4 inc (18)
- Round 3: 2 sc, inc, [1 sc, inc] repeat 3 times, 2 sc, inc, [1 sc, inc] repeat 3 times (26)
Immediately after Round 3, work 7 additional sc into the top loops.
Round 4 (BLO): 6 sc, dec, [2 sc, dec] repeat 3 times, 6 sc (22)
Round 5: 7 sc, dec, [1 sc, dec] repeat 2 times, 7 sc (19)
Round 6: 8 sc, 2 dec, 7 sc (17)
Switch to the main body color.
Round 7 (BLO): 8 sc, dec, 7 sc (16)
Round 8: 16 sc
Round 9: [dec, 6 sc] repeat 2 times (14)
Round 10: 6 sc, dec, 6 sc (13)
Round 11: 13 sc
Round 12: 6 sc, dec, 5 sc (12)
Round 13: [dec, 4 sc] repeat 2 times (10)
After Round 13, work 1 additional sc.
Round 14: Fold the leg in half so the sides touch. Sc 5 through both layers to close. Stuff firmly and leave a long tail for sewing.
Upper Legs
Start with the hoof color.
Ch 3. Working into the 2nd chain from the hook:
- Round 1: 1 sc, 4 sc in the next stitch, turn, 1 sc, 4 sc in the last stitch (10)
- Round 2: 1 sc, 4 inc, 1 sc, 4 inc (18)
Round 3: 2 sc, inc, [1 sc, inc] repeat 3 times, 2 sc, inc, 1 sc, inc. Stop here; do not complete the full round.
Round 4 (BLO): 6 sc, dec, 1 sc, dec, 2 sc, dec, 1 sc, dec, 6 sc (20)
Round 5: 6 sc, dec, [1 sc, dec] repeat 2 times, 6 sc (17)
Round 6: 6 sc, 2 dec, 7 sc (15)
Switch to the main body color.
Round 7 (BLO): 6 sc, dec, 7 sc (14)
Round 8: 14 sc
Round 9: [5 sc, dec] repeat 2 times (12)
Round 10: 5 sc, dec, 5 sc (11)
Round 11: 5 sc, dec, 4 sc (10)
Round 12: [dec, 3 sc] repeat 2 times (8)
After Round 12, work 1 additional sc.
Round 13: Fold in half and sc 4 through both layers to close. Stuff and leave a long tail.
Body
Place your marker in the middle of the back.
- Round 1: 6 sc in mr (6)
- Round 2: 6 inc (12)
- Round 3: [1 sc, inc] repeat 6 times (18)
- Round 4: [2 sc, inc] repeat 6 times (24)
- Round 5: [3 sc, inc] repeat 6 times (30)
- Round 6: [4 sc, inc] repeat 6 times (36)
- Round 7: [5 sc, inc] repeat 6 times (42)
- Round 8: 42 sc
Round 9 (Attach Bottom Legs): 7 sc, 5 sc through both the leg and the body, 18 sc, 5 sc through both the leg and the body, 7 sc (42)
Rounds 10-11: 42 sc (2 rounds)
Round 12: 13 sc, dec, [5 sc, dec] repeat 2 times, 13 sc (39)
Round 13: 11 sc, dec, [3 sc, dec] repeat 3 times, 11 sc (35)
Round 14: 35 sc
Round 15: 11 sc, dec, [4 sc, dec] repeat 2 times, 10 sc (32)
Round 16: 10 sc, dec, 1 sc, dec, 2 sc, dec, 1 sc, dec, 10 sc (28)
Round 17: 3 sc, dec, 4 sc, dec, 6 sc, dec, 4 sc, dec, 3 sc (24)
Round 18: 5 sc, dec, [4 sc, dec] repeat 2 times, 5 sc (21)
After Round 18, work 1 additional sc.
Round 19 (Attach Upper Legs): 3 sc, 4 sc through both the leg and the body, 7 sc, 4 sc through both the leg and the body, 3 sc (21)
Round 20: 21 sc
Stuff the body firmly.
Head
Ch 6. Working into the 2nd chain from the hook:
- Round 1: 4 sc, 4 sc in the next stitch, turn, 4 sc, 4 sc in the last stitch (16)
- Round 2: 4 sc, 4 inc, 4 sc, 4 inc (24)
- Round 3: 24 sc
Important: To shift the marker to the center of the muzzle, work 2 additional sc after Round 3. The next stitch will be the start of Round 4.
Round 4: 9 sc, 6 inc, 9 sc (30)
Round 5: 9 sc, inc, 1 sc, inc (in hdc), 1 hdc, inc (in hdc), 2 hdc, inc (in hdc), 1 hdc, inc (in hdc), 1 sc, inc, 9 sc (36)
Round 6: 13 sc, [inc (in hdc), 2 hdc] repeat 3 times, inc (in hdc), 13 sc (40)
Round 7: 13 sc, inc, 3 sc, inc, 4 sc, inc, 3 sc, inc, 13 sc (44)
Round 8: 17 sc, inc, 8 sc, inc, 17 sc (46)
Eye Placement: Insert safety eyes between Rounds 5 and 6. The eyes should be placed approximately 10 stitches apart in the center of the muzzle.
Round 9-15: 46 sc (7 rounds)
After Round 15, work 1 additional sc.
Round 16: 5 sc, dec, 9 sc, dec, 10 sc, dec, 9 sc, dec, 5 sc (42)
Round 17: [5 sc, dec] repeat 6 times (36)
Round 18: [4 sc, dec] repeat 6 times (30)
Round 19: [3 sc, dec] repeat 6 times (24)
Round 20: [1 sc, dec] repeat 8 times (16)
Round 21: 8 dec (8)
After Round 21, work 2 more dec. Stuff the head firmly and close the remaining opening.
Ears
Start with the main body color.
Ch 4. Working into the 2nd chain from the hook:
- Round 1: 4 sc in mr (4)
- Round 2: [1 sc, inc] repeat 2 times (6)
- Round 3: [1 sc, inc] repeat 3 times (9)
- Round 4: [2 sc, inc] repeat 3 times (12)
- Round 5: [2 sc, inc] repeat 4 times (16)
- Round 6: [3 sc, inc] repeat 4 times (20)
- Round 7: 20 sc
- Round 8: [3 sc, dec] repeat 4 times (16)
- Round 9: [2 sc, dec] repeat 4 times (12)
- Round 10: 12 sc
Round 11: Fold the ear in half. Sc 6 through both layers to join. Sl st through the 1st and 6th stitch of Round 11 to secure the base. Leave a long tail for sewing.
Mouth
Use the main body color. Leave a long tail for sewing.
Ch 2. Working into the 2nd chain from the hook:
- Round 1: 3 sc, turn, ch 1
- Round 2: 3 inc (9)
Horns
Use your chosen accent color.
- Round 1: 6 sc in mr (6)
- Round 2: [2 sc, inc] repeat 2 times (8)
- Round 3: 8 sc
Tail
Use the main body color.
- Round 1: 4 sc in mr (4)
- Round 2: [1 sc, inc] repeat 2 times (6)
- Round 3: [1 sc, inc] repeat 3 times (9)
- Round 4: [2 sc, inc] repeat 3 times (12)
- Round 5: [1 sc, dec] repeat 4 times (8)
- Round 6: [2 sc, dec] repeat 2 times (6)
Finishing
Assembly & Detailing
This is where your little goat truly comes to life! Follow these steps carefully to ensure a polished look.
1. The Eye Pulling Technique (Muzzle Shaping)
To create that adorable, slightly protruding muzzle, use a needle and thread in a color similar to the body. Insert the needle through the head following this specific path to pull the fabric inward around the eyes: 1 → 2 → 3 → 4 → 1 → 5 → 6 → 4. Secure the thread inside the head.
2. Embroidery & Blushing
- Nose & Mouth: Using thin black thread, embroider a small nose and a line down the center of the muzzle. You can also sew the small mouth piece onto Round 6 of the head, securing the side loops into Round 5.
- Details: Embroider eyelashes and eyebrows with thin black thread. You can also add small lines on the hooves for extra detail.
- Blush: For an extra touch of cuteness, use pink dry pastel to lightly shade the nose and the inner part of the ears.
3. Attaching Parts
- Horns: Sew the horns onto the head between Rounds 13 and 16, approximately 8 stitches apart. Be sure to stuff the horns before sewing.
- Ears: Sew the ears onto the head, about 3-4 rows below the horns. Position the tips pointing downward. Tip: To prevent ears from sticking out too far, take a couple of extra stitches through the head when sewing them down.
- Tail: Sew the tail to Round 9 of the body.
- Head Attachment: If you didn’t use a cotter pin, sew the head to the body between Rounds 8 and 13 of the head.
Tips
Tension is Key: When working with plush yarn, try to keep your tension even. If you crochet too tightly, the stuffing might show through; if it’s too loose, the toy may look uneven.
Stuffing: Don’t be afraid to stuff your amigurumi firmly! A well-stuffed toy holds its shape much better over time. However, remember to stuff the head and body more densely than the limbs to maintain a balanced silhouette.
Safety First: If this toy is intended for a very small child or an infant, please consider embroidering the eyes instead of using safety eyes to prevent any choking hazards.
Have Fun: Crochet is a journey! Don’t worry if your first goat isn’t perfect. Every stitch is a learning experience. Happy crocheting!