Adorable Crochet Ginger Goose Amigurumi Pattern
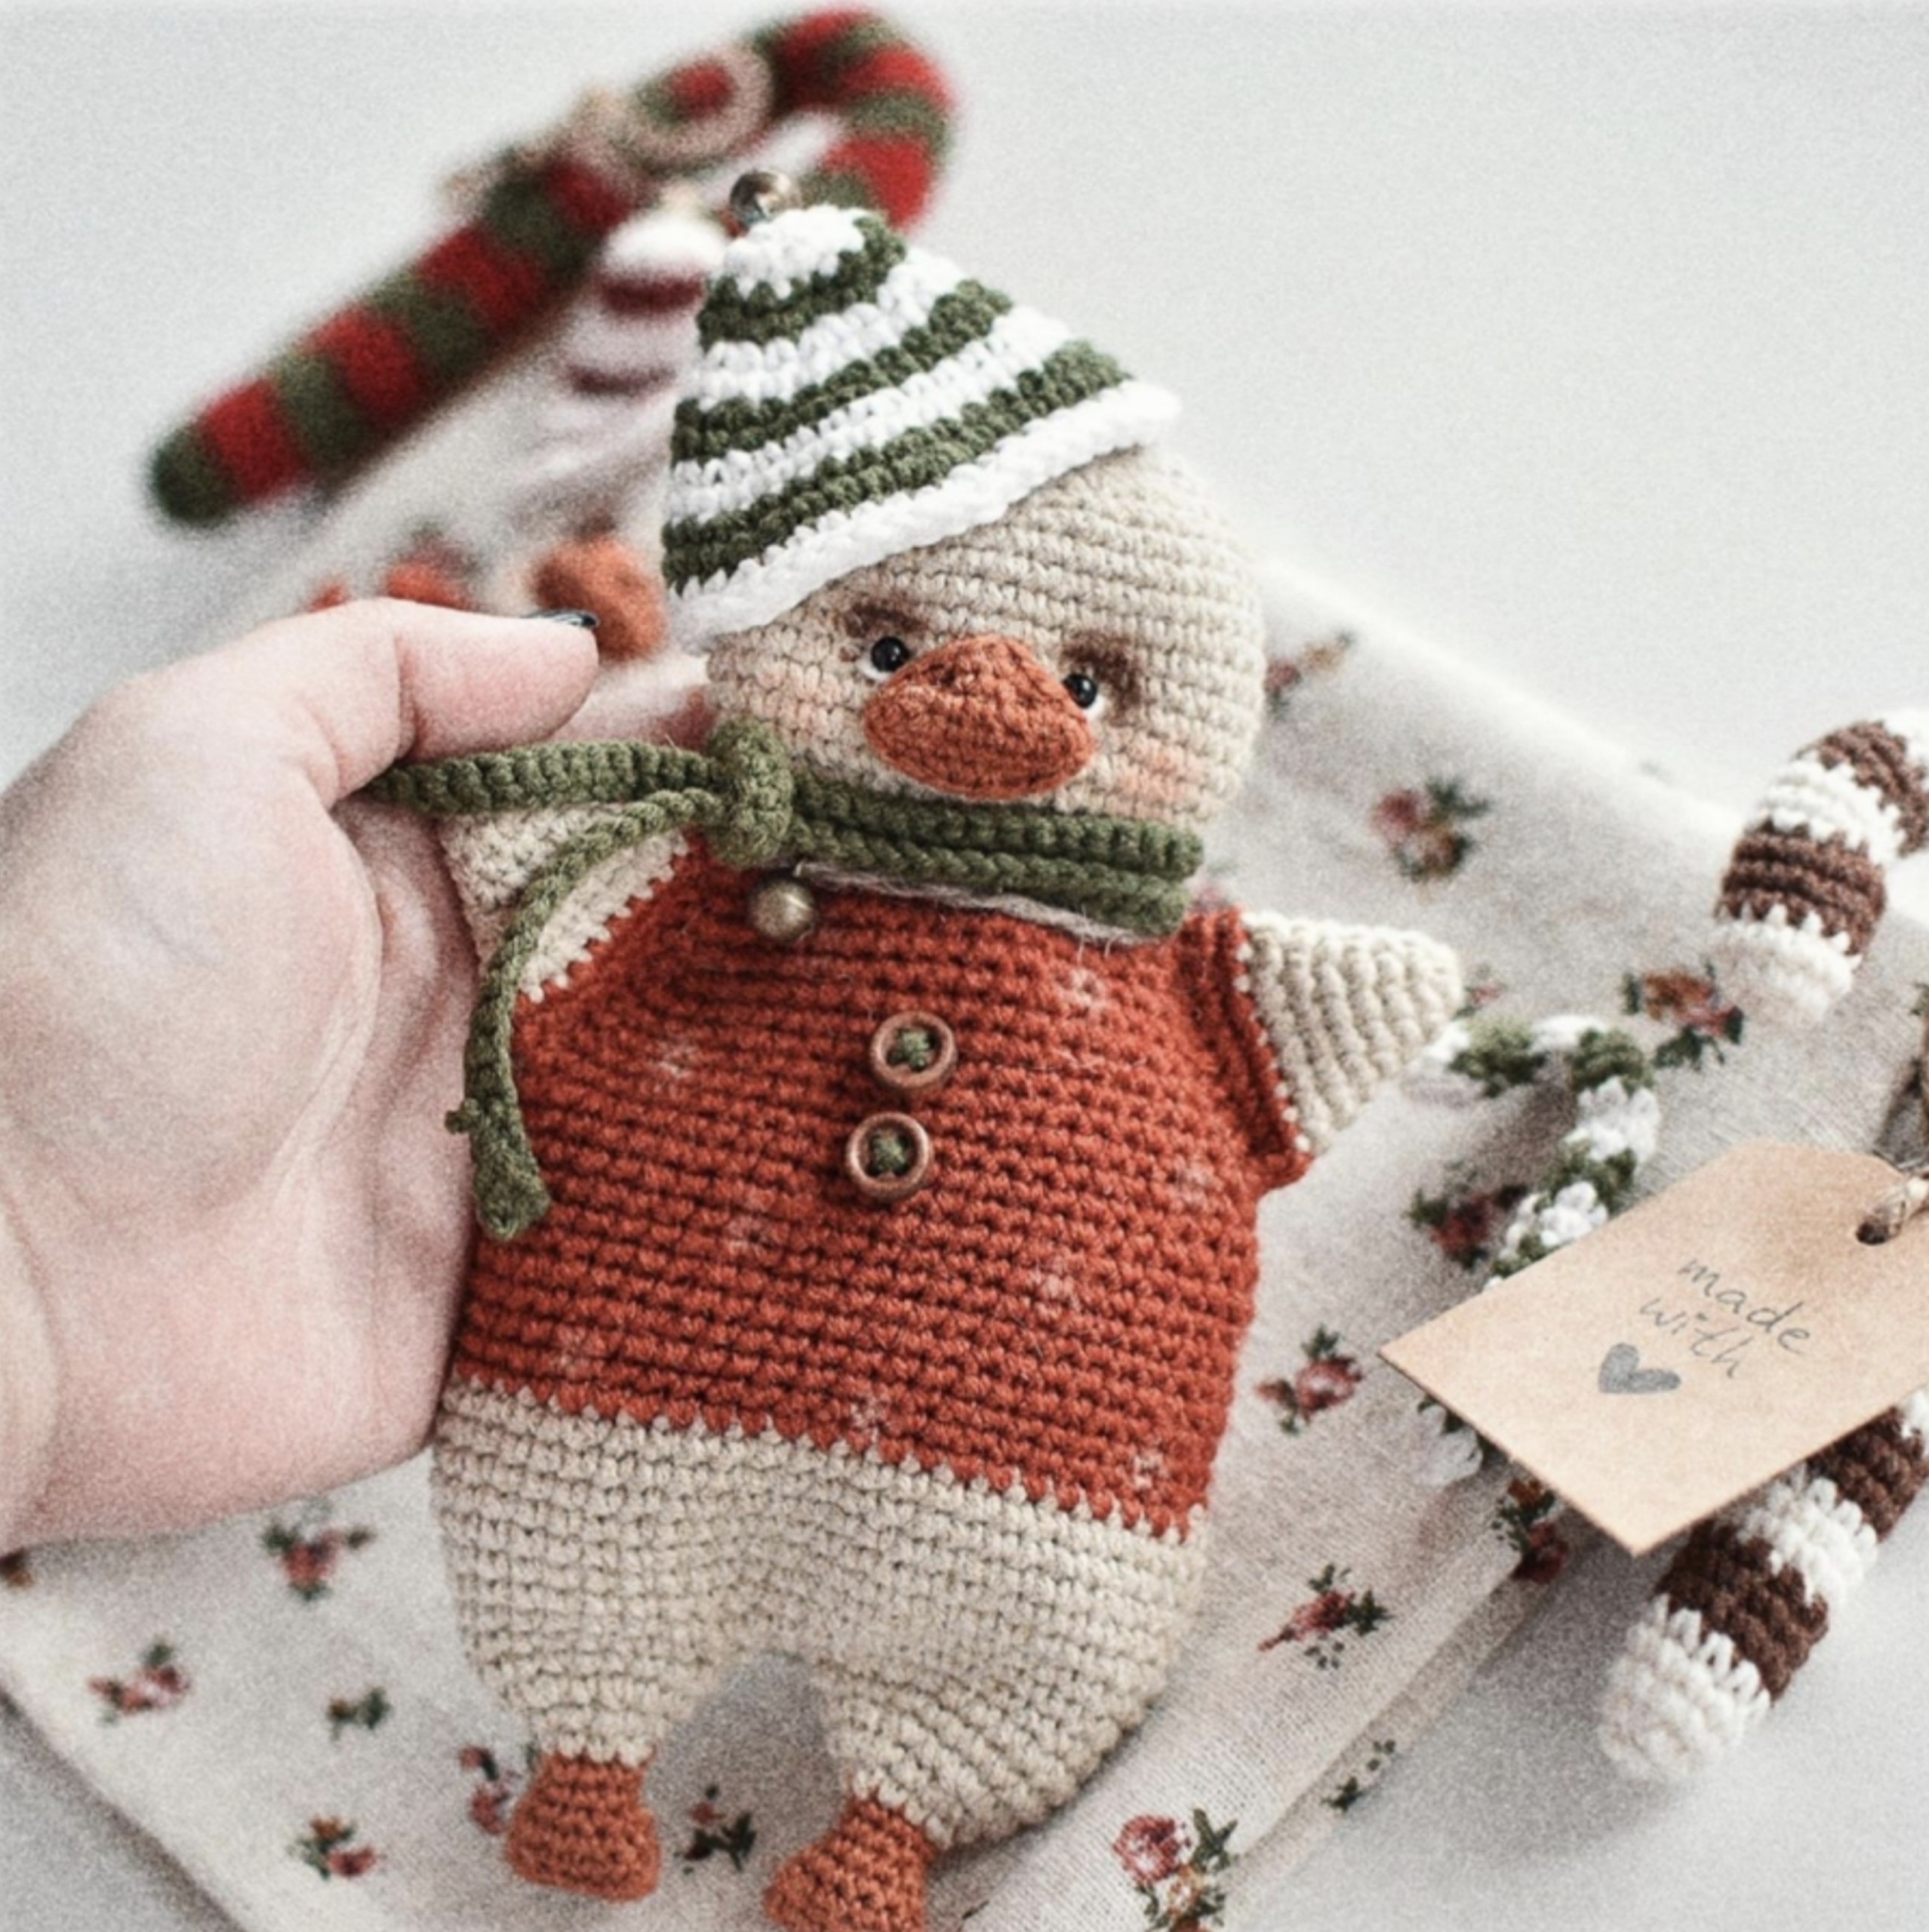
Bring a touch of cozy, winter magic to your home with this adorable Crochet Ginger Goose! This charming amigurumi project is the perfect holiday decoration, a whimsical nursery accent, or a thoughtful handmade gift for a loved one. Standing at approximately 6 inches tall, this little goose comes fully dressed in a festive red sweater, a striped winter hat, and a tiny scarf. It even comes with its own little candy cane accessory!
Whether you are looking to create a unique Christmas ornament or simply want to practice your amigurumi skills, this pattern is designed to be beginner-friendly and highly rewarding. The weighted body, achieved through the use of glass beads, gives the goose a wonderful, high-quality feel that makes it sit perfectly on a shelf or mantle.
Materials & Abbreviations
Materials
To complete this project, you will need the following supplies. Please ensure you have the correct colors on hand to achieve the signature look of the Ginger Goose.
- Yarn: Cotton or cotton-blend yarn works best for clear stitch definition.
- Main Body Color (Cream/Beige): Approximately 175 yards (160m).
- Sweater Color (Red): Approximately 427 yards (390m) if using two strands, or 175 yards of a standard weight yarn.
- Feet and Beak Color (Orange): Approximately 183 yards (167m).
- Hat and Candy Colors (White and Dark Green): Small amounts of both.
- Scarf Color (Dark Green): Small amount.
- Crochet Hook: 1.15mm (or a size that creates a very tight, dense fabric to prevent stuffing from showing).
- Eyes: 4mm to 5mm (approx. 3/16 inch) safety eyes.
- Buttons: Two small buttons (approx. 1/4 inch or 6-8mm) for the sweater.
- Stuffing:
- Polyester fiberfill (poly-fill) for the legs and wings.
- Glass micro-beads (approx. 1/8 inch or 3-4mm) for the body and head to provide weight and a flat shape.
- Extras:
- White embroidery thread or thin yarn for eye details.
- Large sewing needle for assembly.
- Stitch marker.
- Scissors.
- Pins.
- Pastel makeup (Brown for eye shading, Pink for cheeks, White for sweater speckles).
- Small bell for the hat.
Abbreviations
Please note that these are US crochet terms:
- MR: Magic Ring
- ch: Chain
- sc: Single Crochet
- sl st: Slip Stitch
- inc: Increase (2 sc in one stitch)
- dec: Decrease (sc 2 together)
Step-by-Step Instructions
The Legs and Body
We begin by creating the legs, which will eventually form the base of the body.
First Leg
Using orange yarn:
- R1: Ch 7. From the 2nd ch from the hook: inc, 4 sc, 3 sc in the last stitch, 5 sc along the bottom of the chain (14)
- R2: 14 sc in the back loops only (BLO) (14)
- R3: (dec, 5 sc) x 2 (12)
- R4: (dec, 4 sc) x 2 (10)
- R5: (dec, 3 sc) x 2 (8)
- R6: 8 sc (8)
Fasten off the first leg.
Second Leg and Body Connection
Repeat R1 through R11 using orange yarn for the second leg, but do not fasten off. Instead, we will join the two legs to create the body.
Note: To ensure symmetry, make sure both legs have the same number of stitches. If your tension varies, add or subtract one sc to ensure they are identical.
- R11 (Second Leg): 3 sc (do not end the round).
- Join: Ch 2 and join to the first leg with a sl st.
- R12: 18 sc around the first leg, 2 sc on the chain, 18 sc around the second leg, 2 sc on the other side of the chain (40)
- R13: 18 sc, inc x 2, 18 sc, inc x 2 (44)
- R14: 18 sc, inc, 2 sc, inc, 18 sc, inc, 2 sc, inc (48)
- R15: 9 sc, inc, 23 sc, inc, 14 sc (50)
Stuffing Tip: Stuff the legs firmly with polyester fiberfill at this stage.
- R16-20: 50 sc (5 rounds)
To create the sweater look, we need to shift the start of the round. Work 10-11 sc, then switch to the red yarn.
- R21-29: 50 sc (9 rounds in red)
Now we begin shaping the body. We will decrease at the sides. Ensure your decreases are placed symmetrically at the sides of the goose.
- R30: (dec, 23 sc) x 2 (48)
- R31: 48 sc (48)
- R32: (dec, 22 sc) x 2 (46)
- R33: 46 sc (46)
- R34: (dec, 21 sc) x 2 (44)
- R35: (dec, 20 sc) x 2 (42)
- R36: (dec, 19 sc) x 2 (40)
- R37: (dec, 18 sc) x 2 (38)
- R38: (dec, 17 sc) x 2 (36)
- R39: (dec, 16 sc) x 2 (34)
- R40: (dec, 15 sc) x 2 (32)
- R41: (dec, 14 sc) x 2 (30)
- R42: (dec, 3 sc) x 6 (24)
Important: As you work these rows, begin filling the body with glass micro-beads. Do not overstuff; the goal is for the body to remain slightly flat and weighted rather than a perfect sphere.
The Head
Switch back to the main beige/cream color.
- R43-44: 24 sc (2 rounds)
- R45: (inc, 3 sc) x 6 (30)
- R46: (inc, 4 sc) x 6 (36)
- R47: (inc, 5 sc) x 6 (42)
- R48-56: 42 sc (9 rounds)
Begin shaping the head by decreasing at the sides:
- R57: (dec, 5 sc) x 6 (36)
- R58: (dec, 4 sc) x 6 (30)
- R59: (dec, 3 sc) x 6 (24)
- R60: (dec, 2 sc) x 6 (18)
- R61: (dec, 1 sc) x 6 (12)
Stuff the head with glass beads. Like the body, keep the stuffing light so the head maintains a slightly flattened shape. To prevent beads from escaping, you can add a few hidden stitches around the neck area.
- R62: 6 dec (6)
Fasten off, leaving a long tail for sewing.
The Wings
Using the main beige/cream color:
- R1: 6 sc in a MR (6)
- R2: (inc, 1 sc) x 3 (9)
- R3: 9 sc (9)
- R4: (inc, 2 sc) x 3 (12)
- R5: 12 sc (12)
- R6: (inc, 3 sc) x 3 (15)
- R7: (inc, 4 sc) x 3 (18)
Switch to red yarn:
- R8: (inc, 5 sc) x 3 (21)
Fold the wing in half lengthwise and sc 10 stitches along the top edge, joining the two sides. Fasten off, leaving a long tail for sewing. Make two wings in total.
The Beak
Using orange yarn:
- R1: Ch 6. From the 2nd ch from hook: inc, 3 sc, 3 sc in the last stitch, 4 sc along the bottom of the chain (12)
- R2: 2 inc, 3 sc, 3 dec, 3 sc, inc (18)
- R3: 18 sc (18)
End with a sl st. Fasten off, leaving a tail for sewing. Fold the beak into a triangular shape as shown in your reference photos.
Accessories: Hat, Scarf, and Candy
The Tiny Scarf
Using dark green yarn:
- Ch 90. Work 89 sl st in the opposite direction of the chain. Fasten off.
The Striped Winter Hat
Start with white yarn:
- R1: 6 sc in a MR (6)
- R2: 6 inc (12)
- R3-4: 12 sc (2 rounds in white)
Switch to green yarn:
- R5: (1 sc, inc) x 6 (18)
- R6: 18 sc (18)
Switch to white yarn:
- R7: (2 sc, inc) x 6 (24)
- R8: 24 sc (24)
Switch to green yarn:
- R9: (3 sc, inc) x 6 (30)
- R10: 30 sc (30)
Switch to white yarn:
- R11: (4 sc, inc) x 6 (36)
- R12: (5 sc, inc) x 6 (42)
Switch to green yarn:
- R13: (6 sc, inc) x 6 (48)
- R14: 48 sc (48)
Fasten off. Sew a small bell to the very top of the hat.
The Candy Accessory
Start with white yarn:
- R1: 6 sc in a MR (6)
- R2: 6 sc (6)
Switch to green yarn:
- R3-4: 6 sc (2 rounds in green)
Switch to white yarn:
- R5-6: 3 sc, 3 sl st, 3 sc (2 rounds)
Switch to green yarn:
- R7-8: 1 sc, 3 sl st, 2 sc (2 rounds)
Switch to white yarn:
- R9-10: 2 sc, 3 sl st, 1 sc (2 rounds)
Switch to green yarn:
- R11-12: 6 sc (2 rounds in green)
Switch to white yarn:
- R13-14: 6 sc (2 rounds in white)
Continue alternating colors every 2 rounds for 8 more rounds to create a long, striped candy shape. Fasten off.
Finishing
Now it is time to bring your goose to life! Follow these steps for perfect assembly:
- Wings: Sew the wings onto the sides of the body between rows 32 and 41. Ensure they are symmetrical.
- Beak: Sew the beak onto the head between rows 45 and 49.
- Eyes: Place the safety eyes between rows 48 and 49. Use a tiny bit of white thread to stitch small eye details if desired.
- Sweater: Sew the two small buttons onto the front of the red sweater.
- Hat: Sew the hat onto the top of the head.
- Final Touches: Use brown pastel to lightly shade around the eyes and pink pastel to add a soft blush to the cheeks. For a festive “snowy” look, dab a little white pastel onto the red sweater to create tiny white speckles.
Tips for Success
- Tight Tension is Key: When making amigurumi, your stitches should be very tight. This prevents the white stuffing or the glass beads from peeking through the holes. If you find your stitches are too loose, try a smaller crochet hook.
- Symmetry Matters: When making the legs and the body, always count your stitches. If one leg is even a single stitch larger than the other, the goose might look lopsided once you join them.
- Weighting the Goose: The glass beads are what make this goose feel premium and help it stay upright. Be careful when pouring them; use a small funnel if needed to ensure they go exactly where you want them.
- Color Changes: To get clean color changes, work the last stitch of the old color and the first stitch of the new color in the same loop.