DIY Crochet Bee-Themed Amigurumi Doll Pattern: A Cute Step-by-Step Tutorial
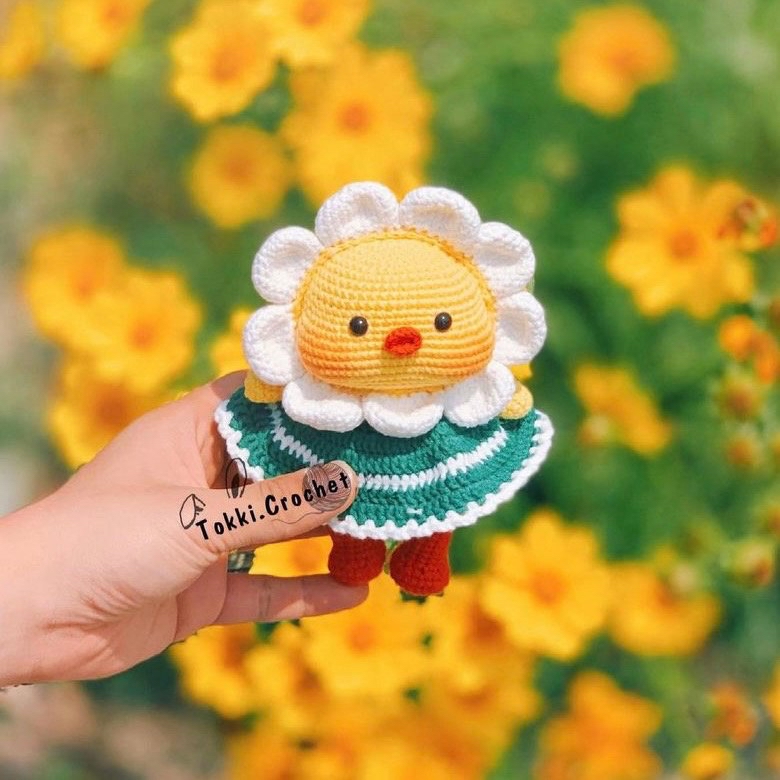
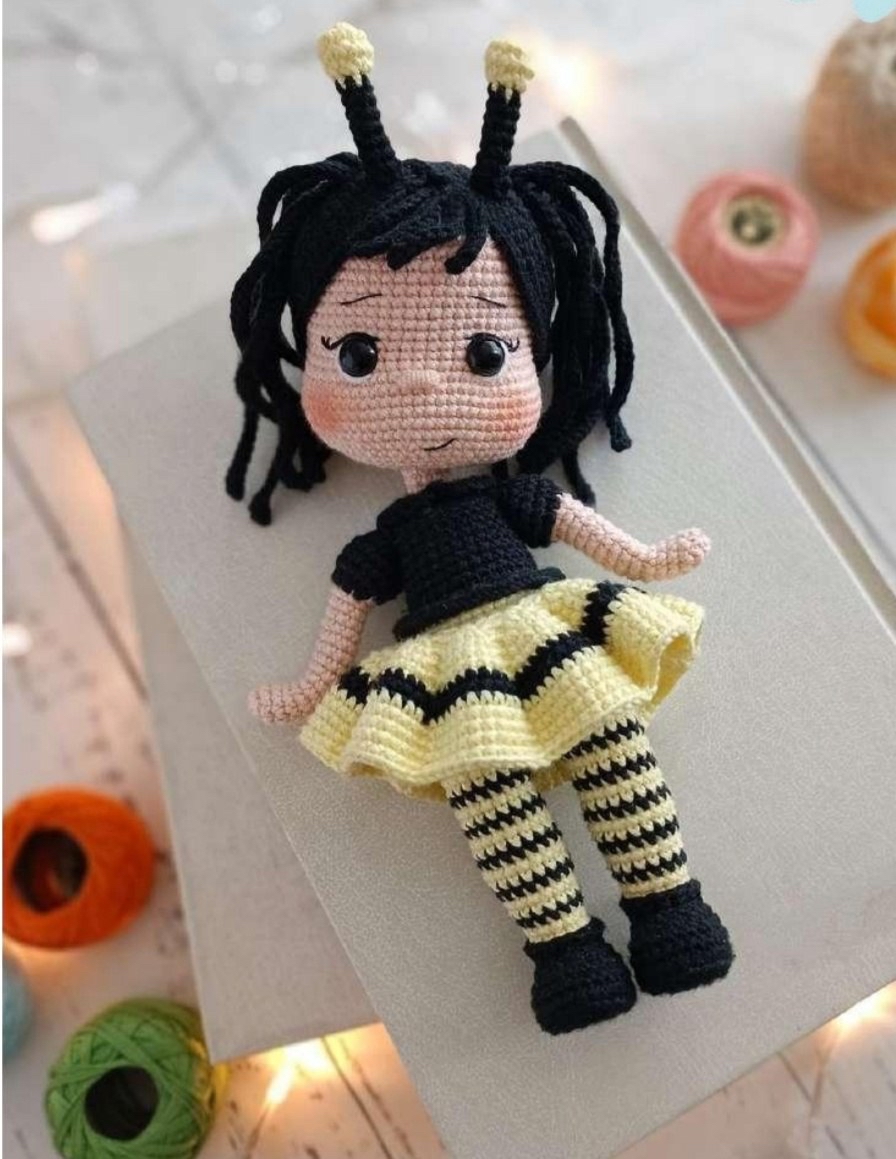
Are you looking for your next adorable crochet project? This bee-themed amigurumi doll is the perfect blend of whimsical and stylish. With its striking black and yellow color palette, chunky hair, and cute little antennae, this doll makes for a fantastic nursery decoration, a unique gift, or a charming addition to your crochet collection. This detailed tutorial is designed to be beginner-friendly, walking you through every stitch to ensure your little bee friend turns out perfectly.
Materials & Abbreviations
To create this doll, you will need the following supplies. Using high-quality cotton yarn will give your amigurumi a clean, professional finish with great stitch definition.
Materials Needed
- Yarn: Cotton yarn in three colors: Beige (for skin), Yellow (for the skirt and antennae), and Black (for hair, dress, and details).
- Crochet Hook: 2mm hook.
- Safety Eyes: 10mm black safety eyes.
- Wire: Two 6-inch pieces of wire (to make the arms posable).
- Stuffing: Polyester fiberfill.
- Extras: Small piece of plastic (to use as insoles for the feet) and embroidery thread for facial details.
Abbreviations (US Terms)
Please ensure you are using US crochet terminology to follow this pattern accurately:
- MR: Magic Ring
- ch: Chain
- sl st: Slip stitch
- sc: Single crochet
- inc: Increase (2 sc in one stitch)
- dec: Decrease (sc 2 together)
- hdc: Half double crochet
- dc: Double crochet
- tr: Treble crochet
- hdc inc: Increase using a half double crochet (2 hdc in one stitch)
- dc inc: Increase using a double crochet (2 dc in one stitch)
- BLO: Back loop only
Step-by-Step Instructions
The Arms
Worked in Beige, then switch to Black.
- MR, 5 sc (5)
- 5 inc (10)
- 3-15. 10 sc (10)
- Switch to Black yarn.
- 16. 10 inc (20)
- 17-19. 20 sc (20)
- 20. 10 dec (10)
Fasten off. To make the arms posable, wrap the ends of your 6-inch wires with tape and insert them into the arms before closing them up completely.
The Skirt
Worked in Yellow, then switch to Black, then back to Yellow.
- Chain 30, join with a sl st to the first ch to form a ring.
- 1. 30 sc, join with sl st (30)
- 2. (inc, 2 sc in BLO) * 10, join (40)
- 3. (2 inc, 2 sc in BLO) * 10, join (60)
- 4. (inc, 2 sc, inc, 2 sc in BLO) * 10, join (80)
- 5. (6 sc, 2 sc in BLO) * 10, join (80)
- 6. (inc, 4 sc, inc, 2 sc in BLO) * 10, join (100)
- Switch to Black yarn.
- 7. (8 sc, 2 sc in BLO) * 10, join (100)
- 8. (inc, 6 sc, inc, 2 sc in BLO) * 10, join (120)
- Switch to Yellow yarn.
- 9-13. (10 sc, 2 sc in BLO) * 10, join (5 rows) (120)
Fasten off.
The Legs
Make two legs. Note: The legs feature a striped pattern.
Left Leg
Worked in Black.
- 6 ch, starting from the 2nd ch from hook: (inc, 3 sc, 6 sc in the last stitch, 3 sc on the other side of the chain, inc) = 14
- 2. (inc, 4 sc, 4 inc, 4 sc, inc) = 20
- 3. (sc, inc, 5 sc, (inc, sc) * 6, 4 sc, inc) = 26
- 4. 26 sc in BLO (26)
- 5-6. 26 sc (26)
Important: Cut out a piece of plastic to fit the foot and insert it into the leg to provide stability.
- 7. 7 sc, 6 sc in one stitch, 7 sc = 20
- 8. 4 sc, 6 sc in one stitch, 4 sc = 14
- Switch to Yellow yarn.
- 9. 14 sc in BLO (14)
- 10-11. 14 sc (14)
- Switch to Black yarn.
- 12. 3 sc, inc, 6 sc, inc, 3 sc = 16
- Switch to Yellow yarn.
- 13-14. 16 sc (16)
- Switch to Black yarn.
- 15. 3 sc, inc, 7 sc, inc, 4 sc = 18
- Switch to Yellow yarn.
- 16-17. 18 sc (18)
- Switch to Black yarn.
- 18. 18 sc (18)
- Switch to Yellow yarn.
- 19-20. 18 sc (18)
- Switch to Black yarn.
- 21. 18 sc (18)
- Switch to Yellow yarn.
- 22-23. 18 sc (18)
- Switch to Black yarn.
- 24. 18 sc (18)
- Switch to Yellow yarn.
- 25-26. 18 sc (18)
Fasten off. For the Right Leg, repeat the same steps until row 25, then finish row 26 with yellow yarn.
The Body
Connecting the legs and building the torso.
- 27. 6 sc on the right leg, 3 ch, 18 sc on the left leg (starting from the last stitch of the row), 3 sc on the chain, 18 sc on the right leg, 3 sc on the chain = 42 stitches. Place a stitch marker.
- 28-35. 42 sc (42)
- 36. (5 sc, dec) * 6 = 36
- 37. 2 sc, dec, (4 sc, dec) * 5, 2 sc = 30
- 38-39. 30 sc (30)
- 40. 30 sc working into the stitches of both the body and the skirt to join them.
- 41. 30 sc (30)
- Switch to Black yarn.
- 42. 30 sc (30)
- 43. 30 sc in BLO (30)
- 44-49. 30 sc (30)
Attaching the Arms
- 50. 6 sc on body, 5 sc through both arm and body, 10 sc on body, 5 sc through both arm and body, 4 sc on body = 30
- 51. 6 sc on body, 5 sc on arm, 10 sc on body, 5 sc on arm, 4 sc on body = 30
Twist the wires from the two arms together and wrap them with tape to create a single, sturdy support structure.
- 52. (3 sc, dec) * 6 = 24
- 53. (2 sc, dec) * 6 = 18
- 54. (sc, dec) * 6 = 12
- Switch to Beige yarn.
- 55. 12 sc in BLO (12)
- 56-58. 12 sc (3 rows)
Fasten off.
The Collar
Worked in Black.
- 14 ch, join with sl st to the first ch.
- 2 ch, 6 dc, [decorative cluster: dc, 2 ch, sl st in one st, then 2 ch, dc in next st], 6 dc, sl st to close.
Leave a long tail for sewing the collar to the body.
The Head
Worked in Beige.
- MR, 8 sc (8)
- 2. 8 inc (16)
- 3. (sc, inc) * 8 (24)
- 4. sc, inc, (2 sc, inc) * 7, sc (32)
- 5. (3 sc, inc) * 8 (40)
- 6. 2 sc, inc, (4 sc, inc) * 7, 2 sc (48)
- 7. (7 sc, inc) * 6 (54)
- 8. 4 sc, inc, (8 sc, inc) * 5, 4 sc (60)
- 9-17. 60 sc (9 rows) (60)
- 18. 4 sc, dec, (8 sc, dec) * 5, 4 sc (54)
- 19. 21 sc, 2 ch, skip 2 stitches, 8 sc, 2 ch, skip 2 stitches, 21 sc (54) (This creates the eye holes)
- 20. 17 sc, 4 inc, 4 sc in the 2-ch space, 8 sc, 4 sc in the 2-ch space, 4 inc, 17 sc = 66
- 21-26. 66 sc (6 rows) (66)
- 27. (9 sc, dec) * 6 = 60
- 28. 4 sc, dec, (8 sc, dec) * 5, 4 sc = 54
- 29. (7 sc, dec) * 6 = 48
- 30. 3 sc, dec, (6 sc, dec) * 5, 3 sc = 42
- 31. (5 sc, dec) * 6 = 36
- 32. 2 sc, dec, (4 sc, dec) * 5, 2 sc = 30
- 33. (3 sc, dec) * 6 = 24
- 34. (2 sc, dec) * 6 = 18
- 35. (sc, dec) * 6 = 12
Stuff the head firmly. Insert your 10mm safety eyes into the holes created in row 19. Fasten off, leaving a long tail.
Hair, Bangs, and Antennae
Hair (Make 2 pieces)
Worked in Black.
- MR, 6 sc (6)
- 2. 6 inc (12)
- 3. (sc, inc) * 6 (18)
- 4. sc, inc, (2 sc, inc) * 5, sc (24)
- 5. (3 sc, inc) * 6 (30)
- 6. 2 sc, inc, (4 sc, inc) * 5, 2 sc (36)
- 7. (5 sc, inc) * 6 (42)
- 8. 3 sc, inc, (6 sc, inc) * 5, 3 sc (48)
- 9-10. 48 sc (48)
- 11. (7 sc, inc) * 6 (54)
- 12. 54 sc (54)
Fasten off, leaving a long tail.
Bangs/Fringe
Worked in Black.
- MR: (11 ch, 2 ch from hook: 10 sl st, sl st in 1st ch) * 4 times.
Fasten off, leaving a long tail.
Antennae (Make 2 pieces)
Worked in Yellow, then switch to Black.
- MR, 6 sc (6)
- 2. 6 inc (12)
- 3. 12 sc (12)
- 4. 6 dec (6)
- Switch to Black yarn.
- 5-11. 6 sc (7 rows)
Fasten off, leaving a long tail.
Finishing
Now comes the magic! Use your embroidery thread or leftover yarn to sew the facial features (eyebrows, eyelashes, and a small nose) onto the head. Sew the hair pieces to the top of the head, attaching the bangs to the front. Finally, sew the antennae to the top of the head, the collar to the neck, the arms to the body, and the head onto the torso. Ensure the skirt is securely attached to the waist.
Tips for Success
- Tension is Key: When working with smaller hooks like a 2mm, keep your tension consistent so the stuffing doesn’t show through the stitches.
- Color Changes: To get clean color changes, pull the new color through the last two loops of the final stitch of the previous color.
- Safety First: Always ensure safety eyes are securely fastened, especially if the doll is intended for a child’s room.
- Wire Support: Don’t skip the tape on the wires! It prevents the metal from poking through your beautiful crochet work.