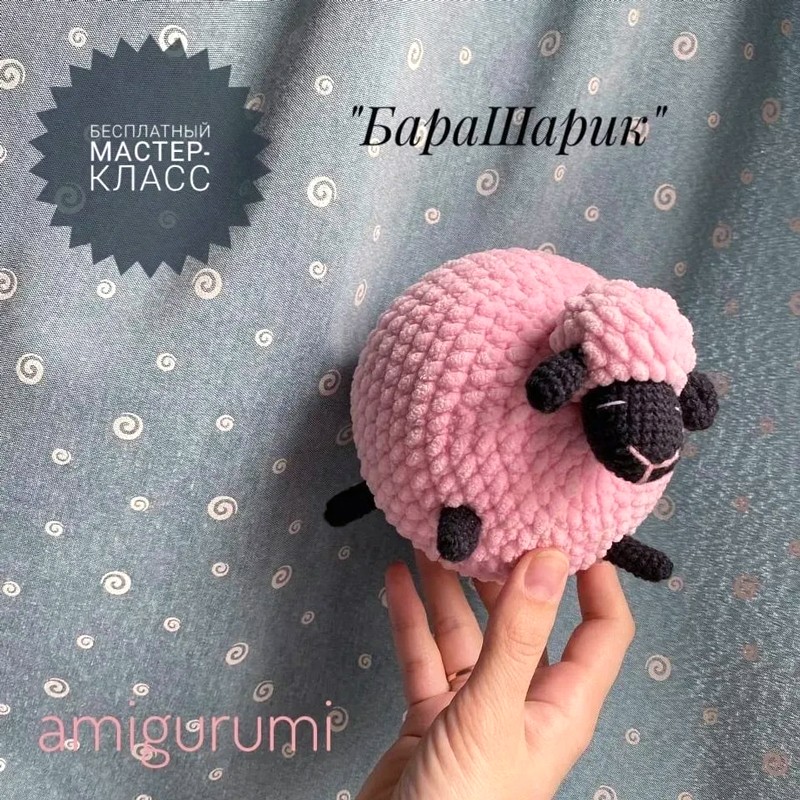
Adorable Round Plush Sheep Crochet Pattern: A Beginner-Friendly Amigurumi Tutorial
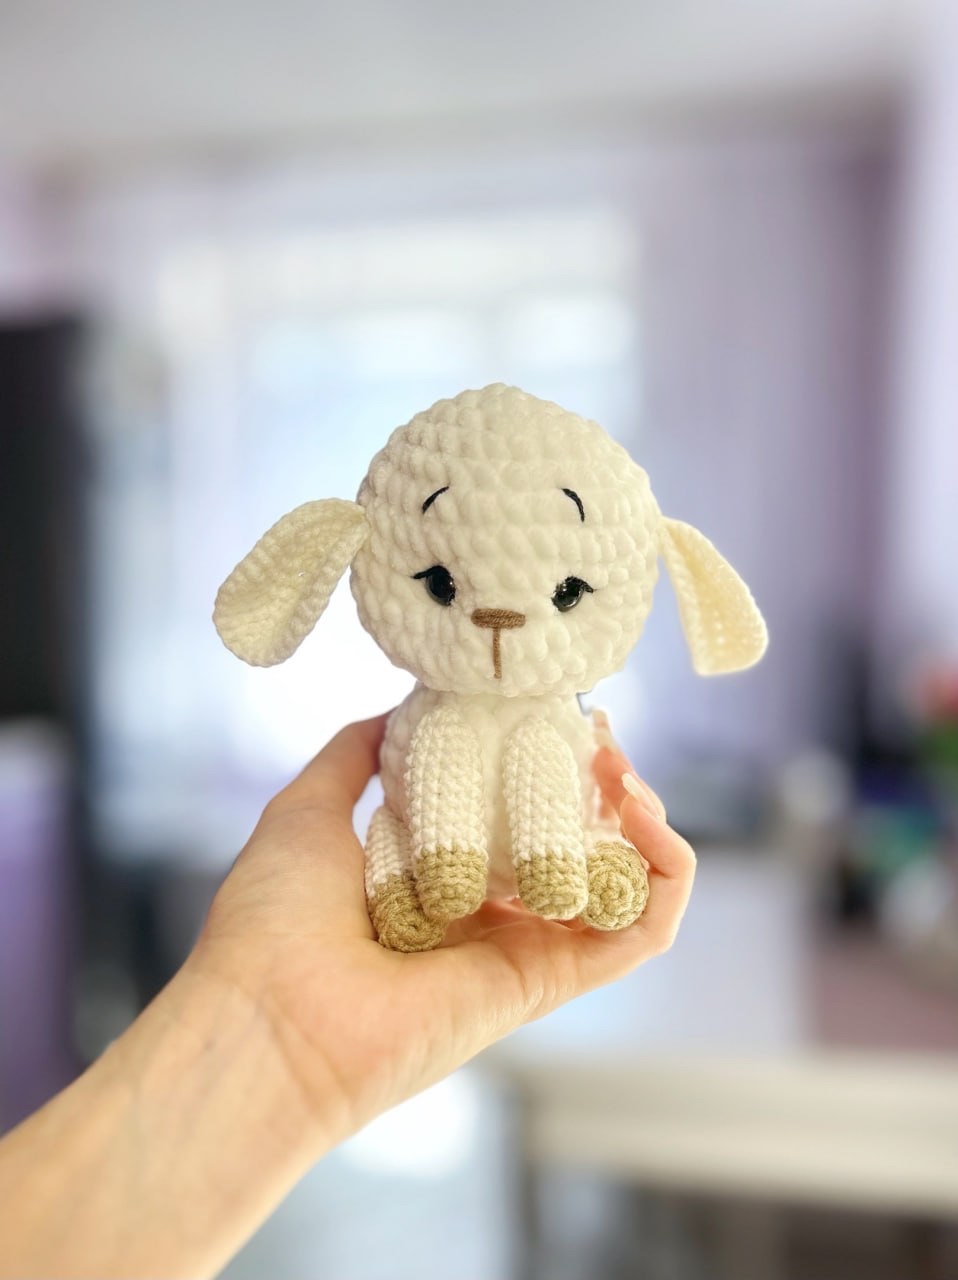
Looking for a project that is as cuddly as it is cute? This round plush sheep is the perfect addition to your amigurumi collection. With its spherical body and sweet expression, this little lamb is designed to be a stress-reliever and a delightful gift for children or craft enthusiasts alike. Whether you are a seasoned pro or just starting your crochet journey, this pattern is designed to guide you through the process of mixing textures to create a professional, high-quality toy.
The magic of this pattern lies in the combination of smooth cotton yarn for the detailed facial features and thick, velvety plush yarn for the body. This contrast not only makes the sheep look more realistic but also adds a sensory element that makes it impossible not to squeeze! In this tutorial, we will walk you through every stitch to ensure your chubby little sheep turns out perfectly.
Materials & Abbreviations
To get started, gather the following supplies. We recommend using a high-quality chenille or velvet yarn for that signature “cloud-like” feel.
Materials Needed
- Cotton Yarn: A small amount of black or dark grey cotton yarn for the muzzle, ears, and legs.
- Plush/Chenille Yarn: Pink (or your color of choice) plush yarn for the body and the top of the head.
- Crochet Hooks: One 2.5mm hook (for the cotton sections) and one 3.5mm hook (for the plush sections).
- Stuffing: High-quality polyester fiberfill (poly-fill).
- Tools: A tapestry needle for sewing, stitch markers, and scissors.
- Embroidery Thread: Black and white thread for the eyes and nose details.
Abbreviations (US Terms)
- MR: Magic Ring
- Sc: Single crochet
- Inc: Increase (two single crochet stitches in the same stitch)
- Dec: Decrease (invisible decrease is recommended for amigurumi)
- Ch: Chain
- St: Stitch
- Rnd: Round
Step-by-Step Instructions
The Muzzle & Head
The head is worked in two stages. We begin with the smooth cotton yarn to define the face, then transition to the plush yarn to create the fluffy “wool” on top. Use your 2.5mm hook for this entire section.
Working with Cotton Yarn:
- Round 1: Create a MR and work 6 sc into the ring. (6 sts)
- Round 2: Work an inc in every stitch around. (12 sts)
- Round 3: (1 sc, inc) repeat 6 times. (18 sts)
- Round 4: (2 sc, inc) repeat 6 times. (24 sts)
- Rounds 5-11: Work one sc in each stitch for 7 rounds. (24 sts)
Transitioning to Plush Yarn:
Now, switch your yarn to the pink plush yarn, but keep using the 2.5mm hook to ensure the stitches remain tight and the stuffing doesn’t peek through.
- Round 12: Work one sc in each stitch around. (24 sts)
Adding Volume:
At this point, begin stuffing the muzzle firmly with fiberfill. Now, switch to your 3.5mm hook to accommodate the thicker yarn.
- Round 13: Work one sc in each stitch around. (24 sts)
- Round 14: (2 sc, dec) repeat 6 times. (18 sts)
- Round 15: (1 sc, dec) repeat 6 times. (12 sts)
- Round 16: Work 3 to 4 decreases. Use your tapestry needle to weave the yarn through the remaining stitches to close the hole completely. Continue adding small amounts of stuffing as you sew the opening shut to maintain a round shape.
The Ears (Make 2)
The ears are small and simple. Use the black cotton yarn and your 2.5mm hook.
- Round 1: Create a MR and work 6 sc into the ring. (6 sts)
- Round 2: Work an inc in every stitch around. (12 sts)
- Rounds 3-6: Work one sc in each stitch for 4 rounds. (12 sts)
- Round 7: Fold the piece in half flat. Chain 1, then work 6 sc through both layers of the fold to create a flat ear. Fasten off, leaving a long tail for sewing.
The Legs (Make 4)
The legs are tiny tubes that give our sheep its stability. Use the black cotton yarn and your 2.5mm hook.
- Round 1: Create a MR and work 5 sc into the ring. (5 sts)
- Round 2: Work an inc in every stitch around. (10 sts)
- Rounds 3-8: Work one sc in each stitch for 6 rounds. (10 sts)
Fasten off, leaving a long tail for sewing. No stuffing is required for the legs, as they will be quite small.
The Body
The body is the heart of the toy—a big, fluffy ball. Use the pink plush yarn and your 3.5mm hook throughout this section.
- Round 1: Create a MR and work 6 sc into the ring. (6 sts)
- Round 2: Work an inc in every stitch around. (12 sts)
- Round 3: (1 sc, inc) repeat 6 times. (18 sts)
- Round 4: (2 sc, inc) repeat 6 times. (24 sts)
- Round 5: (3 sc, inc) repeat 6 times. (30 sts)
- Round 6: (4 sc, inc) repeat 6 times. (36 sts)
- Rounds 7-14: Work one sc in each stitch for 8 rounds. (36 sts)
- Round 15: (4 sc, dec) repeat 6 times. (30 sts)
- Round 16: (3 sc, dec) repeat 6 times. (24 sts)
Stop here to stuff the body firmly with fiberfill. You want the sheep to feel plump and hold its round shape.
- Round 17: (2 sc, dec) repeat 6 times. (18 sts)
- Round 18: (1 sc, dec) repeat 6 times. (12 sts)
- Round 19: Work 3 to 4 decreases. Like you did with the head, use a tapestry needle to close the hole, adding extra stuffing as you go.
Finishing & Assembly
Now it is time to bring your sheep to life! Assembly is where the character of the toy really emerges.
Assembling the Parts
- The Ears: Take your finished ears and fold them slightly to give them a natural curve. Use a tapestry needle to sew 2-3 small stitches into the center of the ear, then attach them to the top sides of the head.
- Head to Body: Align the head with the top of the body. Sew the head securely to the plush body using the plush yarn.
- The Legs: Attach the four legs to the bottom of the body. Position them slightly outward to help the sheep “sit” balanced on a flat surface.
Facial Details
Since we are using a small muzzle, we will embroider the features for a cleaner look. Use a tapestry needle and embroidery thread:
- Eyes: Stitch two small, sleepy eyes (straight horizontal lines or tiny French knots) on the cotton part of the face.
- Nose: Stitch a small “V” or a tiny horizontal line at the center of the muzzle to create a cute little nose.
Tips for a Perfect Plush Sheep
To ensure your amigurumi looks professional, keep these tips in mind:
- The Invisible Decrease: When working with plush yarn, traditional decreases can leave gaps. Use the invisible decrease method (insert hook into the front loop of the first stitch, then the front loop of the second stitch, and complete the sc) to keep the body seamless.
- Tension Control: Plush yarn can be slippery. Keep your tension consistent, especially when switching between the 2.5mm and 3.5mm hooks, to prevent the stuffing from showing through.
- Stuffing Strategy: Don’t overstuff the neck area, but make sure the bottom of the body is firm. This prevents the head from flopping over and keeps the sheep looking “round.”
- Yarn Management: If you find the plush yarn difficult to see the stitches in, try using a stitch marker at the beginning of every round.