Free Crochet Seagull Pattern: Cute Amigurumi Tutorial
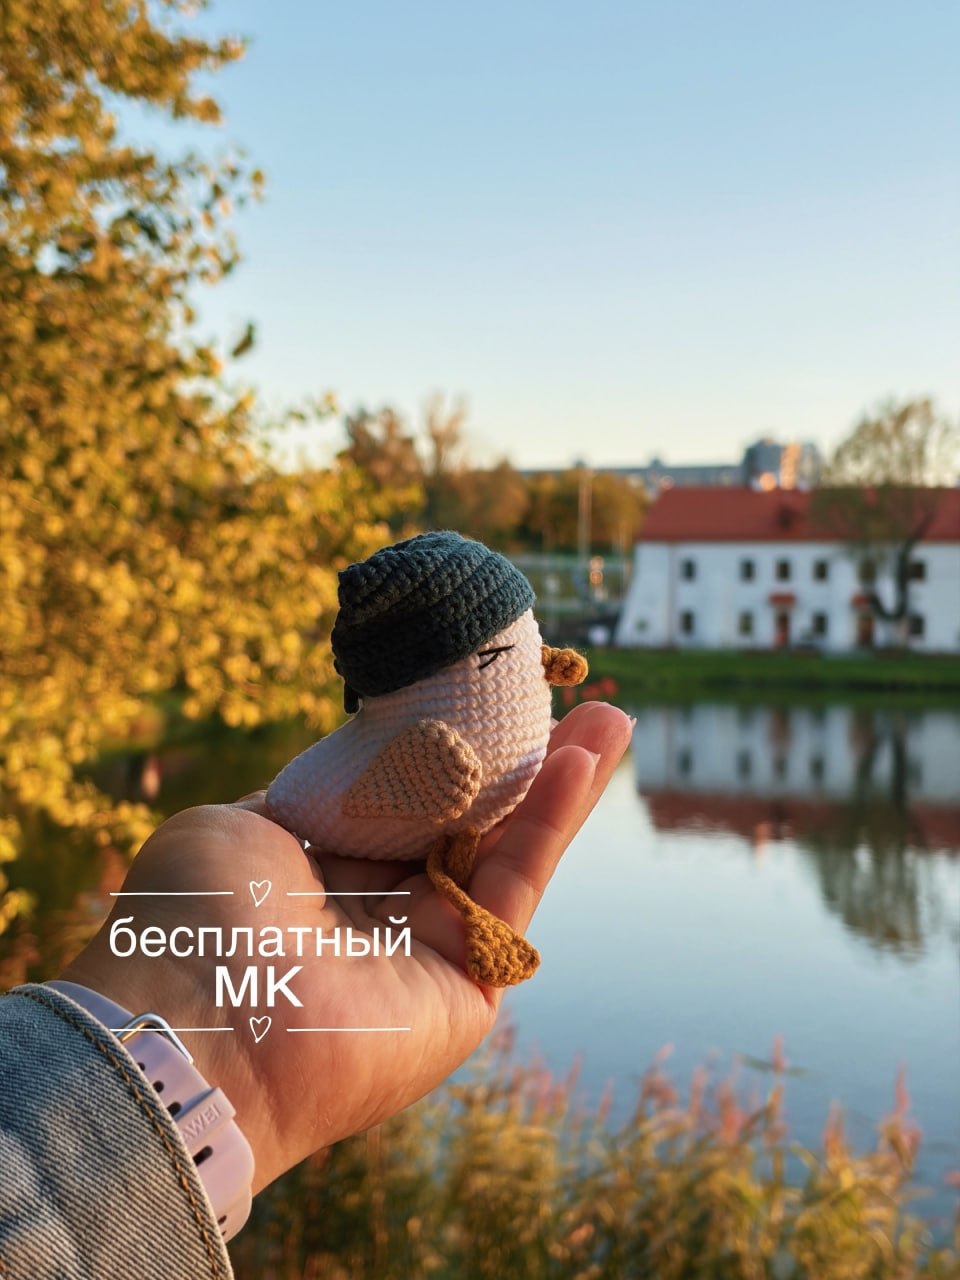
Are you looking to bring a touch of the coast into your home? This adorable, pocket-sized crochet seagull is the perfect weekend project! Complete with a jaunty bandana, this little nautical bird makes a wonderful gift, key chain, or tier-tray decor item. Written in standard US terms with imperial measurements, this beginner-friendly tutorial will guide you through every stitch.
Grab your hook, put on some ocean sounds, and let’s get crocheting!
Materials & Abbreviations
Supplies Needed
- Yarn: Sport weight (#2 Fine) cotton/acrylic blend yarn (such as YarnArt Jeans or similar). You will need:
- White (approx. 50 yards) for the body
- Light Beige or Flax (approx. 15 yards) for the wings
- Mustard Yellow (approx. 15 yards) for the beak and legs
- Dark Grey, Navy Blue, or any color of your choice (approx. 15 yards) for the bandana
- Crochet Hook: Size US B-1 / 2.0 mm (or size needed to obtain a tight, gap-free stitch tension)
- Stuffing: Polyester fiberfill
- Thread: Black embroidery floss for the eyes
- Tools: Yarn needle, sewing pins, and sharp scissors
Crochet Abbreviations (US Terms)
- MR: Magic Ring (Magic Loop)
- ch: Chain
- sc: Single crochet
- inc: Increase (work 2 single crochets into the same stitch)
- dec: Decrease (work an invisible single crochet decrease over 2 stitches)
- sl st: Slip stitch
- st(s): Stitch(es)
- t-ch: Turning chain
- * [instructions] * x: Repeat the instructions inside the asterisks the specified number of times
Step-by-Step Instructions
The Body
The body is worked from the top of the head down. We will use a unique folding technique to shape the seagull’s tail directly into the body piece.
Using White yarn:
- Round 1: Work 6 sc in a MR (6)
- Round 2: Work 6 inc (12)
- Round 3: *1 sc, inc* x 6 (18)
- Round 4: *1 sc, inc, 1 sc* x 6 (24)
- Round 5: *3 sc, inc* x 6 (30)
- Round 6: *2 sc, inc, 2 sc* x 6 (36)
- Round 7: *5 sc, inc* x 6 (42)
- Round 8: *3 sc, inc, 3 sc* x 6 (48)
- Round 9: *7 sc, inc* x 6 (54)
- Rounds 10–14: Sc in each st around (54 sts for 5 rounds)
- Round 15 (Tail Shaping): Ch 1, fold the piece flat in half. Work 10 sc through both layers of the fabric to seal off the tail section. Then, continue working in the round around the remaining open stitches of the body: 36 sc. Stuff the tail portion firmly now, as it will be hard to reach later.
- Rounds 16–21: Sc in each st around (36 sts for 6 rounds)
- Round 22: *2 sc, dec, 2 sc* x 6 (30). Begin stuffing the body firmly.
- Round 23: *3 sc, dec* x 6 (24)
- Round 24: *1 sc, dec, 1 sc* x 6 (18)
- Round 25: *1 sc, dec* x 6 (12). Add any final stuffing needed to keep the body nice and plump.
- Round 26: Work 6 dec (6)
Cut your yarn, leaving a short tail. Use your yarn needle to weave the tail through the front loops of the remaining 6 stitches, pull tight to close the opening, and hide the yarn end inside the body.
The Wings (Make 2)
The wings are worked in the round to create a flat, teardrop-shaped wing.
Using Light Beige or Flax yarn:
- Round 1: Work 6 sc in a MR (6)
- Round 2: Work 6 inc (12)
- Round 3: *1 sc, inc* x 6 (18)
- Round 4: Sc in each st around (18)
- Round 5: *dec, 7 sc* x 2 (16)
- Round 6: *dec, 6 sc* x 2 (14)
- Round 7: *dec, 5 sc* x 2 (12)
- Round 8: *dec, 4 sc* x 2 (10)
- Round 9: *dec, 3 sc* x 2 (8)
- Round 10: *dec, 2 sc* x 2 (6)
- Round 11: *dec, 1 sc* x 2 (4)
Pull the remaining opening closed. Bring your yarn tail out through one of the side edges of the wing, leaving a long end to sew the wing to the body later.
The Beak
Using Mustard Yellow yarn:
- Round 1: Work 5 sc in a MR (5)
- Round 2: Sc in each st around (5)
Fasten off, leaving a long tail for sewing.
The Legs (Make 2)
The feet and legs are worked in turning rows first to create the flat webbed foot, and then transitioned into a chain for the leg stem.
Using Mustard Yellow yarn:
- Row 1: Ch 6, start in the 2nd chain from the hook and work 5 sc, turn (5)
- Row 2: Skip the first stitch, work 4 sc, turn (4)
- Row 3: Skip the first stitch, work 3 sc, turn (3)
- Row 4: Work 3 sc, turn (3)
- Row 5: Skip the first stitch, work 2 sc, turn (2)
- Row 6: Skip the first stitch, work 1 sc, then immediately chain 12 to create the leg.
Fasten off, leaving a long yarn tail for assembly. Repeat to make the second leg.
The Bandana
The bandana is crocheted in turning rows to form a triangle, finished with ties on each side.
Using your choice of bandana color (e.g., Dark Grey):
- Row 1: Work 1 sc in a MR, turn (1)
- Row 2: Ch 1, work 3 sc in the stitch, turn (3)
- Row 3: Ch 1, inc, 1 sc, inc, turn (5)
- Row 4: Ch 1, inc, 3 sc, inc, turn (7)
- Row 5: Ch 1, inc, 5 sc, inc, turn (9)
- Rows 6+: Continue this pattern of increasing in the first and last stitch of every row (Ch 1, inc, sc across to the last stitch, inc, turn) until you have a total of 41 stitches.
- Last Row (Ties & Top Border): Ch 6, starting in the 2nd chain from the hook, work 5 sc along the chain. Next, work 41 sc across the top flat edge of your bandana. Then, ch 6, starting in the 2nd chain from hook, work 5 sc back down the chain. Sl st to the bandana edge to secure.
Fasten off, leaving a long yarn tail to sew the bandana onto the seagull’s head.
Finishing & Assembly
1. Position and Attach the Beak
Place the tiny yellow beak on the front center of the face, roughly around rounds 11 to 13. Secure it temporarily with a sewing pin to check the placement, then sew it firmly to the body using your yarn needle. Weave in and hide any remaining thread.
2. Embroider the Eyes
Using a needle and black embroidery floss, stitch two sleeping, curved closed eyes on either side of the beak. These should sit right next to the beak, spanning about 2 stitches wide. Knot the thread securely inside the head and trim.
3. Attach the Wings
Pin the wings to the sides of the body, just below the neck line (around rounds 15-16). Angle them slightly backward so your seagull looks ready to glide. Sew along the upper flat edge of each wing, leaving the pointed tips free to stand out slightly from the body.
4. Sew on the Legs
Thread the yarn tail of each leg chain into your needle. Insert the needle into the bottom center of the body, leaving about 1 to 1.5 inches of the chained legs dangling down. Secure them firmly with a couple of strong stitches inside the body fabric and weave in your ends.
5. Add the Bandana
Drape the triangle bandana over the top of the seagull’s head, tilting it slightly to one side for a jaunty look. Use your sewing pins to hold it in place. Tie the two side ties into a small knot at the back of the head. Using the long tail, sew a few small tack stitches around the edge of the bandana to keep it permanently secured to the head.
Pro Tips for Amigurumi Success
- Use a smaller hook: If you see stuffing popping through your stitches, size down your crochet hook. Amigurumi requires a very dense, tight stitch fabric.
- Invisible Decreases: Always use the invisible decrease method when working in the round. Instead of inserting your hook through both loops, insert it only through the front loops of the next two stitches before completing your single crochet. This makes your decreases virtually unnoticeable!
- Yarn Choice: Cotton-acrylic blend yarns (like Sport weight) provide the absolute best stitch definition and don’t pill, keeping your finished bird looking crisp and professional.