Adorable Amigurumi Bunny Crochet Pattern: A Step-by-Step Tutorial
If you are looking for a sweet, cuddly project to brighten up your home or create the perfect handmade gift, this little crochet bunny is an ideal choice. Whether you are preparing for Easter, making a baby shower present, or simply practicing your amigurumi skills, this pattern is designed to be beginner-friendly and rewarding.
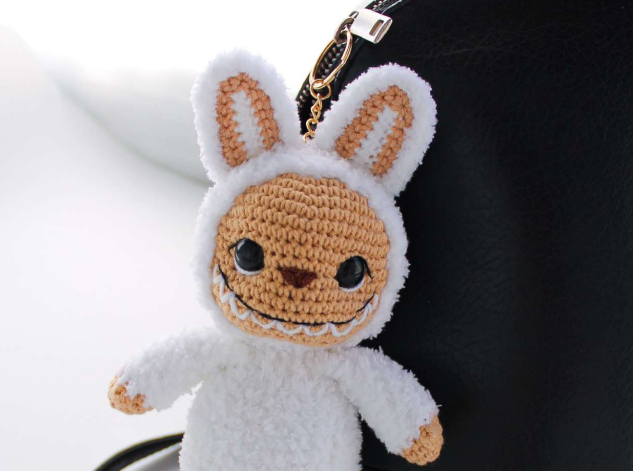
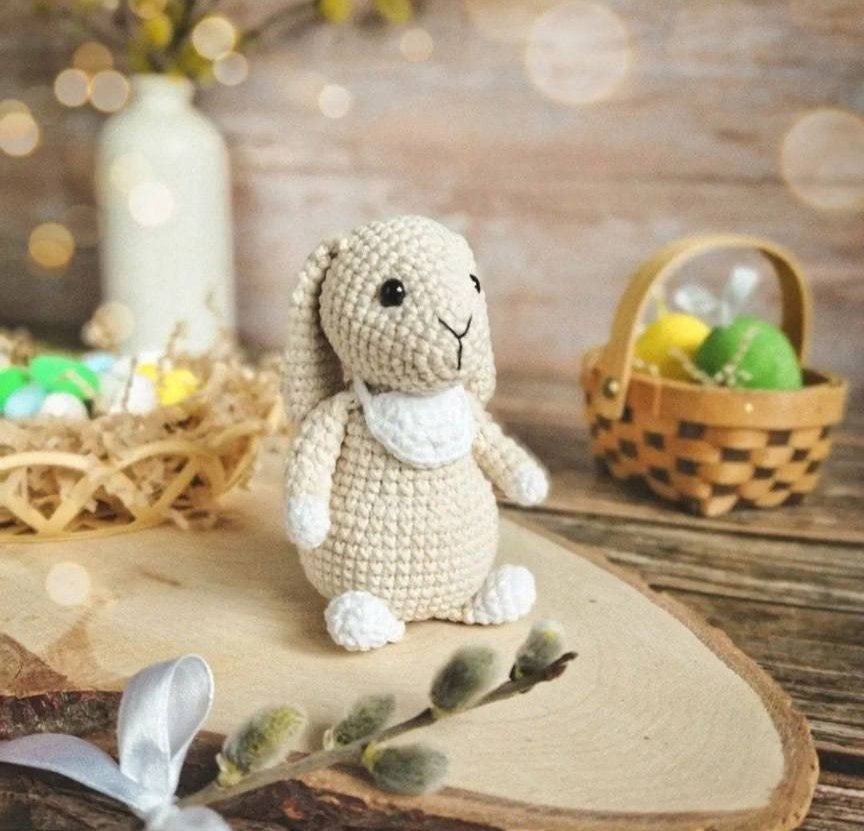
This bunny features a plump little body, floppy ears, and a charming little white collar that gives it a sophisticated yet cozy look. In this guide, we will walk through every stitch needed to bring this little friend to life, using standard US crochet terms and imperial measurements.
Materials & Abbreviations
To get started, gather your supplies. This project uses a cotton-blend yarn for a smooth finish and a defined stitch structure.
Supplies Needed
- Yarn: Approximately 250-300 yards of a medium-weight (DK) cotton blend yarn in Tan/Beige (Main Color) and a small amount of White yarn for the paws and collar.
- Crochet Hook: A size appropriate for your yarn to ensure a tight fabric (usually a 2.25mm to 3.0mm hook for amigurumi).
- Eyes: Two 6mm safety eyes.
- Stuffing: High-quality polyester fiberfill.
- Tools: A yarn needle for sewing, scissors, and black embroidery thread for the nose and mouth.
Abbreviations (US Terms)
- MR: Magic Ring
- Ch: Chain
- Sc: Single Crochet
- Inc: Increase (two single crochet in one stitch)
- Dec: Decrease (single crochet two stitches together)
- Hdc: Half Double Crochet
- Sl st: Slip Stitch
- BLO: Back Loop Only
- St(s): Stitch(es)
- Rnd: Round
Step-by-Step Instructions
The Head
Start with your main tan color. We will work in continuous rounds.
- Rnd 1: 6 sc in MR (6)
- Rnd 2: Inc in each st around (12)
- Rnd 3: (1 sc, inc) * 6 (18)
- Rnd 4: Sc in each st around (18)
- Rnd 5: (2 sc, inc) * 6 (24)
- Rnd 6: Sc in each st around (24)
- Rnd 7: (3 sc, inc) * 6 (30)
- Rnd 8: 9 sc, (1 sc, inc) * 6, 9 sc (36)
- Rnd 9-14: Sc in each st around (36)
Note: Place your 6mm safety eyes between Rounds 7 and 8.
- Rnd 15: (4 sc, dec) * 6 (30)
- Rnd 16: (3 sc, dec) * 6 (24)
- Rnd 17: (2 sc, dec) * 6 (18)
- Rnd 18: (1 sc, dec) * 6 (12)
- Rnd 19: Dec around (6)
Fasten off and weave in the end. Stuff the head firmly.
The Body
Continue with the main tan color.
- Rnd 1: 6 sc in MR (6)
- Rnd 2: Inc in each st around (12)
- Rnd 3: (1 sc, inc) * 6 (18)
- Rnd 4: (2 sc, inc) * 6 (24)
- Rnd 5: (3 sc, inc) * 6 (30)
- Rnd 6: Working in BLO: (4 sc, inc) * 6 (36)
- Rnd 7: (5 sc, inc) * 6 (42)
- Rnd 8: (6 sc, inc) * 6 (48)
- Rnd 9-13: Sc in each st around (48)
- Rnd 14: (6 sc, dec) * 6 (42)
- Rnd 15: Sc in each st around (42)
- Rnd 16: (5 sc, dec) * 6 (36)
- Rnd 17: (4 sc, dec) * 6 (30)
- Rnd 18-22: Sc in each st around (30)
- Rnd 23: (3 sc, dec) * 6 (18)
- Rnd 24: (2 sc, dec) * 6 (12)
Work 6 sc across the top, then finish with a sl st. Fasten off, leaving a long tail for sewing. Stuff the body firmly.
The Floppy Ears (Make 2)
Using the main tan color:
- Rnd 1: 6 sc in MR (6)
- Rnd 2: Inc in each st around (12)
- Rnd 3-8: Sc in each st around (12)
- Rnd 9: Dec, 4 sc, dec, 4 sc (10)
- Rnd 10-12: Sc in each st around (10)
- Rnd 13: Dec, 3 sc, dec, 3 sc (8)
- Rnd 14-15: Sc in each st around (8)
To finish the ear, work 1 sc, fold the piece in half, and work 4 sc across the opening to seal it. Leave a tail for sewing.
The Arms (Make 2)
Start with white yarn:
- Rnd 1: 6 sc in MR (6)
- Rnd 2: (1 sc, inc) * 2, 2 sc (8)
- Rnd 3: Sc in each st around (8)
Switch to tan yarn:
- Rnd 4-6: Sc in each st around (8)
- Rnd 7: 4 sl st, 4 hdc (8)
- Rnd 8-11: Sc in each st around (8)
Flatten the arm and work 4 sc across the base to close it. Leave a tail for sewing.
The Legs (Make 2)
Start with white yarn:
- Rnd 1: 6 sc in MR (6)
- Rnd 2: Inc in each st around (12)
- Rnd 3-4: Sc in each st around (12)
- Rnd 5: 3 dec, 6 sc (9)
Switch to tan yarn:
- Rnd 6: Sc in each st around (9)
Flatten the leg and work 4 sc across the base to close it. Leave a tail for sewing.
The Tail
Using tan yarn:
- Rnd 1: 6 sc in MR (6)
- Rnd 2: Inc in each st around (12)
- Rnd 3: Sc in each st around (12)
- Rnd 4: (1 sc, dec) * 6 (6)
Finish with a sl st and leave a tail for sewing.
The Collar
Using white yarn:
- Row 1: Ch 9, sc in 2nd ch from hook and each ch across (8 sc). Turn.
- Row 2: Ch 1, dec, 4 sc, dec (6 sc). Turn.
- Row 3: Ch 1, 2 sc, dec (3 sc). Turn.
- Row 4: 2 dec (1 sc).
The Tie: Ch 30. Attach the chain to the side of the collar piece. Work 4 sc, inc, 2 sc, inc, 4 sc. Finally, Ch 30 more to create the other side of the tie. Fasten off.
Finishing Touches
Assembling the Bunny
Using your yarn needle and the tails left on your pieces, sew the components together. Start by attaching the head to the body, then the arms, legs, ears, and the small tail on the back. Attach the white collar around the neck and tie it into a cute bow.
Face Sculpting and Embroidery
To give the bunny a professional look, we will “sculpt” the muzzle:
- Insert your needle through the bottom of the head, coming up between the eyes.
- Pass the needle from the left eye to the right eye, and then back down through the bottom of the head.
- Gently pull the thread to cinch the face slightly, creating a little snout, and tie a knot.
- Using black embroidery thread, stitch a small “Y” or “V” shape between the eyes to create the nose and mouth.
Tips for Success
- Tension is Key: Since amigurumi is stuffed, keep your tension tight so that the fiberfill doesn’t peek through the stitches.
- Marker Stitches: Use a scrap piece of yarn or a stitch marker at the beginning of each round to keep track of your increases and decreases.
- Stuffing: Stuff your pieces as you go, but don’t overstuff the limbs, or they may become too stiff to pose.
- Choosing Yarn: If you want a fuzzier bunny, try substituting the cotton blend for a soft acrylic or a velvet yarn, though you may need to adjust your hook size.