Adorable Plush Puppy Knitting Pattern: Free Step-by-Step Tutorial
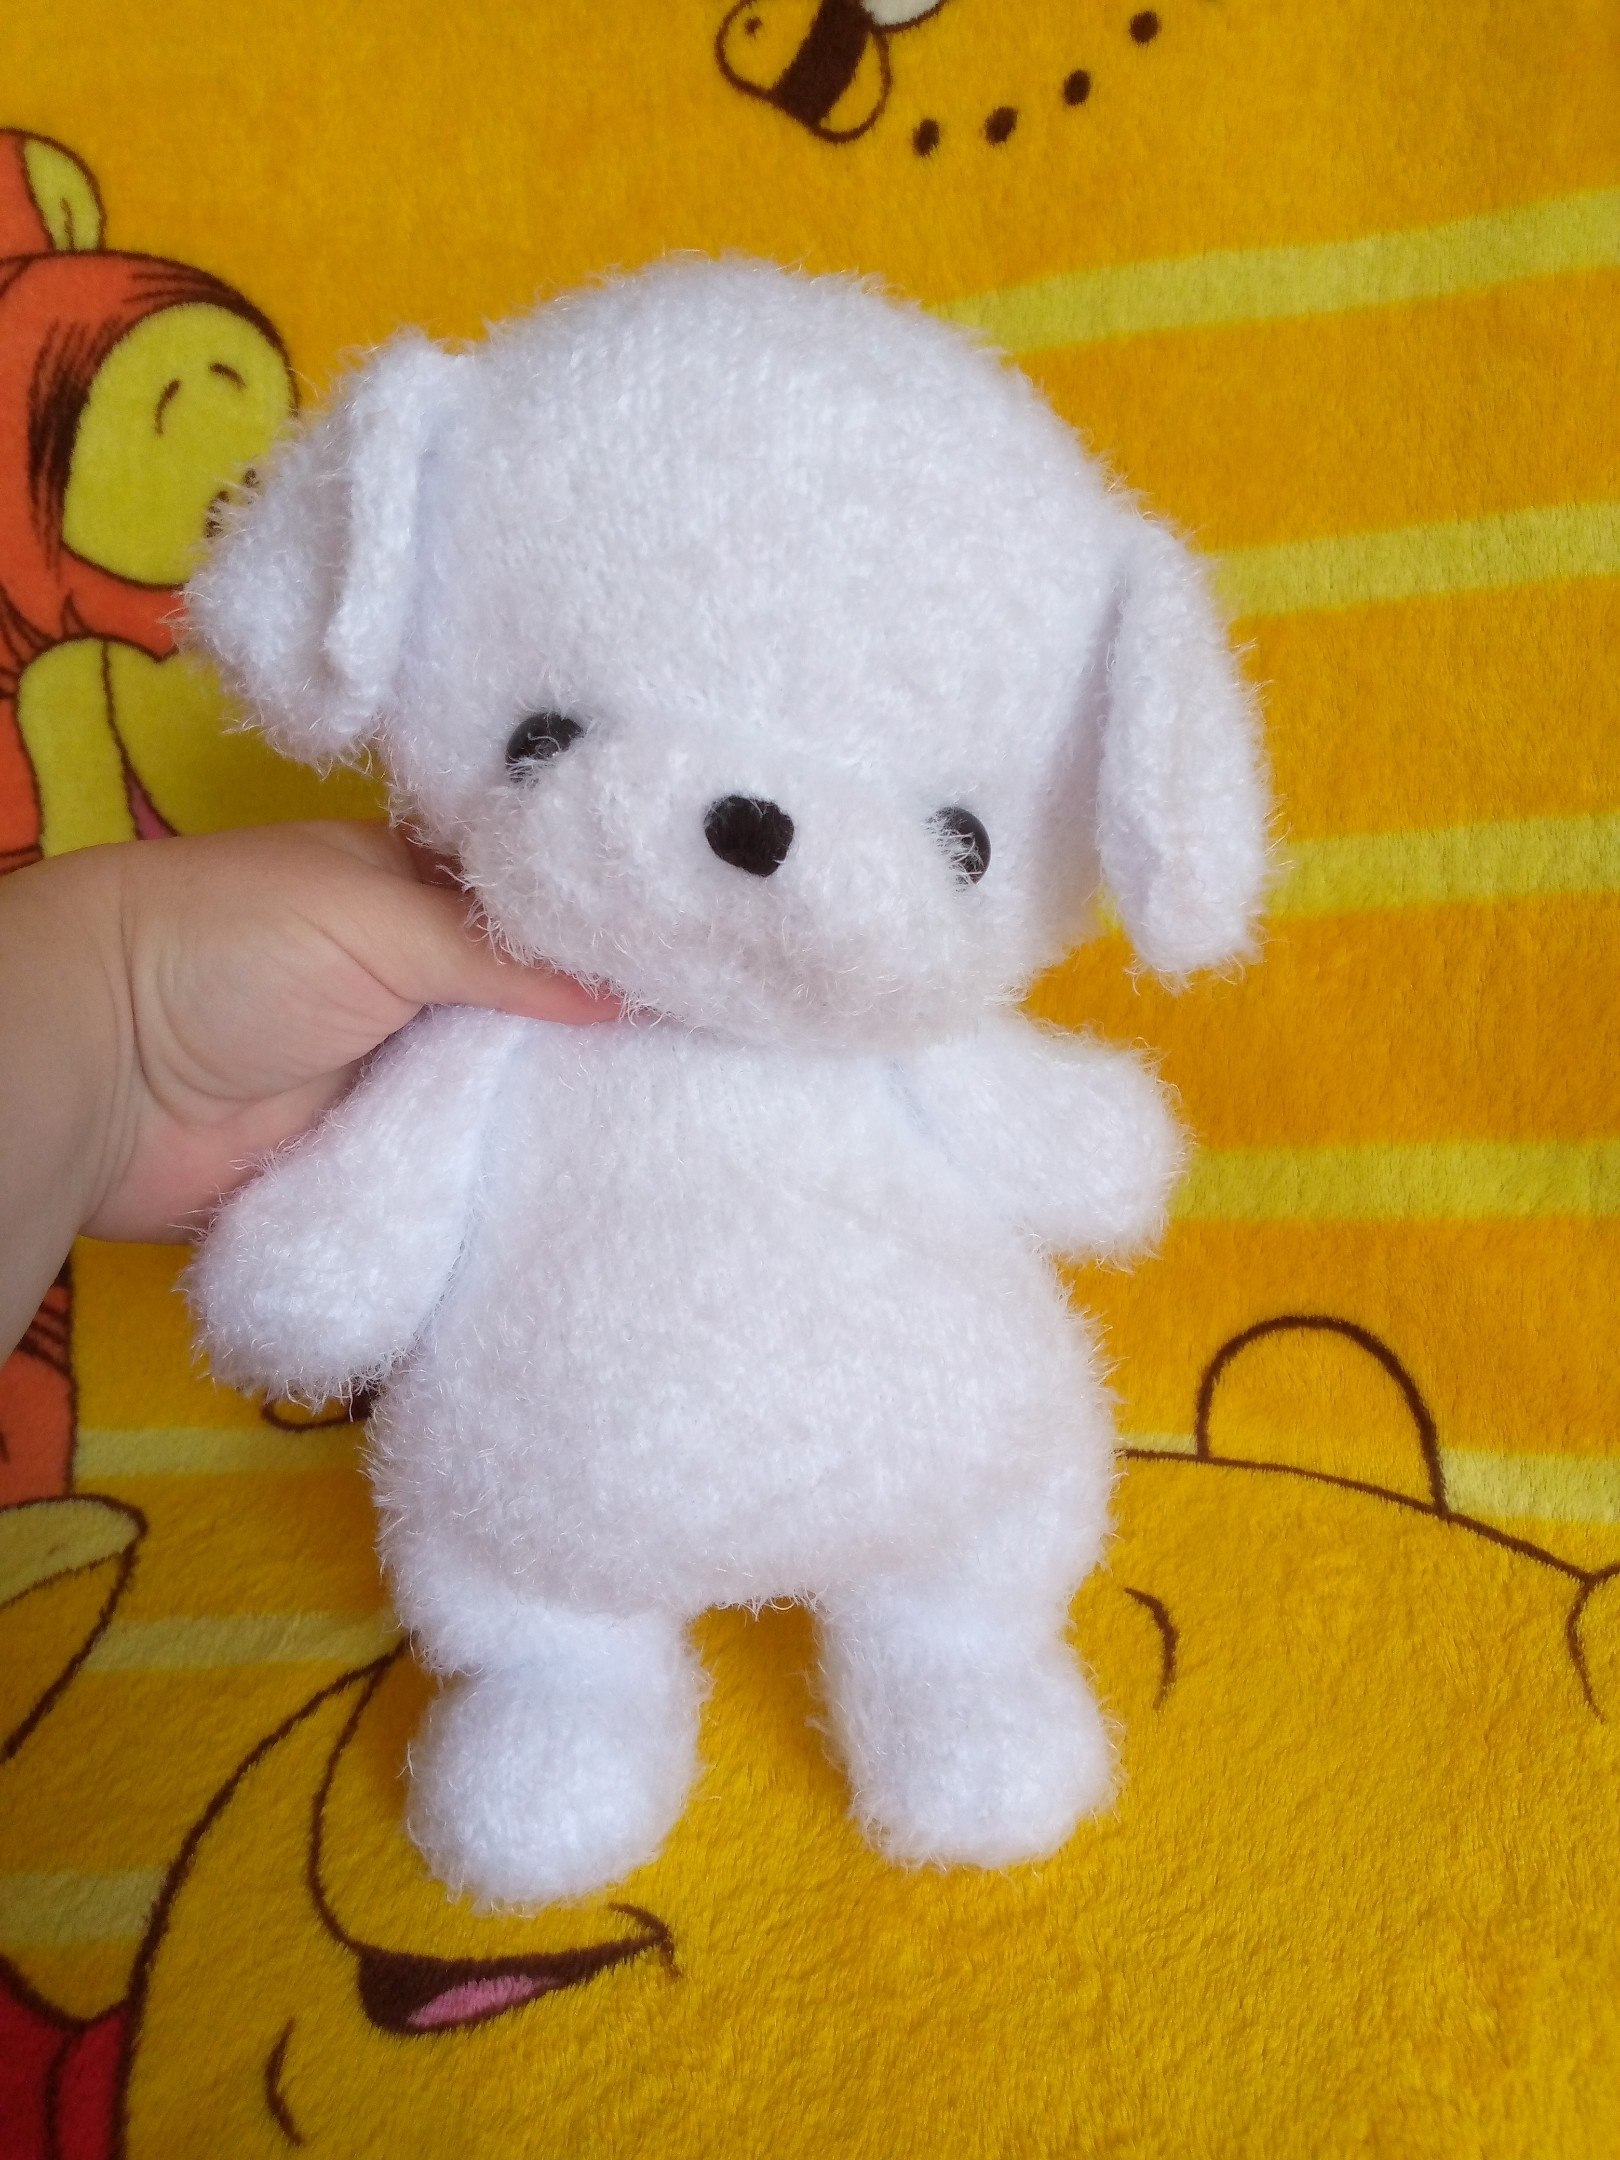
Looking for a heartwarming project to add to your collection? This plush puppy pattern is the perfect blend of cozy and cute. With its fuzzy texture and sweet expression, this little pup makes an incredible gift for children or a charming addition to any nursery. Whether you are an intermediate knitter or a beginner looking to challenge yourself with a few new techniques, this tutorial will guide you through every stitch.
The finished puppy stands approximately 11 inches tall and is designed to be soft, squishy, and completely huggable. In this guide, we will walk through the construction of the head, paws, and body, ensuring you have all the details needed to create your own fluffy companion from scratch.
Materials & Abbreviations
To get started, gather your supplies. Since this puppy is meant to be plush, the choice of yarn is key to achieving that professional “toy store” look.
Materials Needed
- Yarn: Approximately 200 yards of fuzzy cotton or chenille-style yarn (white or any color of your choice). Two 100g balls are recommended to ensure you have enough.
- Needles: 2.5mm double-pointed needles (DPNs) or a circular needle suitable for small-diameter projects.
- Stuffing: High-quality polyester fiberfill or hypoallergenic stuffing (about 2 ounces).
- Eyes: Two 15mm safety eyes.
- Notions: Embroidery thread for the nose, a long yarn needle for sewing, stitch markers, and scissors.
US Knitting Abbreviations
- K: Knit
- P: Purl
- K2tog: Knit two stitches together (Right-leaning decrease)
- SSK: Slip, slip, knit (Left-leaning decrease)
- K3tog: Knit three stitches together (Double decrease)
- M1R: Make one right (Increase)
- M1L: Make one left (Increase)
- CDI: Central double increase (M1R, K1, M1L)
- Turn: Turn the work to start a short row
- St(s): Stitch(es)
- Marker: Stitch marker to denote the start of the round
Step-by-Step Instructions
The Head
The head is worked in the round, starting with a small magic circle and expanding to create a sphere. The most unique part of this puppy is the muzzle, which utilizes short rows to create a realistic fold in the face.
Part 1: The Main Sphere
Cast on 6 stitches and join for working in the round.
Round 1: K 6 (6 sts)
Round 2: M1R in every stitch (12 sts)
Round 3: K 12 (12 sts)
Round 4: (K 1, CDI, K 1) repeat 4 times (20 sts)
Round 5: K 20 (20 sts)
Round 6: (K 2, CDI, K 2) repeat 4 times (28 sts)
Round 7: K 28 (28 sts)
Round 8: (K 3, CDI, K 3) repeat 4 times (36 sts)
Round 9: K 36 (36 sts)
Round 10: K2tog, K 10, K3tog, K 10, K2tog, K 9 (32 sts)
Round 11: K 3 and place a marker. This is a partial round.
Part 2: The Muzzle Fold
Now we create the “fold” of the snout. This is done by knitting back and forth over a specific section of stitches.
Back Section: Knit 7 rows of 21 stitches, alternating Purl and Knit rows. Place these 21 stitches on a holder/marker.
Front Volume: Now, work a series of short rows to build the 3D shape of the snout. You will knit across, turn the work, purl back, and turn again, gradually increasing the number of stitches worked before turning. This creates a “wedge” of fabric that pushes the snout forward.
Follow the pattern’s short-row sequence from row 12 to 27, utilizing the “slip 1, turn” method to keep edges seamless.
Joining the Fold: In row 28, bring the held 21 stitches back onto the needle and knit them together with the front section stitches in pairs. This closes the fold and creates the puppy’s face shape.
Continue knitting the rest of the head, increasing to 100 stitches to create the skull, then steadily decreasing (K2tog) every few rows until you reach 16 stitches. Fasten off and weave in the ends.
The Front Paws (Arms)
Cast on 8 stitches.
Increase gradually over the first 5 rounds to reach 32 stitches.
Knit straight for 10 rounds.
Perform a series of decreases (K2tog) across the center of the paw over the next 4 rounds to create a tapered shape.
Knit straight for 19 rounds.
Work a partial round of 10 stitches and distribute the remaining stitches evenly across the needle. Leave these live for joining to the body.
The Back Paws (Legs)
Cast on 14 stitches.
Increase over the first 5 rounds to reach 38 stitches.
Knit for 6 rounds.
Shape the foot by decreasing in the center over 3 rounds.
The Heel: Similar to the muzzle, use short rows (knitting a few stitches, turning, and purling back) over 15 stitches to create a rounded heel.
Once the heel is shaped, continue increasing to create the thigh, reaching 38 stitches again. Leave the stitches live for joining.
The Body
The body starts by joining the two back paws.
Joining the Legs: Using your needle, knit across the first leg, cast on 4 stitches for the crotch, knit across the second leg, cast on 4 stitches for the tail area, and finish across the first leg again. You should have 80 stitches total.
The Belly and Bottom: Work a section of short rows on the front of the body to create a rounded belly, and a similar section on the back to create the puppy’s bottom.
Joining the Arms: As you knit the upper body, you will “knit-in” the front paws. This is done by placing the arm stitches alongside the body stitches and knitting them together (K2tog or K3tog) as specified in the pattern. This securely attaches the arms to the torso.
Once the arms are attached, decrease steadily over the final rows until you have a small opening at the neck. Fasten off.
The Ears
The ears are worked flat first.
Cast on 2 stitches. Use CDI increases to expand the ear into a wide, rounded leaf shape.
After reaching the widest point, work a few rounds in the round to create a tubular edge, then decrease rapidly to a point.
Repeat for the second ear.
Finishing
Now comes the magic part where your puppy comes to life!
- Stuffing: Firmly stuff the paws, then the body, and finally the head. Make sure to stuff the snout well to maintain the fold.
- Eyes: Insert the 15mm safety eyes symmetrically on the face, just above the muzzle fold.
- Nose: Use black embroidery thread to stitch a small, cute triangular nose at the center of the snout.
- Assembly: Pin the ears in place to find the cutest position, then sew them securely to the top of the head. Finally, sew the head to the body, using a few temporary stitches to align it before permanently sewing the seam.
Tips for Success
Working with Fuzzy Yarn
Fuzzy or chenille yarns can be tricky because the stitches are hard to see. To make it easier, use stitch markers at the beginning and end of your rounds. If you drop a stitch, don’t panic! Use a crochet hook to gently pull the loop back up through the fabric.
Taming the Short Rows
The “turn and knit” technique (short rows) is what gives the puppy its 3D shape. If the fabric feels too tight when you turn, give the yarn a little slack. The goal is to create a seamless transition that looks like a natural fold in the skin.
Achieving a Professional Look
When sewing the head to the body, use a “ladder stitch” or invisible seam. This prevents any bulky lumps from showing through the fuzzy yarn and ensures your puppy stays together even after lots of hugs!