Adorable Amigurumi Panda Crochet Pattern: A Step-by-Step Beginner Guide
Are you looking for a cuddly, sweet, and incredibly cute project to add to your crochet collection? This adorable amigurumi panda is the perfect solution! Whether you are looking to create a new best friend for a little one or simply want a charming desk companion, this panda is designed to be easy, fun, and highly rewarding.
This pattern is specifically crafted with beginners in mind. While amigurumi can sometimes feel intimidating due to the small stitches and shaping, this panda uses fundamental techniques like the magic ring, increases, and decreases to create a professional-looking, round, and huggable shape. By the time you finish, you’ll have a little panda roughly 8 inches tall, ready to bring a smile to anyone’s face!
Materials & Abbreviations
Before we pick up our hooks, let’s make sure you have everything you need. Having your materials organized makes the crocheting process much more relaxing.
Abbreviations
This pattern uses standard US crochet terminology. If you are used to UK terms, please ensure you translate these to avoid changing the shape of your panda!
- MR: Magic Ring
- sc: Single Crochet
- inc: Increase (2 single crochets in the same stitch)
- dec: Decrease (join two stitches together)
Materials Needed
- Yarn: Approximately 50 grams of white yarn and 50 grams of black yarn. A medium weight cotton yarn (like Catania) works beautifully for a clean, stitch-defined look.
- Hook: A 2.2 mm crochet hook (or a size that produces a tight, dense fabric).
- Safety Eyes: 8 mm safety eyes.
- Felt: Self-adhesive felt in both black and pink (for the eyes and cheeks).
- Stuffing: High-quality polyester fiberfill.
- Tools: A yarn needle for sewing and scissors.
Step-by-Step Instructions
Follow these steps carefully. Remember to work in continuous rounds for the amigurumi pieces to avoid visible seams.
The Head
We begin with the head. The shape is worked in a spiral to maintain a smooth surface.
- 6 sc in MR (6)
- inc * 6 (12)
- inc * 3, 5 sc, inc * 3, 2 sc (18)
- (1 sc, inc) * 3, (7 sc, inc) * 3, 4 sc (24)
- (2 sc, inc) * 4, (9 sc, inc) * 5, 4 sc (33)
- sc around (3 rounds 33)
- (4 sc, inc, sc) * 3, (10 sc, inc, sc) * 3, 6 sc (40)
- (5 sc, inc, 2 sc) * 6, inc, 15 sc (46)
- sc around (46)
- (10 sc, inc, 5 sc, inc) * 3, 17 sc (50)
- sc around (50)
- (11 sc, inc, 6 sc, inc) * 3, 17 sc (54)
- sc around (5 rounds 54)
- (3 sc, dec, 4 sc) * 6 (48)
- sc around (48)
- (5 sc, dec, 1 sc) * 6 (42)
- sc around (42)
- (dec, 5 sc) * 6 (36)
- sc around (36)
- (2sc, dec, 2 sc) * 6 (30)
- (3 sc, dec) * 6 (24)
- (1 sc, dec, 1 sc) * 6 (18)
- (1 sc, dec) * 6 (12)
- dec * 6 (6)
Stop here and stuff the head firmly with fiberfill.
The Body
The body features a color change to create the panda’s signature black and white markings. Start with the white yarn.
- 6 sc in MR (6)
- inc * 6 (12)
- (1 sc, inc) * 6 (18)
- (2 sc, inc) * 6 (24)
- (3 sc, inc) * 6 (30)
- (4 sc, inc) * 6 (36)
- (5 sc, inc) * 6 (42)
- (6 sc, inc) * 6 (48)
- (7 sc, inc) * 6 (54)
- sc around (9 rounds 54)
- (7 sc, dec) * 6 (48)
- sc around (48)
- (6 sc, dec) * 6 (42)
Change your yarn color to black.
- sc around (42)
- (5 sc, dec) * 6 (36)
- sc around (36)
- (4sc, dec) * 6 (30)
- sc around (5 rounds 30)
Stuff the body firmly. When you sew the pieces together, ensure the color change section is positioned on the side to allow for easy leg attachment.
The Ears (Make 2)
- 6 sc in MR (6)
- inc * 6 (12)
- (1 sc, inc) * 6 (18)
- sc around (3 rounds 18)
- (1sc, dec) * 6 (12)
Fold the ears in half and sew the sides together.
The Legs (Make 4)
- 6 sc in MR (6)
- inc * 6 (12)
- (1 sc, inc) * 6 (18)
- sc around (9 rounds 18)
Stuff the legs firmly.
The Tail
- 6 sc in MR (6)
- inc * 6 (12)
- sc around (12)
- dec * 6 (6)
Stuff the tail firmly.
Finishing
Now comes the most rewarding part: bringing your panda to life! Assembly is key to getting that cute, expressive face.
Face Details
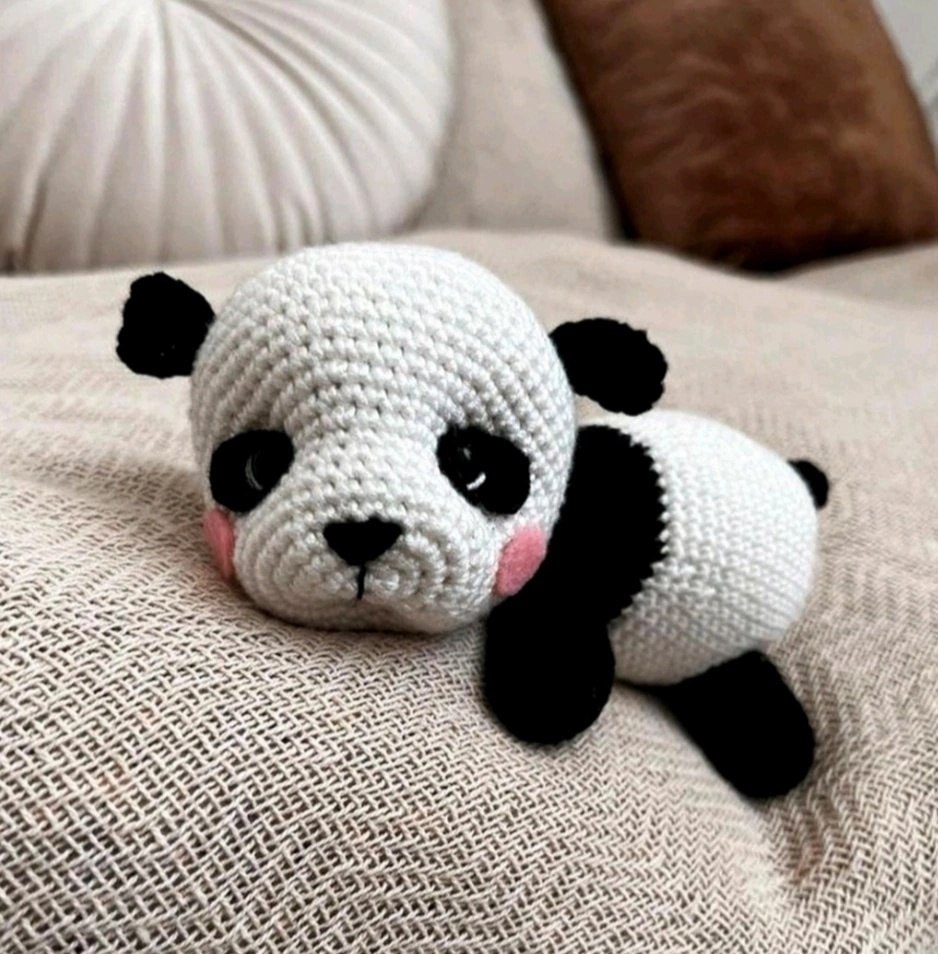
- Eye Patches: Take your black felt and insert the 8mm safety eyes into it. Once the eyes are secured, cut an oval shape around them in the black felt.
- Placement: Attach these felt eye patches to the head between rounds 9 and 10. For a perfect look, ensure they are spaced approximately 13 holes apart.
- Cheeks: Cut small, symmetrical shapes from your pink felt and attach them just below the eyes.
- Nose: Using black yarn, sew a small nose onto the face around rounds 2 through 4.
- Mouth & Details: After everything else is attached, you can use a small amount of black yarn to embroider a little mouth and fine details around the eyes.
Final Assembly
- Ears: Sew the ears onto the head at rounds 18 or 19.
- Hind Legs: Sew the back legs onto the body at rounds 8 or 14.
- Front Legs: Sew the front legs onto the body at rounds 23 or 29.
- Tail: Sew the tail onto the body at rounds 6 or 10.
- Head to Body: Finally, sew the head securely onto the body.
Tips for Success
To ensure your panda turns out as beautiful as the photos, keep these amateur-to-pro tips in mind:
- Tension is Everything: When making amigurumi, you want your stitches to be tight so that the stuffing doesn’t peek through the holes. If you find gaps, try using a slightly smaller hook.
- Use Stitch Markers: Since we are working in continuous rounds, it is very easy to lose your place. Always use a stitch marker to identify the start of your round.
- Don’t Overstuff: While you want a firm panda, stuffing too aggressively can distort the shape of the stitches or make the seams bulge. Stuff in small increments.
- Symmetry Matters: When attaching the eyes, ears, and legs, step back frequently to check that everything looks symmetrical. This makes a huge difference in the “personality” of your toy!